All-Things-Docker-and-Kubernetes
Helm
Pre-requisites
- A basic understanding of Kubernetes
- Experience in deploying Kubernetes resources sucj as Pods, Deployments, Services, etc.
Helm
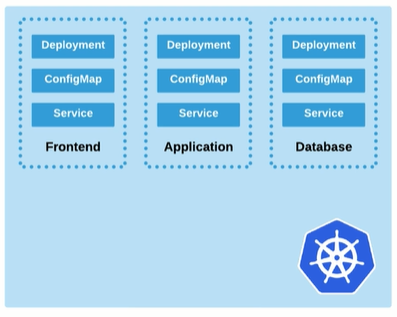
Helm is the Kubernetes package manager which helps package installation in Kubernetes and manages package dependencies. A typical 3-tier architecture usually looks like the diagram below, with each tier consiting of a Deployment, ConfigMap, and a Service.

Before Helm, each of this components will have manifests that needs to be ran separately.
kubectl apply -f frontend-deployment.yml
kubectl apply -f frontend-configmap.yml
kubectl apply -f frontend-service.yml

kubectl apply -f app-deployment.yml
kubectl apply -f app-configmap.yml
kubectl apply -f app-service.yml

kubectl apply -f data-deployment.yml
kubectl apply -f data-configmap.yml
kubectl apply -f data-service/yml
This is tedious deployment and raises some important questions:
- How to paramaeterize?
- How to add in application lifecycle hooks?
- How to manage versions of related resources?
This is where Helm comes into play. Helms uses charts which is similar to a Linux package that contains all the related parts of a specific cluster deployment. Helm can therefore be used to deploy multiple resources in a single command.
Benefits of Helm include:
- Helm abstracts away complexity by being able to ran everything in one go
- history changes are versioned
- package or charts are easy to create once you’re done with the build
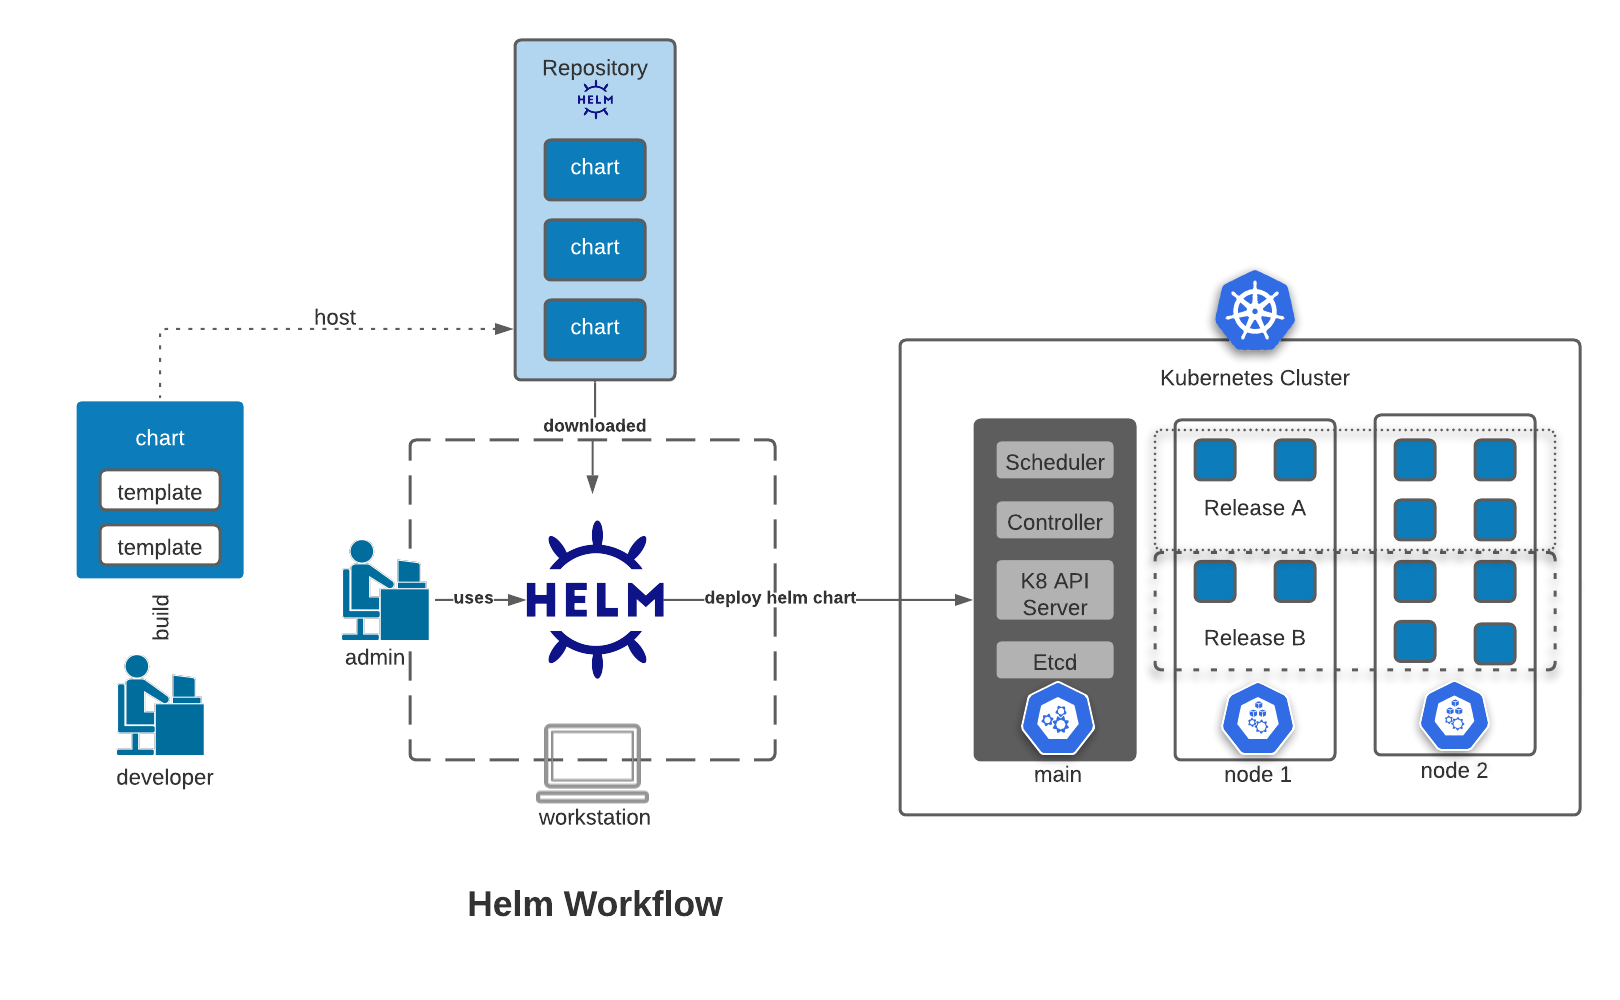
- charts can be hosts in a repository and be shared
To learn more, visit the official Helm website.
Concepts
- Chart - contains all the dependencies to deploy a Kubernetes cluster
- Templates - makes up a chart
- Config - optional configs to override default configs
- Release - a running instance of a chart
- Chart Repository - centralized location for storing charts

Helm 2 vs. Helm 3
There is a new Helm 3 version, which differs with Helm 2.
- Helm 2 architecture is different
- Helm 2 command line and chart structure might differ
- Helm 2 charts are compatible with Helm 3
- Helm 2 uses a cluster component called “Tiller” which acts as authentication
- Helm 3 client communicates directly with the K8S API server
- Helm 3 authenticate using the same credentials in .kube/config file
Architecture
-
Helm Client - CLI client for managing repositories, releases, and interfacing with Helm library
-
Helm Library - responsible for Helm operations towards the API Server.
Setting up Helm
Helm can be installed either from a source, or from pre-built binary releases. The steps for setting up Helm.
Install Helm
If you’re using a Windows Machine with WSL2 that’s running Ubuntu, you can simply run these commands:
$ curl -fsSL -o get_helm.sh https://raw.githubusercontent.com/helm/helm/main/scripts/get-helm-3

$ chmod 700 get_helm.sh

$ ./get_helm.sh
For auto-completion, consider running this in the command line.
source <(helm completion bash)
echo "source <(helm completion bash)" >> ~/.bash_profile
Initialize a Repository
Next, add a repository. Note that starting with Helm v3, there are no repositories installed by default. We can also add other repositories.
In the command below, we named the repo “stable”.
$ helm repo add stable https://charts.helm.sh/stable
Let’s try to add another repo and give it the name “bitnami”
$ helm repo add bitnami https://charts.bitnami.com/bitnami
To check the repositories added,
$ helm repo list
It’s best practice to fetch the latest updates from the repo.
$ helm repo update
We can take a look at all the charts contained in the repository.
$ helm search repo
Deploy a Sample Chart
Let’s try to install a redis chart and name it “my-test-redis1
$ helm install my-test-redis1 bitnami/redis
Verify that the pods are running.
$ kubectl get pods
To get a list of deployed charts,
$ helm ls
Delete the Chart
Run the uninstall command and specify the chart name.
$ helm uninstall my-test-1