Lab: Securing and Optimizing APIs
Overview
This lab demonstrates how to secure Azure Functions APIs, manage access with API keys, and apply APIM policies to improve reliability and performance.
Pre-requisites
Note: If you're using the Consumption SKU for Function App, you may get an error when adding the ratelimit policy and setting up usage quotas.
Using API Keys
API keys control access to APIs and ensure only authorized applications can make requests. Without the key, the API cannot be accessed and unauthorized users are blocked from retrieving sensitive or business-critical information.
Function Authorization Level
Function keys are tied to individual functions, similar to a key for a specific door. Host and master keys work across all functions.
-
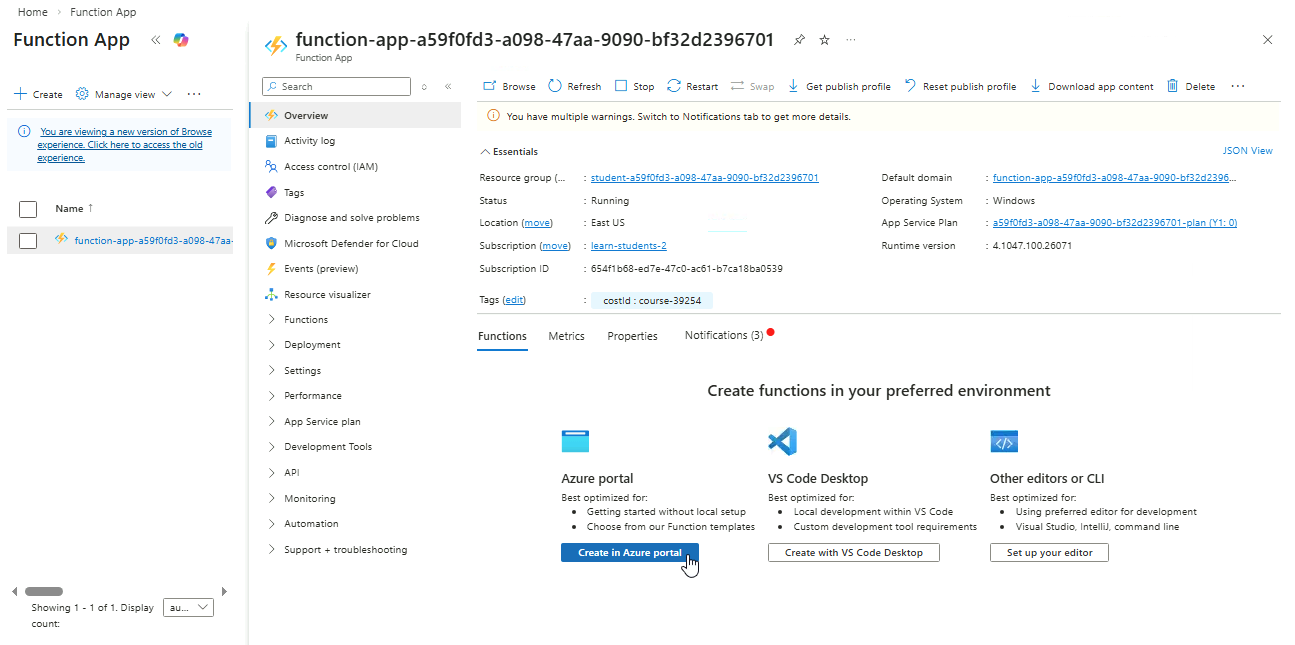
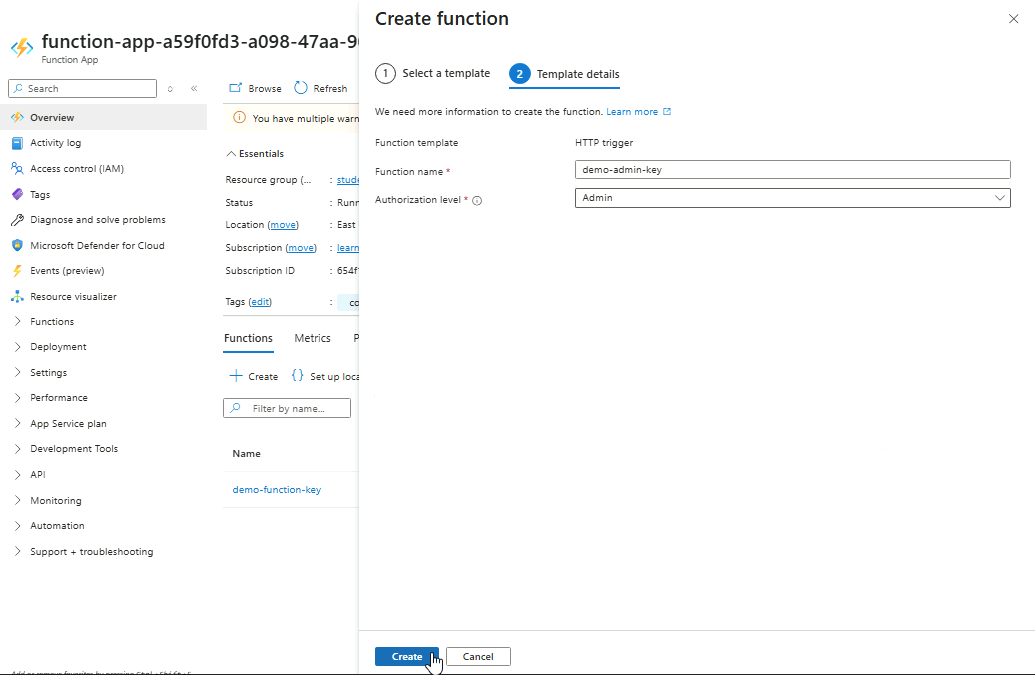
Open your Function App ➔ Overview ➔ Functions ➔ Create in Azure Portal.
-
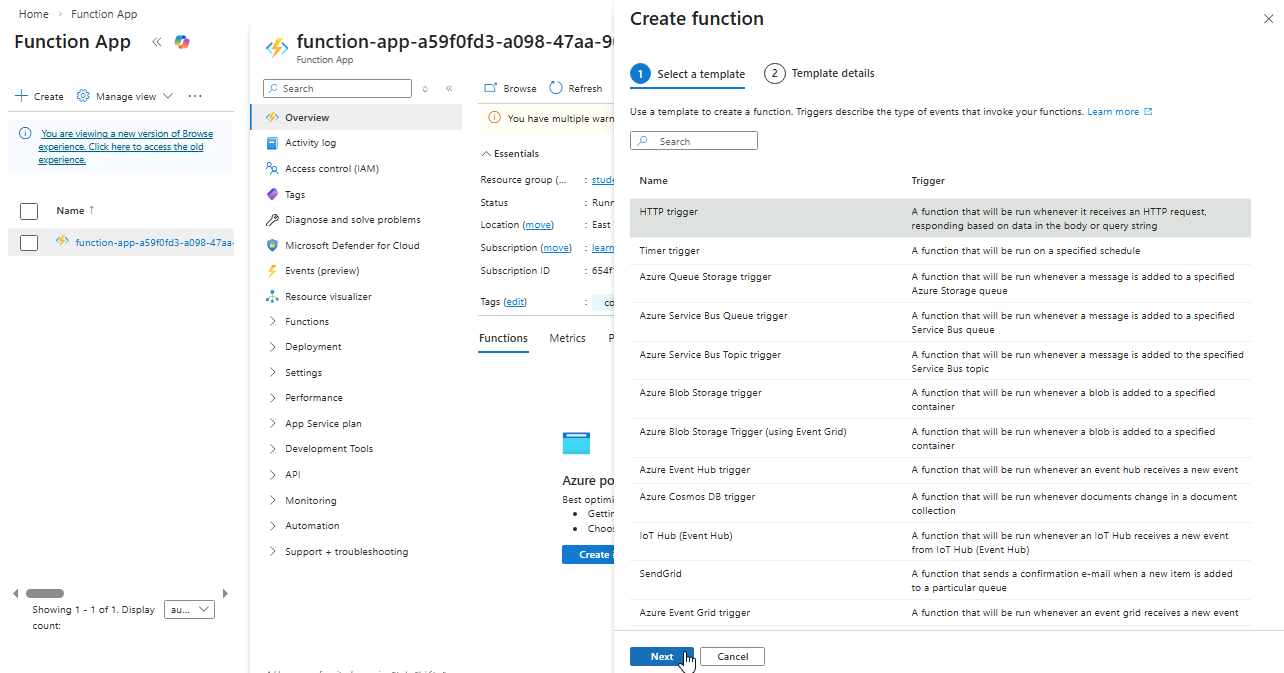
Select HTTP trigger ➔ Next.
-
Provide a name for the trigger and set Authorization Level to Function.

-
Open the function ➔ Get function URL ➔ Copy the URL labelled Function key.
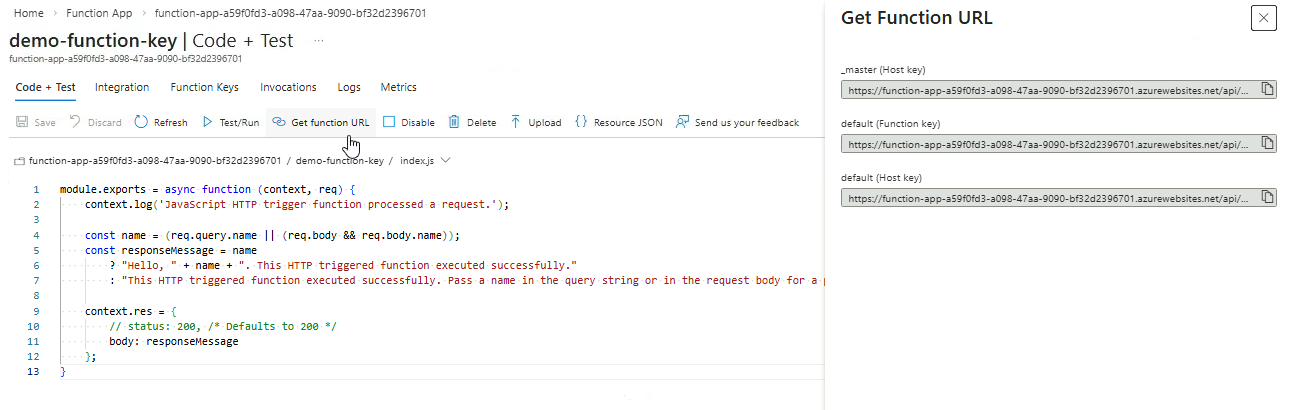
-
Verify that the URL works in the browser and returns a valid response.

Admin Authorization Level
-
Create another HTTP trigger but set Authorization Level to Admin.
-
Open the function ➔ Get function URL ➔ Copy the URL with the Function key label.
-
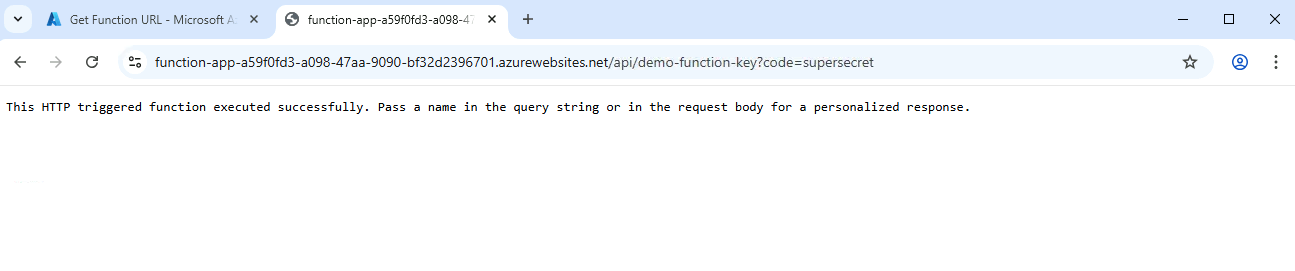
Opening it in a browser, it returns a
401response.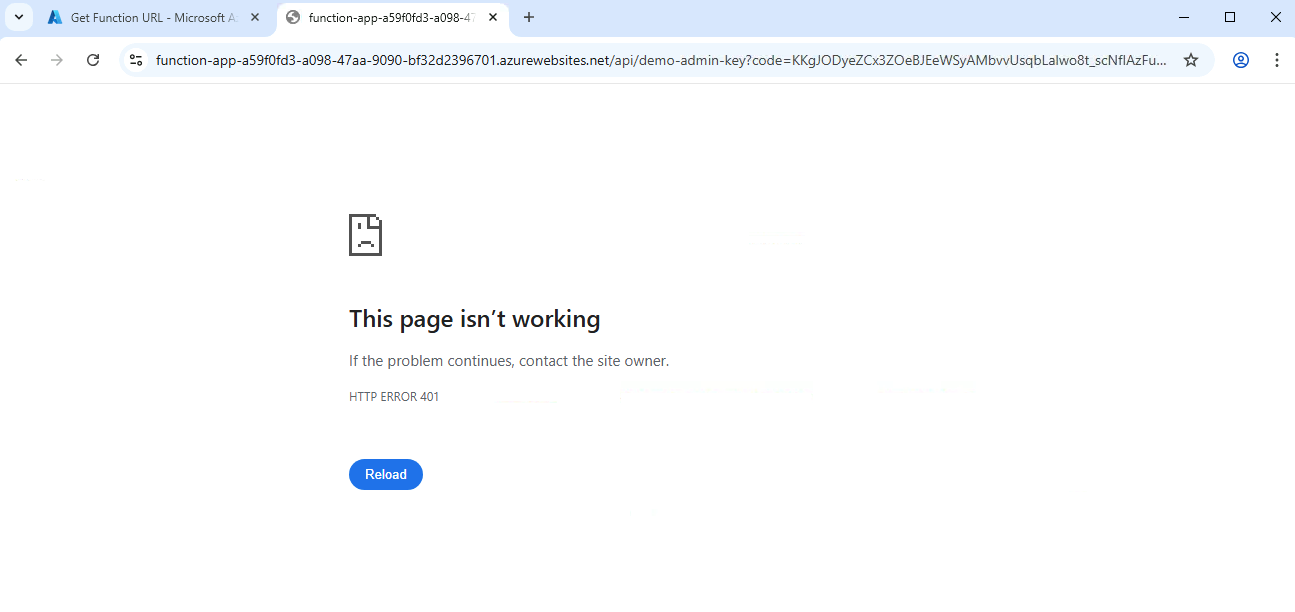
-
Try the other URL with default (Host key) label and check in the browser.
It also returns a
401response. -
Finally, try the URL with _master (Host key) label and check in the browser.

Admin-level functions can only be accessed by the host-level key. Master-level key is equivalent to the Host-level key and should also work.
Anonymous Authorization Level
-
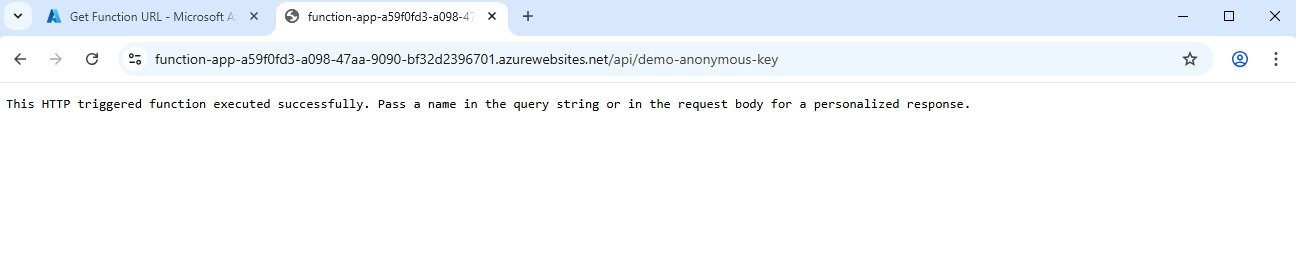
Create another HTTP trigger but set Authorization Level to Anonymous.

-
Open the function ➔ Get function URL ➔ Copy any of the URL
-
All three URLs should work without a valid key.
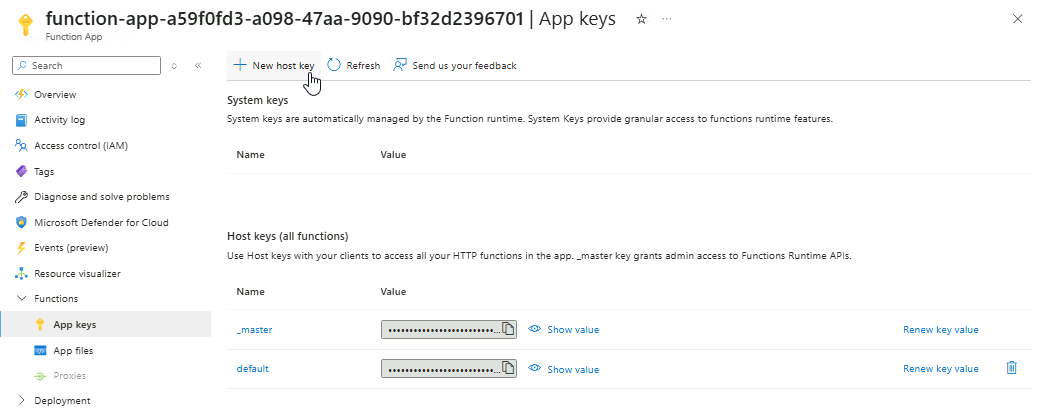
Managing API Keys
Regularly updating keys reduces the risk of compromise, and creating new keys allows additional services or applications to access the API safely without exposing existing keys.
-
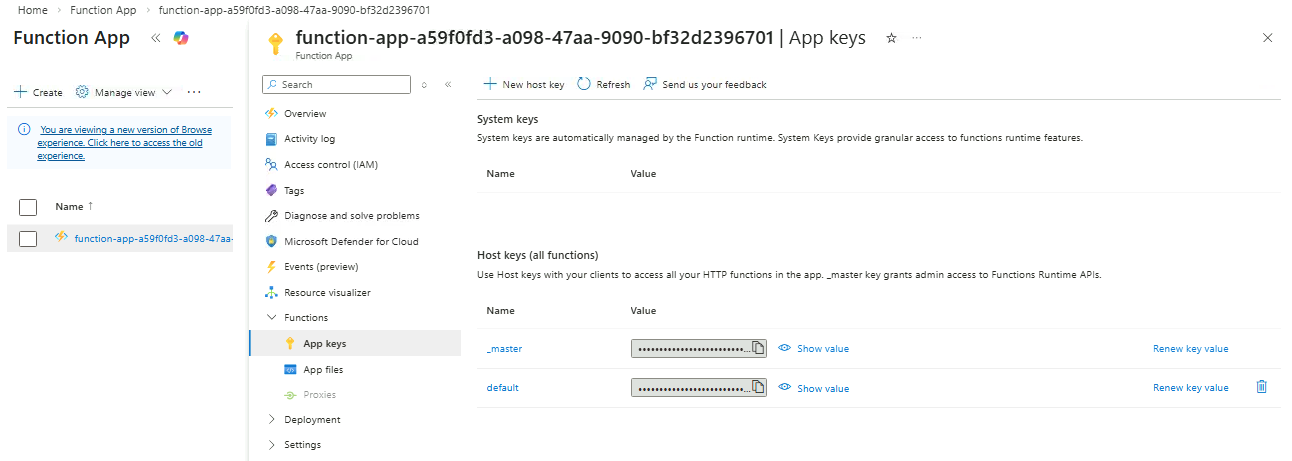
Navigate to your Function App and go to Functions ➔ App keys.
You should see the two host keys here.
-
For both keys, click Renew key value ➔ Renew and save.

-
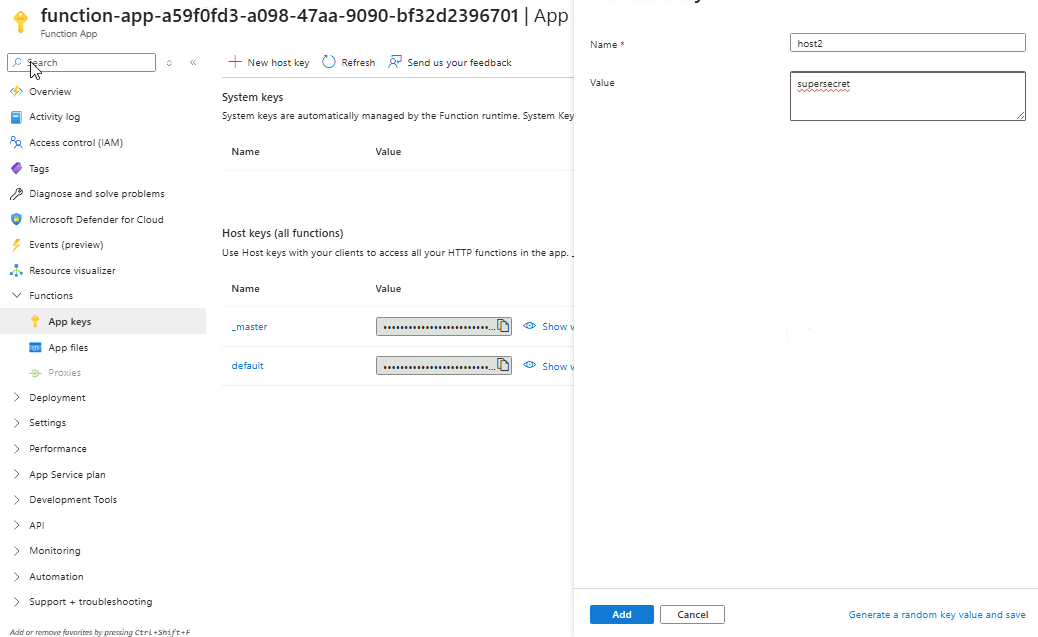
Click New host key to create a new key.
-
Provide a name and value for the key,then click Add.
-
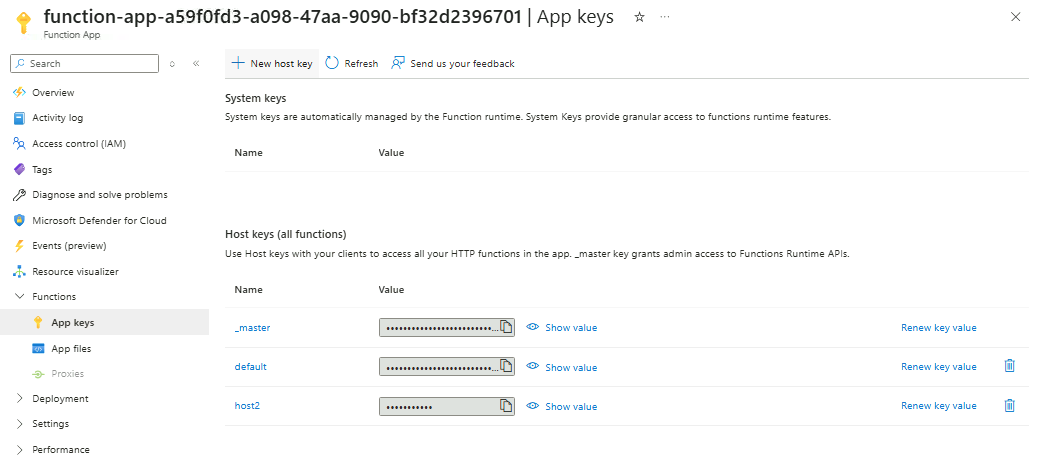
You should now see three host keys.
-
Go back to Overview and click any non-anonymous function.
-
Click Get function URL and copy the URL with the
host2label.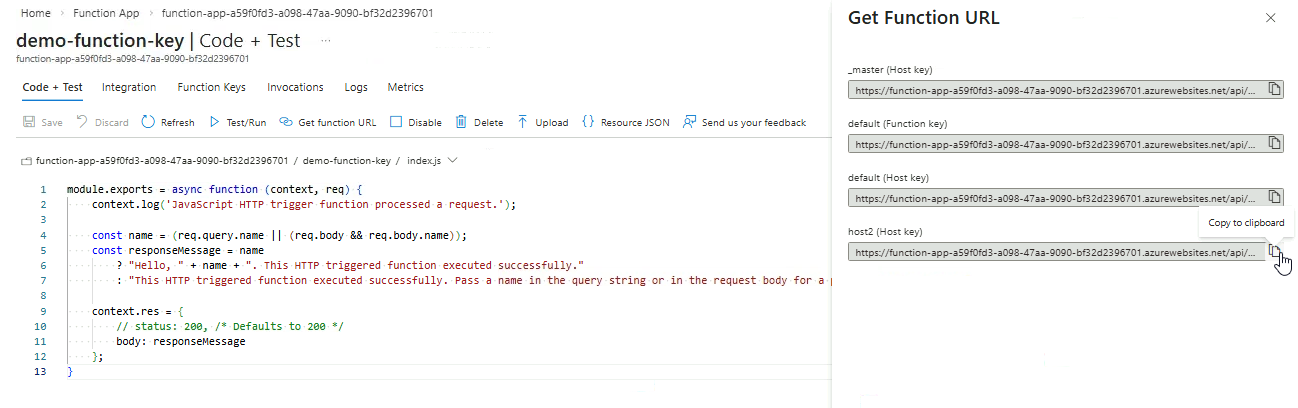
-
Open it in a browser. As you can see, the value for the host key is visible in the URL.
-
If you change the API key in the URL, it will return a
401response.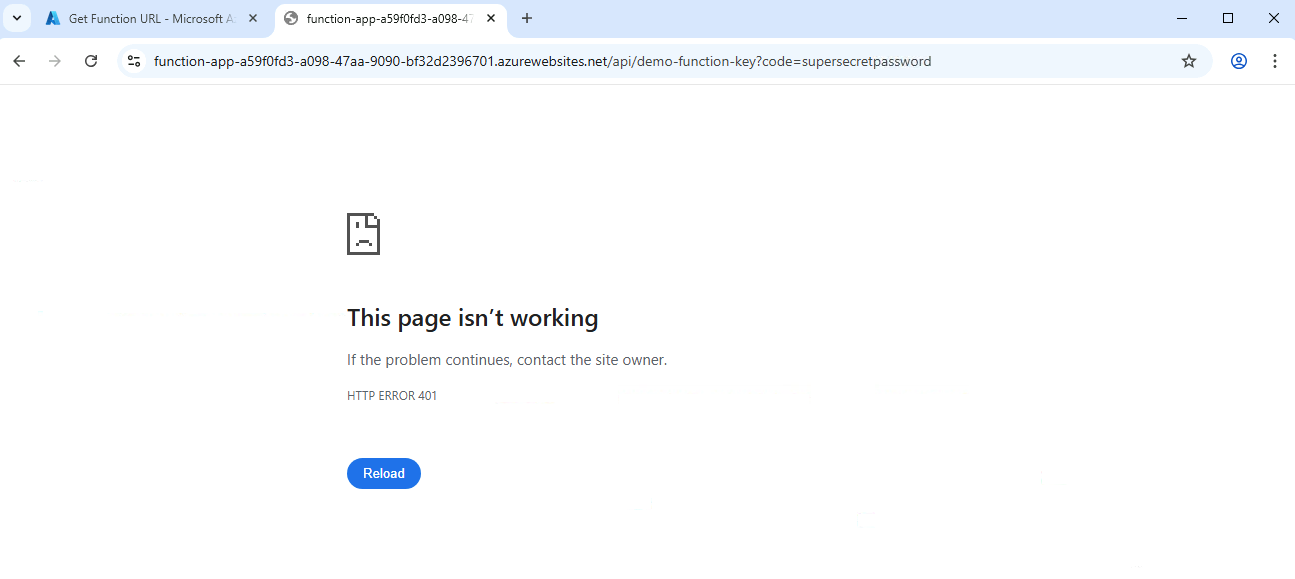
Rotate keys periodically (e.g., monthly) to reduce the risk of compromise. Avoid rotating too often, which can disrupt clients.
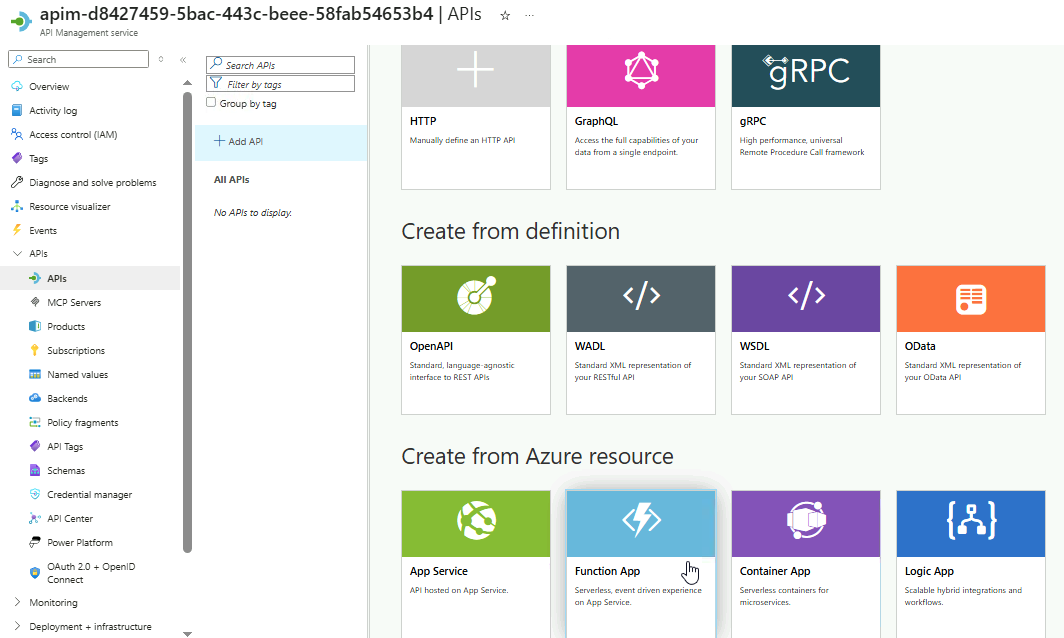
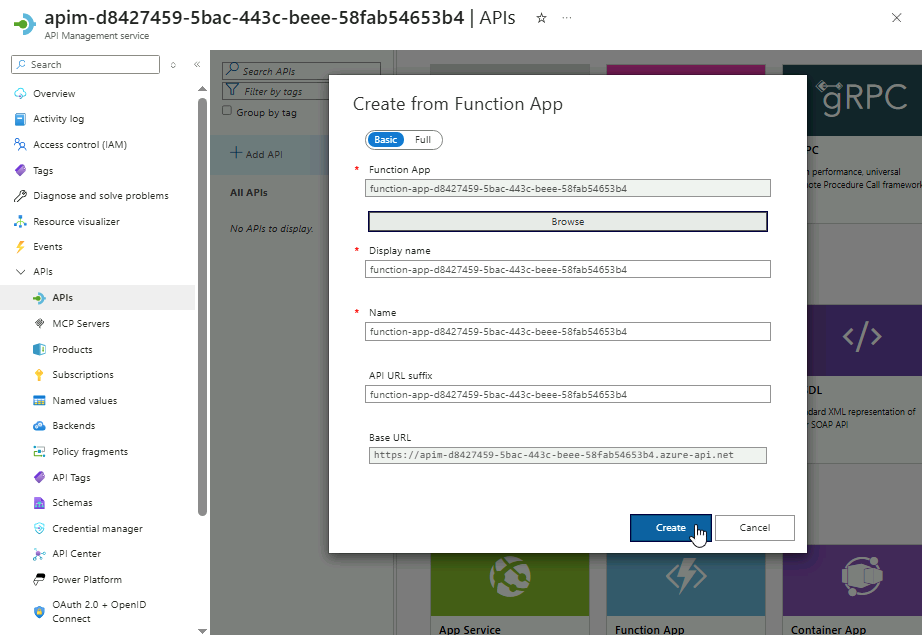
Add the APIs to APIM
Import your Function App into APIM for centralized management.
-
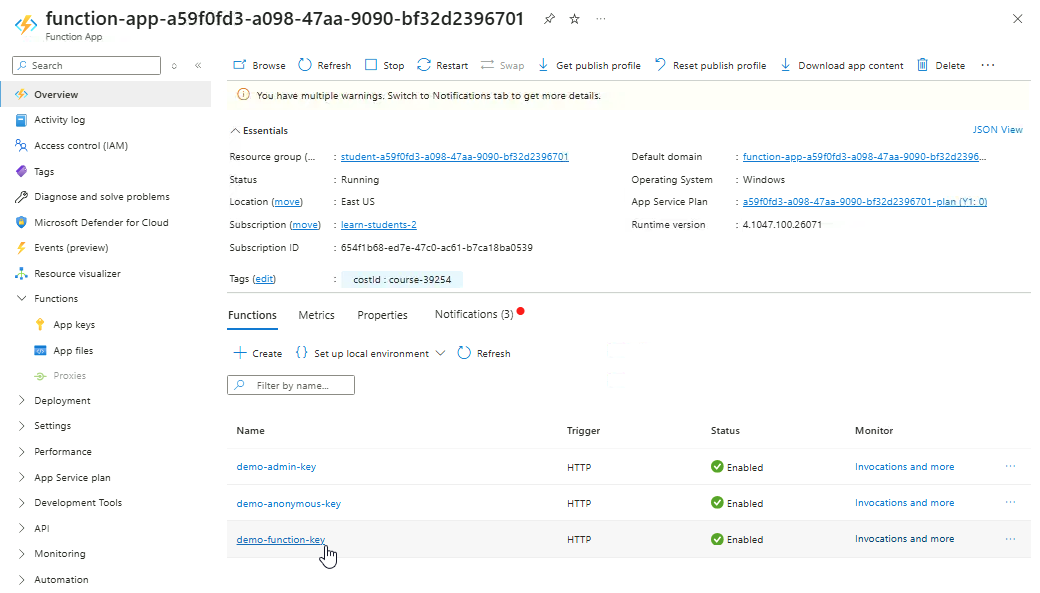
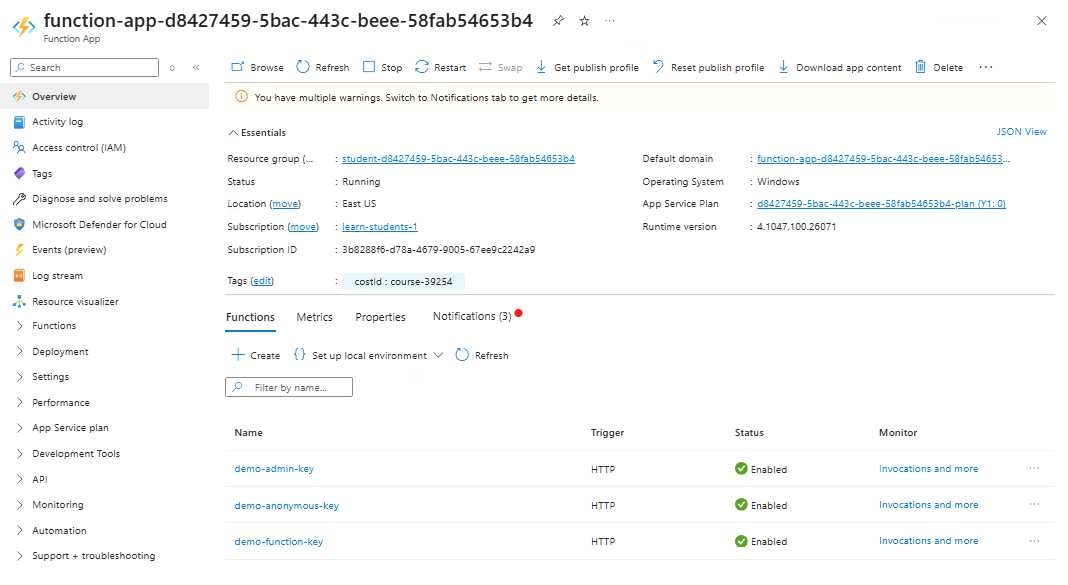
Navigate to your Function app and confirm the three functions
-
Now go to API Management service and open your APIM instance.
-
Go to APIs ➔ APIs ➔ Create from Azure resource ➔ Function App
Click Browse.
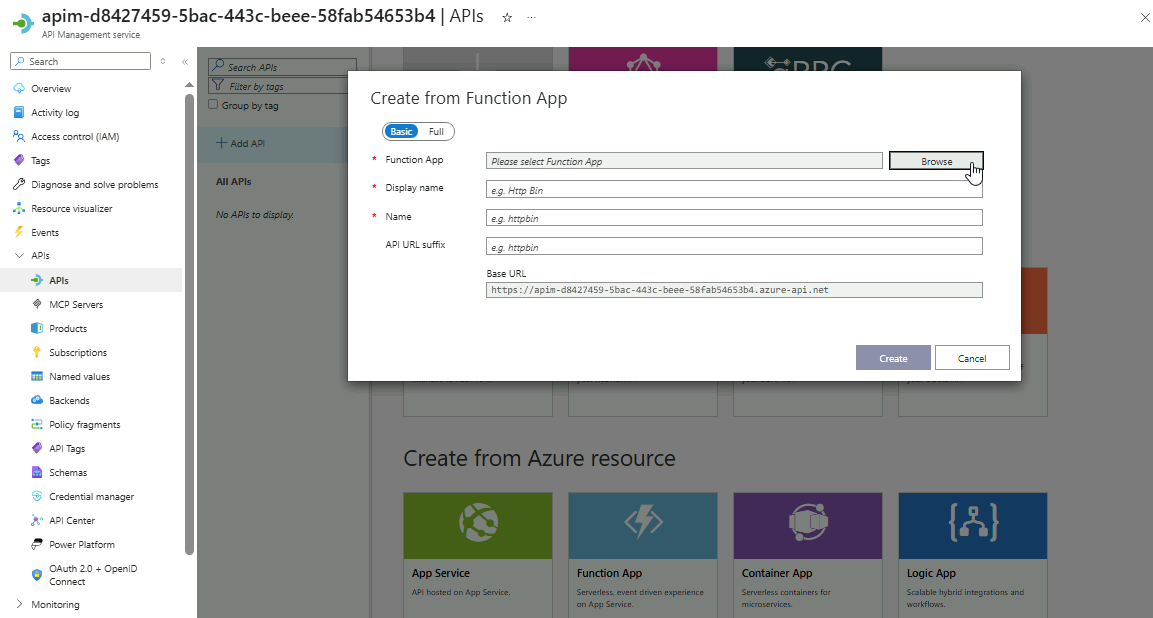
-
Choose your Function App ➔ Select
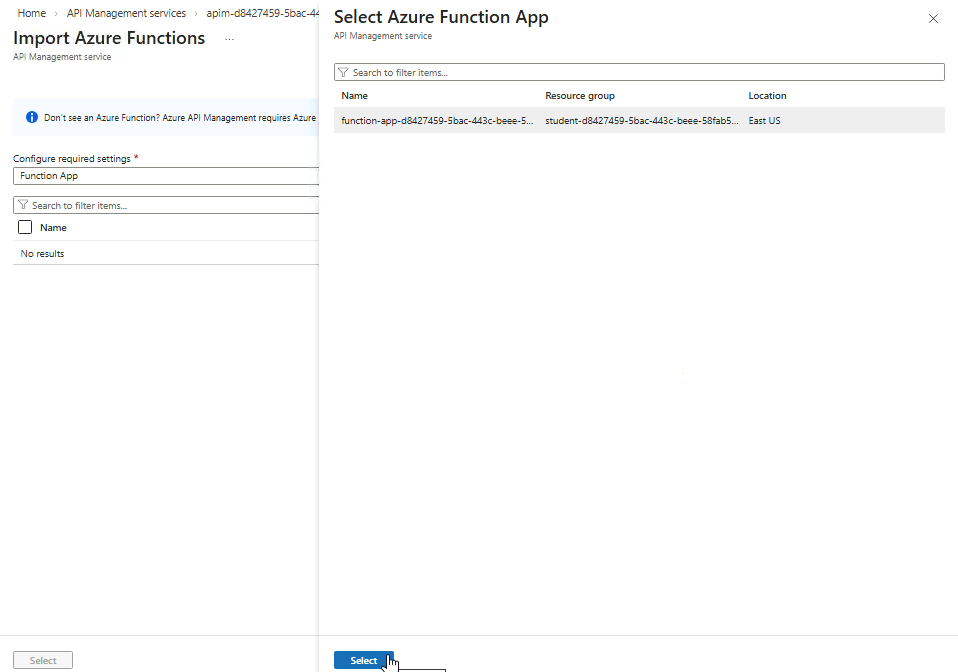
-
The two non-admin functions will appear here. Click Select.
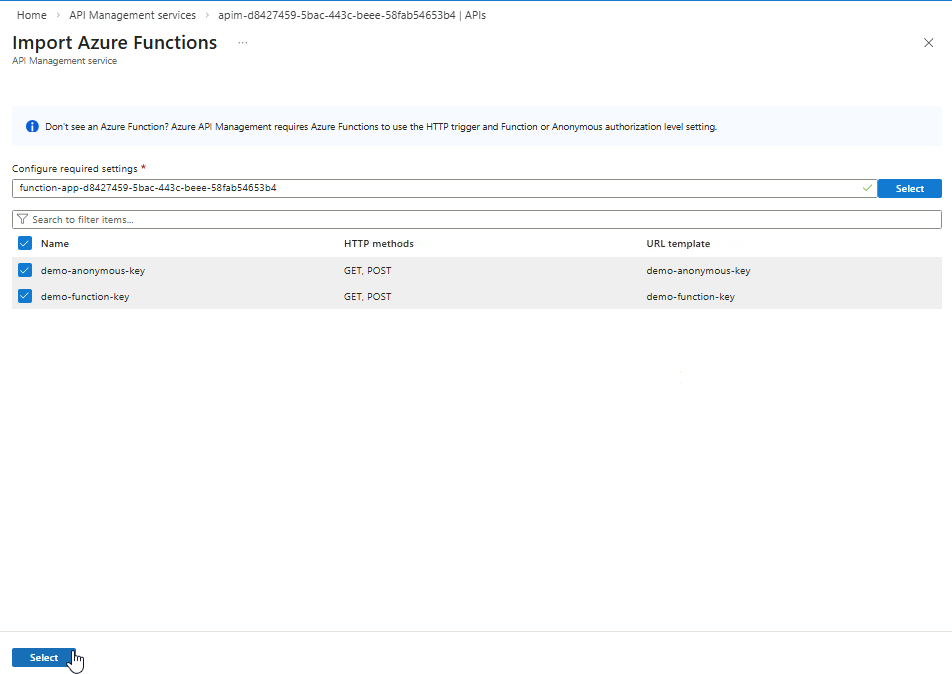
-
Review the details then click Create.
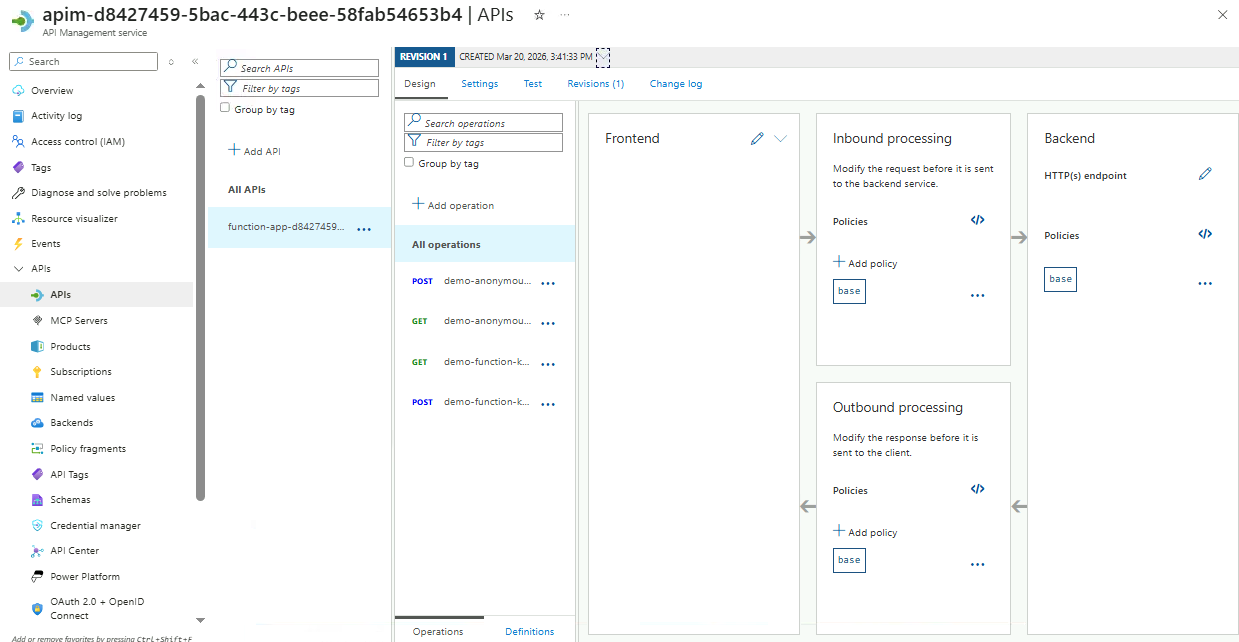
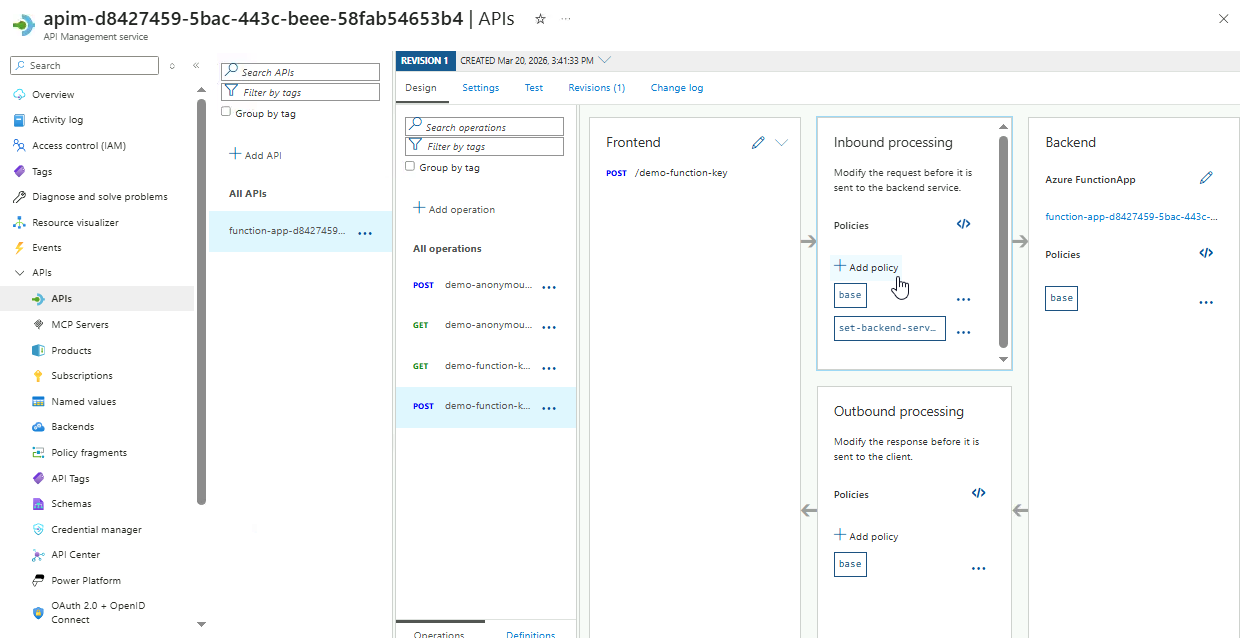
After adding the API mapping, you will be directed to the management page where policies are configured. A policy will be added in the next section to validate requests before they reach the backend.
Policies
Validate JWT Token
Validating JWT tokens ensures that only clients with a legitimate token issued by an identity provider can access the API. This prevents unauthorized users from calling your services, protects sensitive data, and enforces access control at the API level.
-
Go to API Management service and open your APIM instance.
-
Proceed to APIs ➔ APIs ➔ Select the linked Function App
-
You will see all endpoints that the Function App exposes.
-
Select the
POSTendpoint fordemo-anonymous-key. -
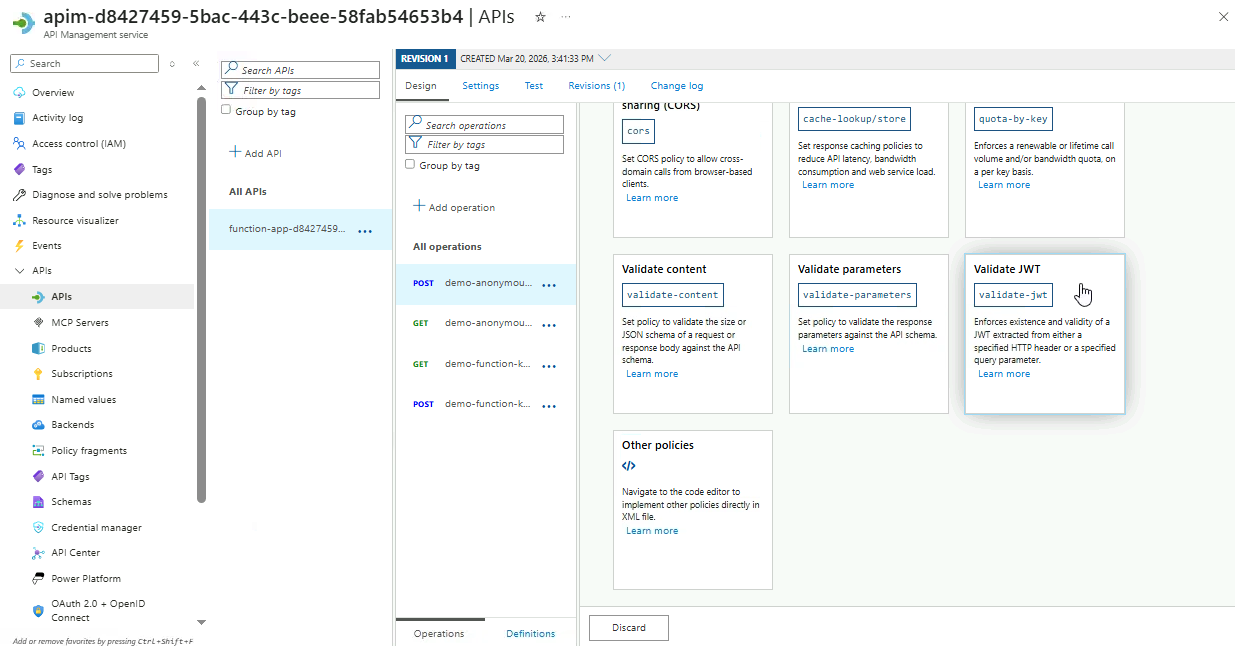
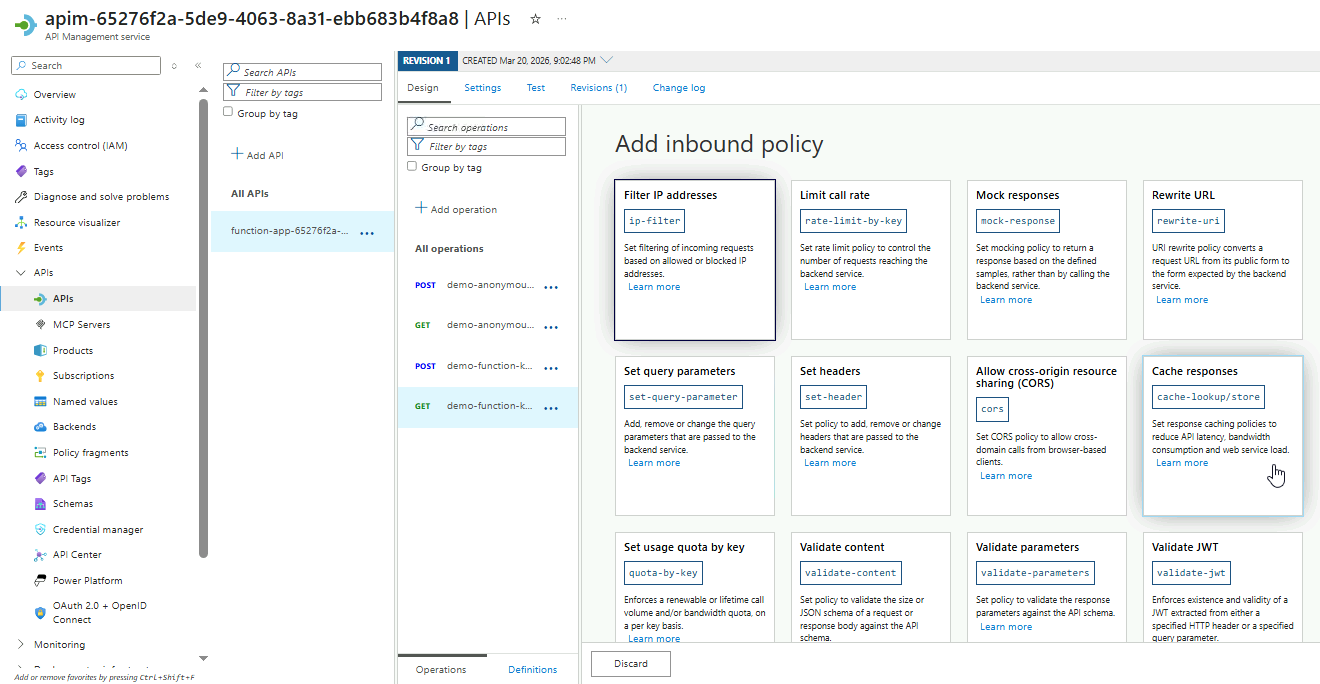
In the Inbound processing box, click Add policy.

-
It will return all the available inbound policies.
Scroll down to the bottom and select the Validate JWT option.
-
Next, configure the policy as shown below:
Setting Value Header name Authorization Failed validation HTTP code 401 - Unauthorized Failed validation error message You are not allowed to use this service Audiences example.com The
Authorizationheader is used because it is the standard way to send JWT tokens in API requests. This ensures all incoming requests include a valid token.Click Save.
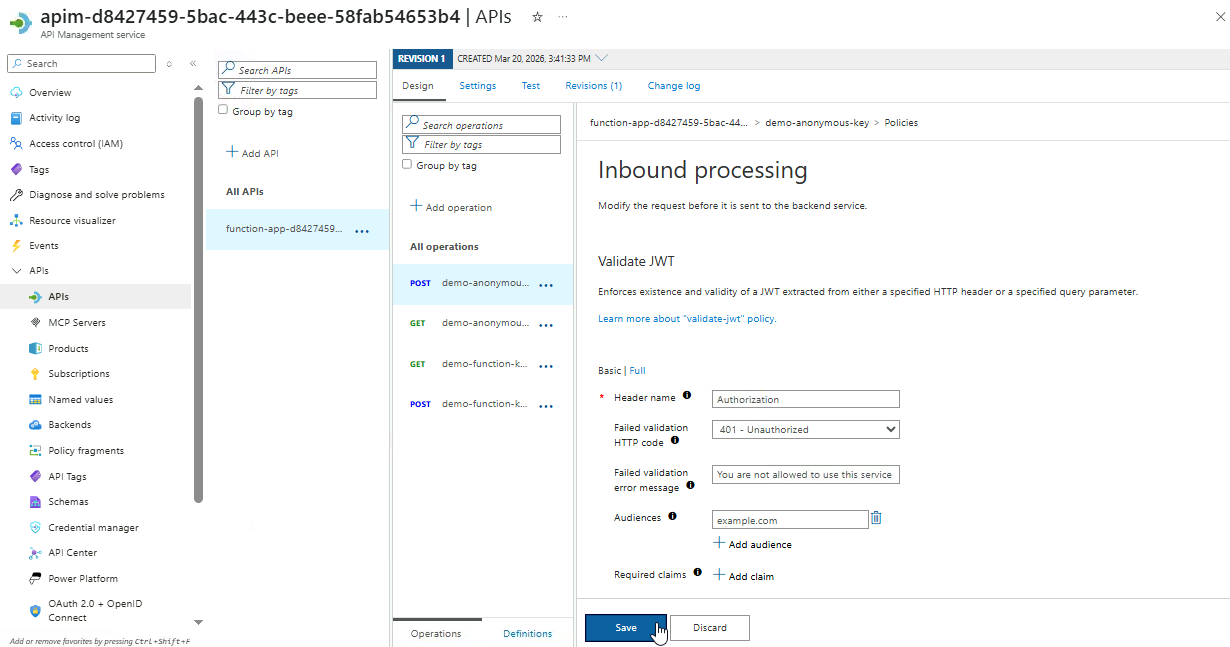
-
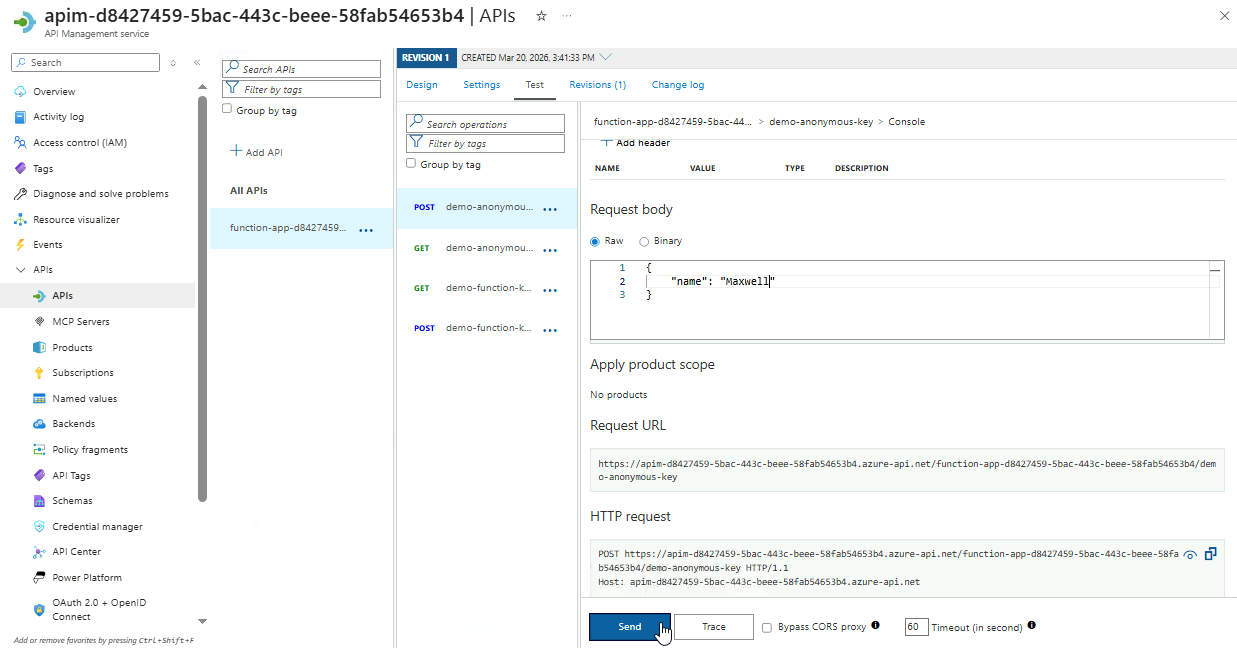
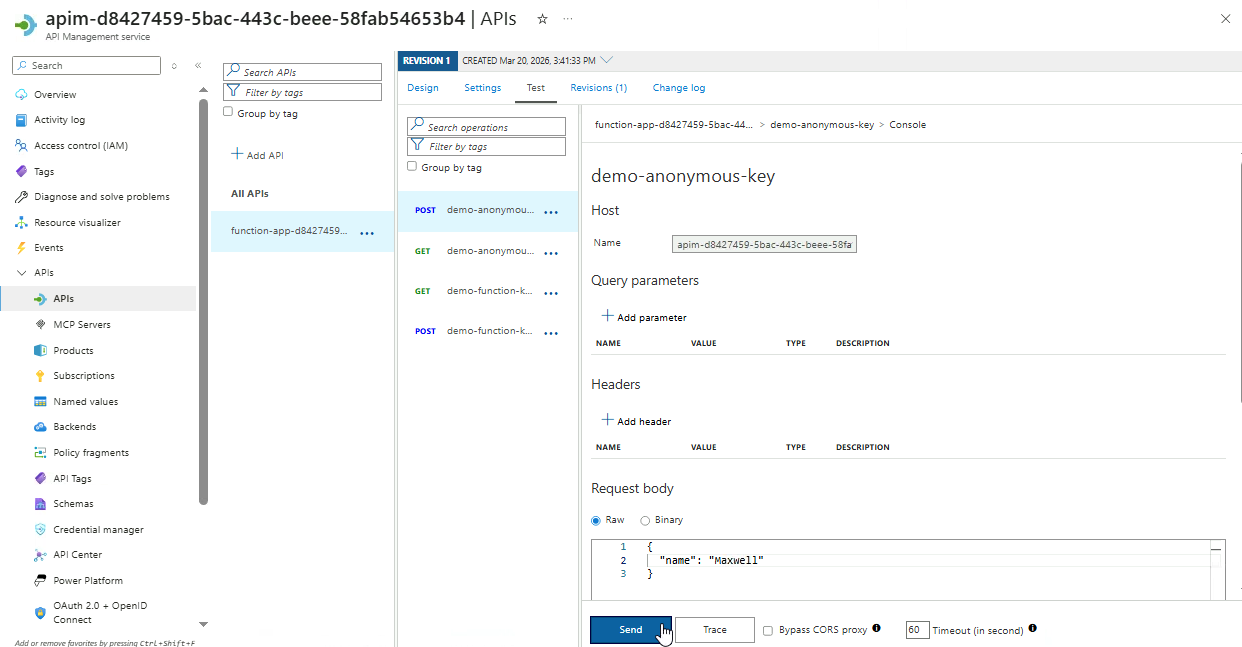
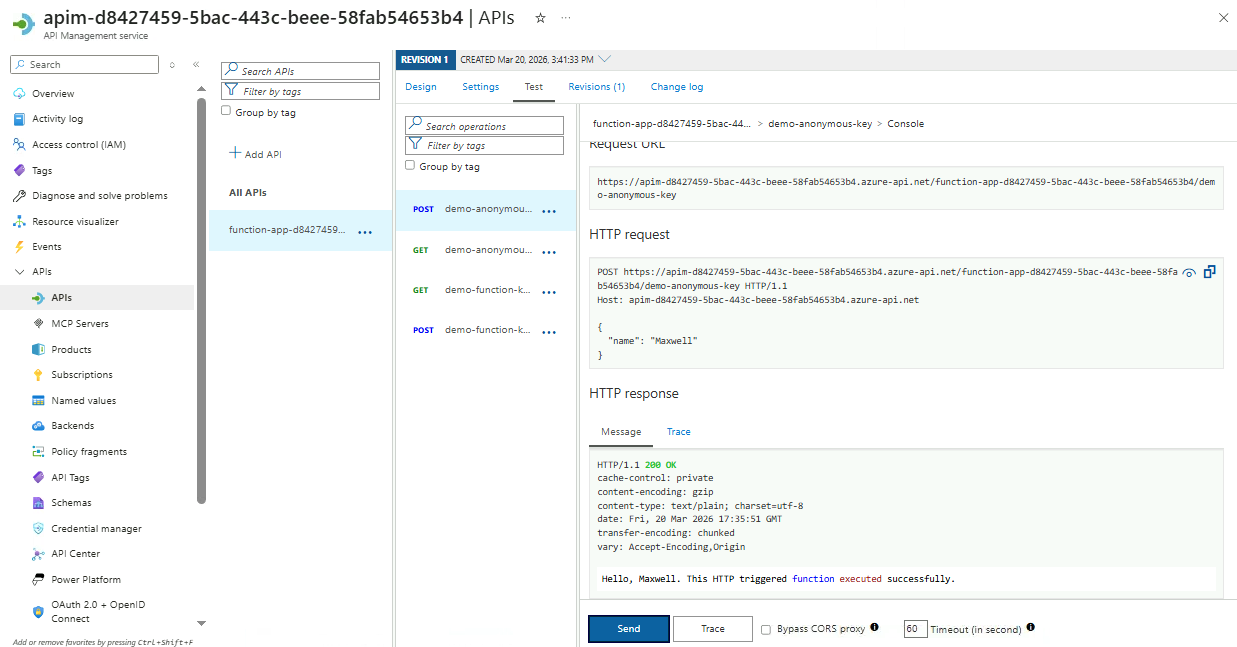
To test the policy, go to the Test tab.
Select the endpoint, enter the request payload below, and then click Send.
{
    "name": "your name"
}
-
After sending the request, go to the HTTP response section to see the result.
{
    "statusCode": 401,
    "message": "You are not allowed to use this service"
}
Because the request does not include a valid JWT, it is rejected with a
401response. This shows that only clients presenting a token issued by a trusted identity provider can access the API.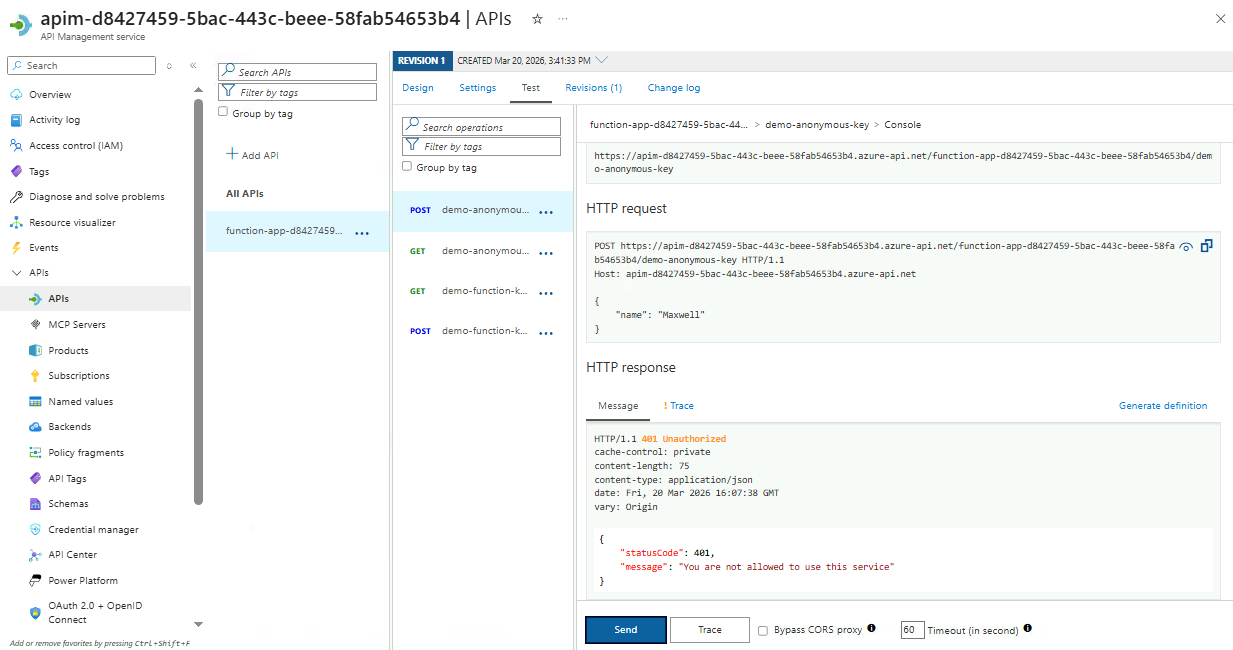
-
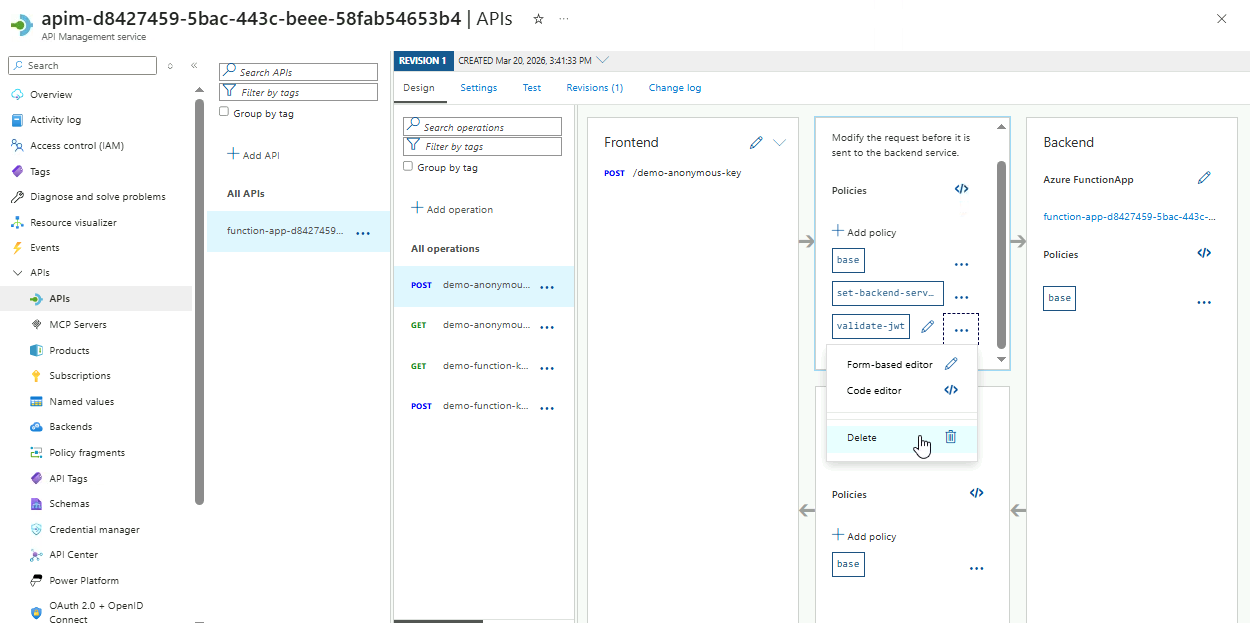
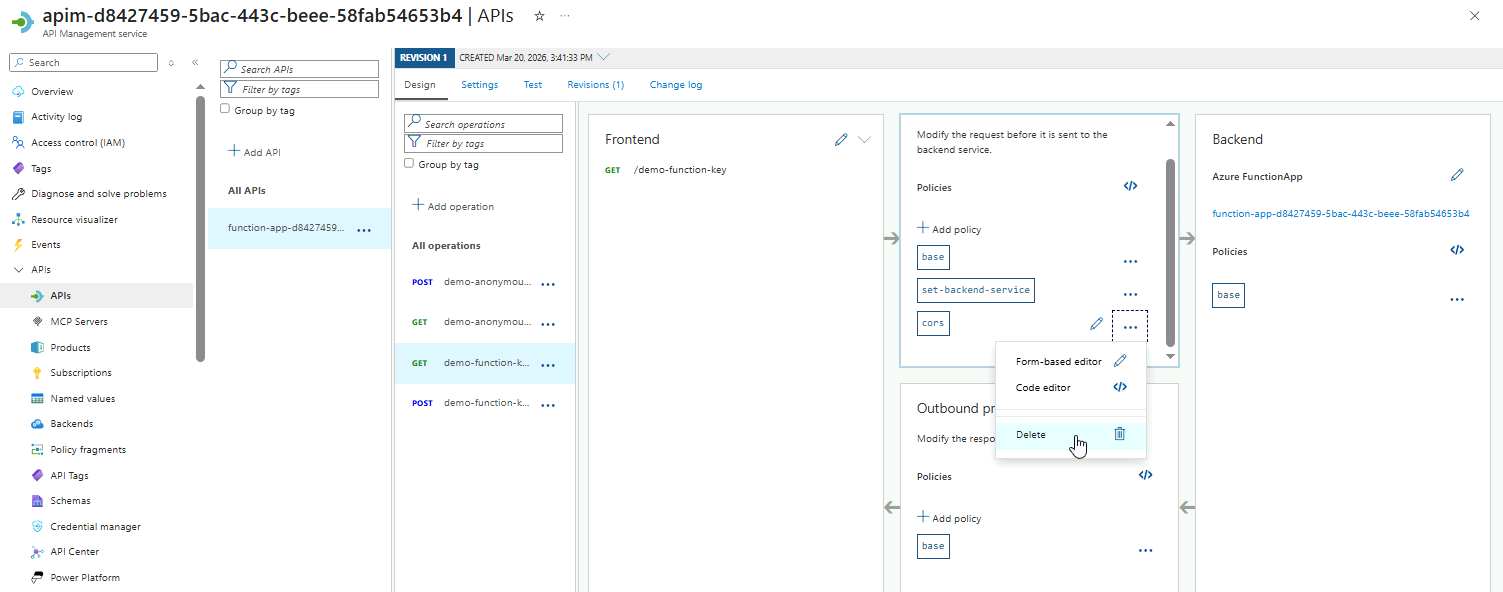
After completing this section, make sure to delete the policy and save.
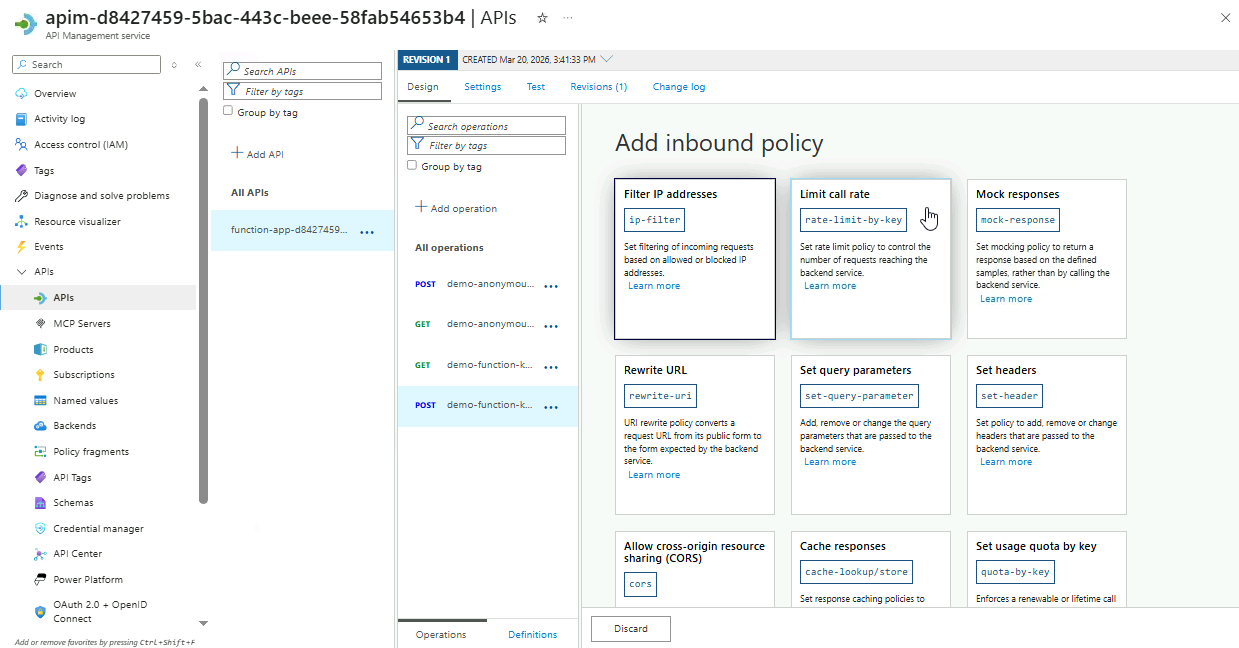
Rate-Limiting
APIs can be overwhelmed by sudden traffic spikes, misconfigured clients, or abusive requests. Implementing rate limiting protects the service, ensures consistent performance, and maintains reliable access for all authorized users.
-
Select the
POSTendpoint fordemo-function-key. -
Go to Inbound processing ➔ Add policy.
-
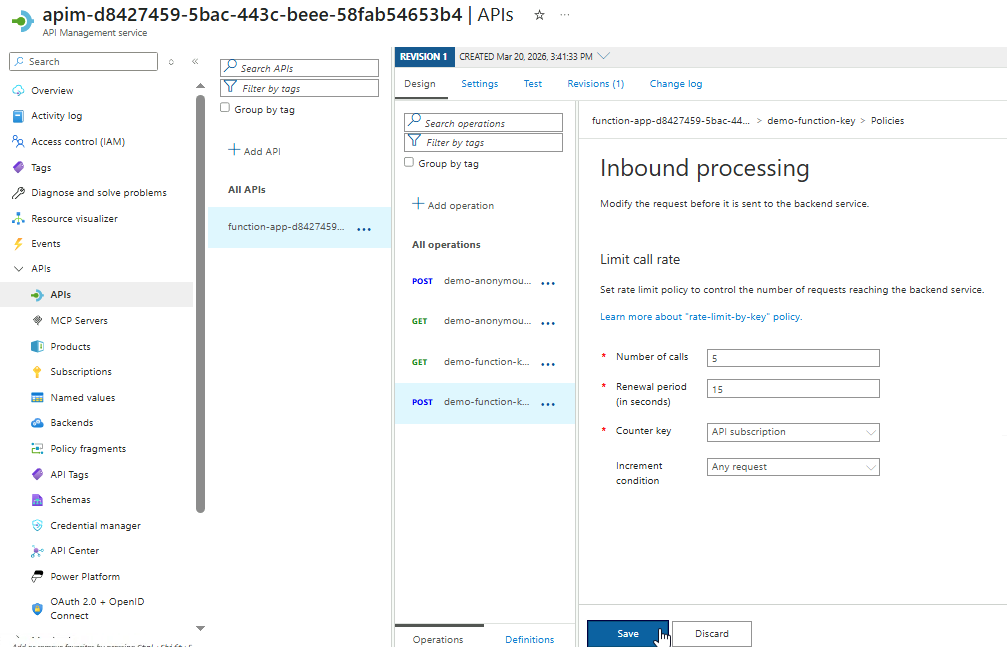
View the available options, and select the Limit call rate card.
-
Configure the rate limiting policy.
Setting Value Number of calls 5 Renewal period (seconds) 15 Counter key API subscription Increment condition Any request Click Save.
-
Review the XML policy configuration and click Save.
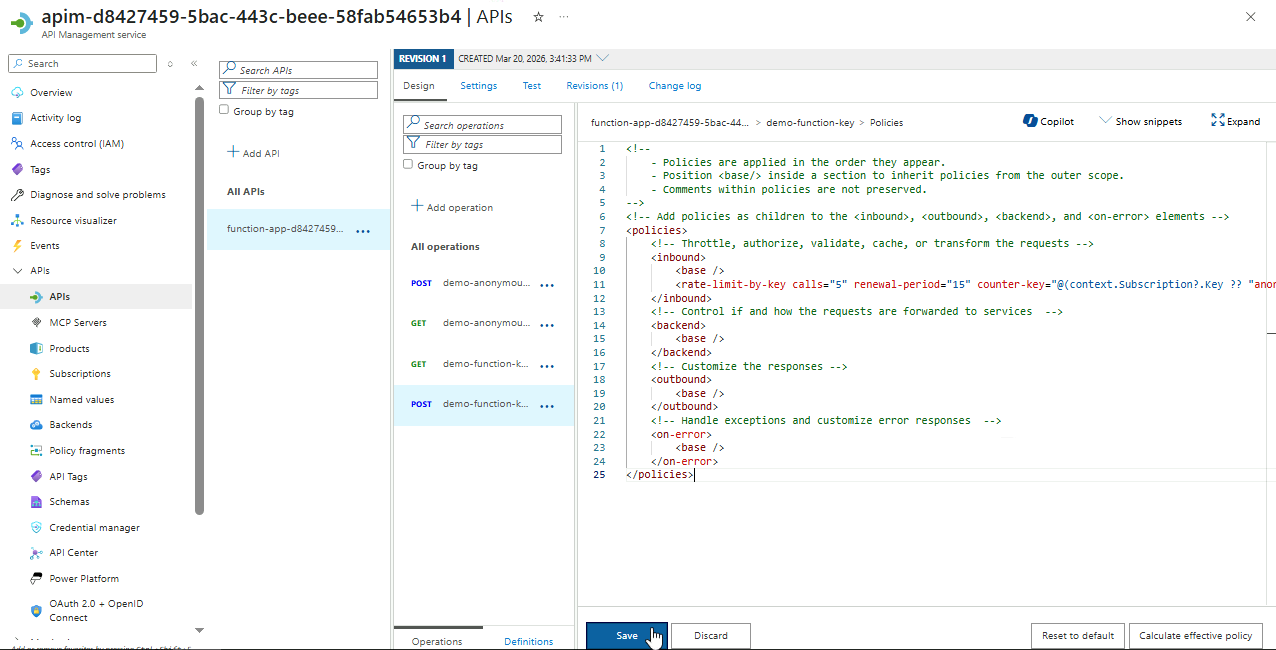
Note: If you're using the Consumption SKU for Function App, you may get an error:
One or more fields contain incorrect values:
Error in element 'rate-limit-by-key' on line 11, column 10: Policy is not allowed in 'Consumption' sku
-
Go to Test tab and click Send several times in a row.
After sending too many requests in the configured period, you will get the following response:
{
    "statusCode": 429,
    "message": "Rate limit is exceeded. Try again in 9 seconds."
}
-
Wait for at least 15 seconds, the send the request again. This time, it should return a
200 OKresponse. -
After completing this section, remove the policy to ensure the endpoint remains fully accessible for later steps.
Payload Transofrmation
Payload transformation allows APIs to adapt request and response formats to meet client requirements. In this example, the Azure Function accepts JSON and returns plain text, but the client only supports XML.
The goal is to apply an inbound policy that converts incoming XML requests into JSON for the backend and transforms the plain-text response into XML before returning it to the client.
-
Select the
POSTendpoint fordemo-anonymous-key➔ Test -
Populate the Request Body and click Send.
{
"name": "Your name"
}
-
Scroll to the HTTP Response section to verify that the response returns plain text.
-
Go to the Design tab and make sure the correct
POSTHTTP endpoint is selected.In the Inbound processing card, click the
</>icon (Policy code editor).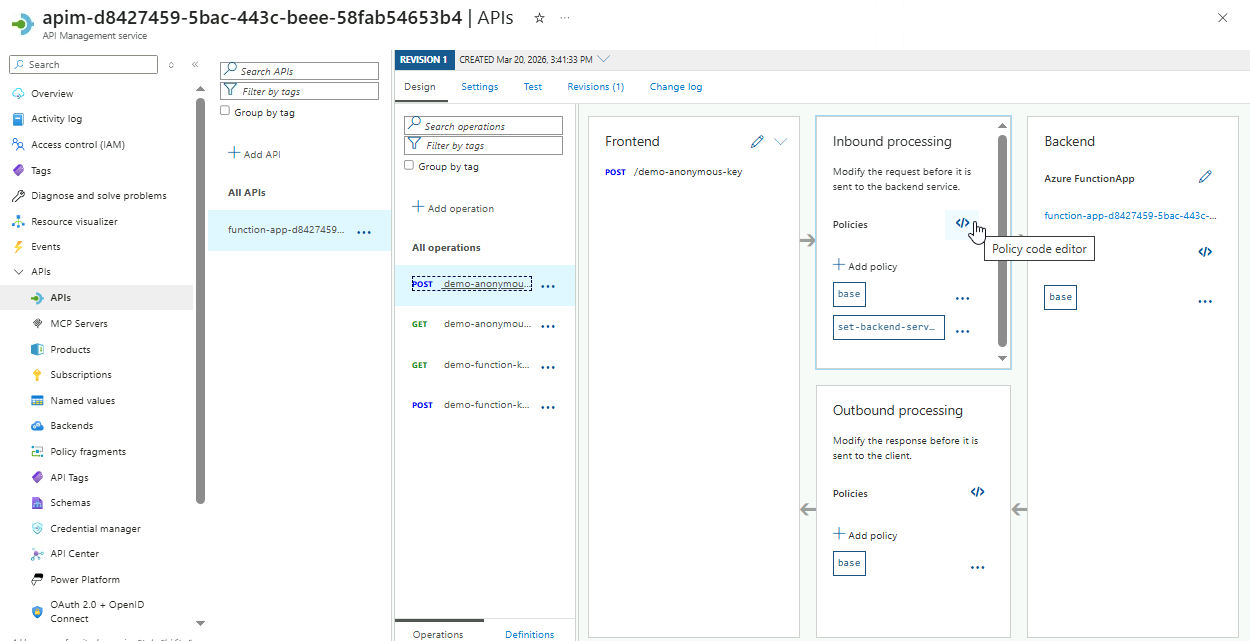
-
Add the inbound payload transformation in the
inboundsection:<set-body>@{
var doc = context.Request.Body
.As<XDocument>(preserveContent: true);
var name = doc.Root
.Element("name")?
.Value
?? string.Empty;
var result = new JObject();
result["name"] = name;
return result.ToString();
}</set-body>Your code should resemble the example below:
Note: Do not copy this code directly, as it does not include the function ID.
<policies>
<inbound>
<base />
<set-backend-service id="apim-generated-policy" backend-id="function-name" />
<set-body>@{
    var doc = context.Request.Body
            .As<XDocument>(preserveContent: true);
    var name = doc.Root
            .Element("name")?
            .Value
            ?? string.Empty;
    var result = new JObject();
    result["name"] = name;
    return result.ToString();
}</set-body>
</inbound>
<backend>
<base />
</backend>
<outbound>
<base />
</outbound>
<on-error>
<base />
</on-error>
</policies>NOTE: Do not save yet.
This C# script converts an incoming XML request into JSON for the backend. The XML payload is stored in the
docvariable, and the<name>element is extracted into thenamevariable. A JSON object is created inresult, thenamefield is added, and the object is converted to a string to form the request payload sent to the backend.The
inboundsection defines request policies, and theset-bodyelement handles the payload transformation to match the backend’s expected format. -
Add the outbound payload transformation in the
outboundsection:<set-body>@{
var text = context.Response.Body
.As<string>(preserveContent: true);
return new XElement("response", text).ToString();
}</set-body>Click Save.
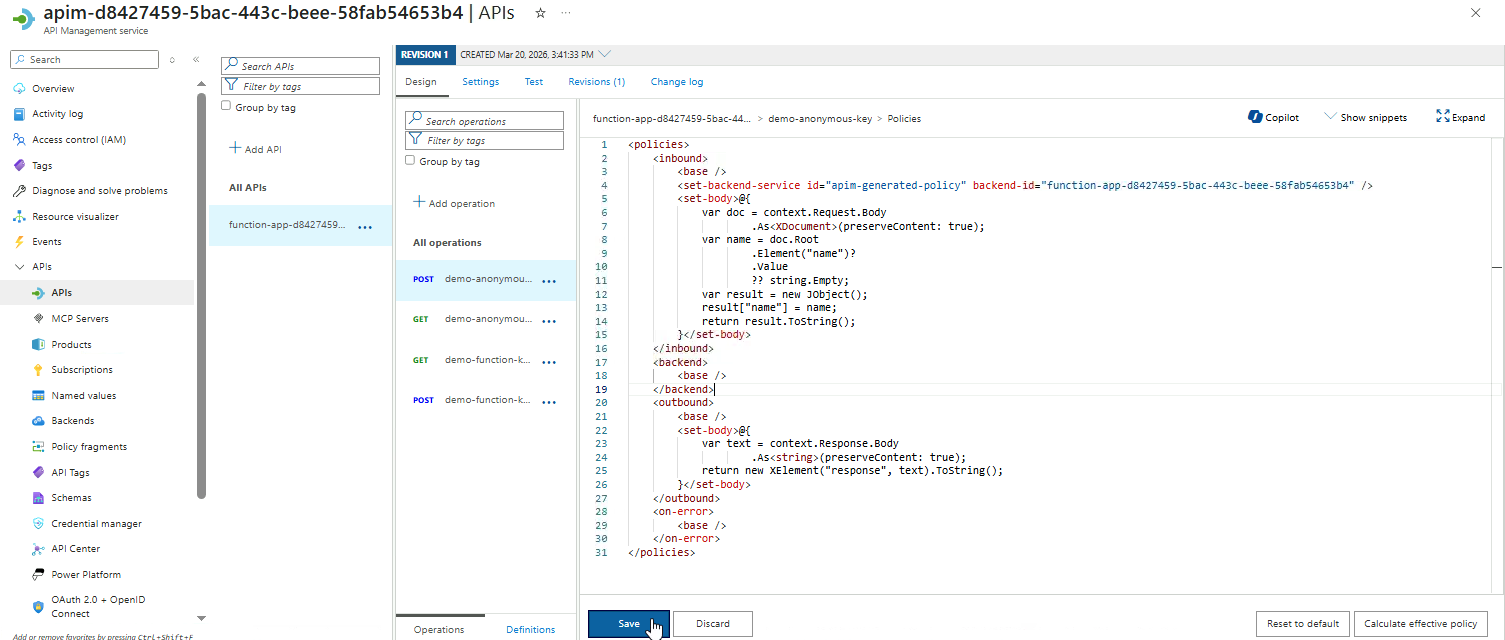
The backend returns a plain-text response, which is stored in the
textvariable. This value is then wrapped in an XML element called<response>, creating a new XML structure.Finally, the XML is converted to a string and returned as the API response.
-
Go to Test tab, add the following to the Request body, and click Send.
<root>
<name>your name</name>
</root>
-
Check the HTTP Response to confirm the payload is wrapped in the
<response>XML tag.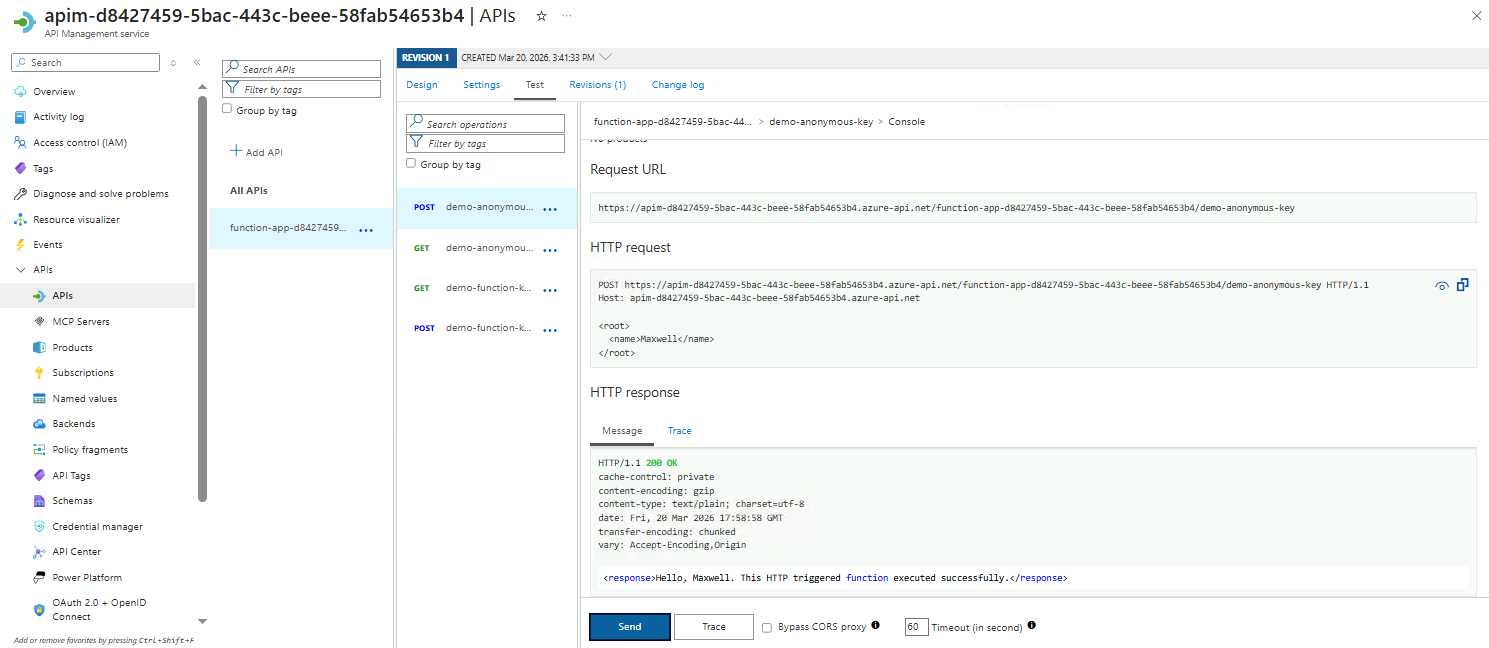
CORS Policy
CORS (Cross-Origin Resource Sharing) is a browser security feature that controls how a web page from one domain (like example.com) can request resources from another domain (like api.example.org).
By default, browsers block cross-site requests to protect users from malicious sites accessing private data. With CORS, the API explicitly allows certain domains to make requests, enabling safe cross-domain communication.
This section demonstrates how to apply a CORS policy in APIM.
-
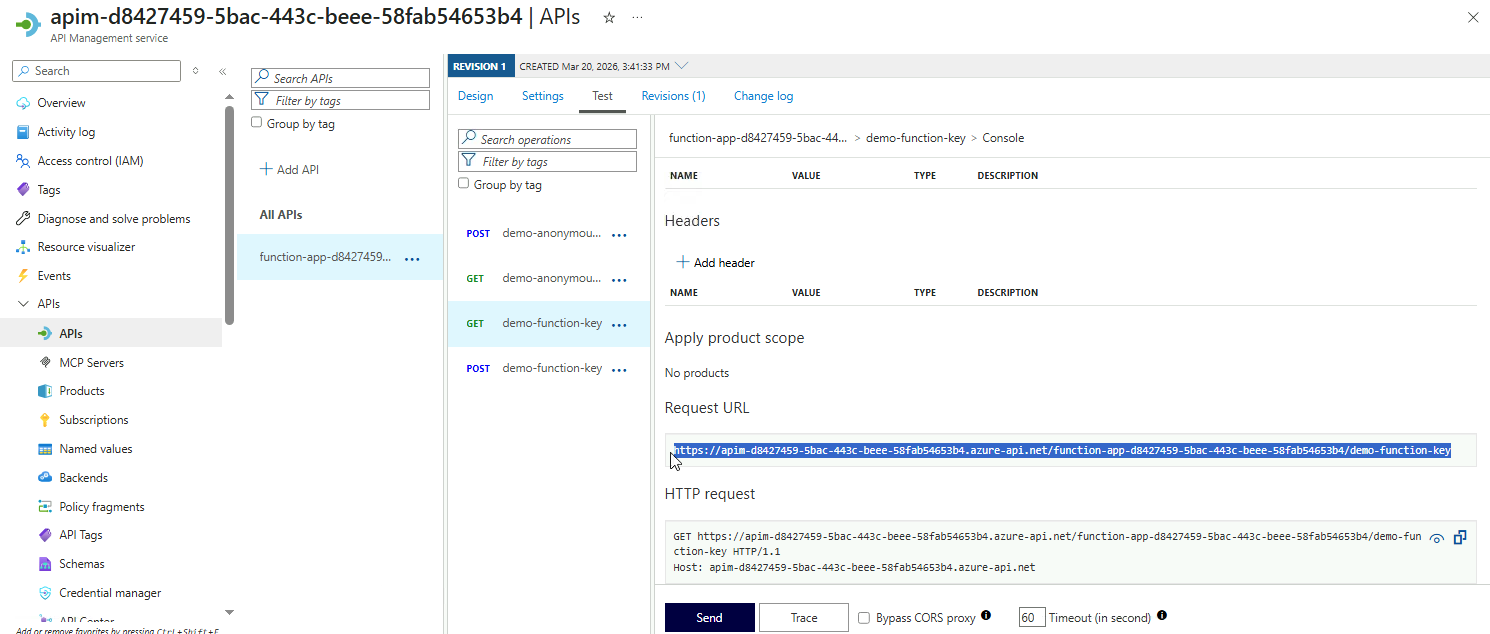
Select the
GETendpoint fordemo-function-key. -
Go to Inbound processing ➔ Add policy.
-
Select Allow cross-origin resource sharing (CORS) card.
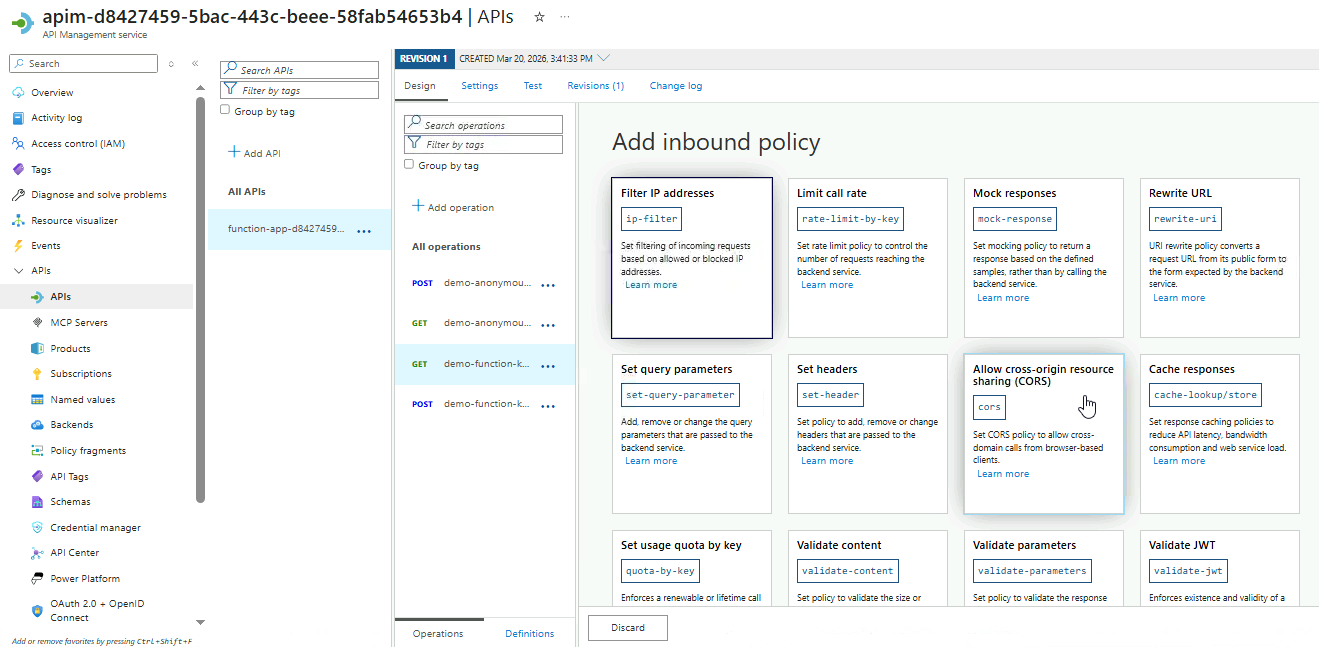
-
Next, configure the CORS policy.
Setting Value Allowed origins *Allowed methods Select all Allowed headers *Click Save.
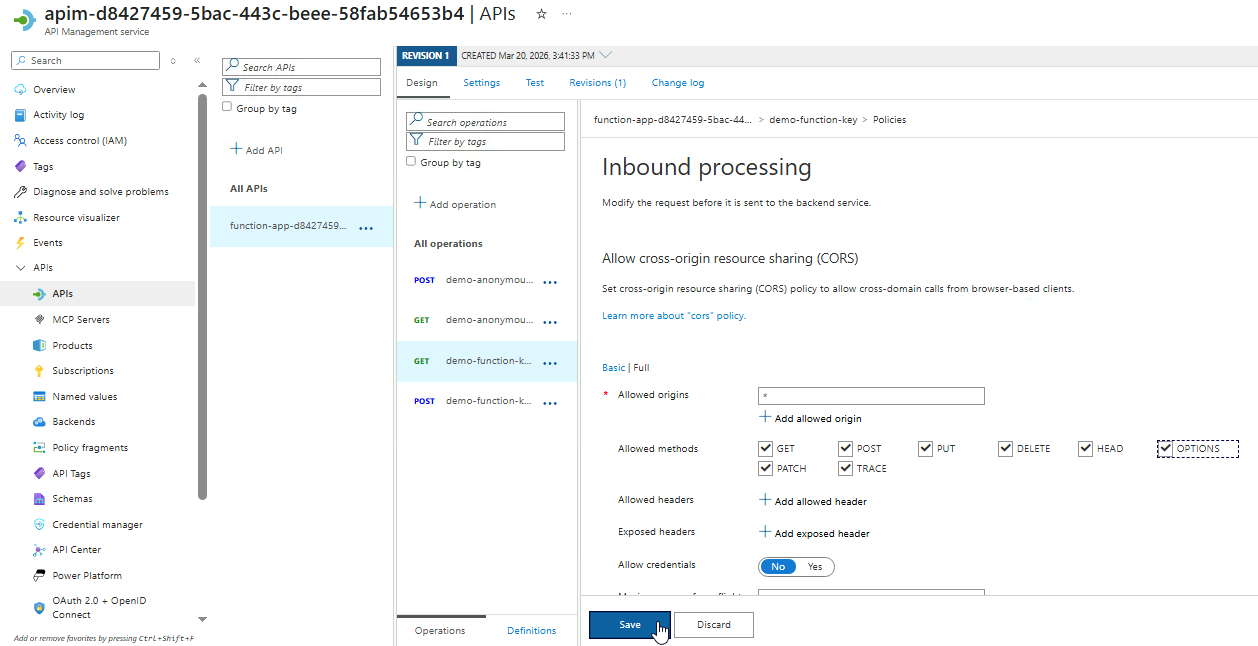
The wildcard
*allows any origin and method. This ensures browsers can call your API from any allowed domain safely.
Because CORS only affects browsers, testing with tools like curl or Postman does not fully reflect policy enforcement. To test effectively:
-
Copy the Request URL from the Test tab for the endpoint.
Make sure to note it down. We'll use it later.
-
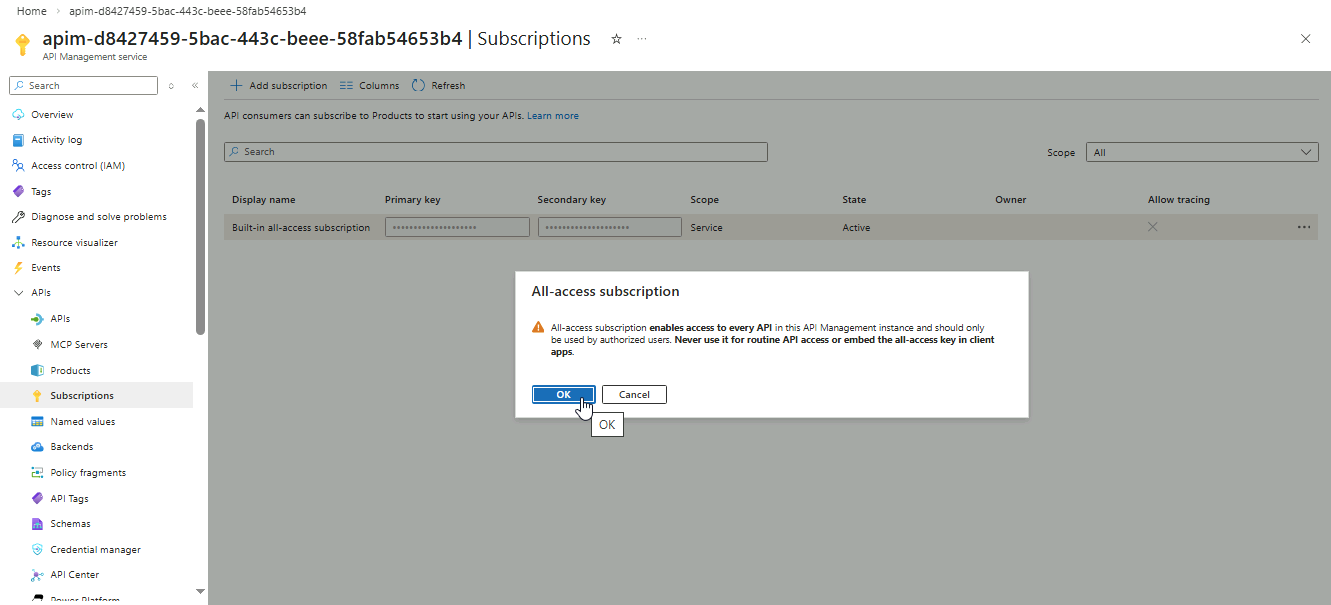
On your APIM instance, go to APIs ➔ Subscriptions.
For the Built-in all-access subscription, click the three dots on the right and select Show/hide keys.
 info
infoThe Built-in all-access subscription is automatically created for every APIM instance. It provides a default key so you can test your APIs without creating a new subscription.
When prompted, click OK.
-
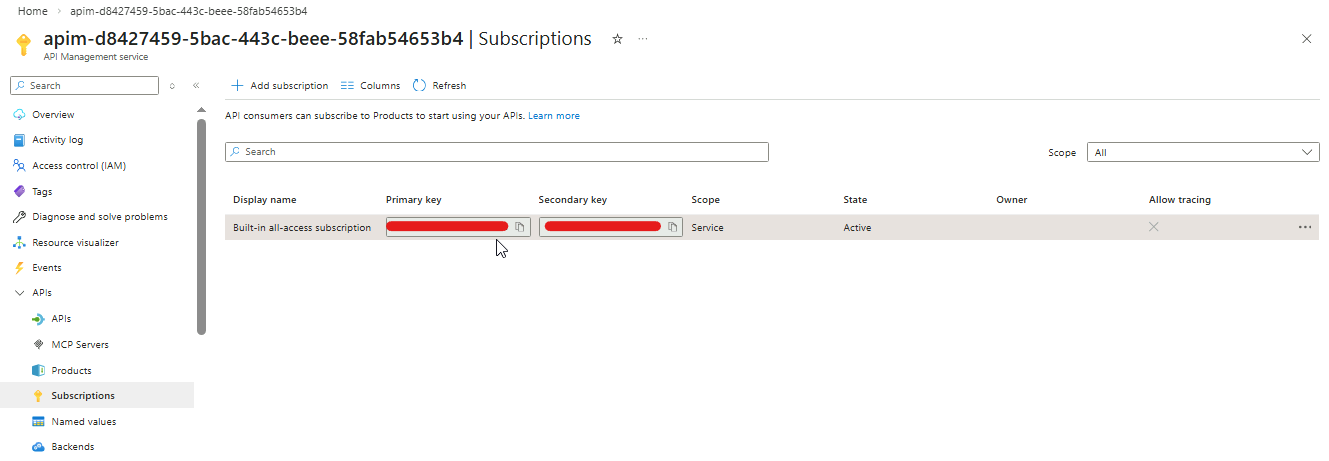
Copy the primary key and note it down.
-
Open a terminal and save the request URL and subscription key to variables:
APIM_URL="https://you-apim-url"
SUBSC_KEY="your-subsc-key"
Use
cURLto send aGETrequest to your APIM endpoint, including theOriginheader:curl -i \
-H "Ocp-Apim-Subscription-Key: $SUBSC_KEY" \
-H "Origin: https://example.com" \
$APIM_URL;echoTo confirm CORS is working, check for this header in the response:
Access-Control-Allow-Origin: *This confirms that the API allows cross-origin requests from any origin.
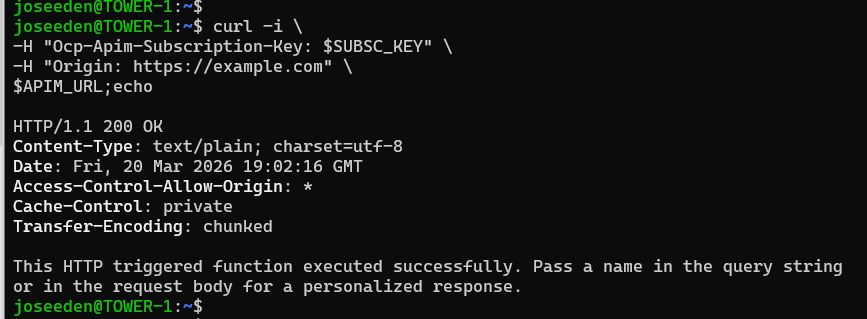
Note that this test isn’t fully accurate because curl and other non-browser clients ignore CORS. Even if you delete the CORS policy, the request will still succeed.
CORS only affects browsers. It controls whether JavaScript on a page from one origin can access an API on another origin. To test it correctly, you need to make a request from a web page hosted on a different origin than your API.
-
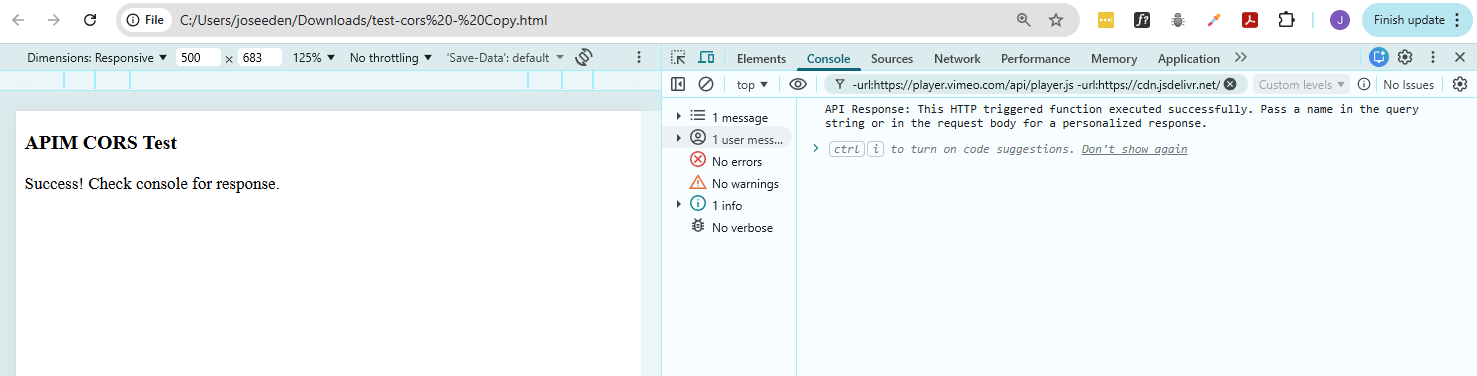
Create a local HTML file called
test-cors.htmlon your computer.Note: Make sure to set your APIM URL in
apiURLand subscription key insubKey.<!DOCTYPE html>
<html>
<head>
<title>CORS Test</title>
</head>
<body>
<h3>APIM CORS Test</h3>
<script>
// Replace with your APIM endpoint
const apiUrl = "https://YOUR-API-URL";
// Replace with your subscription key
const subKey = "YOUR-SUBSCRIPTION-KEY";
fetch(apiUrl, {
method: "GET",
headers: {
"Ocp-Apim-Subscription-Key": subKey
}
})
.then(response => response.text())
.then(data => {
console.log("API Response:", data);
document.body.innerHTML += "<p>Success! Check console for response.</p>";
})
.catch(error => {
console.error("CORS error:", error);
document.body.innerHTML += "<p>CORS blocked the request. See console.</p>";
});
</script>
</body>
</html> -
Double-click
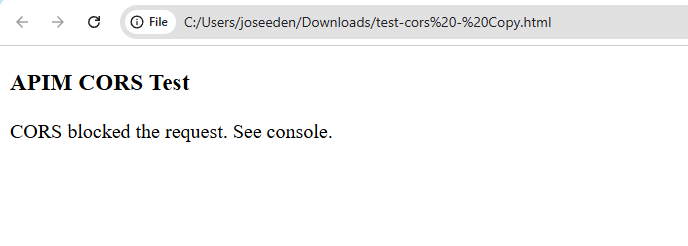
test-cors.htmlto open it in Chrome, Edge, or Firefox.Since the CORS policy is enabled, you should see a
Successmessage.
If you open Developer Tools ➔ Console, you should see no errors.
-
Go back to the endpoint and delete the CORS policy.
-
Double-click
test-cors.htmlagain to reopen it.You should now see that CORS have blocked the request.
Checking Developer Tools, you should now see error...with..
Access to fetch at 'https://YOUR-APIM-URL' from origin 'null' has been blocked by CORS policy: Response to preflight request doesn't pass access control check: No 'Access-Control-Allow-Origin' header is present on the requested resource.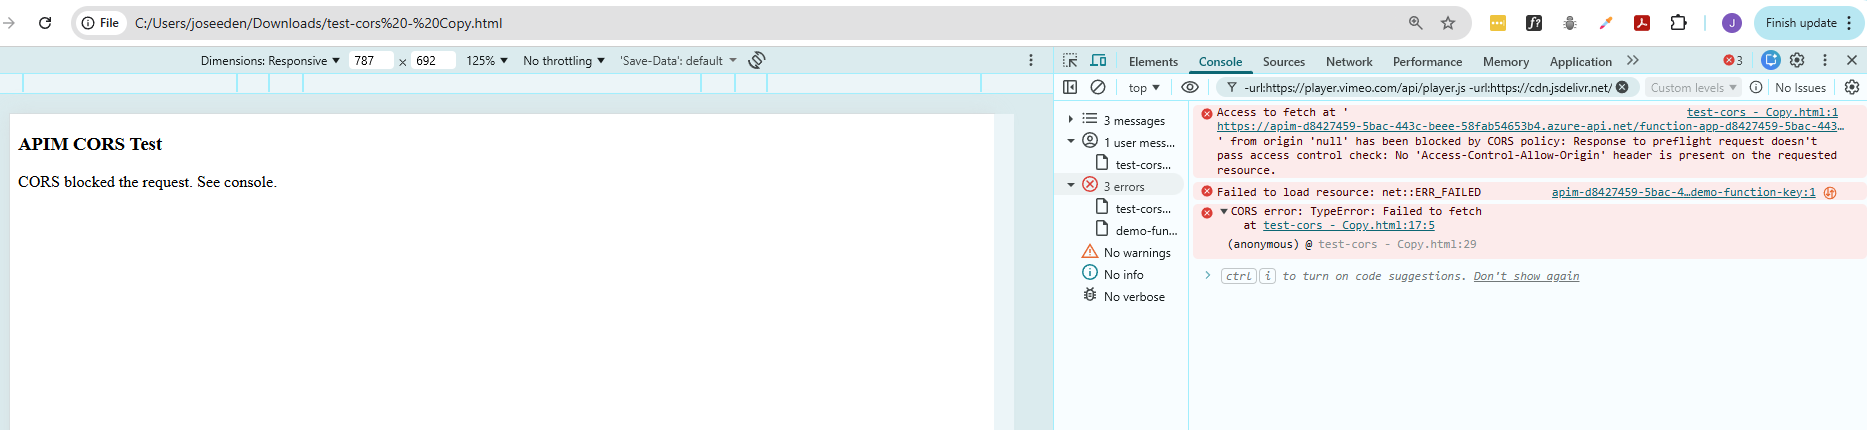
Caching and Usage Quotas
Enabling Response Caching
Response caching helps improve API performance and reduces load on backend services by temporarily storing responses. Instead of invoking the backend for every request, APIM can serve repeated requests from the cache, which makes APIs faster and more efficient.
This section shows how to add a response caching policy to an HTTP endpoint in APIM and where to configure it.
-
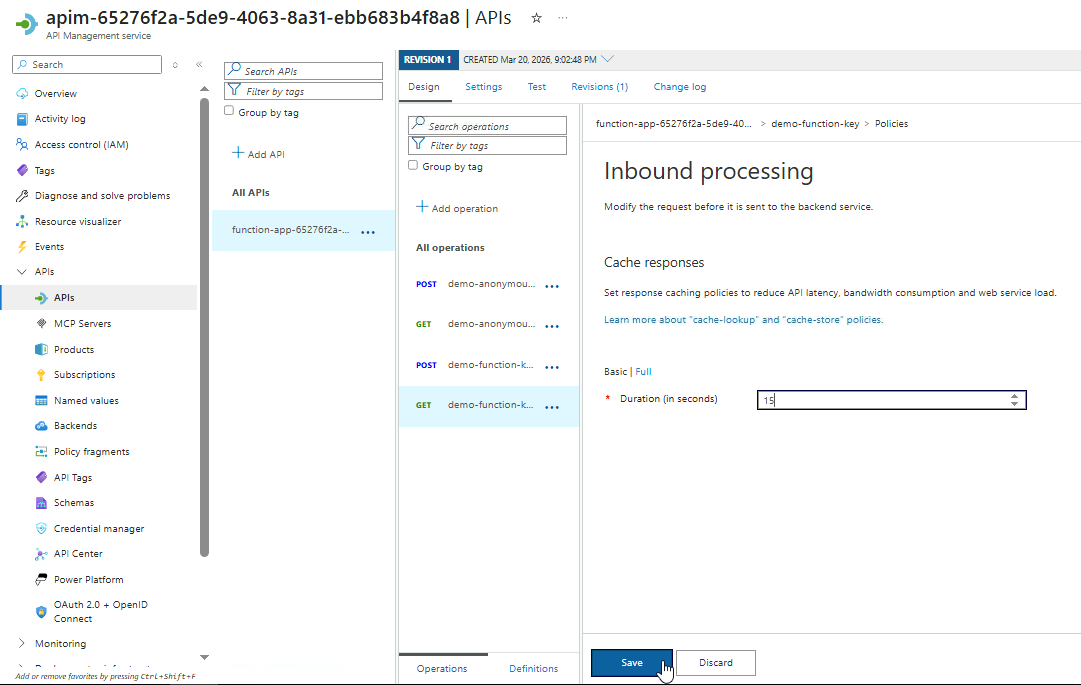
Choose the
GETendpoint fordemo-function-key -
Proceed to Inbound procesing ➔ Add policy
-
From the available policies, select the Cache responses option.
-
Set the cache duration to 15 seconds.
This means that each cached response will be removed after 15 seconds and will need to be created again.
Click Save.
-
The
cache-lookupandcache-storepolicies should now appear in inbound and outbound repsectively.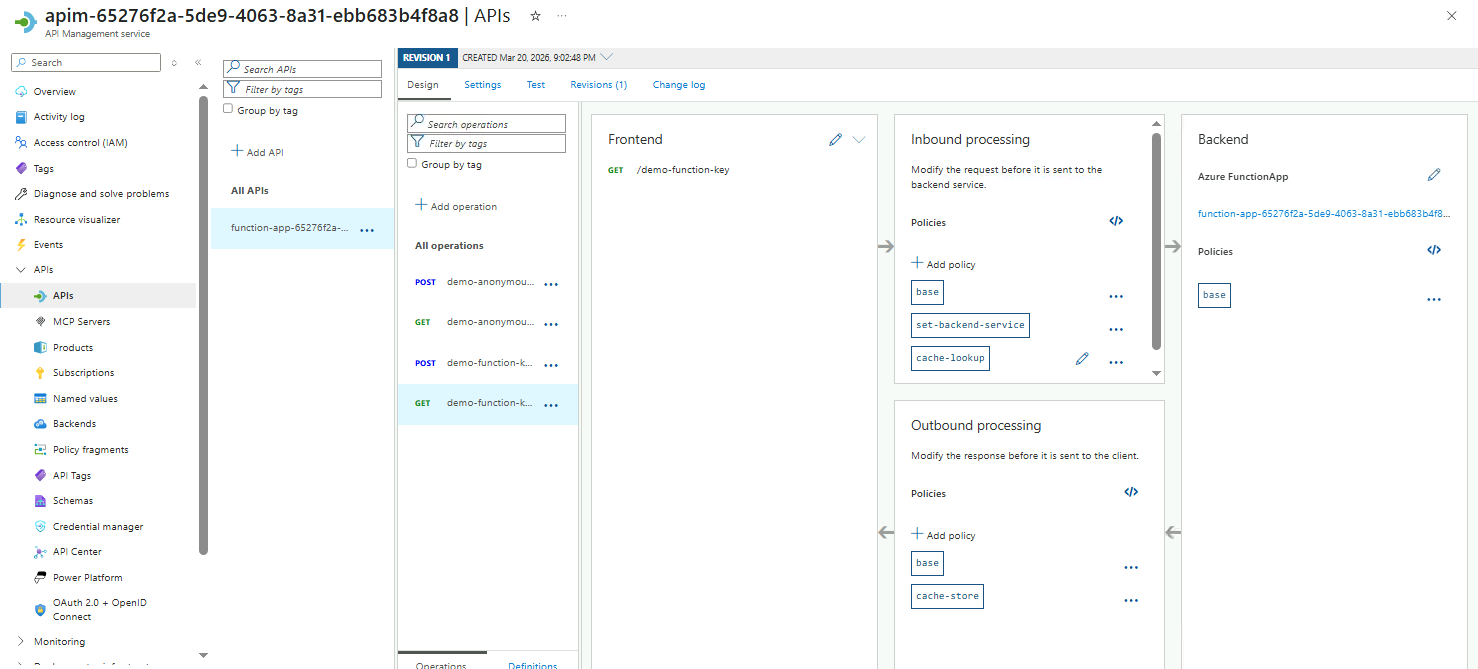
-
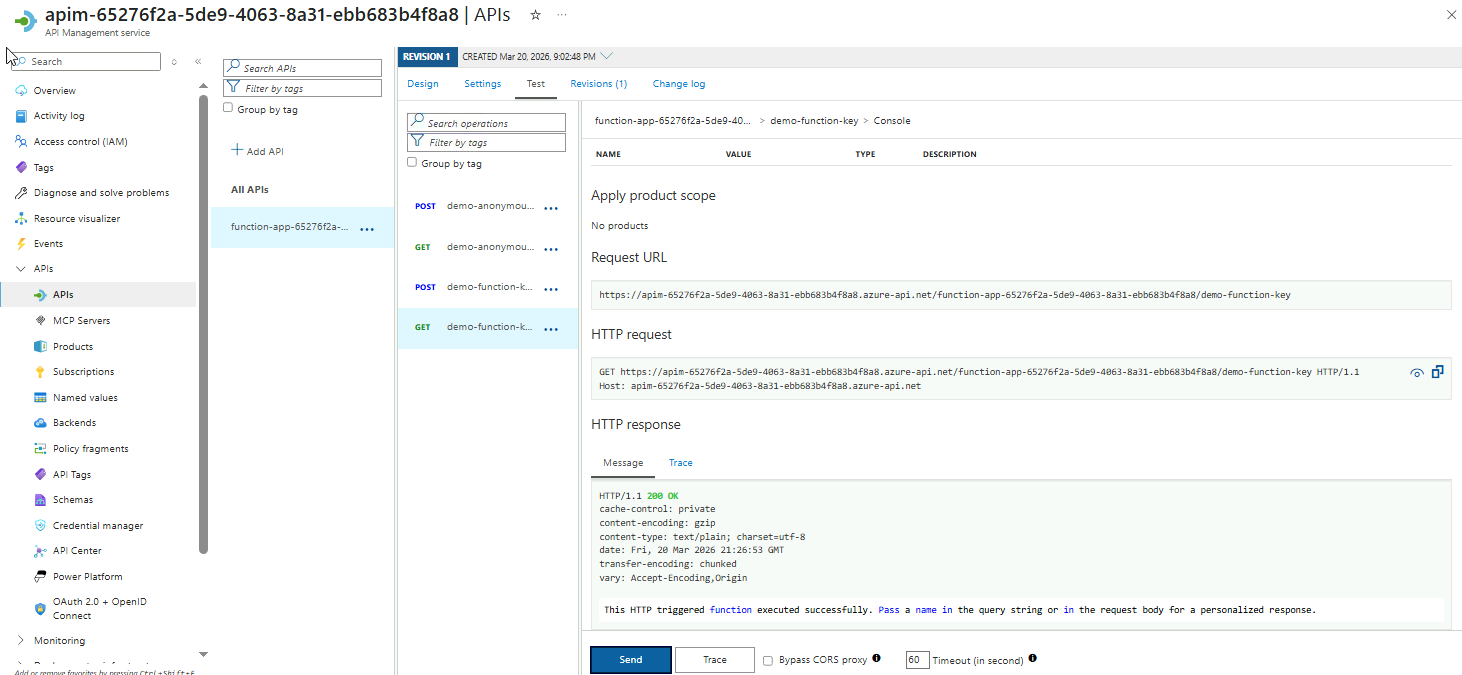
Go to Test and hit Send to verify the API works.
 info
infoThere’s no fully accurate way to verify response caching just by sending requests to the APIM URL, even with curl.
APIM caching works outside the backend, so even if the function generates dynamic values like timestamps or random IDs, these will not reflect whether the response is being served from the cache.
To verify that caching is working correctly, you need to review APIM’s Trace or Cache Hit metrics, which show whether repeated requests are being returned from the cache without invoking the backend.
-
After completing this section, make sure to delete the policy.
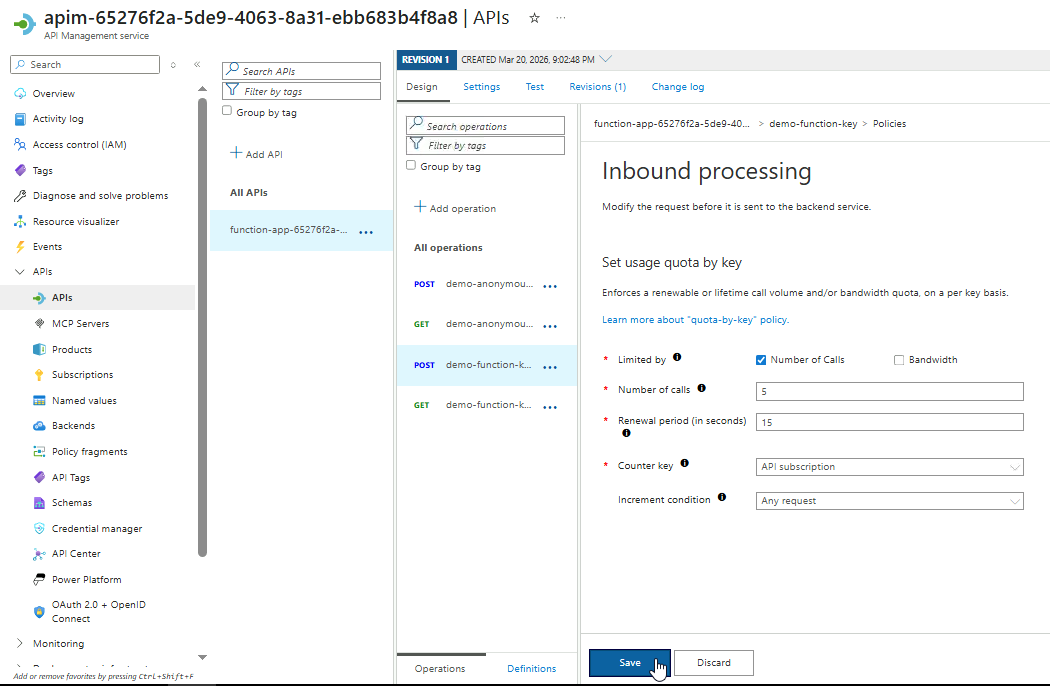
Setting Usage Quotas
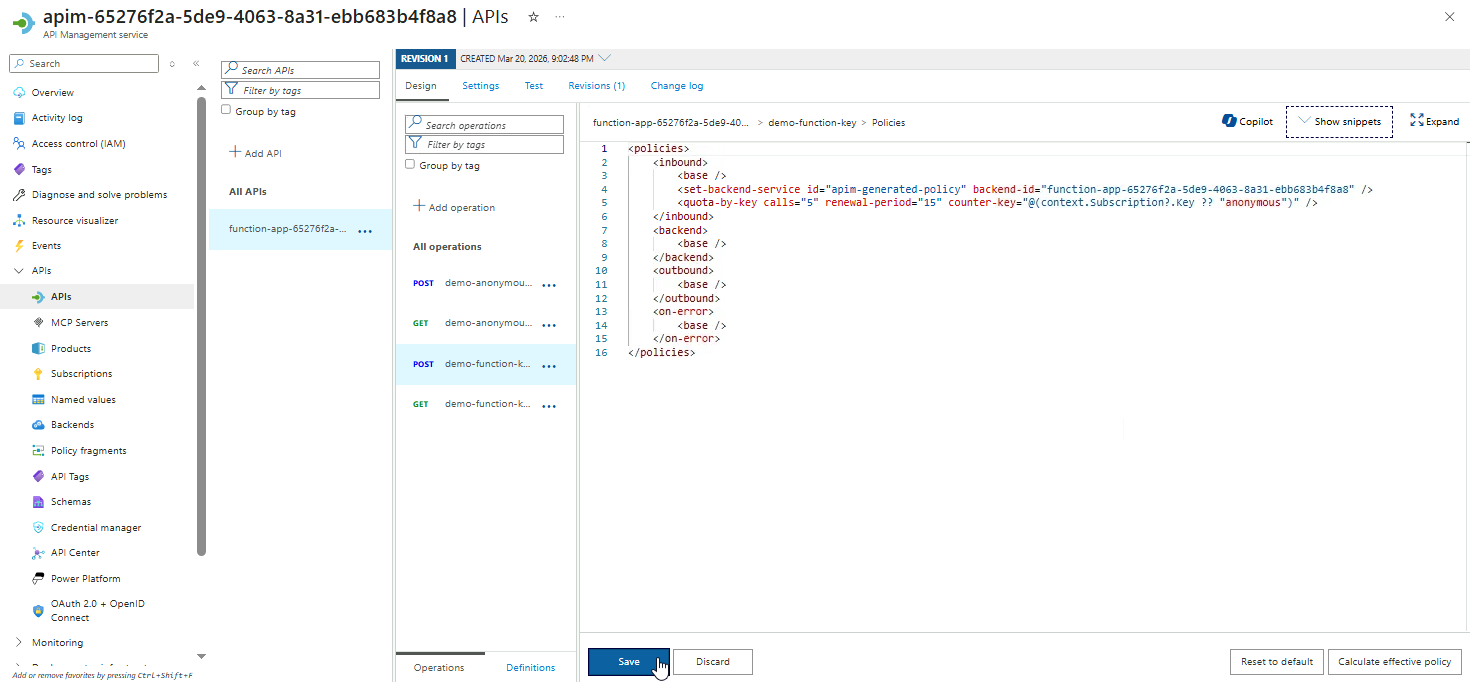
Usage quotas help control how many times an API can be called within a specific period. This protects your backend from overuse, ensures fair usage across clients, and prevents accidental or abusive traffic from affecting other users.
-
Select the
POSTendpoint fordemo-function-key -
Go to Inbound procesing ➔ Add policy
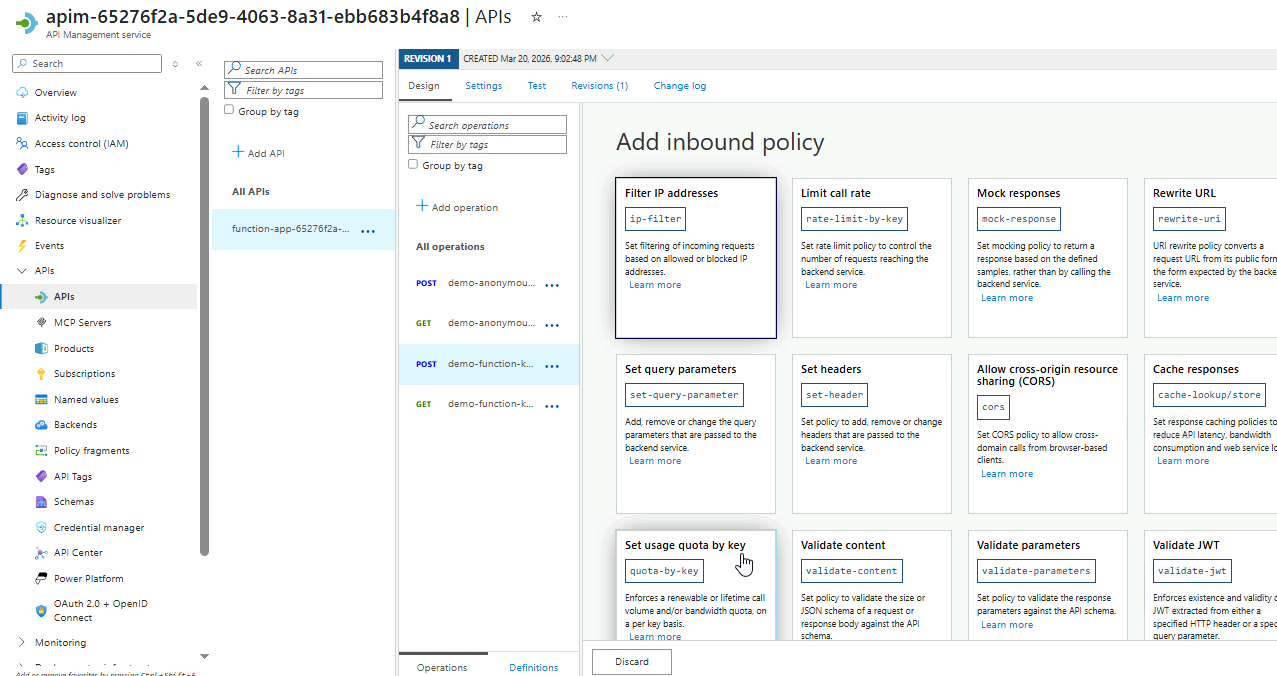
-
From the policies, select the Set usage quota by key option.
-
Configure the usage quota policy:
Setting Value Limited by Number of Calls Number of Calls 5 Renewal period (in seconds) 15 Counter key API subscription Click Save
-
Review the generated XML configuration and save.
UPDATE: The usage quotas can only be configured on premium APIM tier, so I didn't proceed with saving and testing this.