All-Things-Docker-and-Kubernetes
Lab 054: Everything in Console
- Pre-requisites
- Introduction
- Create the EKSClusterRole
- Create the VPC through CloudFormation
- Create the Nodegroup through CloudFormation
- Create the EKS cluster
- Create the Worker Nodes
- Verify the Nodes
- Access the Cluster through CLI
- Deploy an NGINX pod
- Cleanup
Pre-requisites
Introduction
In this lab, we’ll be creating the cluster through the EKS dahsboard in AWS Management Console.
For this lab, we’ll be using ap-southeast-1 region (Singapore).
Create the EKSClusterRole
- Go to IAM dashboard.
- in the left menu, click Roles > Create Role
- In the Select trusted entity page, choose AWS Service.
- In the Use cases for other AWS services, type EKS.
- Select the EKS - Cluster then click Next > Next
- Git it a name: EKSServiceRole.
- Finally, click Create role.
Create the VPC through CloudFormation
Let’s start with creating a VPC where our EKS Cluster will reide. We’ll use a Cloudformation template from the AWS Documentation.
- Go to Cloudformation dashboard and click Create cluster.
- Under the Prepare template, choose Template is ready.
- Under Specify template, choose Amazon S3 URL.
-
In the Amazon S3 URL field, paste the link below.
https://s3.us-west-2.amazonaws.com/amazon-eks/cloudformation/2020-10-29/amazon-eks-vpc-private-subnets.yaml - Click Next.
- Give the stack a name: eks-lab-vpc. Click Next.
-
Add tags:
- Key: Name
- Value: eks-lab-vpc
- Click Next > Create stack.
Create the Nodegroup through CloudFormation
Next, we’ll create the nodegroup.
- Back at the Stacks page, click Create stack > With new resources.
-
Follow the same steps, and paste the link below:
https://s3.us-west-2.amazonaws.com/amazon-eks/cloudformation/2020-10-29/amazon-eks-nodegroup-role.yaml -
Click Next. In the next page, give it a name: eks-lab-nodegroup.
- After clickig Next. sdd tags:
- Key: Name
- Value: eks-lab-nodegroup
- Click Next to go to the next page.
- Scroll down below to the The following resource(s) require capabilities: [AWS::IAM::Role] section. Tick the checkbox.
- Click Create stack.
Back at the Stacks page, wait for the two stacks to finish setting up.

Create the EKS cluster
Recall that the EKS has two planes, Management plabne and Contol Plane. Let’s create the control plane.
- Go to the EKS Dashboard and click Add cluster > Create.
- Give it a name: eks-bounavista.
- For the Kubernetes version, select the default.
- For the role, select EKSClusterRole then click Next.
- For thee VPC, select the eks-lab-vpc that we created.
- For the security group, select the one created by cloudformation: ControlPlaneSecurityGroup.
- Under the Cluster endpoint access, select Public.
- Click Next > Next.
- In the Review and create page, scroll down to the bottom and click Create cluster
It will take a few minutes before the cluster is created.

Create the Worker Nodes
- Go to EKS > Clusters > eks-buonavista.
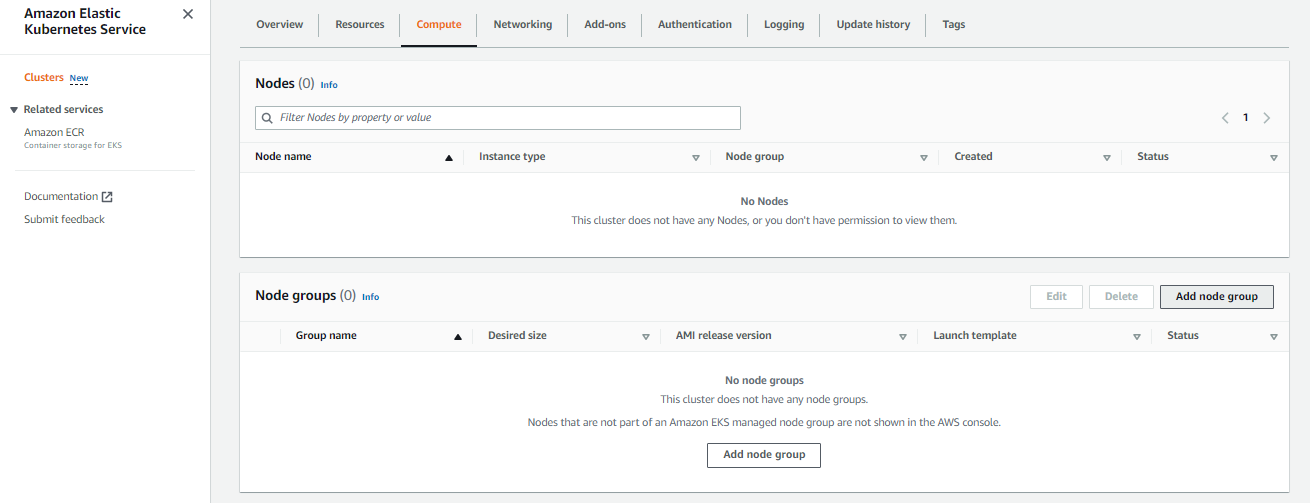
- Click the Compute tab.
-
In the Node groups section, click Add node group.

- Give it a name: eks-buounavista-ng1
- For the Node IAM Role, select the role that was created by Cloudformation: NodeInstanceRole
-
In the next page, set the configurations:
- Instance type: t3.small
- Disk Size: 5G
- Desired Size: 2
- Minimum Size: 1
- Minimum Size: 5
- Click Next > Next > Create
Back at the Compute tab, wait for the node to change status from NotReady to Ready.

Verify the Nodes
Go to the EC2 dashboard. We should see the nodes created for our EKS cluster.

Access the Cluster through CLI
In your terminal, check if the identity that you’re using is the same as the user you used to log-in to the AWS Console.
$ aws sts get-caller identity
You should be able to retrieve the nodes now.
$ kubectl get nodes
If you get this error,
error: You must be logged in to the server (Unauthorized)
Run the command below to update the kubeconfig file.
$ aws eks update-kubeconfig \
    --region ap-southeast-1 \
    --name eks-buenavista
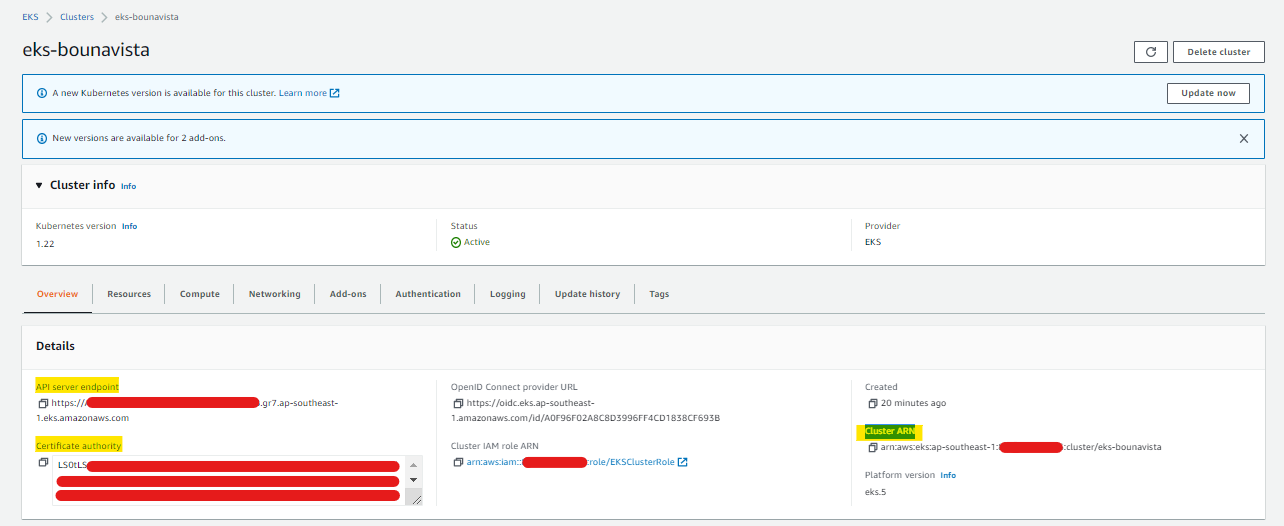
If this doesn’t solve the error, you may need to edit the ~/.kube/config manually and add the cluster information. You can find all of these in the Overview tab of your cluster in the EKS dashboard.

Modify the kubeconfig file.
$ vim ~/.kube/config
Clusters
Start with the cluster block. You need to add the:
- certificate-authority-data
- server endpoint
- cluster ARN
clusters:
- cluster:
    certificate-authority-data: <Certificate-authority>
    server: <API server endpoint>
  name: <Cluster ARN>
Contexts
Next is the Context block.
contexts:
- context:
    cluster: <Cluster ARN>
    user: <Cluster ARN>
  name: eks-buonavista
Users
Finally, configure the Users block.
users:
- name: <Cluster ARN>
  user:
    exec:
      apiVersion: client.authentication.k8s.io/v1beta1
      args:
      - --region
      - ap-southeast-1
      - eks
      - get-token
      - --cluster-name
      - eks-bounavista
      command: aws
      env:
      - name: AWS_PROFILE
        value: k8s-admin
Retrieve the contexts. It should now show the new cluster.
$ kubectl config get-contexts
If you other cluster added to the config file, you can switch over to the new cluster. Notice that the “*” now shifts to the new cluster when you retrieve the contexts again.
$ kubectl config use-context eks-bounavista
$ kubectl config get-contexts
Now try to retrieve the nodes.
$ kubectl get nodes
Then try to check the nodes and cluster.
$ aws eks list-clusters
{
    "clusters": [
        "eks-bounavista"
    ]
}
$ kubectl get nodes
NAME                                                 STATUS   ROLES    AGE   VERSION
ip-192-168-148-225.ap-southeast-1.compute.internal   Ready    <none>   15m   v1.22.12-eks-ba74326
ip-192-168-220-9.ap-southeast-1.compute.internal     Ready    <none>   16m   v1.22.12-eks-ba74326
Verify if they’re the same nodes in the EKS dashboard.

Deploy an NGINX pod
As a bonus, let’s try to deploy an NGINX pod using this nginx.yml file.
apiVersion: v1
kind: Pod
metadata:
  name: nginx-demo
  namespace: default
spec:
  containers:
  - name: nginx-ctr
    image: nginx:latest
    ports:
      - containerPort: 80
Apply the manifest.
$ kubectl apply -f nginx.yml

pod/nginx-demo created
Retrieve the pods.
$ kubectl get pods

NAME         READY   STATUS    RESTARTS   AGE
nginx-demo   1/1     Running   0          11s
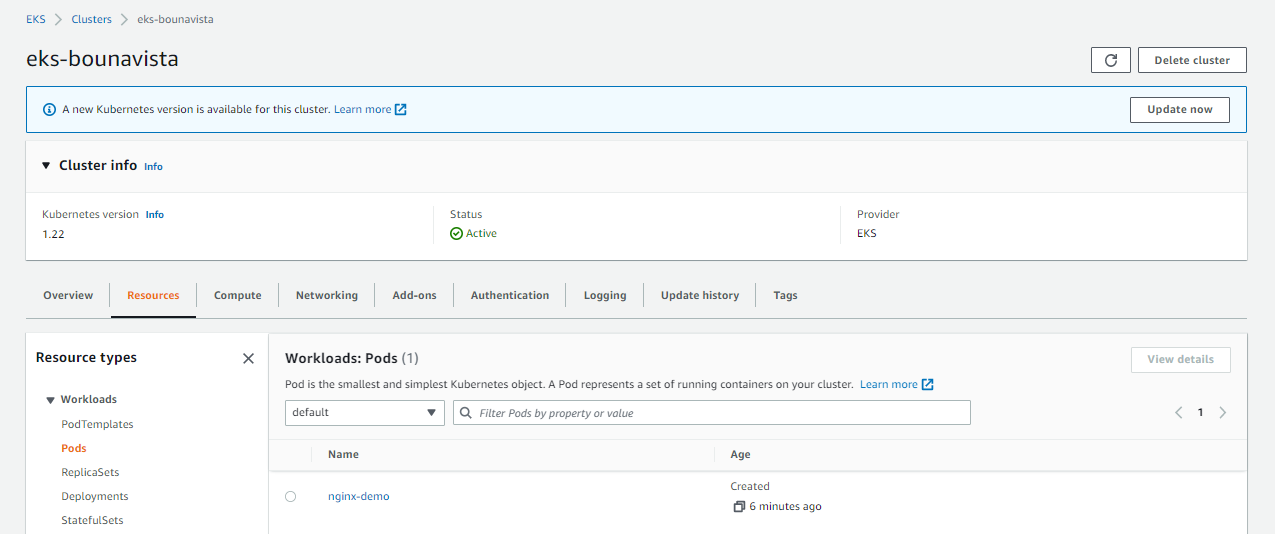
Go back to the your cluster in the EKS dashboard and open the Resources tab. Open Workloads > Pod.
In the All Namespaces dropdown bar, select default. You should now see the NGINX pod running.

Click nginx-demo to see mroe information about the pod. Scroll down below to the Events section. If there are any errors hta occured, it will be displayed here.

Cleanup
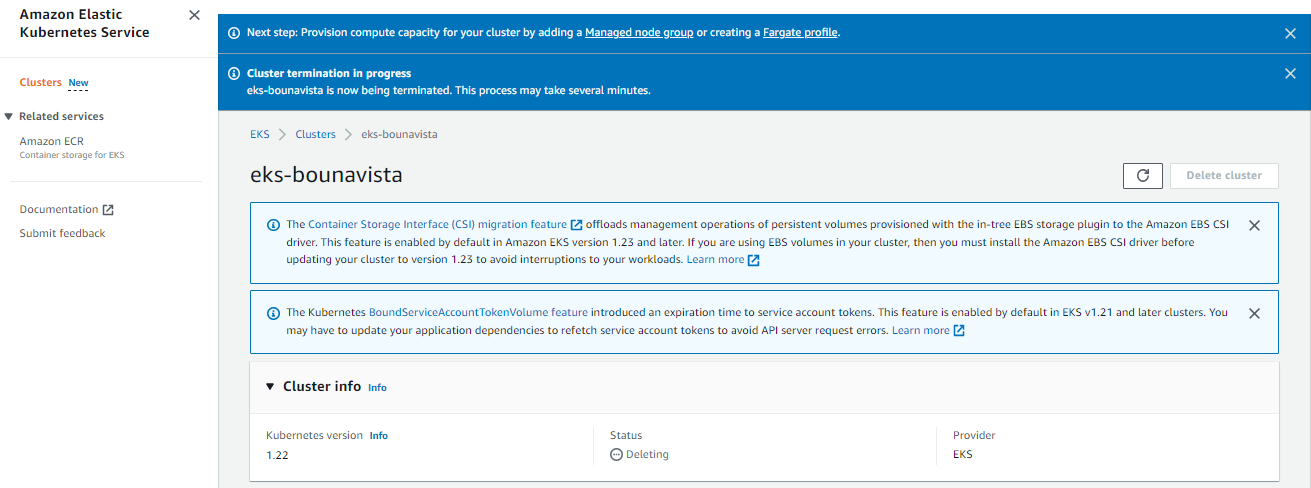
Before we officially close this lab, make sure to destroy all resources to prevent incurring additional costs. Go to the EKS dashboard and delete the nodegroup, then the cluster.

Next, go to the Cloudformation dashboard and delete the two stacks. Note that when you delete your cluster, make sure to double check if the stacks are dropped cleanly.

It could encounter an error sometimes which causes the stack to fail.

In this cases, open the stack and go to the Resources tab. The Status Reason should display what caused the delete to fail.

For this error, we can simply click the link in the Physical ID and it should bring us to the role that we need to detach.
Since we don’t need the role anymore, we can simply delete it.

Go back to the Stacks page in Cloudformation and retry the delete again.

The delete should now succeed. Delete the other stack to completely remove all resources.
