Sprint 04
Todo
Todo:
- ✔️ Connect Cloud Build to Github repository
- ✔️ Automate Docker image build process
Notes
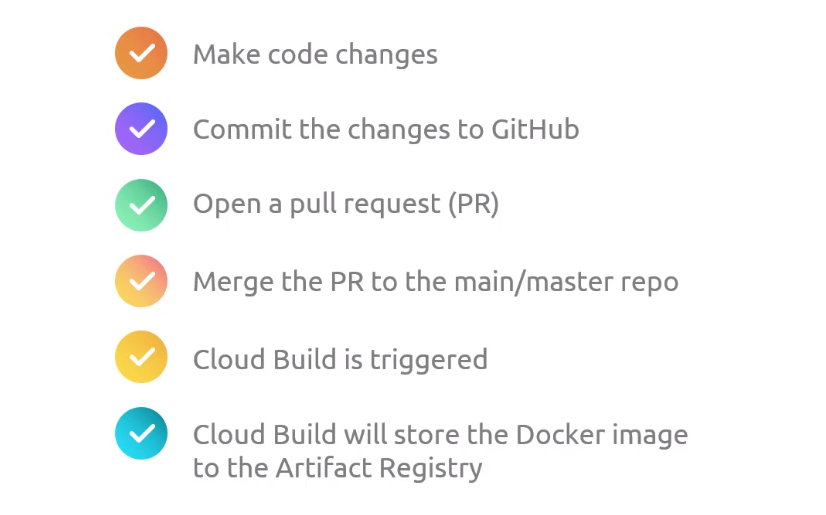
In traditional Jenkins, we use Webhooks to monitor activities in a repository. The Jenkins job will be triggered when new changes are committed.

In Cloud Build, we can use a Cloud Build Trigger. This will be the event that will start the Cloud Build job. This can be any push that is done on the main/master branch. This can also be configured for other branches.

Once triggered, Cloud Build will check the Cloudbuild.yaml which will contain the instructions. This is the CD code.
Connecting Github repo to Cloud Build
-
First, search for Cloud Build. If this is the first you've used it, you'll need to enable the Cloud Build API. Refresh the window or try searching Cloud Build from the search bar again.

-
In the Cloud Build homepage, go to Triggers > MANAGE REPOSITORIES > CONNECT REPOSITORY.
In the right-side window, select Github. This will open a new tab for authentication. It will fail for the first time because it will require the Google Cloud Build to be installed in your Github account.
When installing tools in you code repository, make sure to allow access to specific repositories only. Click "Only select repositories" and select the "gcp-devops-project". Click Install afterwards.
Provide your Github password to confirm. You'll be redirected back to Cloud Build.
-
Still in the connect repository step, your Github account should appear. Select the correct resporitory, tick the box to accept the conditions, and click CONNECT.
Setup the Cloud Build Trigger
-
In the Cloud Build page, click the three dots at the right side of your repository > Add trigger. Provide the following details and click CREATE afterwards.
- Name: gcp-devops-project-master-branch-trigger
- Description: Trigger for master branch
- Event: Push to a branch
- Configuration: Cloud Build configuration file (yaml or json)
-
Return to the terminal and create a new branch.
git checkout -b "minor/cloudbuild
git branch -
Create the cloudbuild.yaml.
-
Commit the change to your Github repository.
git add .
git commit -m "Created the cloudbuild yaml file"
git push -
Open a PR and then merge it to the master branch.
-
Back at the Cloud Build console, we should see a running job. This will take up to 2 minutes to finish.
Go to History. Once successful, we should see a green check mark.
-
Search for Artifact Resgitry in the search bar. If this is the first time you've used it, you'll need to enable the API first.
Refresh the page. Go to Repositories > CONTAINER REGISTRY > asia.gcr.io
We should see the folder. The Docker image should be inside it.