Link Shortener using NextJS
Overview
This project is a full-stack Link Shortener application designed to demonstrate how a modern web app is built using multiple architectural layers, including frontend, backend, authentication, and database integration.
The goal is not just to build a simple URL shortener, but to simulate a real-world system where:
- Users authenticate securely
- Data is stored and managed in a database
- Backend logic processes requests
- Frontend provides a clean user experience
The project also demonstrates advanced workflows using GitHub Copilot, including:
- MCP (Model Context Protocol) for database interaction
- Custom agents for code and documentation generation
- Structured multi-layer architecture
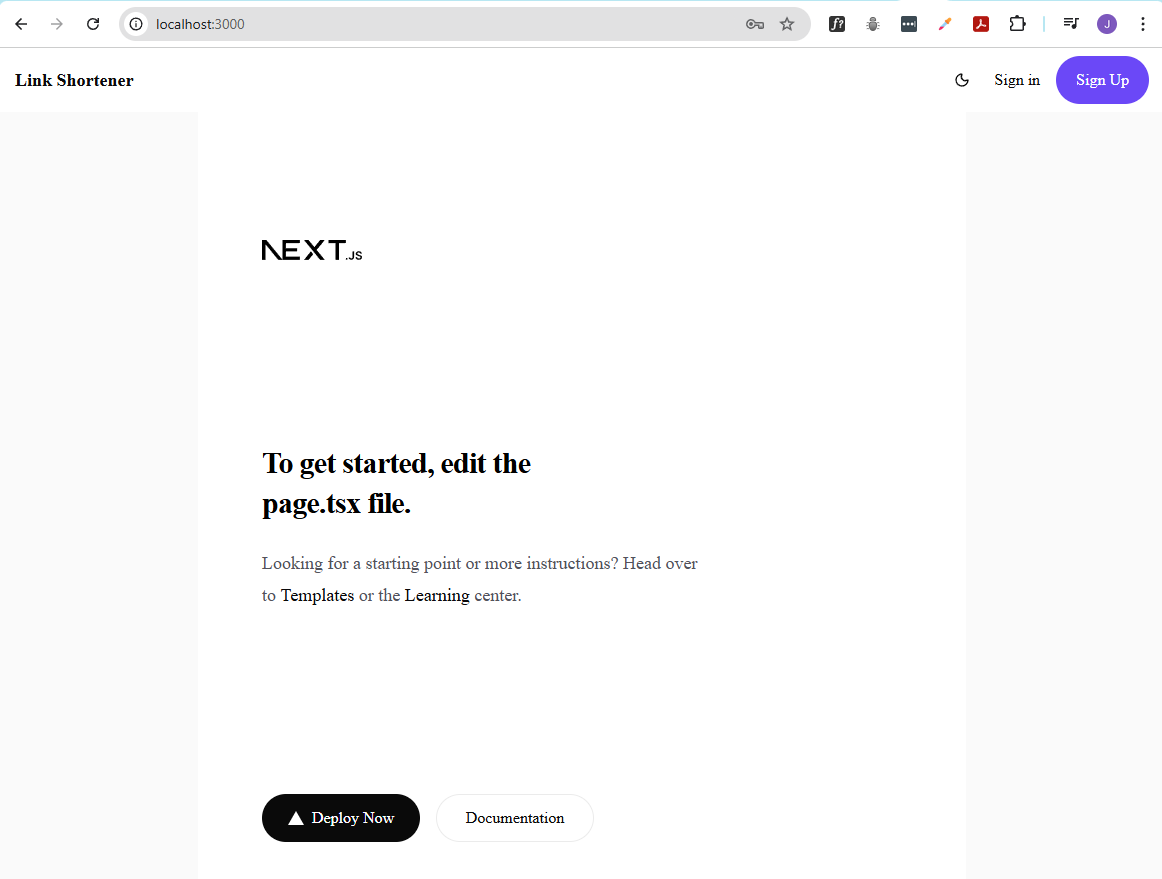
Screenshot:
Application Flow
The diagram below gives a quick view of how the main link-shortening flow works, from submitting a long URL to resolving the generated short link.

Architecture and Stack
The application is built entirely using Next.js as a full-stack framework, meaning both frontend and backend logic live in the same project.
Key technologies:
| Component | Purpose |
|---|---|
| Next.js | Frontend + backend (server actions, route handlers) |
| shadcn UI + Tailwind CSS | All UI components |
| Clerk | Authentication (login, signup, session handling) |
| Neon (Postgres) | Cloud-hosted database |
| Drizzle ORM | Database interaction (no raw SQL) |
| Zod | Validation |
Important constraints enforced in this project:
- No raw SQL queries → only Drizzle ORM
- No custom-built UI → only shadcn components
- No alternative auth → Clerk only
This ensures consistency and makes Copilot-generated code more reliable.
Project Initialization
We start by scaffolding a Next.js application using the official CLI with recommended defaults.
npx create-next-app@latest linkshortener
When prompted, choose the default options.
? Would you like to use the recommended Next.js defaults? › - Use arrow-keys. Return to submit.
❯   Yes, use recommended defaults
If successful:
Generating route types...
✓ Types generated successfully

Initialized a git repository.

Success! Created linkshortener at /mnt/c/Git/3-Repos/linkshortener
Navigate into the project and open it in VS Code:
cd linkshortener/
code .
If you get this error:
You are using Node.js 18.20.5. For Next.js, Node.js version ">=20.9.0" is required.
The project was actually created successfully, but the scaffolding failed during the type generation step.
See Troubleshooting section.
UI Setup (shadcn + Tailwind)
Instead of building UI from scratch, the project uses shadcn UI, which provides prebuilt, composable components styled with Tailwind.
Initialize it with:
npx shadcn@latest init -t next
Example output:
✔ Select a component library › Radix
✔ Which preset would you like to use? › Nova
✔ Preflight checks.
✔ Verifying framework. Found Next.js.
✔ Validating Tailwind CSS. Found v4.
✔ Created 2 files:
  - components/ui/button.tsx
  - lib/utils.ts
This sets up your UI foundation and ensures consistent design across the app.
Authentication Setup (Clerk)
Authentication is handled entirely by Clerk. This removes the need to build login systems manually and ensures secure session handling.
Sign up here: https://dashboard.clerk.com/sign-up
After signing up:
-
Click Create application
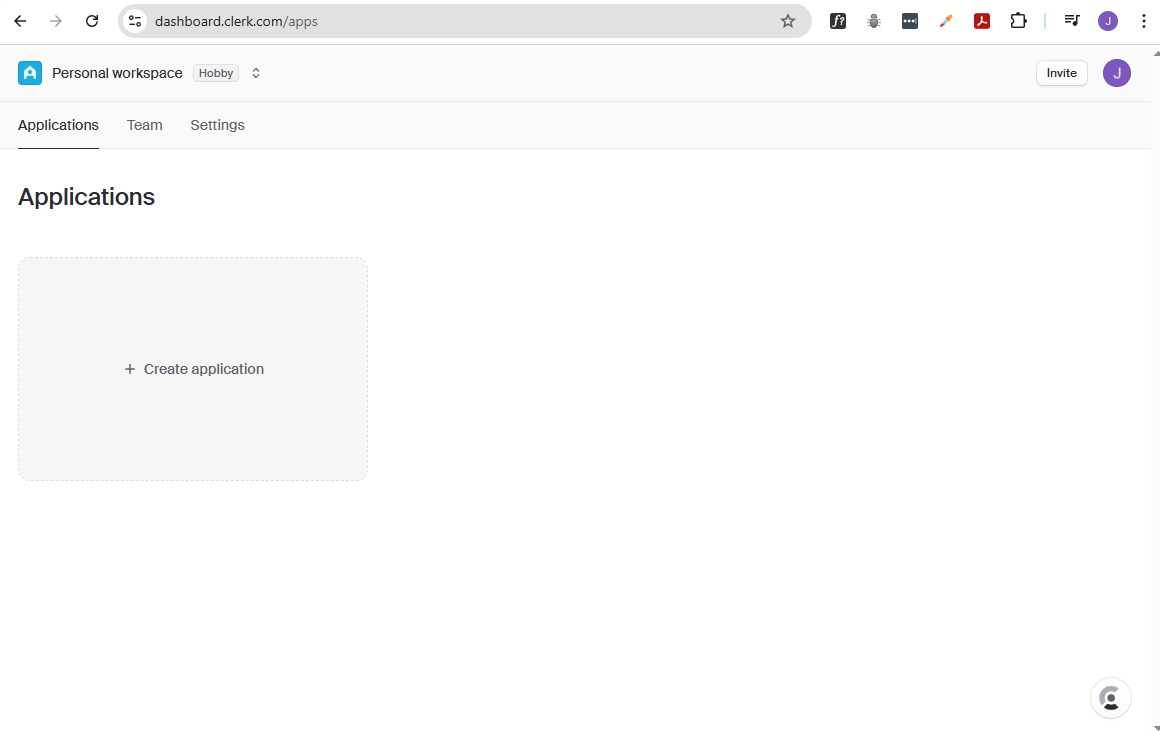
-
Provide a name for your application and choose Email as the sign-in option
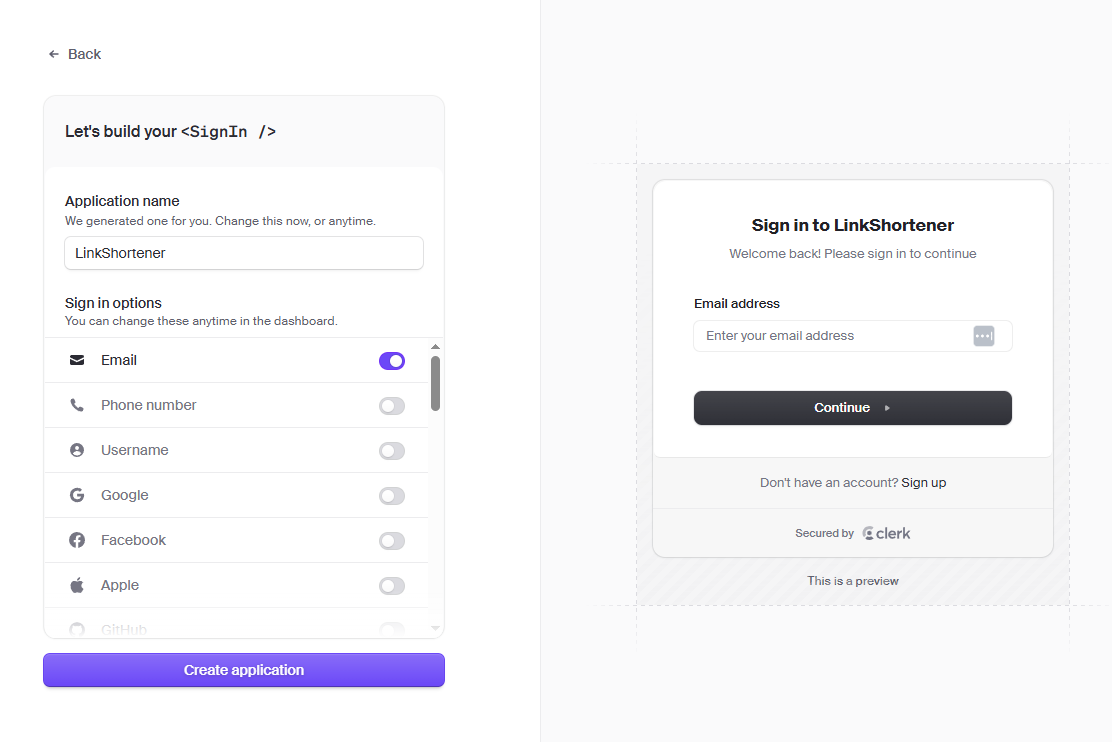
-
Upon creating the application, you should see your application dashboard.
Clerk provides the list of steps to integrate Clerk with your application, but it also provides a prompt you can copy and use directly in GitHub Copilot to generate integration code.

Click Copy prompt, and then in VS Code, open GitHub Copilot chat and paste the prompt in there.
-
Install Clerk:
npm install @clerk/nextjs@latest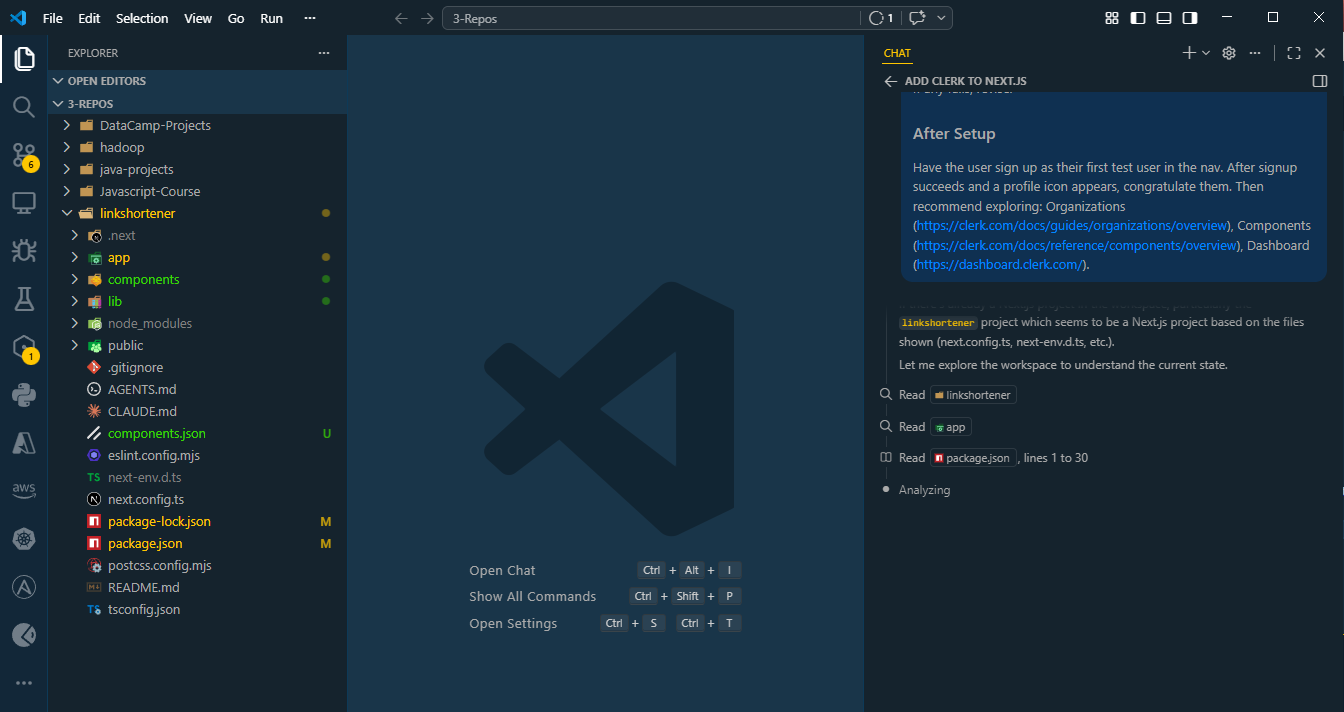
This updates the following files:
app/layout.tsxproxy.ts(previouslymiddleware.ts).env.localor.env
-
If the
.envfile is not created, you can create it and add the following environment variables:NEXT_PUBLIC_CLERK_PUBLISHABLE_KEY=YOUR_PUBLIC_KEYCLERK_SECRET_KEY=YOUR_SECRET_KEYDATABASE_URL=YOUR_DATABASE_URL -
Back in the Clerk dashboard, locate the API keys.
Copy the Publishable key and Secret key to your
.envfile.
-
Edit the
.envfile and add the API keys as environment variables:NEXT_PUBLIC_CLERK_PUBLISHABLE_KEY=pk_test_********************CLERK_SECRET_KEY=************************************************************DATABASE_URL=YOUR_DATABASE_URL
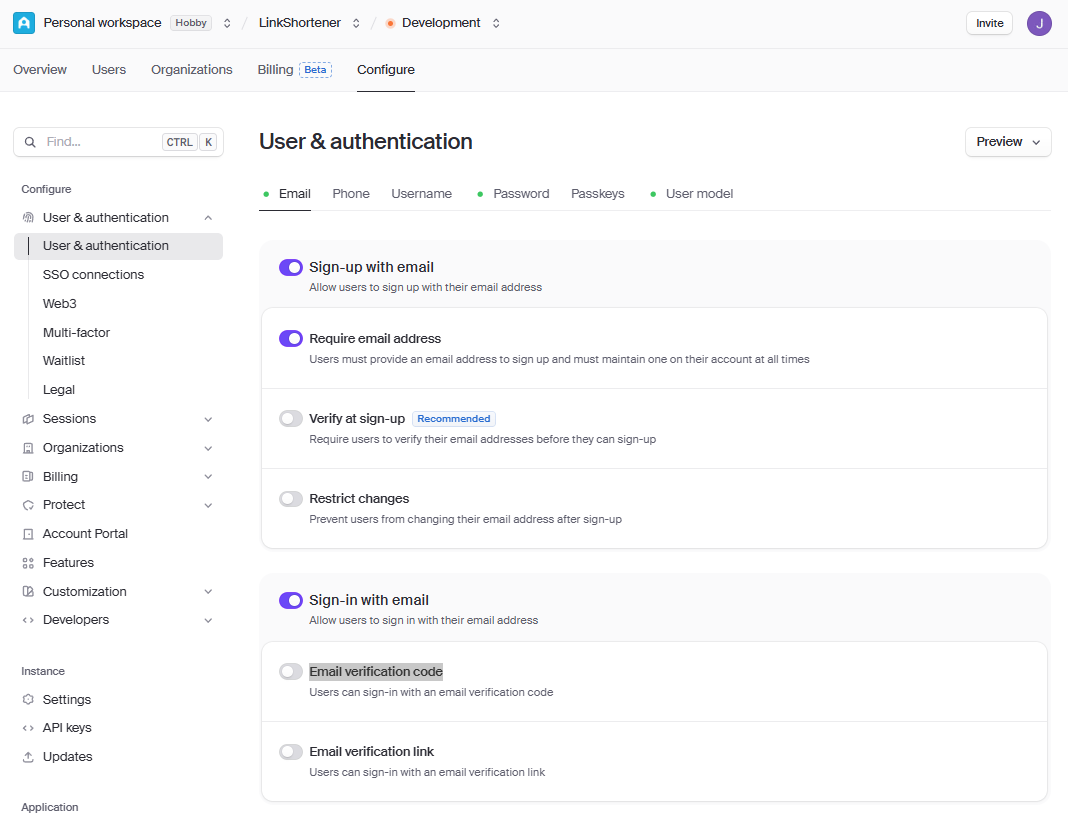
Since this project uses test accounts during development, email verification can be disabled to simplify the sign-up and login process. This allows users to authenticate immediately without needing to verify their email.
-
Go to Configure → User & Authentication → Email.
-
Disable Verify at sign-up and confirm when prompted.
-
Scroll to the sign-in options section.
-
Disable Email verification code.
-
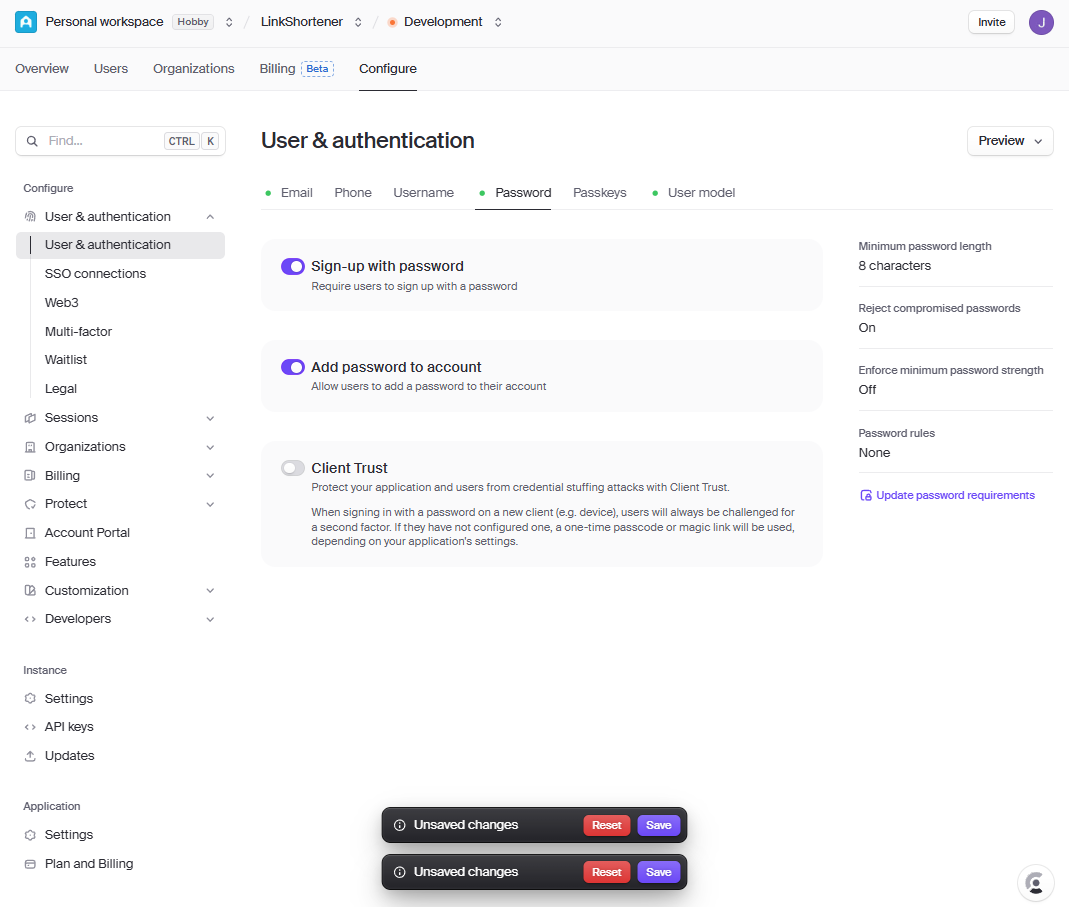
Go to the Password tab and temporarily disable Client Trust.
Once done, click Save.
Note: To ensure compatibility with the latest versions of Next.js and Clerk, I added a prompt instructing the agent to use proxy.ts instead of middleware.tsx, since middleware.tsx is deprecated in newer versions of Next.js.
Update this file to clearly state that the agent must NEVER use middleware.tsx, as it is deprecated in newer versions of Next.js, and should use proxy.ts instead.
Database Setup (Neon + Drizzle)
The application uses a serverless Postgres database hosted on Neon, with Drizzle ORM as the only way to interact with it.
Go to the Neon website to sign up for a free account: https://neon.com/
After signing up, click Create database and choose region closest to you
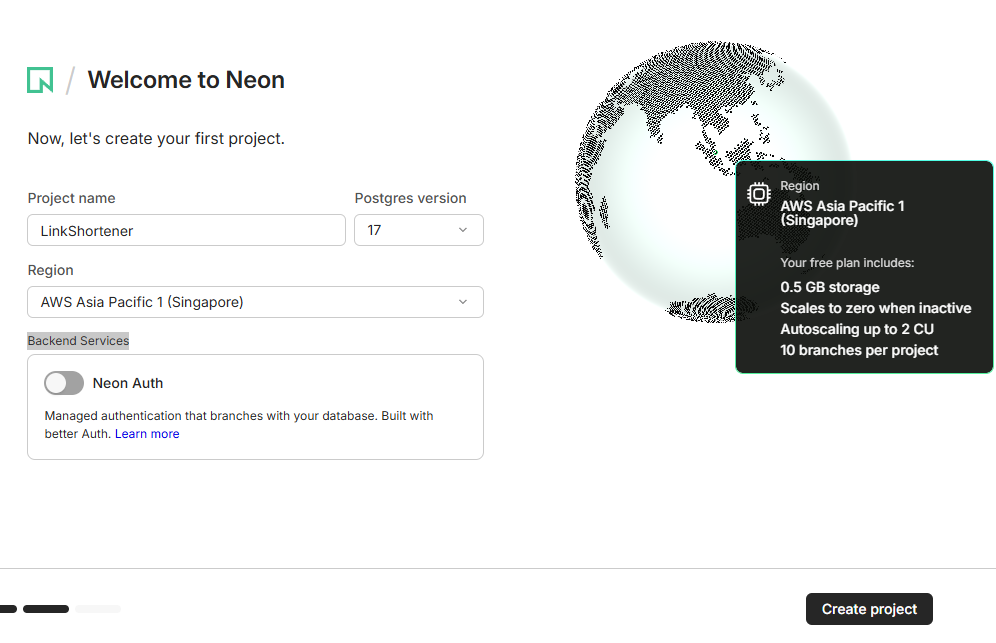
This provides an NPX command for connecting to your database using the Neon CLI, along with a connection string that can be used with any Postgres client.
postgresql://******************************************************?sslmode=req
Add it to .env:
NEXT_PUBLIC_CLERK_PUBLISHABLE_KEY=pk_test_********************
CLERK_SECRET_KEY=************************************************************
DATABASE_URL=postgresql://******************************************************?sslmode=req
Next, we will set up Drizzle ORM to connect to this database. Go to the Drizzle website and then choose the Neon option for the setup instructions.

Copy the instructions to install Drizzle ORM and its dependencies:
npm i drizzle-orm @neondatabase/serverless dotenv
npm i -D drizzle-kit tsx
In your project directory, create the db/index.tsx file and add the following code to set up the Drizzle ORM connection to your Neon database:
import { drizzle } from 'drizzle-orm/neon-http';

const db = drizzle(process.env.DATABASE_URL!);

export { db };
Next, create a drizzle.config.ts file in the root of your project with the following content:
import 'dotenv/config';
import { defineConfig } from 'drizzle-kit';

export default defineConfig({
  out: './drizzle',
  schema: './db/schema.ts',
  dialect: 'postgresql',
  dbCredentials: {
    url: process.env.DATABASE_URL!,
  },
});
Note: Make sure to update the schema property with the correct path to your Drizzle schema file:
schema: './db/schema.ts',
Running the Application
Start the development server:
npm run dev
Expected output:
Local: http://localhost:3000
Open the URL in your browser to verify the app is running.
If you are using WSL with files stored under /mnt/c/..., hot reload may not work correctly. This means changes to the codebase may not automatically refresh the browser. See Hot Reload Not Working with WSL.
Custom Agents and Prompts
To make the application more intelligent, scalable, and automation-friendly, we introduce a documentation-driven agent system powered by GitHub Copilot.
This setup includes:
- A custom agent responsible for generating structured instruction files for the project.
- A custom prompt that creates documentation based on the project structure and codebase.
1. Create AGENTS.md
In the root of the project, create a file called:
AGENTS.md
In some cases, this file may already be generated automatically when initializing a Next.js project with recommended defaults. If not, create it manually.
2. Generate the Agent Definition
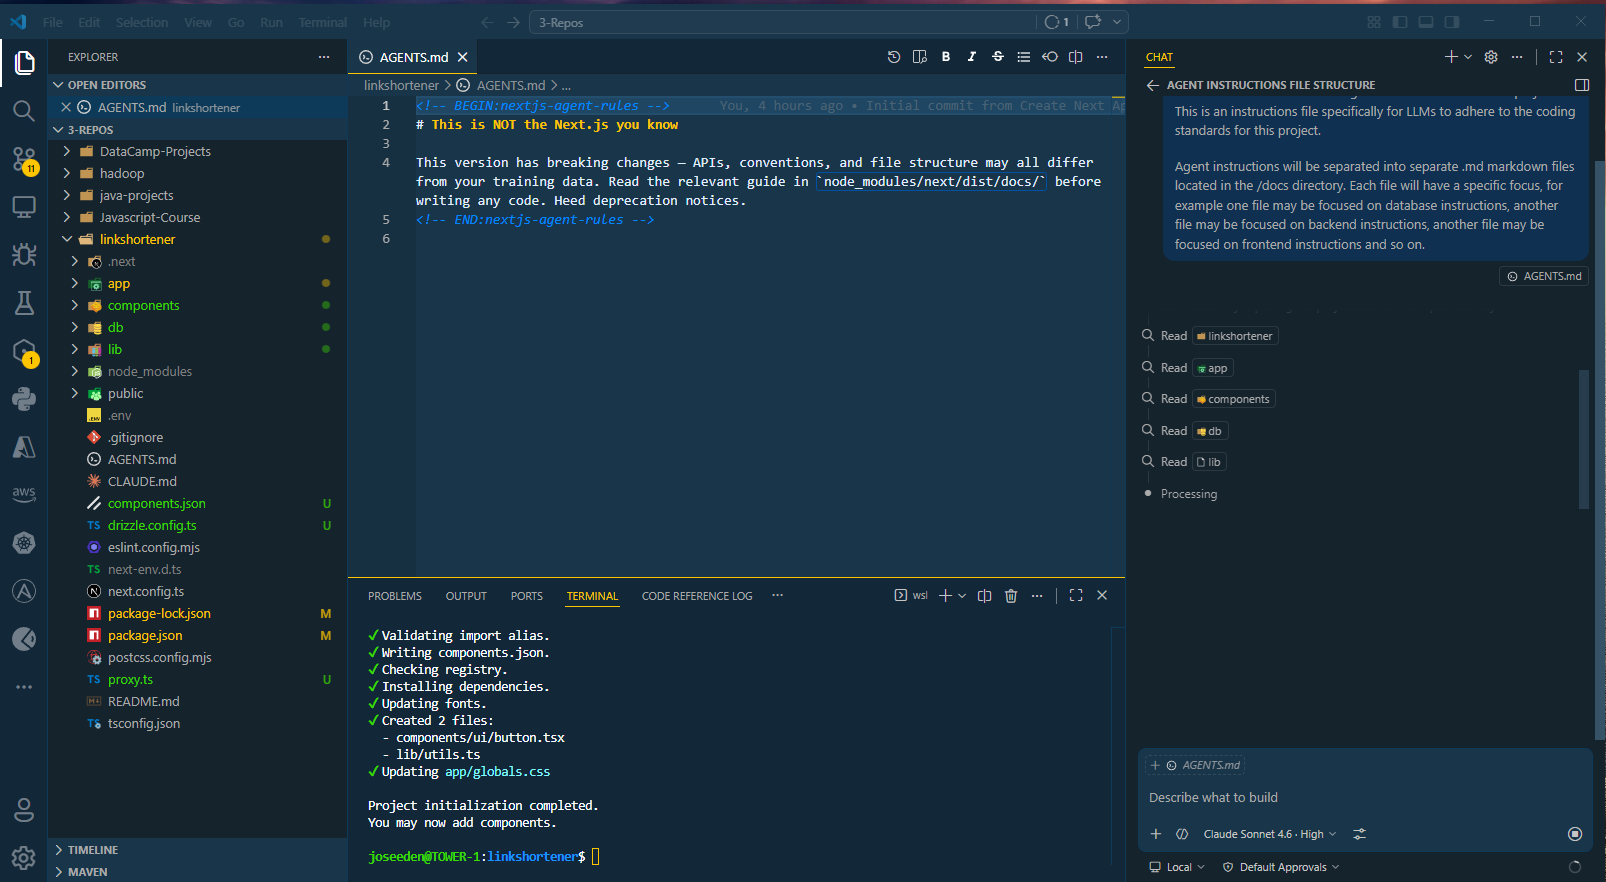
Open GitHub Copilot Chat in VS Code, start a new conversation, and attach AGENTS.md.
Then enter the following prompt:
Build out the content for this agent instructions file for this project. This is an instructions file specifically for LLMs to adhere to the coding standards for this project.
Agent instructions will be separated into separate .md markdown files located in the /docs directory. Each file will have a specific focus, for example one file may be focused on database instructions, another file may be focused on backend instructions, another file may be focused on frontend instructions and so on.
Finally, make sure that in the AGENTS.md file, the relevant instructions files in the /docs directory are ALWAYS read and referenced before generating any code.
After Copilot completes generation, you should see the following files created in the /docs directory:
docs/
├── auth.md
├── backend.md
├── database.md
├── frontend.md
├── general.md
At this stage, Copilot also updates AGENTS.md to reference these files.
3. Reset Documentation Structure
To enforce a controlled structure, remove the generated files from the previous step:
rm -rf docs/*
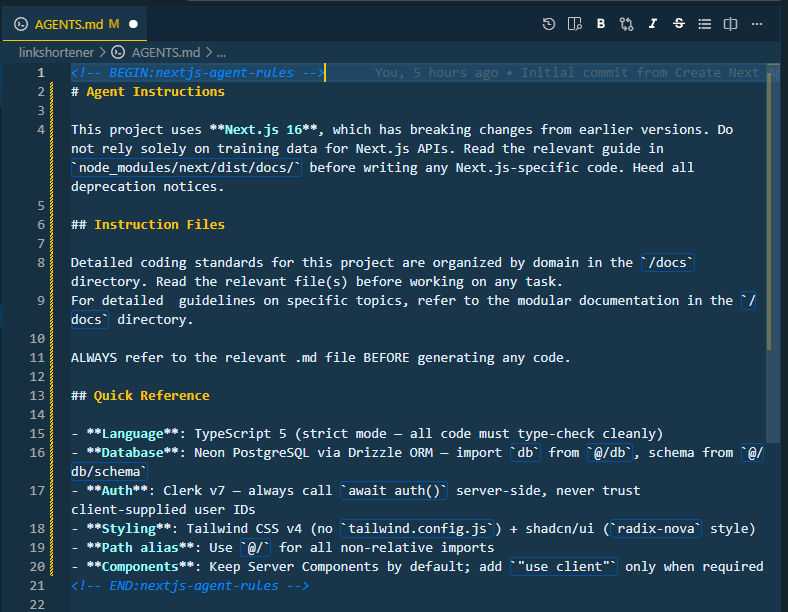
Then update the AGENTS.md file to set the expectation that all agent instructions must be created as separate markdown files in the /docs directory:
For detailed guidelines on specific topics, refer to the modular documentation in the
/docsdirectory.ALWAYS refer to the relevant .md file BEFORE generating any code.
4. Create a Custom Agent in Copilot
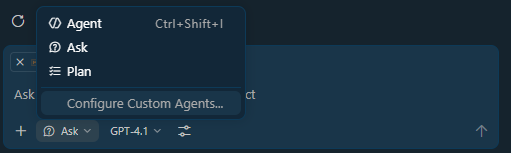
In Copilot Chat:
-
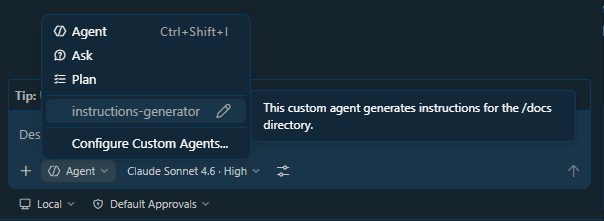
Open context dropdown
-
Select Configure Custom Agents
-
Click Create new custom agent
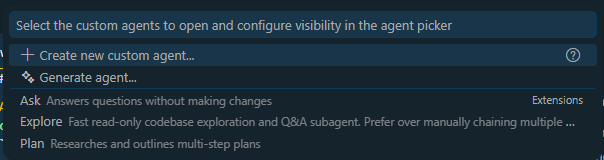
-
You'll be prompted to choose the location for the agent definition file.
If you choose the Workspace options, the agent can only be used within this project, but if you choose the Global option, the agent can be used across all your projects.
For this example, choose the Workspace option.
.github/agents (default)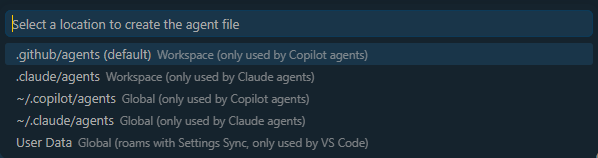
-
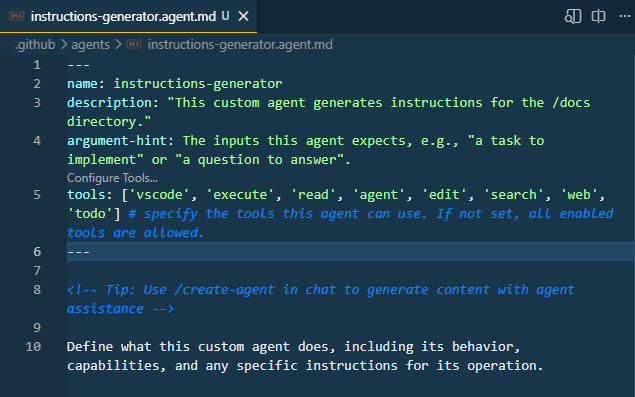
Provide a name to the agent.

This will create a new markdown file with the name of the agent in the
.github/agentsdirectory.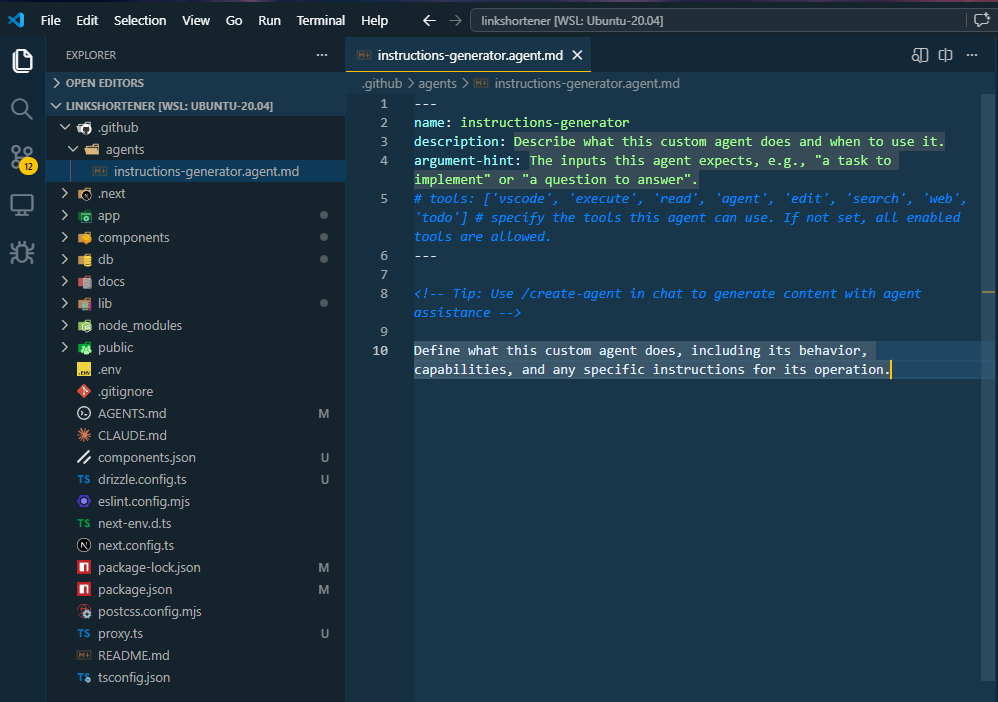
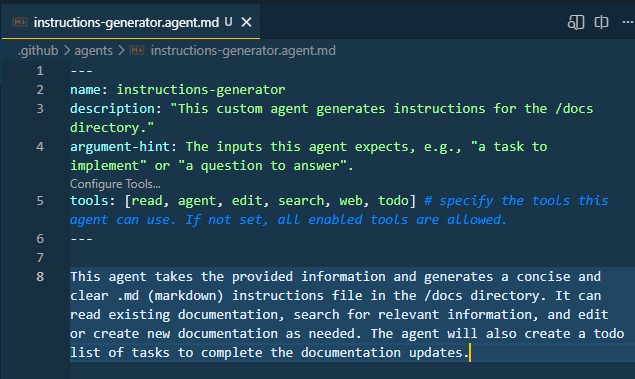
5. Define Agent Behavior
Provide a description for the agent and then uncomment the commented tools. A Configure Tools will appear in the context dropdown, click on it and then click on Add new tool.
Select the following tools:
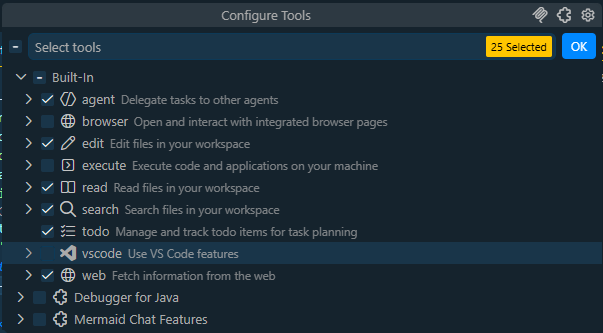
Finally, add the following core instruction:
This agent takes the provided information and generates a concise and clear .md (markdown) instructions file in the /docs directory. It can read existing documentation, search for relevant information, and edit or create new documentation as needed. The agent will also create a todo list of tasks to complete the documentation updates.
Note: VS Code may not immediately detect the newly created agent in the context dropdown. If it doesn’t appear, restart VS Code and reopen the project folder. After that, reopen Copilot Chat and check the context dropdown again—the new agent should now be available.
6. Create a Custom Prompt
In Copilot Chat:
-
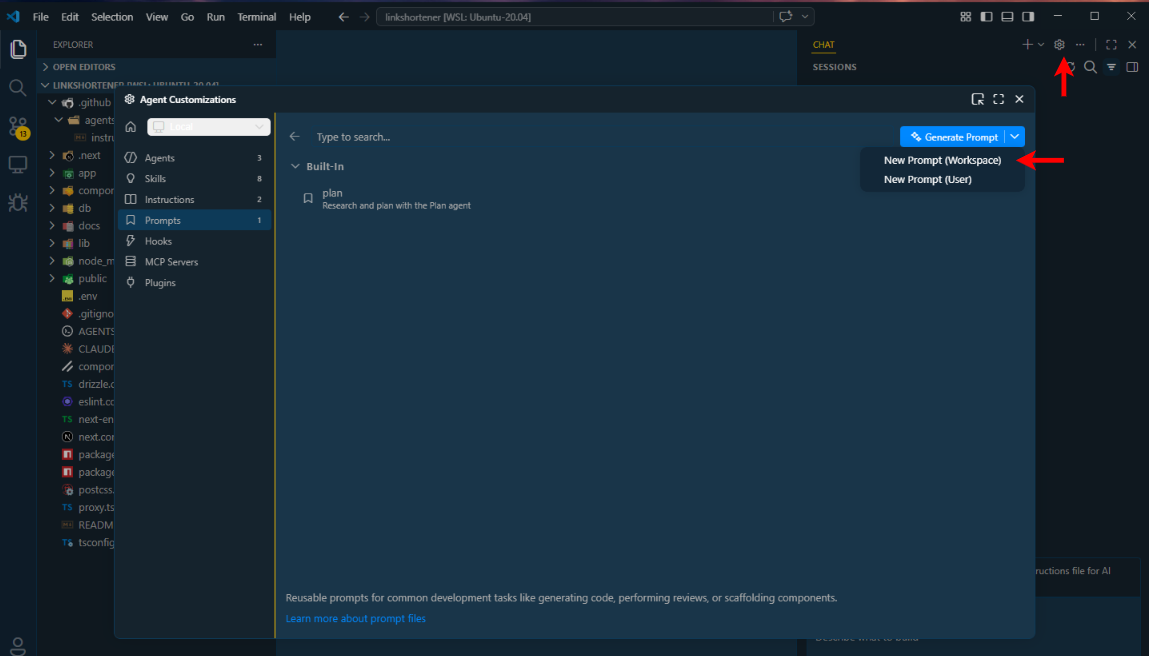
Open Settings (gear icon)
-
Go to Prompts → Generate Prompt
-
Select New Prompt (Workspace)
-
Name the prompt file:
instructions-generator.prompt.mdThis will create the new prompt file in the
.github/promptsdirectory. Provide the following content to the prompt file:Take the information below and create a an agent instructions file in markdown format in the /docs directory of this repository. If a .md filename is provided, use that as the name of the file. If not, use the filename based on the name of the prompt. The instructions should include when to use this prompt, how to use it, and any other relevant information that would help someone understand how to use this prompt effectively. Make sure the instructions are clear, concise, and easy to follow. Use examples if necessary to illustrate your points. Lastly, update the AGENTS.md file to include a link to the new instructions file you created.
If no information is provided, prompt the user to provide the necessary details about the layer of the architecture this prompt is designed for, the intended use cases, and any specific guidelines for using this prompt effectively.
<div class='img-center'></div> -
Type agent: below the name, this should list all the agents available in the context. Select the agent created earlier from the list.
agent: instructions-generator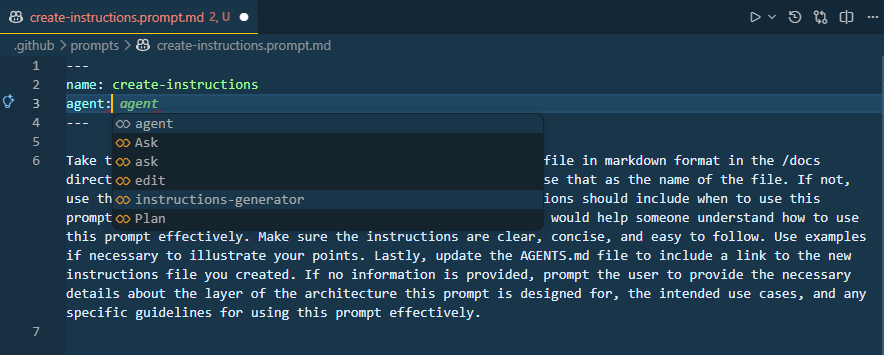
How this works: When we open a new conversation in Copilot chat and type "/", the prompt will now appear as an option in the prompt list.
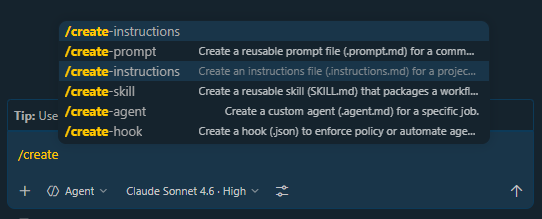
When you select this prompt, it will ask us for the necessary information about the architectural layer, intended use cases, and any specific guidelines for using the prompt effectively.
Once we provide that information, it will use the instructions-generator agent to generate a new instructions file in the /docs directory and update the AGENTS.md file to reference the new instructions file.
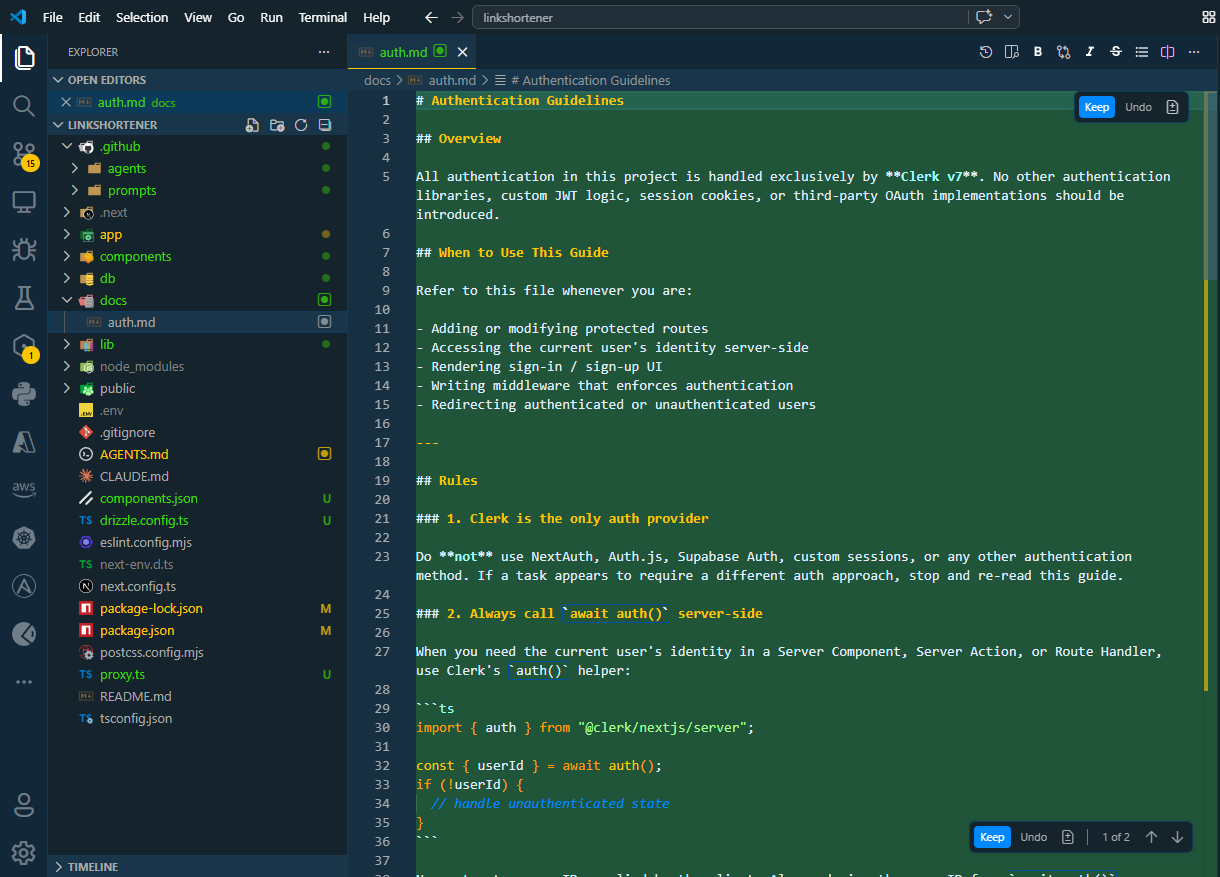
Generating the Instruction File (Auth Layer)
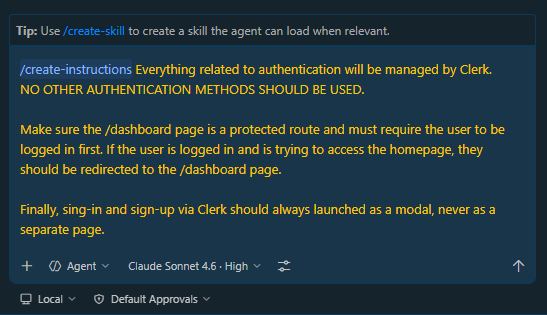
In Copilot chat, open a new conversation, then type "/" to open the prompt list and select the prompt created in the previous steps. Provide the necessary information about the architectural layer, starting with the authtentication layer.
/create-instructions Everything related to authentication will be managed by Clerk. NO OTHER AUTHENTICATION METHODS SHOULD BE USED.
Make sure the /dashboard page is a protected route and must require the user to be logged in first. If the user is logged in and is trying to access the homepage, they should be redirected to the /dashboard page.
Finally, the sign-in and sign-up button should always launched as modal buttons when clicked, instead of redirecting to a separate page.
When you submit the information, it will automatically use the instructions-generator agent to generate a new instructions file in the /docs directory with the provided information and update the AGENTS.md file to reference the new instructions file.
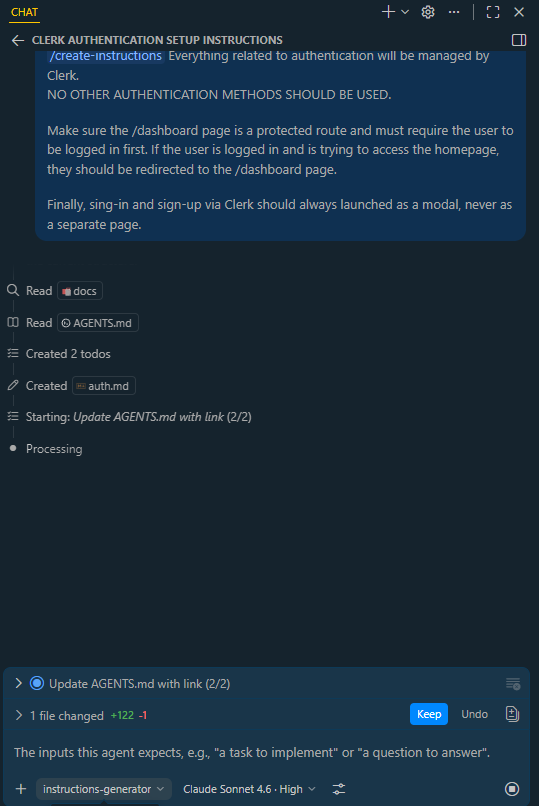
Once its done, you should see a new file called auth.md in the /docs directory with the provided information. The AGENTS.md file should also be updated to reference the new auth.md file.
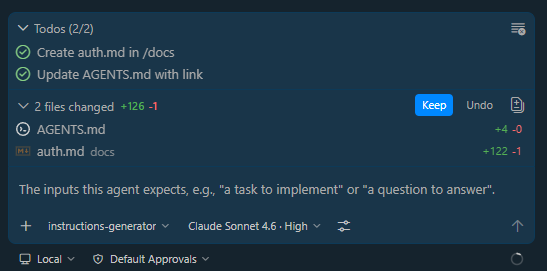
Review the new auth.md file and make sure the information is accurate and clear. If there are any issues with the generated instructions, you can edit the auth.md file directly to make any necessary changes.
Otherwise, click Keep to keep the generated instructions as they are.
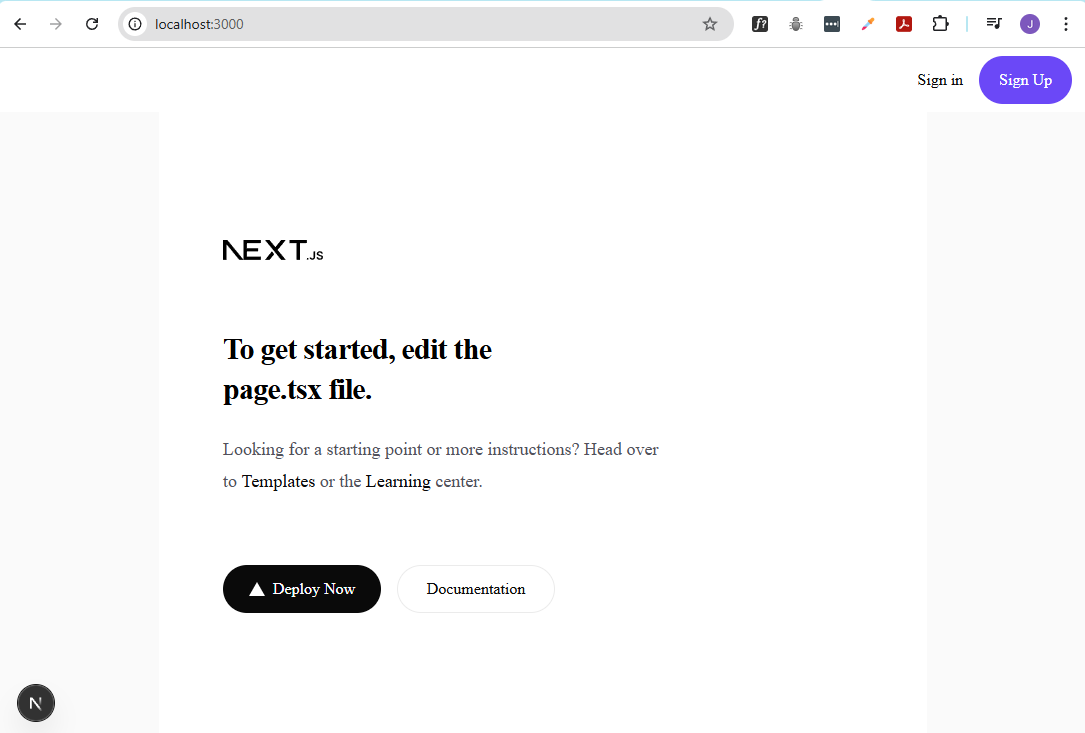
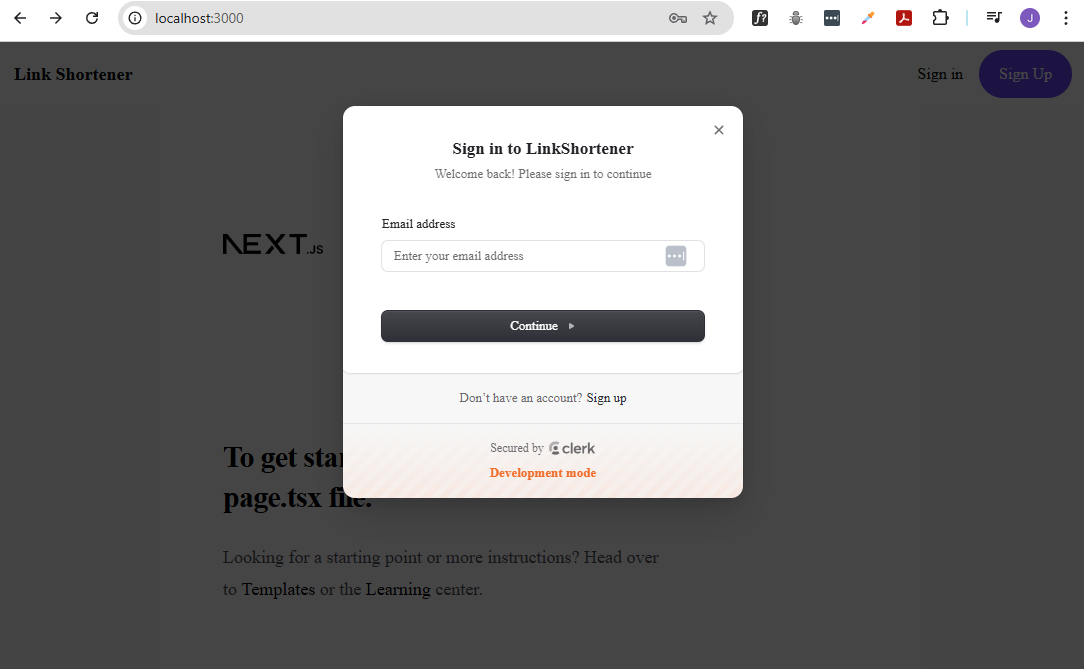
Going back to the web browser, you can try to click the Sign in and Sign up button to confirm that they are launching as modals instead of redirecting to a separate page.
Sign-in:
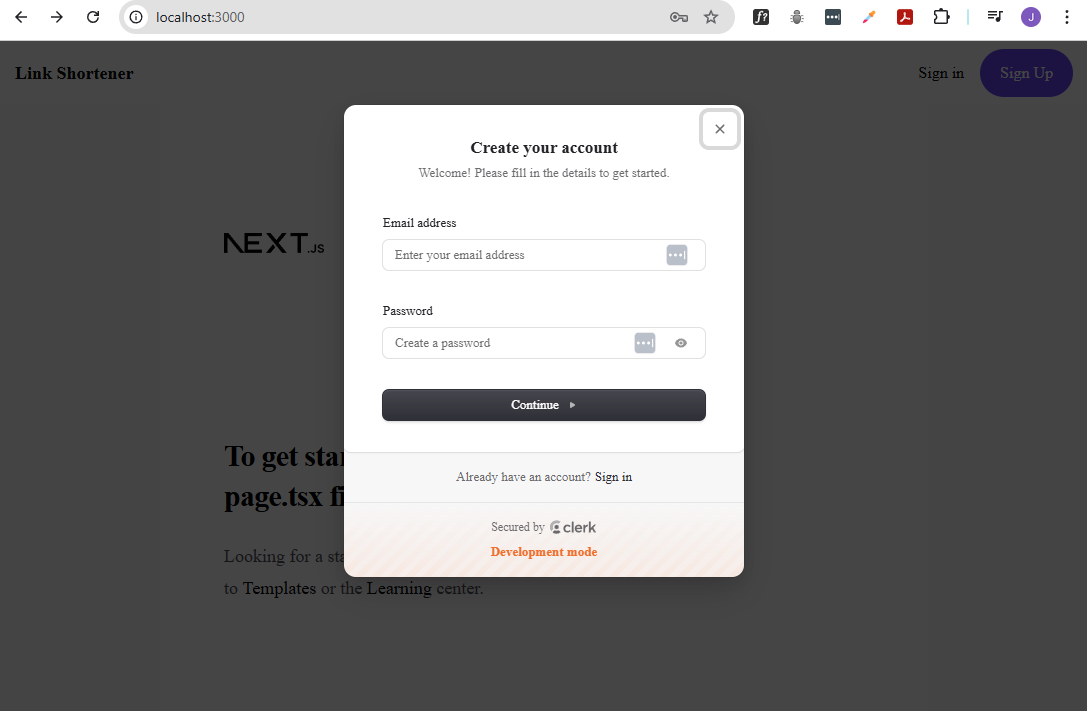
Sign-up:
Now that the authentication instructions file has been generated, repeat the same process for the remaining architectural layers.
For the UI and frontend-related instructions, use the following information:
/create-instructions All UI components should be built using shadcn UI and Tailwind CSS. No other component libraries or custom built components should be used.
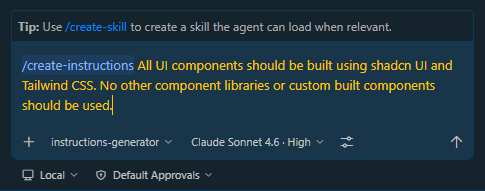
The agent may require installing some tools
Test Account and Dashboard Page
This section implements a protected dashboard route using Clerk authentication and enforces strict routing behavior between authenticated and unauthenticated users.
Open a new conversation in Copilot Chat, switch to Agent mode, then provide the following instructions:
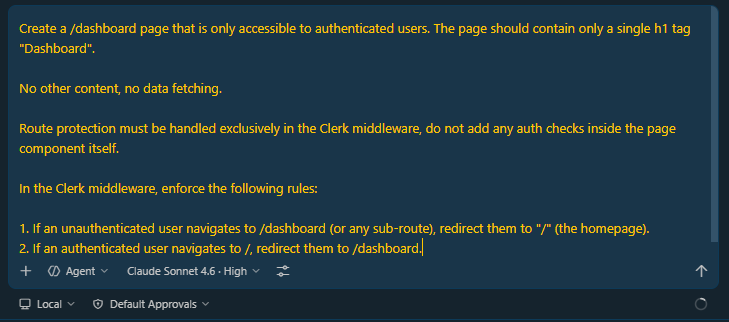
Create a /dashboard page that is only accessible to authenticated users. The page should contain only a single h1 tag "Dashboard".
No other content, no data fetching.
Route protection must be handled exclusively in the Clerk middleware, do not add any auth checks inside the page component itself.
In the Clerk middleware, enforce the following rules:
- If an unauthenticated user navigates to /dashboard (or any sub-route), redirect them to "/" (the homepage).
- If an authenticated user navigates to /, redirect them to /dashboard.
Going back to the browser, try to navigate to the /dashboard page.
http://localhost:3000/dashboard
You should be redirected to the homepage since you're not authenticated.
Now create a test account. Click Sign up, and add a test email address and password to create the test account.
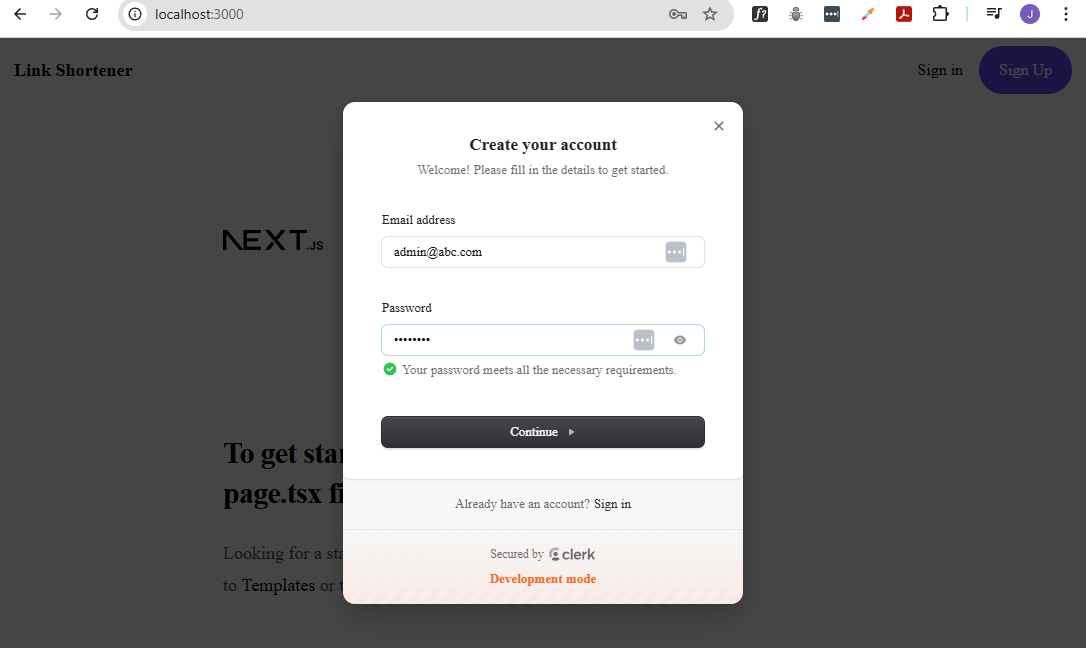
After creating the test account, you should be automatically signed in and redirected to the /dashboard page. The page should display only the "Dashboard" heading
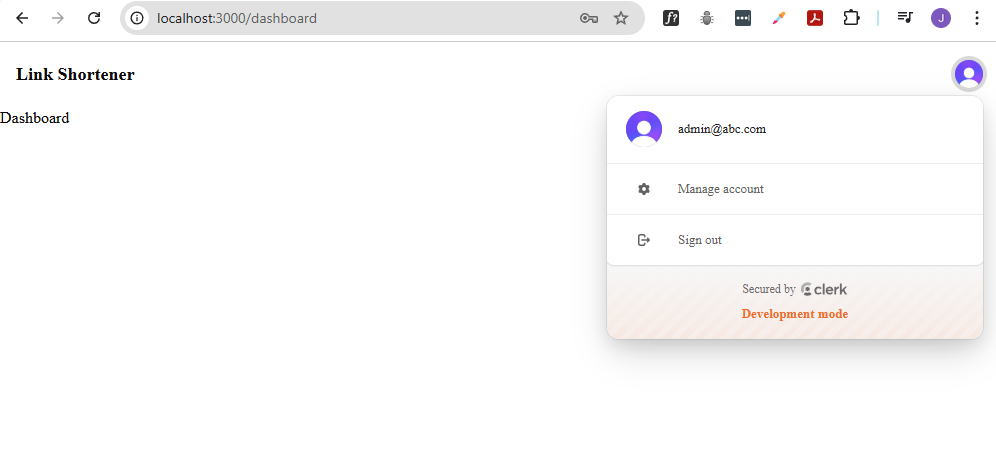
If you try to navigate back to the homepage while authenticated, you should be redirected back to the /dashboard page.
http://localhost:3000/
If you sign out, you should be redirected back to the homepage and if you try to access the /dashboard page again, you should be redirected back to the homepage since you're no longer authenticated.
UPDATE: After some testing, I discovered that after signing in, the app first sends the user to the homepage, then quickly redirects to /dashboard. The correct behavior is to redirect directly to /dashboard after sign-in.
See Sign-in briefly redirects to homepage before dashboard in the Troubleshooting section for the fix.
Dark Mode Support
This section adds theme switching using Tailwind CSS with persistent user preference storage.
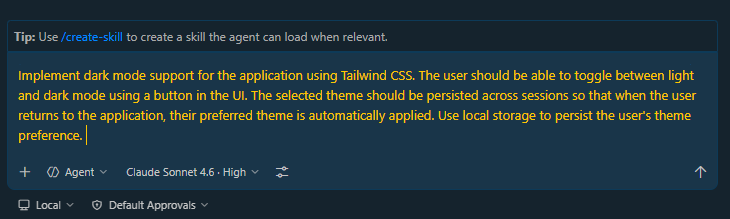
Open a new Copilot Chat session in Agent mode, then provide:
Implement dark mode support for the application using Tailwind CSS. The user should be able to toggle between light and dark mode using a button in the UI. The selected theme should be persisted across sessions so that when the user returns to the application, their preferred theme is automatically applied. Use local storage to persist the user's theme preference.
Go back to the browser, refresh the page, and verify that the dark mode toggle button is working correctly and that the theme preference is persisted across sessions.
Light mode:
Dark mode:

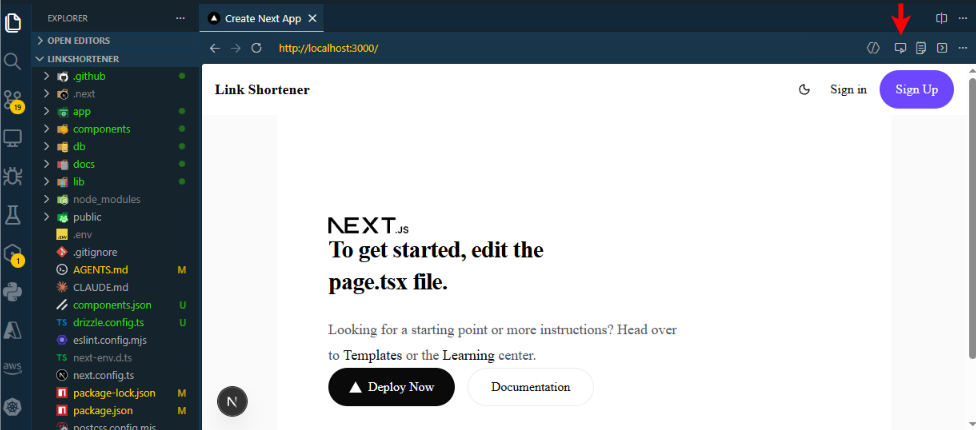
Opening Localhost in VS Code
In VS Code, open the Command Palette (Ctrl + Shift + P) and search for "Browser: Open Integrated Browser" and open it. In the URL field, enter the URL of your localhost server (e.g. http://localhost:3000) and press Enter.
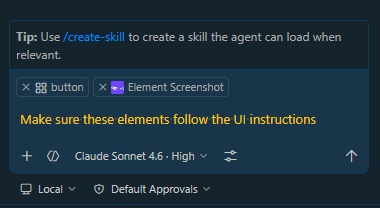
To improve Copilot responses, you can attach UI context directly by clicking on the Add Element to the Chat button.
Select the relevant UI component (e.g., Sign-up button).
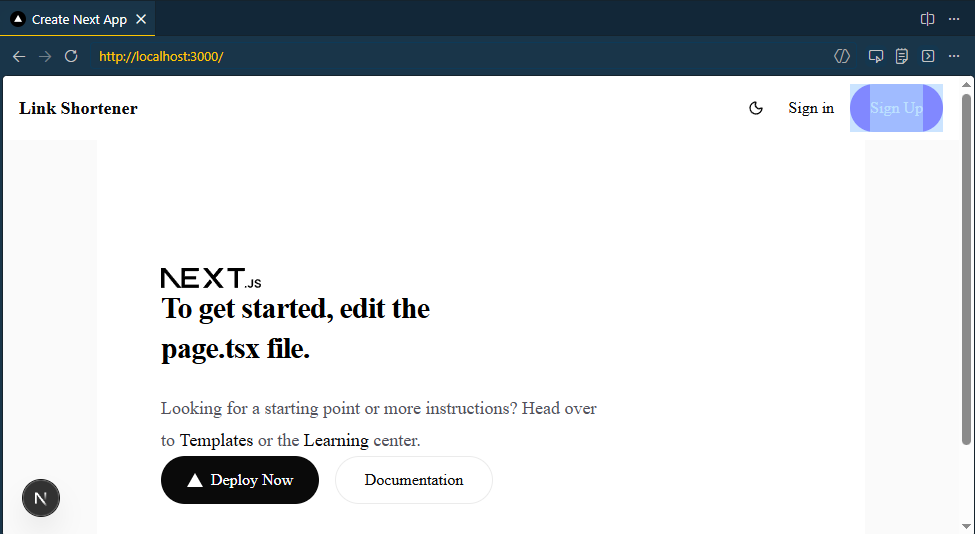
Copilot will include the source code, UI snapshot, and component context in the prompt for better understanding.
Update: I've updated my application to use Roboto as the default font for the application. If you want to do the same, you can simply add a prompt in a new Copilot Chat conversation in Agent mode:
Update the application's default font to Roboto. Make sure to include the necessary imports and configurations to apply the Roboto font across the entire application.
Commit and Push Changes
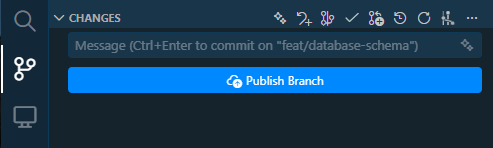
After making changes to the codebase, you can use the Git extension in VS Code to commit and push your changes to a remote repository.
Provide a commit message, click Commit and then Publish branch.
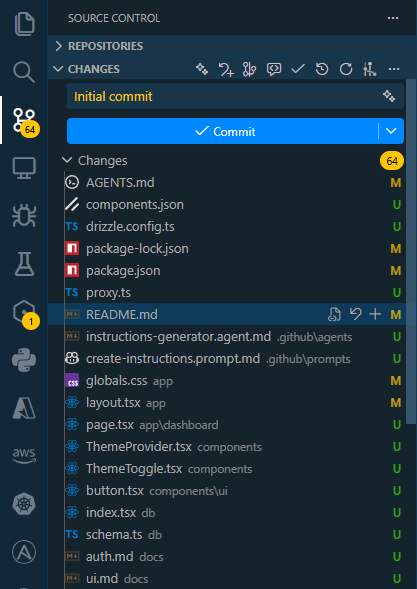
Note that at this point, we have not set up a remote repository yet. VS Code will prompt you to choose between publishing to a private repository or a public repository on GitHub. Provide a repo name and choose public repository.

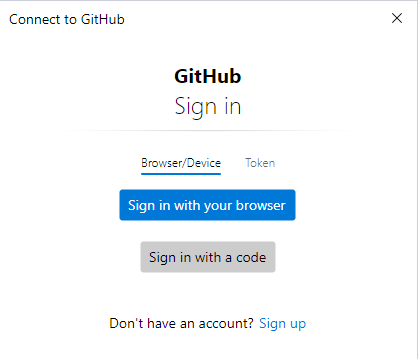
It will open a Connect to Github promtpt, click on Sign in with browser and authorized VS Code to access your GitHub account. After successful authentication, the branch will be published to the new GitHub repository.
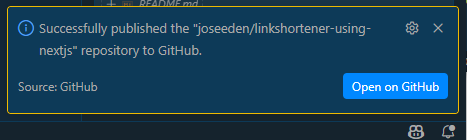
You should see a confirmation message at the bottom right in VS Code indicating that the branch has been published successfully.
Adding a Landing Page with Copilot Cloud Agent
There are three ways to use Copilot agents:
- In-context
- Custom agents
- Copilot Cloud Agents
The previous sections covered in-context agents and custom agents, but now we will see use a Copilot Cloud Agent to generate a landing page for our application.
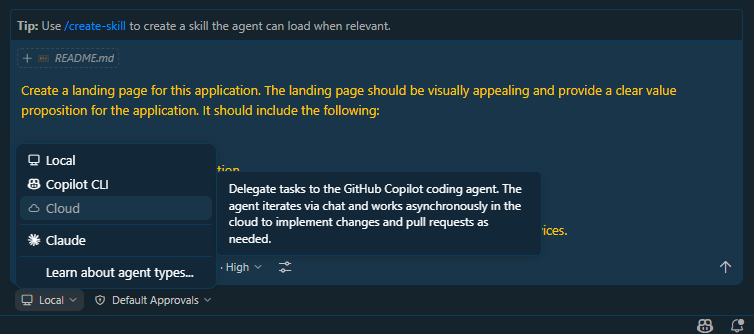
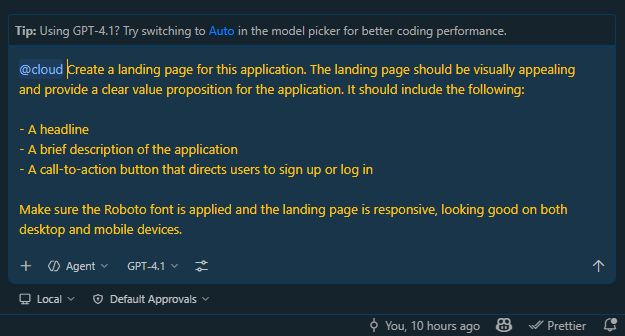
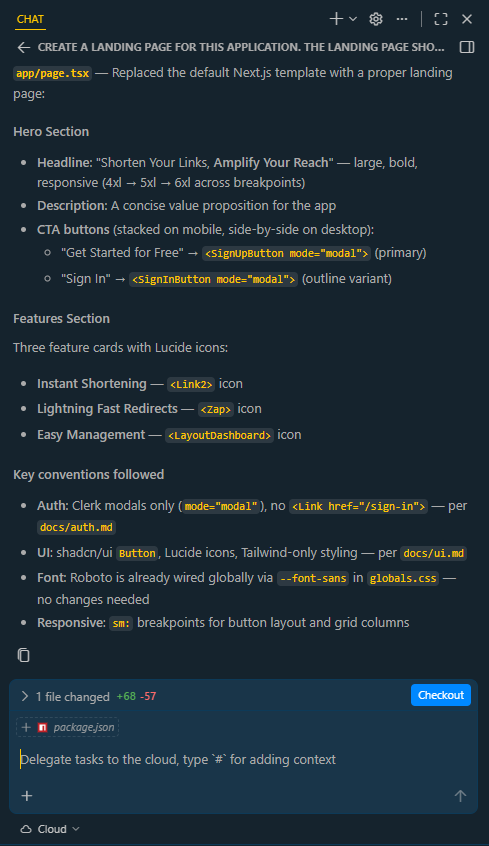
Open a new conversation in Copilot Chat, then click on the Copilot Cloud Agent tab. Add the following prompt:
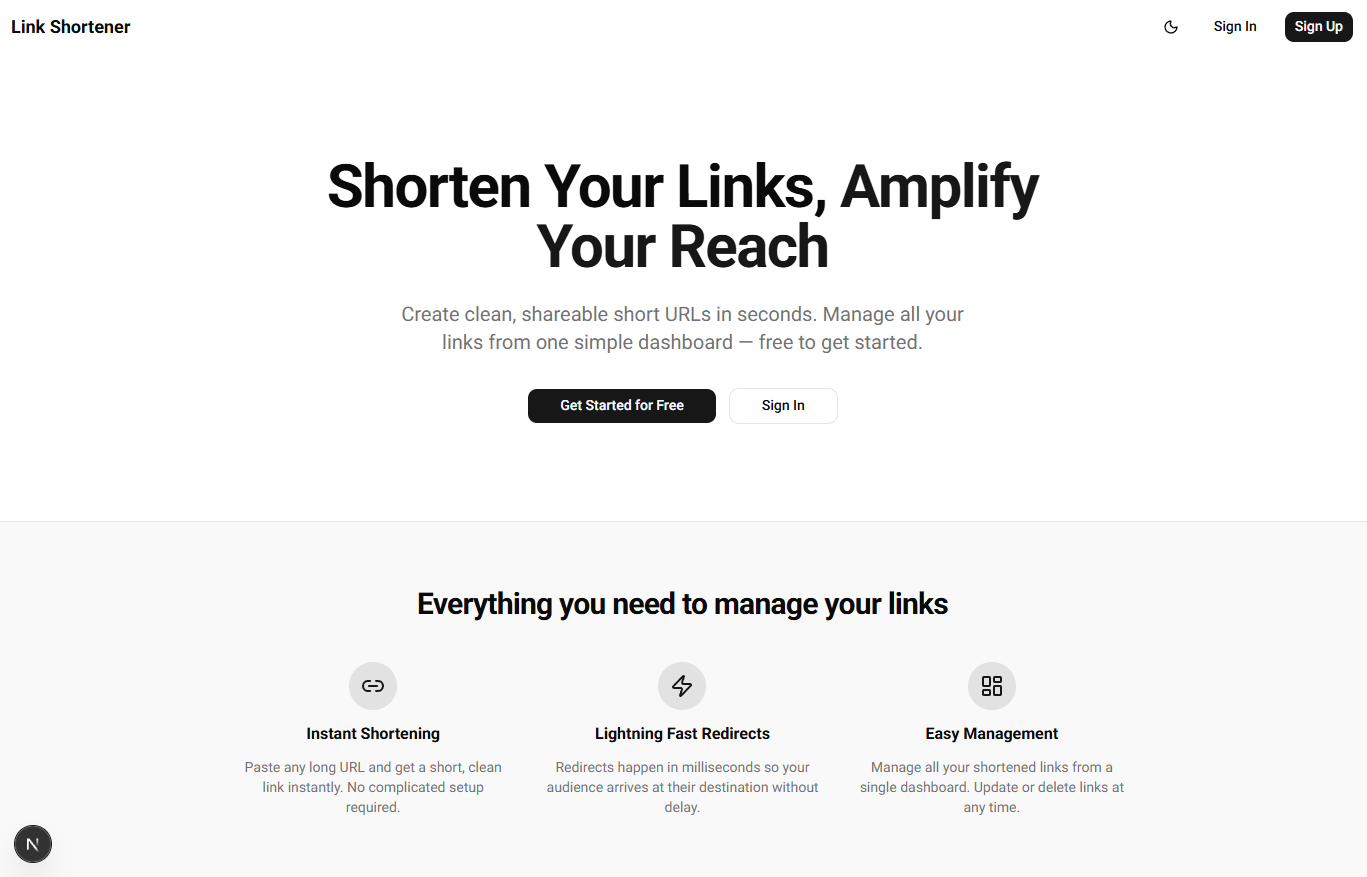
Create a landing page for this application. The landing page should be visually appealing and provide a clear value proposition for the application. It should include the following:
- A headline
- A brief description of the application
- A call-to-action button that directs users to sign up or log in
Make sure the Roboto font is applied and the landing page is responsive, looking good on both desktop and mobile devices.
Click on the options (showing "Local" by default) and select Cloud.
UPDATE: Another way to trigger a cloud agent is to use the @cloud syntax in any prompt.
A few notes:
-
When you choose Copilot CLI, it will run in the background, create a new branch, make the necessary code changes to implement the landing page, and then create a pull request with the changes.
-
When you choose Cloud, the agent will also create a new branch, but it will work on the task in the cloud instead of your local environment. It will also launch a virtual browser via Playwright to test the landing page. Once its done, it will create a pull request with the changes just like the local agent.
-
Using the Cloud agent takes more resources and time since it’s running in the cloud, but it is also useful because you can launch multiple agents at the same time without worrying about resource constraints on your local machine.
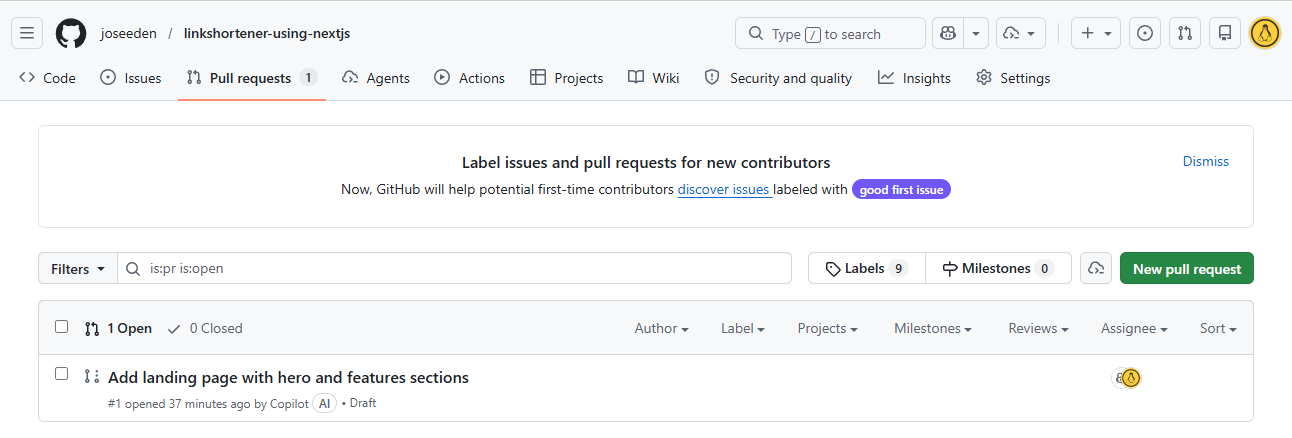
Once the agent is done, head over to your Github repository. You should see a new branch, as well as a new pull request with the changes for the landing page. Review the changes.
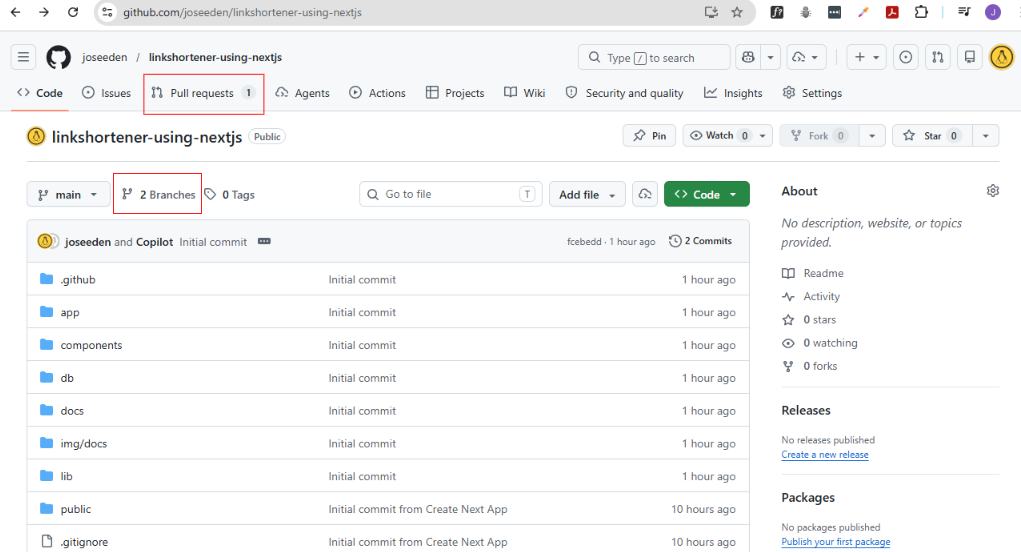
Go to Pull requests and open the PR created by the agent.
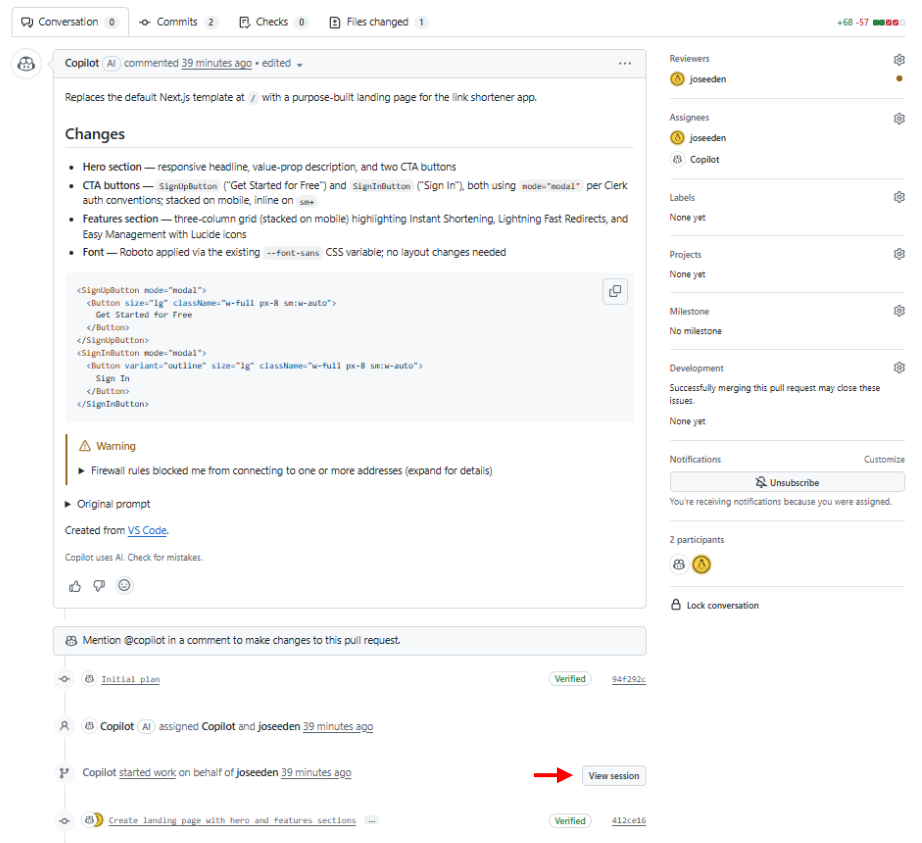
Click on View session to see the detailed activity of the agent, including the code changes it made, the tests it ran, and the browser interactions it performed.
Note: Make sure to review the code changes made by the agent. DO NOT blindly merge the PR without reviewing the changes, as the agent may make mistakes or introduce bugs.
For our setup, we will not merge the changes yet because we want to test the landing page first.
To test the landing page, go back to VS Code and open Copilot Chat. You should see the cloud icon beside the prompt you used to generate the landing page, indicating that it was generated by a cloud agent.
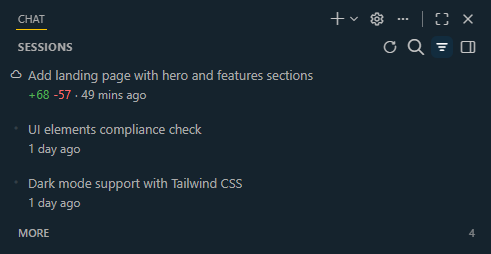
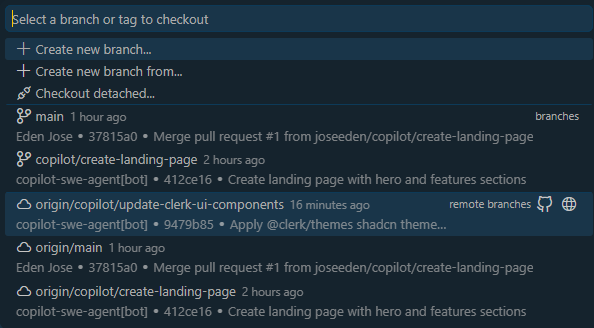
Open the session and click Checkout to switch to the new branch created by the agent.
Note: Make sure you don't have any uncommitted changes in your current branch before checking out the new branch, as you may lose those changes.
If you get this prompt below, you need to install the Github Pull Requests extension. Click on Install and Checkout and then Install (Do not sync).

In your terminal, confirm that you are now on the new branch created by the agent:
git branch
You should see the new branch listed and highlighted with an asterisk (*), indicating that it is the currently active branch.
Example output:
joseeden@TOWER-1:linkshortener$ git branch
* copilot/create-landing-page
  main
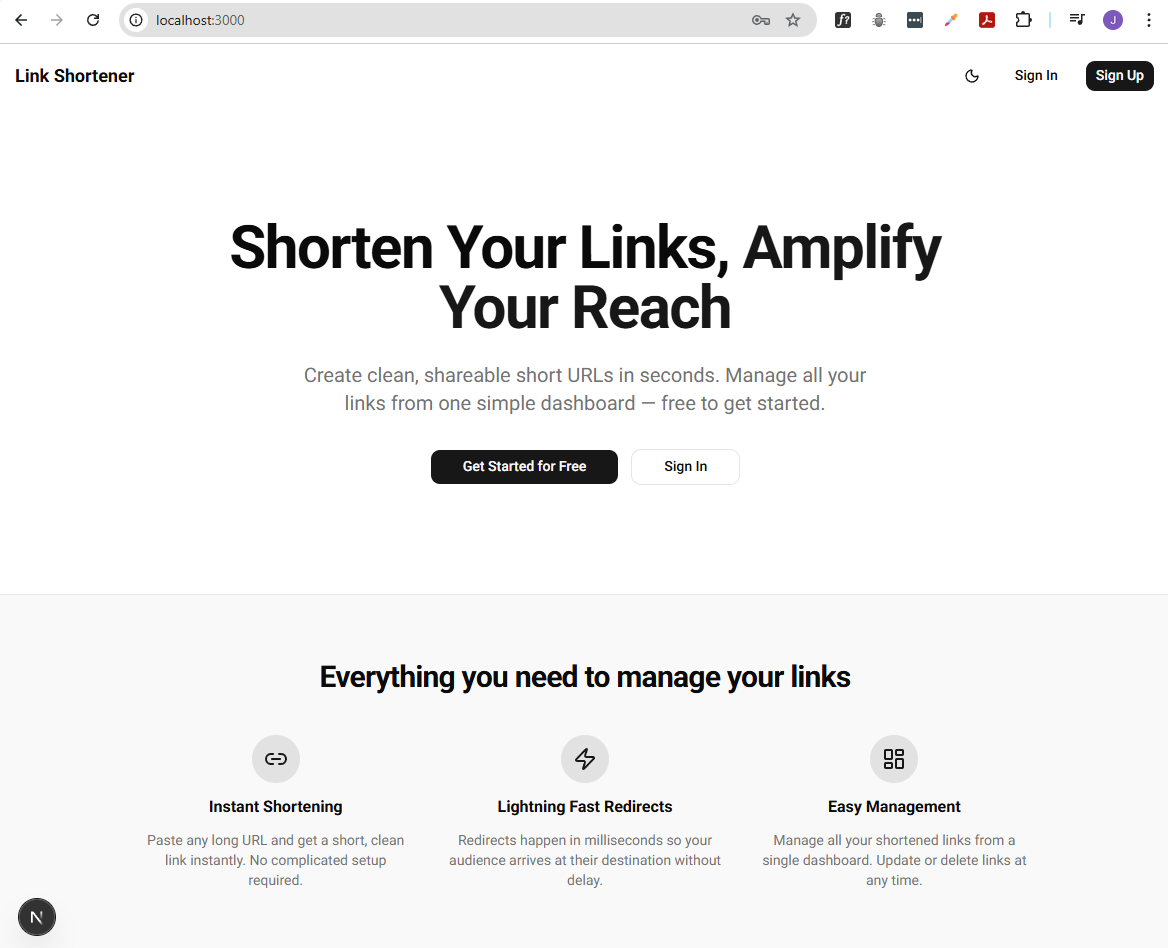
Run the development server to test the landing page:
npm run dev
Open the URL in your browser and verify that the landing page is working correctly.
After testing the landing page, go back to the PR created by the agent and click Add your review.
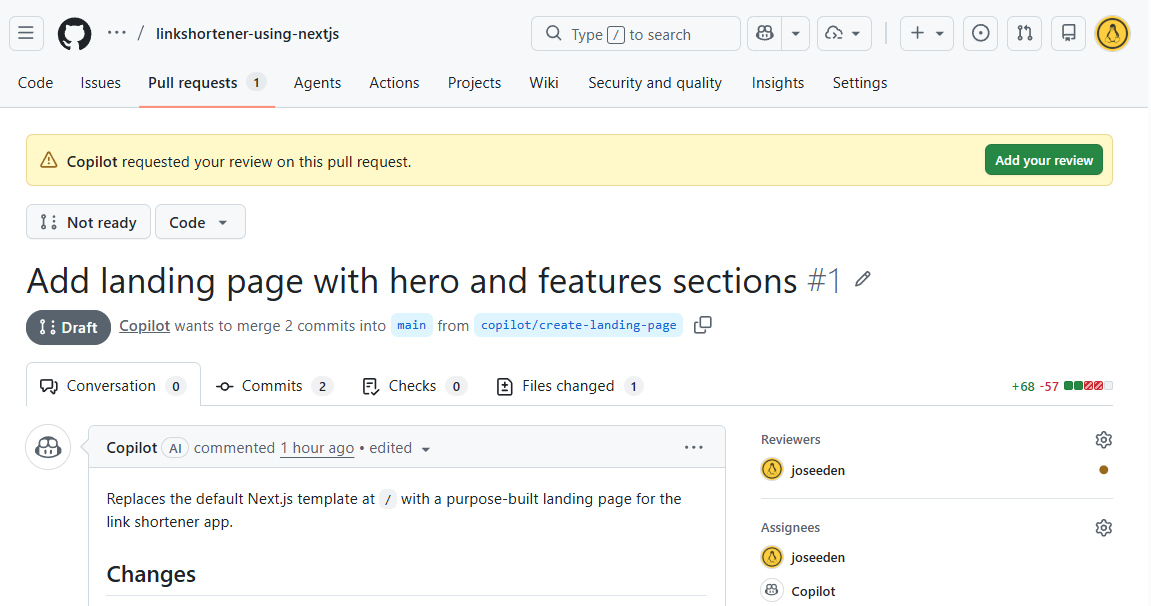
You can review the changes made the agent and then click Viewed., then click the down arrow on the Submit review button. Add any comments here (e.g. changes you want to add). If no changes are needed, you can simply approve the PR by selecting Approve and then click Submit review.
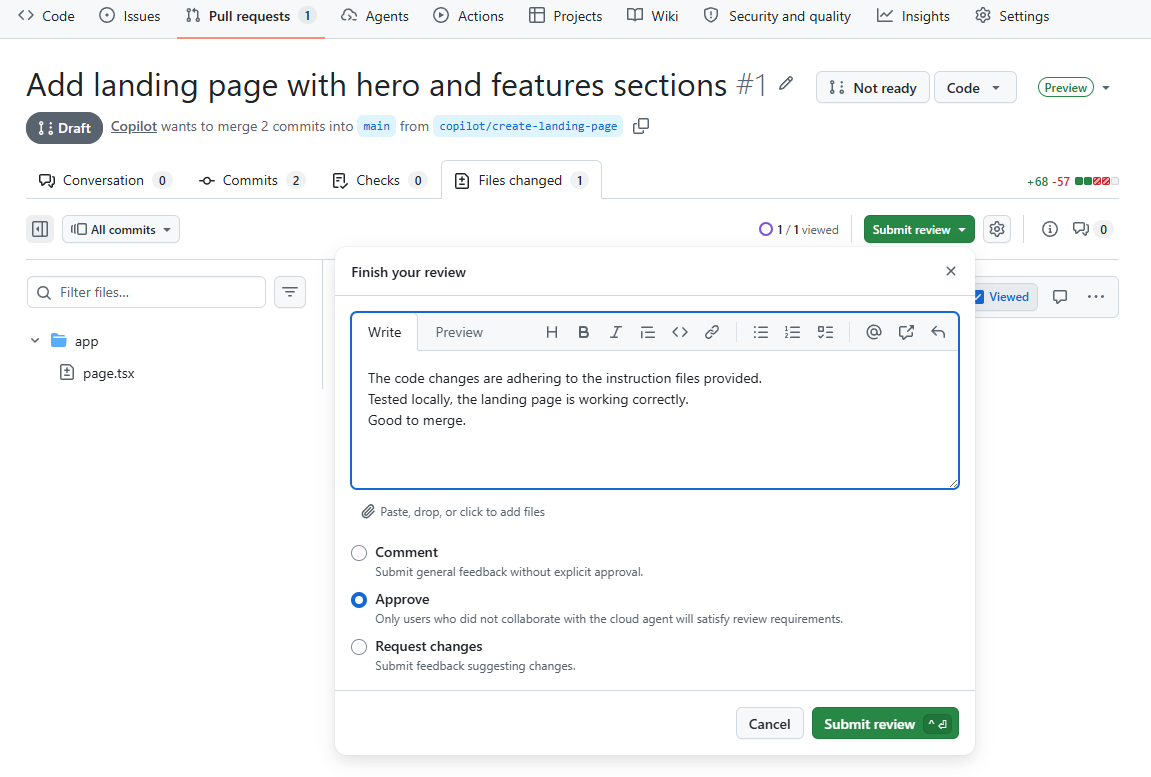
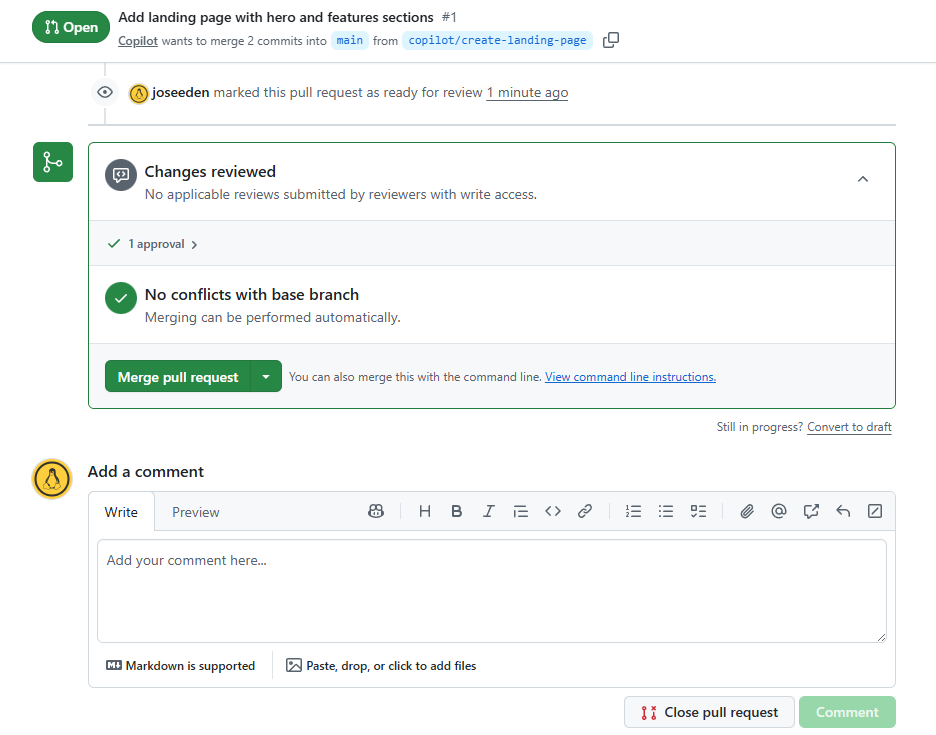
Note: The PR may not automatically merge after approval if the agent created a draft PR. In that case, you can simply click on the Ready for review button to mark the PR as ready. The Merge pull request button should now be available, click on it to merge the PR.
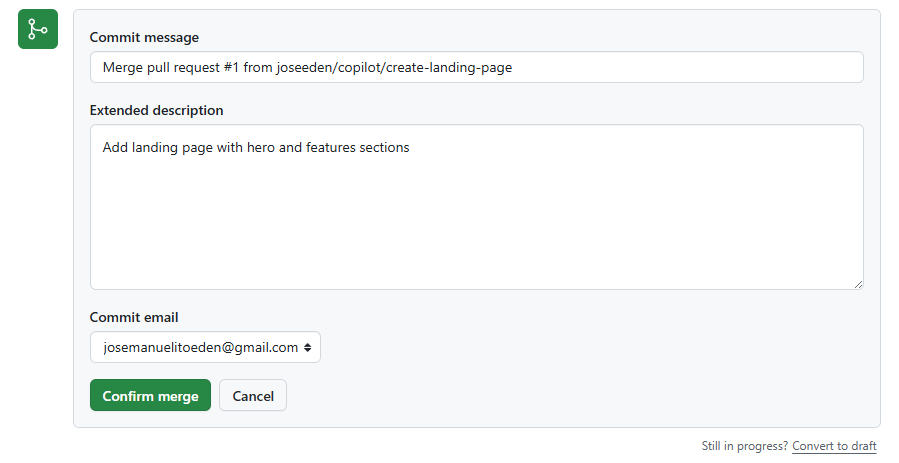
Provide a commit message and click Confirm merge.
Back in VS Code, click the branch name at the bottom left and switch back to the main branch.
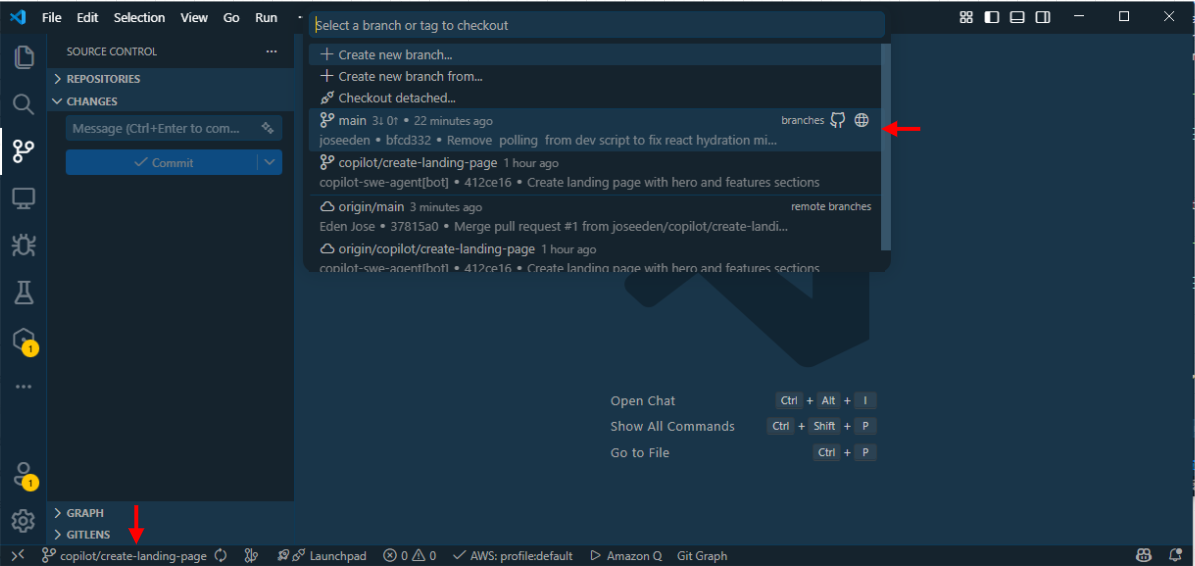
Click Sync Changes to pull down the latest changes from the main branch, which now includes the landing page code.

As best practice, run the development server again to make sure everything is working correctly after merging the changes from the landing page branch.
npm run dev
Orchestrating Cloud and Background Agents
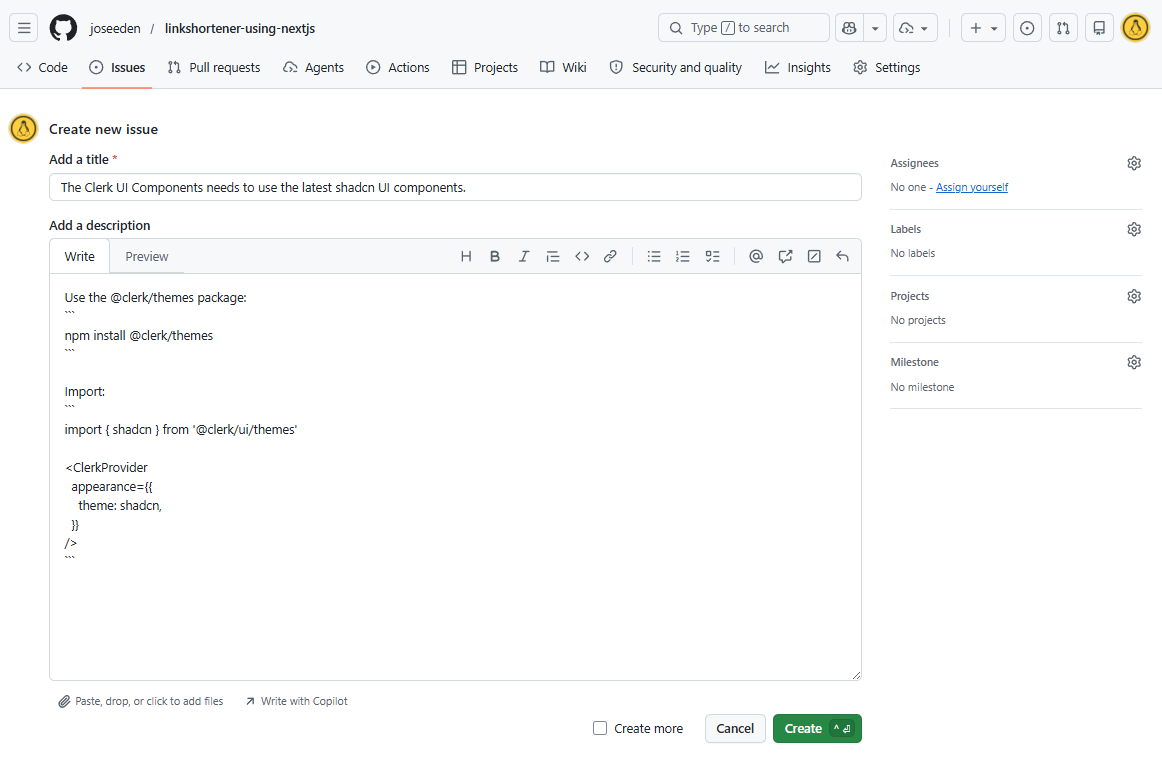
To orchestrate multiple agents together, we can use a combination of custom agents and cloud agents. To start with, we can create go to our Github repository, go to the Issues tab, and create a new issue.
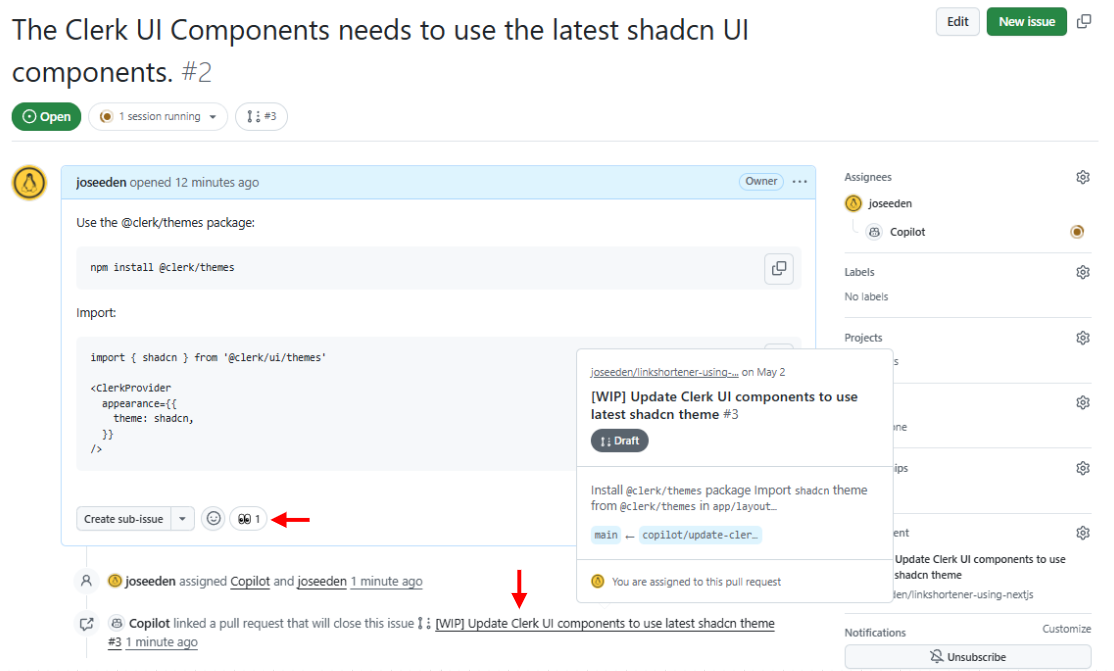
For this one, we want to update the Clerk UI components to use the latest shadcn UI components. Provide an issue title and add the description with the necessary details for the task.
Reference: Clerk Themes
Use the @clerk/themes package:
`npm install @clerk/themes`

Import:
`import { shadcn } from '@clerk/ui/themes'

<ClerkProvider
  appearance={{
    theme: shadcn,
  }}
/>``
Click the Create button to create the issue.
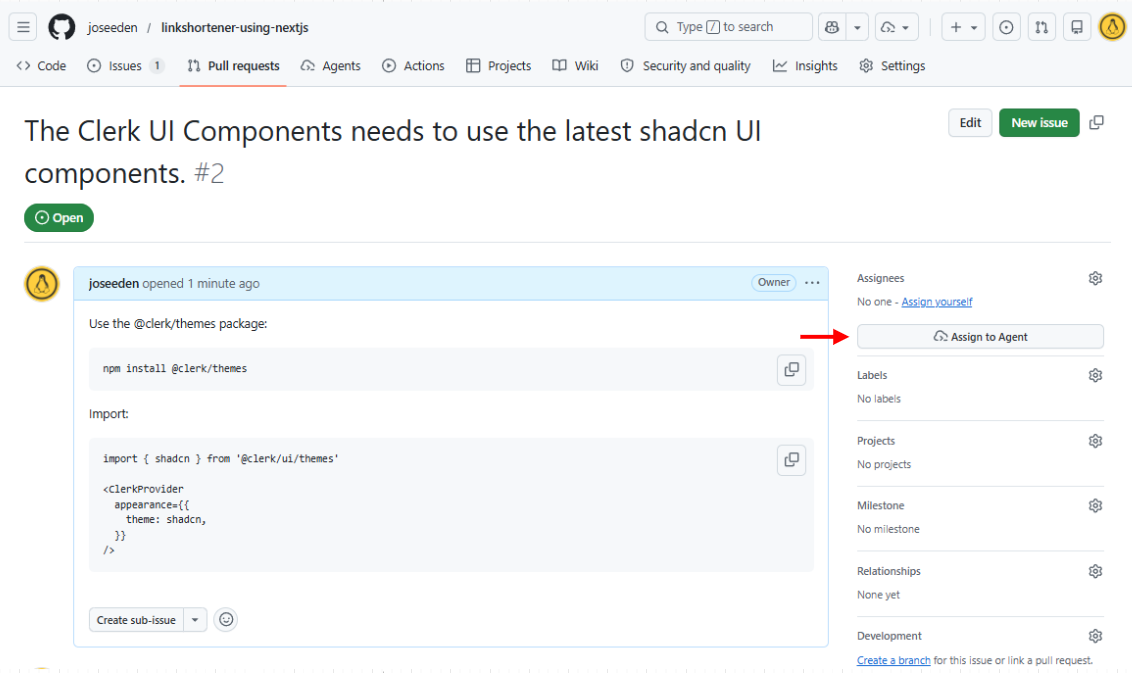
Typically, the issues are created by the product manager or the project manager, and then the engineers will pick up the issue and work on it. In our case, we will have the agent pick up the issue and work on it automatically.
To do this, click the Assign to Agent button
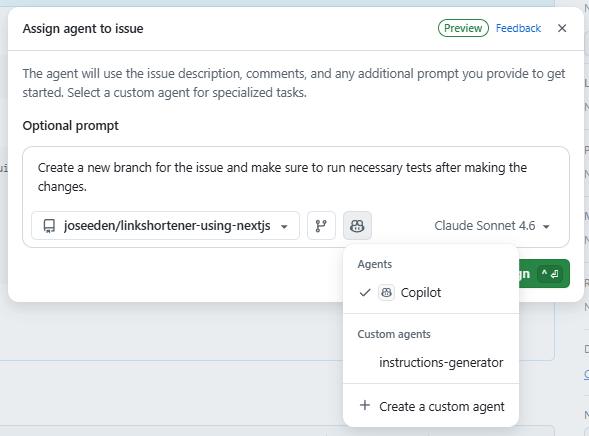
In the prompt window, you can provide additional instructions for the agent if needed. For example, you can specify that the agent should create a new branch for the issue, or that it should run tests after making the changes.
If you click the Copilot icon at the bottom right, it will show the custom agent that was created in previous steps. This means that the Cloud agent can use the tools defined in the custom agent. We'll keep the agent as Copilot for now.
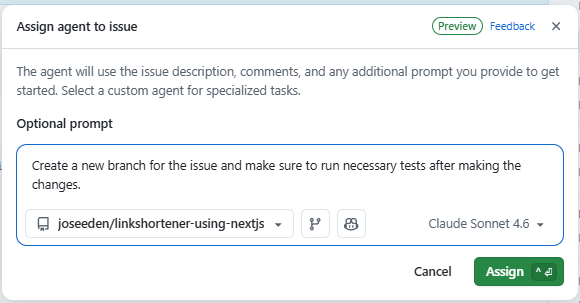
Finally, set the model to a specific model and then click Assign.
In the issue details page, you should now see that the issue is assigned to a Copilot agent and it is working on the issue (indicated by the "eyes" reaction). The agent also created a pull request with the changes for the issue.
Click the pull request to review the changes made by the agent.
Note: Make sure to review the changes made by the agent before merging the PR, as the agent may make mistakes or introduce bugs. If there are any issues with the changes, you can request changes in the PR review and provide feedback for the agent to improve.
Same as before, we will not merge the PR yet because we want to test the changes first. Go back to VS Code and switch to the branch created by the agent for the issue.
Run the development server to test the changes.
npm run dev
Notice that this will immediately return a Module not found error. This is expected because the agent has not installed the new dependency (@clerk/themes) in our local environment. The agent only made the necessary code changes and committed those changes to a new branch, but it did not run npm install to install the new dependency.
To fix this, install the new dependency.
npm install
Additionally, it is recommended to import the shadcn.css file in the global.css file to apply the shadcn theme styles globally across the application.
For demo purposes, we will have the agent make the necessary code changes.
It is important to note that the cloud agent may use premium requests to make code changes, which means this will count towards your monthly quota for the specific model used.
If you have a limited quota, and if the changes are small and straightforward, it may be more cost-effective to make the changes manually instead of using the cloud agent.
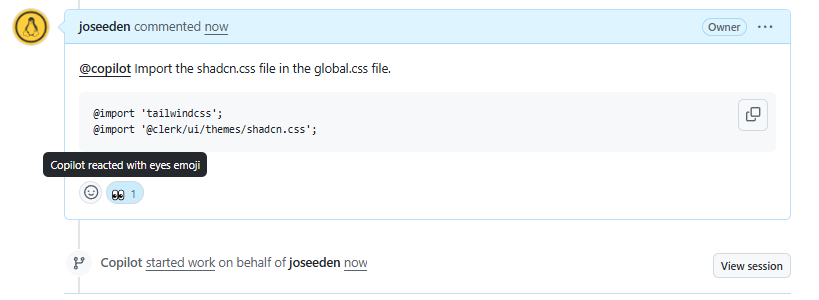
Instead of manually adding it, we can simply ask the agent to do it for us. Go back to the PR created by the agent, and mention @copilot in a comments:
@copilot Import the shadcn.css file in the global.css file.

@import 'tailwindcss';
@import '@clerk/ui/themes/shadcn.css';
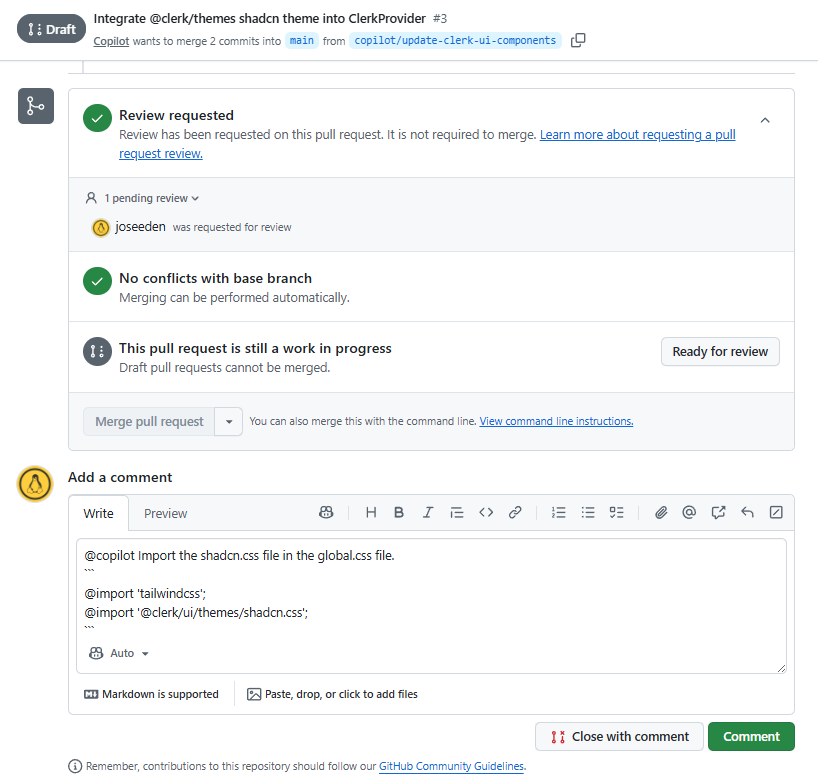
The agent immediately picks up the comment and makes the necessary changes. It then commits the changes to the same branch.
Back in VS Code, make sure you're on the correct branch, then pull the latest changes to get the new commit with the changes for importing the shadcn.css file.
git branch  # Confirm you're on the correct branch
git pull
You might need to run npm install again if the agent added any new dependenciess
npm i
Then run the development server again to test the changes.
npm run dev
UPDATE: After reviewing the changes made by the agent, we noticed that the agent added the wrong import statement for the shadcn.css file.
## ./app/globals.css

@import "@clerk/ui/themes/shadcn.css";
Fixed this and updated the import statement to the correct one:
## ./app/globals.css
@import "@clerk/themes/shadcn.css";
Once you're done reviewing the changes and making sure everything is working as expected, go back to the PR and approve the changes. Then merge the PR to main.
Back in VS Code, switch back to the main branch and pull the latest changes to get the merged code.
git checkout main
git pull
Generating DB Table Schema
Before creating an instruction file for the database layer, it is a good practice to start in Plan mode first because it allows you to:
- Clarify requirements, constraints, and best practices before implementation.
- Prompts you to consider design decisions and research modern recommendations.
- Reduces risk of missing important details or having to redo work later.
- Creates a clear, reviewable artifact for yourself and collaborators.
Note on slug:
In the prompts provided in this section, we use the term "slug" to refer to the unique short code that will be generated for each original URL.
Example: https://sho.rt/abc123, where abc123 is the slug/shortcode.
There is not strict rule for the type of data that can be used for the slug, as long as it can be stored in the database and can be used to uniquely identify the original URL.
- Use
textif you don't need a strict length limit. - Use
varchar(n)if you want the database to enforce a maximum length.
For most link shortener use cases, text is preferred unless you have a business rule requiring a maximum slug length.
Workflow:
-
Plan mode: Open a new conversation in Copilot Chat, set the mode to Plan, and provide the prompt:
Plan a simple database schema for a URL shortening service. The schema should include a table for storing shortened links, with columns for the following:
- Clerk User ID
- The original URL
- The shortened slug
- Timestamps for when the link was created
- Timestamps for when the link was last updated
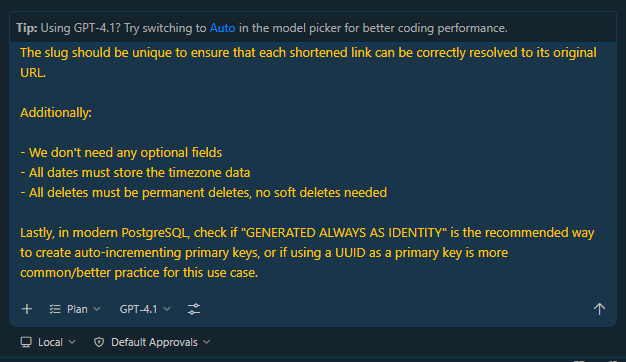
The slug should be unique to ensure that each shortened link can be correctly resolved to its original URL.
Additionally:
- We don't need any optional fields
- All dates must store the timezone data
- All deletes must be permanent deletes, no soft deletes needed
Lastly, in modern PostgreSQL, check if "GENERATED ALWAYS AS IDENTITY" is the recommended way to create auto-incrementing primary keys, or if using a UUID as a primary key is more common/better practice for this use case.
-
Custom prompt for instructions file: After reviewing the plan generated by Copilot Chat, open a new conversation and select the
instructions-generatoras the agent for the conversation.Provide the finalized requirements for the database layer:
/create-instructions The database layer will use Drizzle ORM with the Neon PostgreSQL. The database schema will be defined in the
./db/schema.tsfile using Drizzle's schema definition syntax.The schema must define a single links table representing a shortened link. Each column must be not null, meaning there are no optional fields.
The links table must have the following columns:
- id - integer, primary key, generated always as identity
- userId - the Clerk user ID of the owner
- url - the original destination URL
- slug - the unique short code used to resolve the link; must have a unique constraint
- createdAt - timestamp with timezone, defaults to now
- updatedAt - timestamp with timezone, defaults to now, should automatically update to the current time on every update
Additional requirements:
- All timestamps must store timezone data
- The slug column must have a unique constraint so no two links share the same short code
- There are no soft deletes, do not add a deletedAt column or any deletion flag
Make sure to create a new branch for this task, and perform the necessary tests to ensure the schema is working correctly. After the implementation is complete, update the
AGENTS.mdfile to reference the new instructions file for the database layer.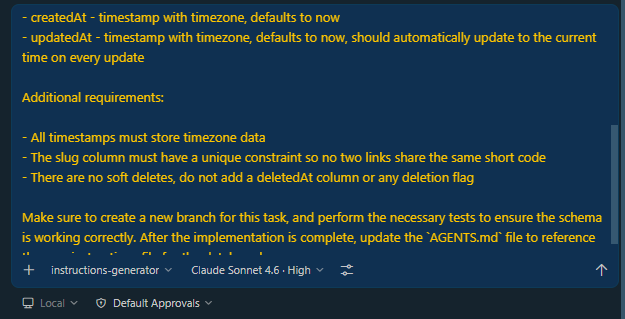
Note on creating a branch:
The agent might not be able to create a new branch for the task. In that case, you can simply create a new branch manually:
git checkout -b feat/database-schema
In a typical enterprise setup, the schema changes are first tested on a staging PostgreSQL database before being applied to production. This is to ensure that the schema works correctly and does not introduce any issues before it is applied to the production database.
In our case, since we are using a single Neon PostgreSQL for this project, we can simply apply the changes to the same database.
In a real-world scenario, it is recommended to have separate databases for staging and production environments.
Before applying the schema changes, make sure you have the .env file set up with the correct database URL for your Neon PostgreSQL database.
NEXT_PUBLIC_CLERK_PUBLISHABLE_KEY=pk_test_******************
CLERK_SECRET_KEY=sk_test_************************************
DATABASE_URL=postgresql://******************************************************?sslmode=req
To push the schema to the Neon PostgreSQL database, use Drizzle's CLI tool to create a migration file:
npx drizzle-kit generate
Output:
[✓] Your SQL migration file ➜ drizzle/0000_big_midnight.sql 🚀
As best practice, review the generated SQL migration file to ensure that it accurately reflects the intended schema changes and does not contain any unintended modifications.
After reviewing the migration file, you can apply the migration to the database using the following command:
npx drizzle-kit push
Output:
[✓] Pulling schema from database...
[✓] Changes applied
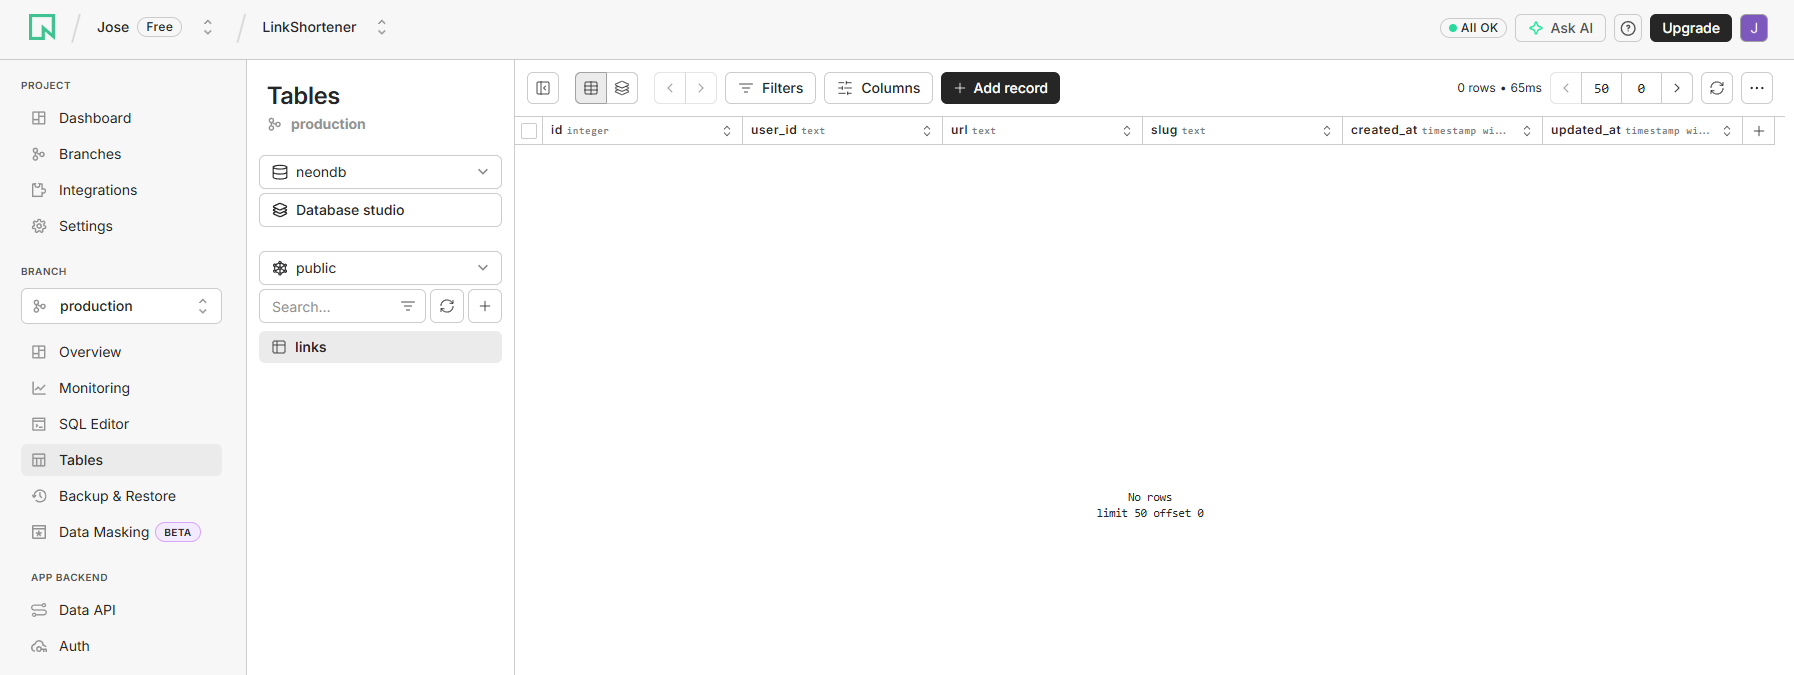
Login to the Neon dashboard, open your project, and navigate to Tables. It should show the new links table , along with the columns defined in the schema.
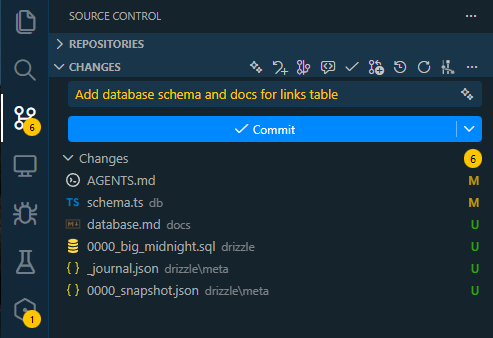
Since everything looks good, we can go back to VS Code and commit the changes for the new database schema.
The files in the drizzle folder (such as migration SQL files) are safe to commit. They only contain schema definitions and migration history, no sensitive data, secrets, or credentials.
Since we only created the new branch locally, we need to publish the branch to the remote repository before we can create a pull request.
You'll get a prompt at the bottom right in VS Code asking if you want to create a new pull request for the branch you just published. Click on Create Pull Request.
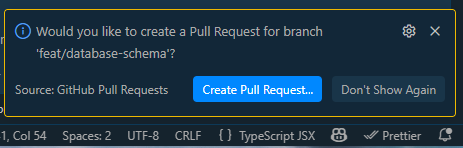
Note: If you don't see the prompt to create a pull request, you can manually create a PR by going to your Github repository, switching to the new branch, and clicking on the New Pull Request button.
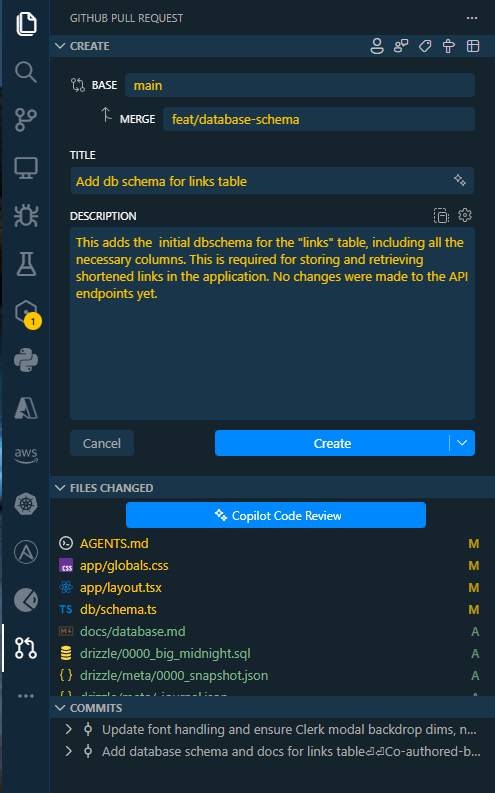
This will open the Github Pull Request extension in VS Code, where you can see all the files changed and the commits for the new branch. Review the changes to make sure everything looks good.
After providing the necessary information, click on Create to create the pull request.
The good thing with having this extension in VS Code is that it will also open the pull request details page in VS Code, so you can review the changes and merge the PR without having to go to the Github website.
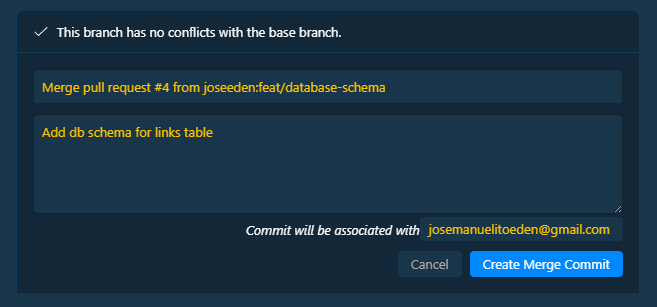
Click Merge Pull Request.
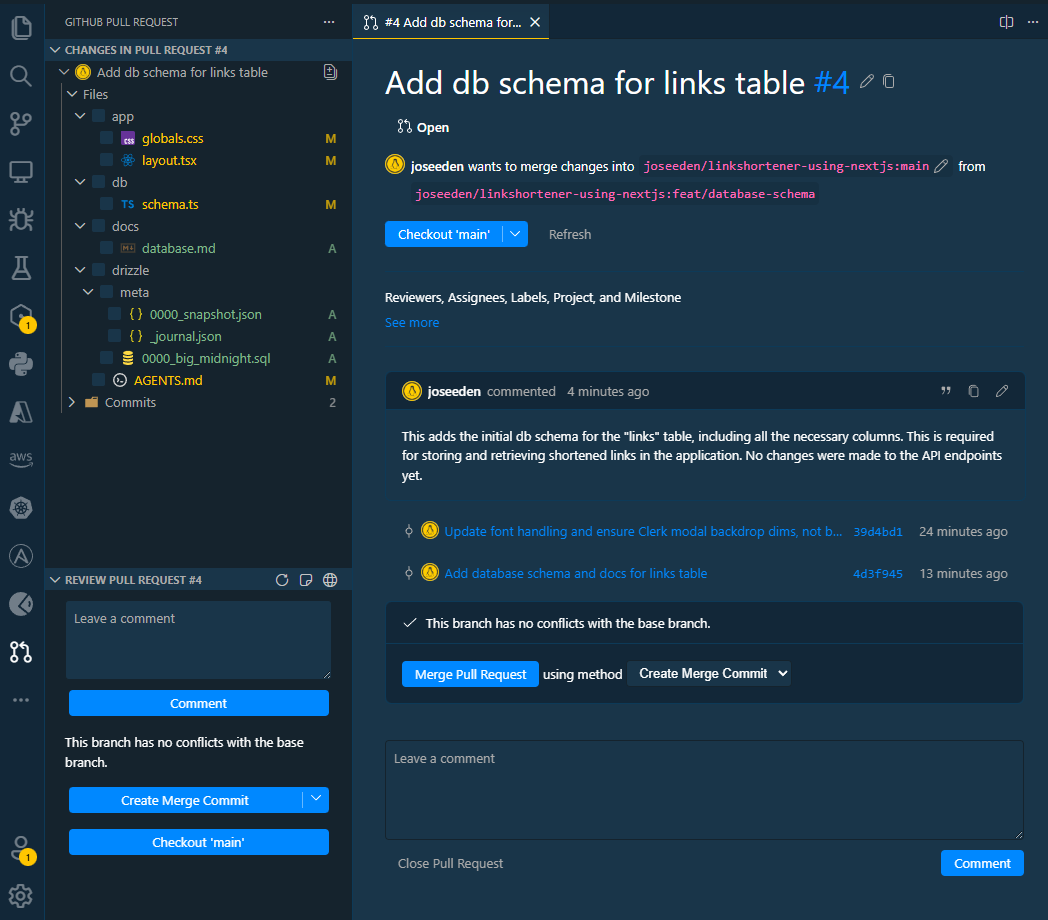
Provide a commit message for the merge commit and click Create Merge Commit.
Now that the PR is merged, go back to VS Code and switch back to the main branch. Then pull the latest changes to get the merged code.
git checkout main
git pull
Seed Data, Neon DB, and MCP
In this step, we'll use Copilot to generate seed data (dummy data) for the database, and then use MCP to run the seed script and populate the database with the generated seed data.
MCP (Model Context Protocol) is a protocol that allows running code in the context of a specific model.
In this project, the MCP server will expose the necessary tools to Copilot chat, which Copilot can use to perform actions such as connecting to the Neon database and running scripts.
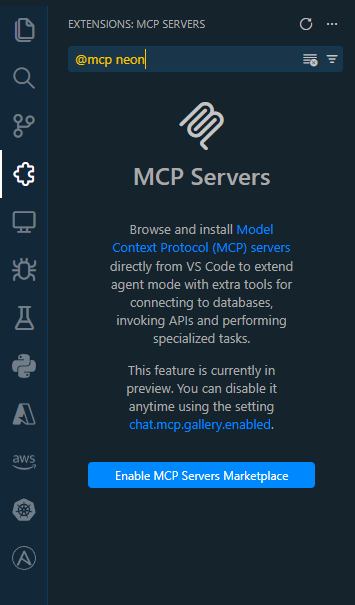
To start with, go to Extensions in VS Code and search for:
@mcp neon
Note that you may need to enable the MCP Marketplace in the settings to see the MCP extensions.
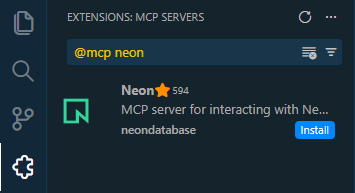
After enabling, you should be able to see the correct MCP server extension. Click on Install to install the MCP server for Neon.
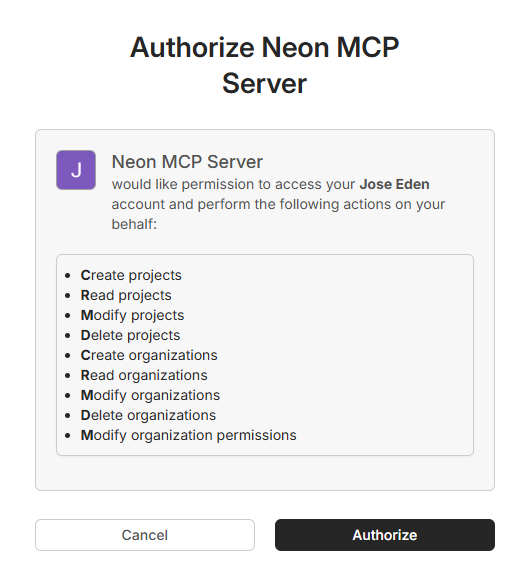
After installing the MCP server, a prompt window will appear asking to authenticate the MCP server with Neon. Click Allow.

This will open a new browser window asking you to log in to your Neon account and authorize the MCP server to access your Neon project. Allow the necessary permissions for the MCP server to access your Neon project, then click Approve

Click Authorize to complete the authentication process.
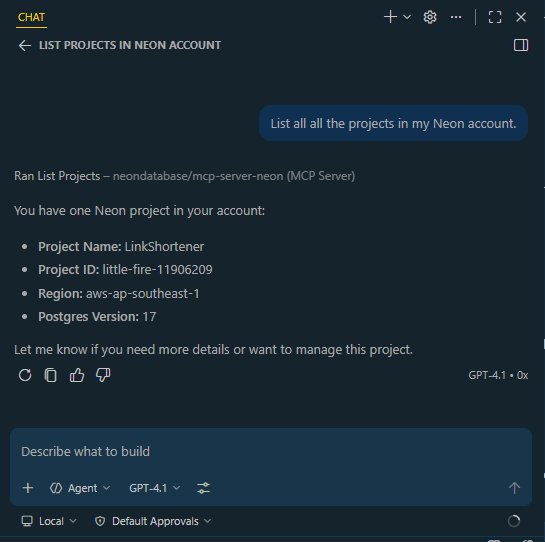
Back in VS Code, open a new conversation in Copilot Chat, set the mode to Agent, and add the prompt:
List all all the projects in my Neon account.
The agent should be able to find the Neon project associated with the database URL in our .env file.
Now that the MCP server is authenticated and can access our Neon project, we can ask the agent to generate seed data for our database and run the seed script using MCP.
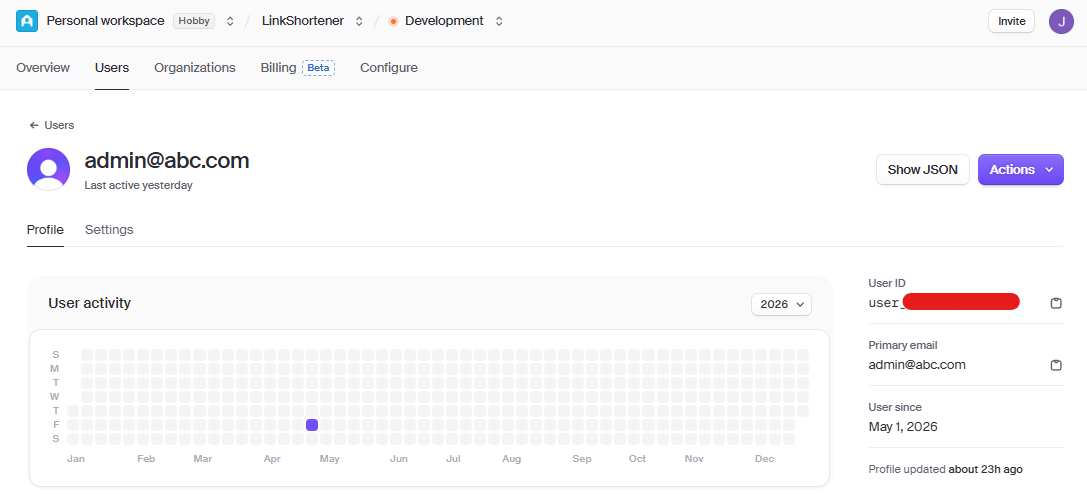
But first, we need to login to our Clerk dashboard to get the user IDs that we will use for the userId column in our links table.
Recall that we created a test account in the Adding a Dashboard Page section.
Go to Users tab and click on the test user. Copy the user ID for that test user, as we will use it in our seed data.
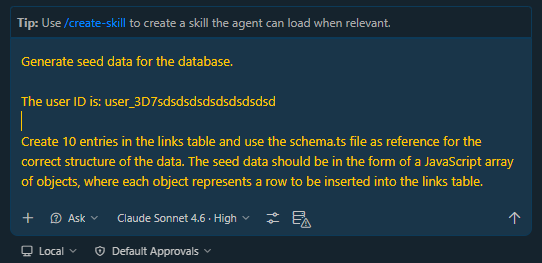
Back in VS Code, open a new conversation in Copilot Chat, set the mode to Ask, and provide the following prompt:
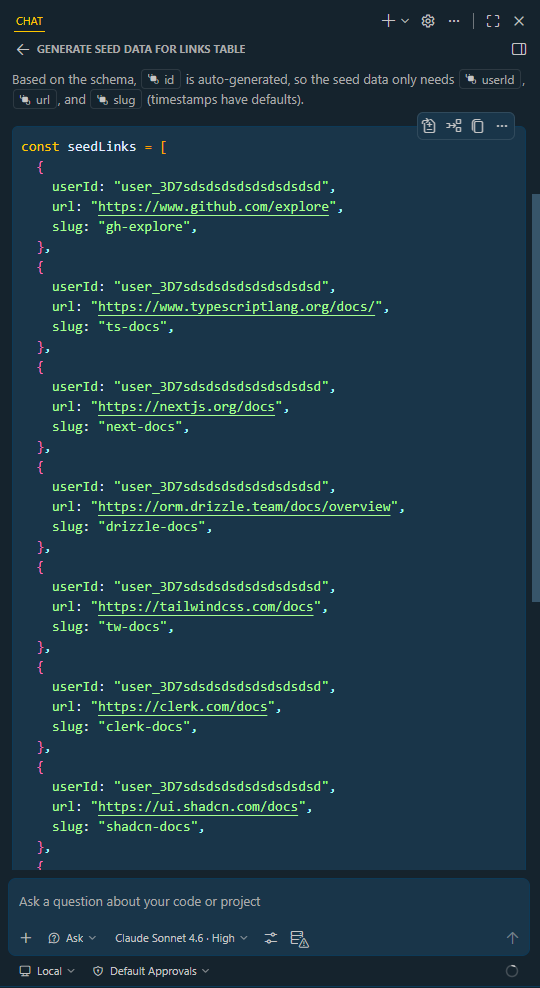
Generate seed data for the database. The user ID is: user_3D7sdsdsdsdsdsdsdsdsd Create 10 entries in the links table and use the schema.ts file as reference for the correct structure of the data. The seed data should be in the form of a JavaScript array of objects, where each object represents a row to be inserted into the links table.
It will generate the seed data in the form of a JSON, which we can then use to create a seed script to populate our database.
Next, click the MCP Server icon below the chat. If there is a a warning in the icon, it means that the MCP server wasn't unable to start succesfully.

After clicking the icon, a list of available actions for the MCP server will appear. Select Start server.
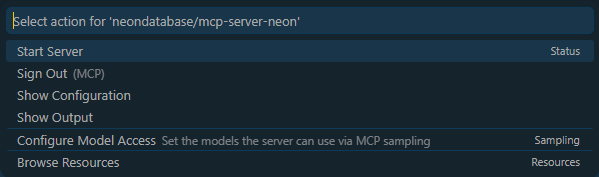
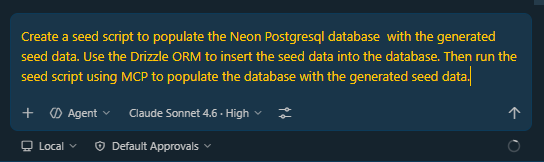
Once the server is started, set the mode to Agent and add the prompt below to run the seed script using MCP.
Note: If you have other projects in Neon, make sure to specify the project name in the prompt to ensure that the seed script is run against the correct database.
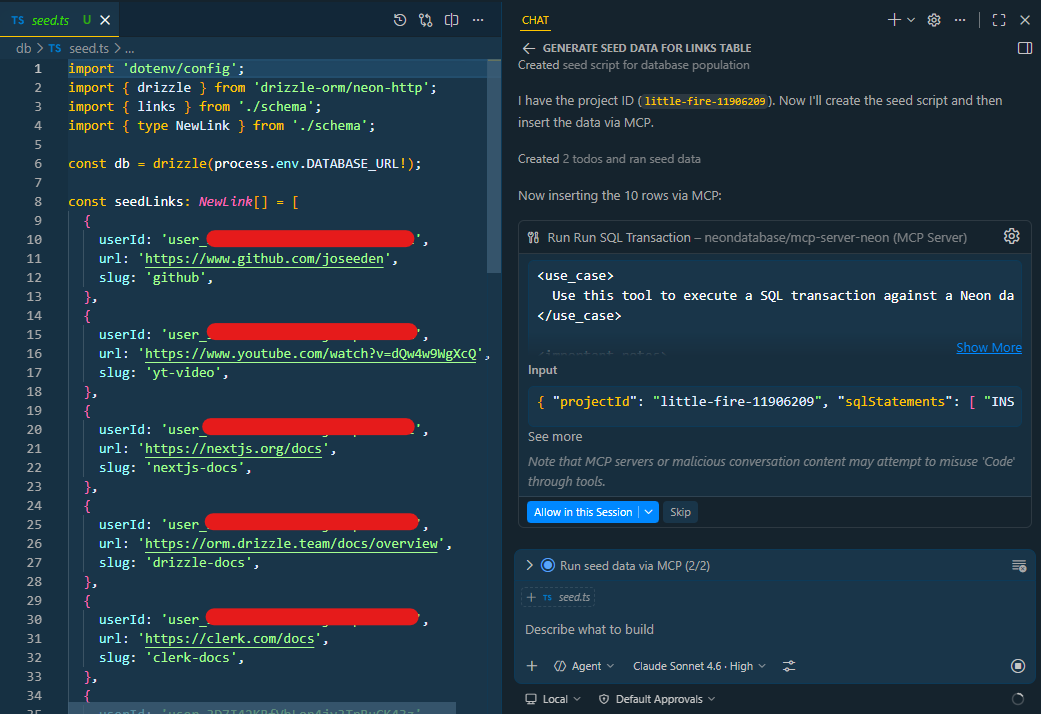
Create a seed script to populate the Neon Postgresql database with the generated seed data. Use the Drizzle ORM to insert the seed data into the database. Then run the seed script using MCP to populate the database with the generated seed data.
Review the generated seed script to ensure that it accurately reflects the intended data insertion logic and does not contain any unintended modifications. After reviewing, click Allow in this session to run the seed script using MCP.
UPDATE: To secure the seed script, I have added the User ID in the .env file and updated the seed script to read the User ID from the environment variable instead of hardcoding it in the script.
The .env:
NEXT_PUBLIC_CLERK_PUBLISHABLE_KEY=pk_test_************************
CLERK_SECRET_KEY=sk_test_******************************************************
DATABASE_URL=postgresql://************************************?sslmode=require
SEED_USER_ID=user_************************************
The seed script will read the SEED_USER_ID from the environment variable and use it in the seed data:
import 'dotenv/config';
import { drizzle } from 'drizzle-orm/neon-http';
import { links } from './schema';
import { type NewLink } from './schema';

const db = drizzle(process.env.DATABASE_URL!);

const userId = process.env.SEED_USER_ID!;

const seedLinks: NewLink[] = [
  {
    userId,
    url: 'https://www.github.com/joseeden',
    slug: 'github',
  },
  ....
To manually run the seed script without using MCP:
npx tsx db/seed.ts
Output:
Seeding database...
Inserted 10 rows into links table.
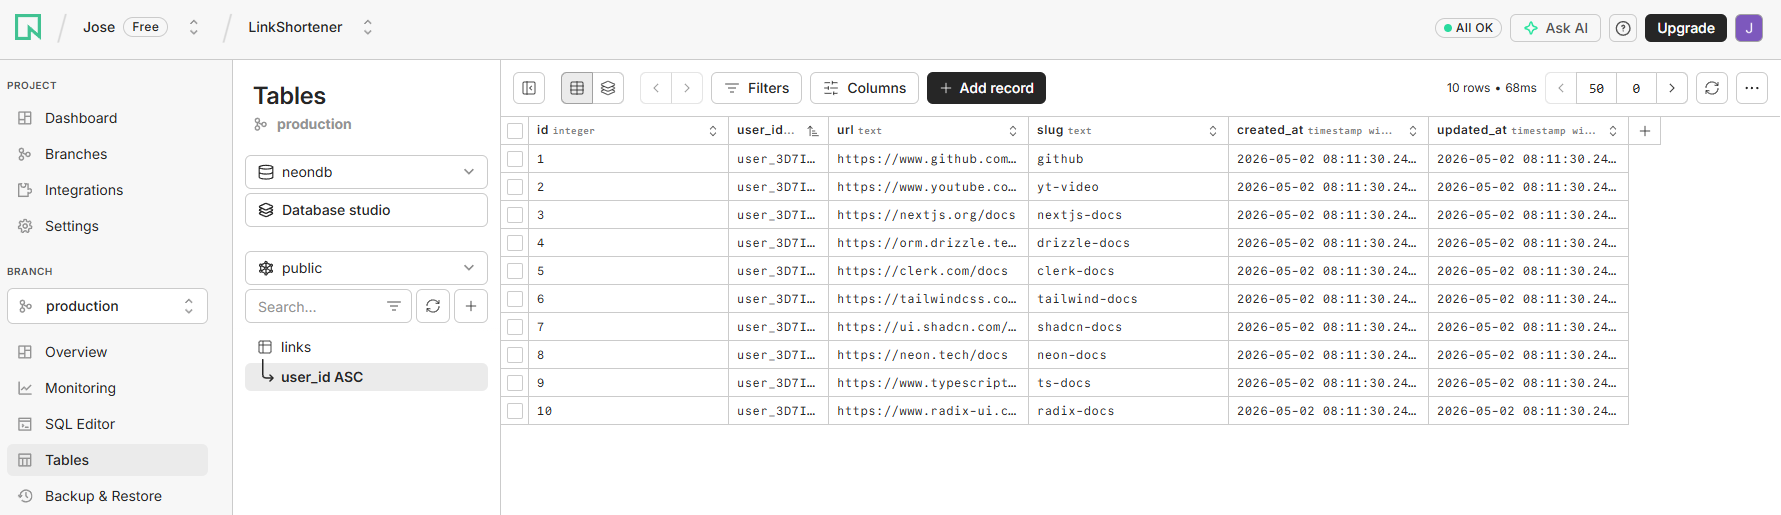
Login to the Neon dashboard, open your project, and navigate to Tables. It should now show the new entries in the links table that were inserted by the seed script.
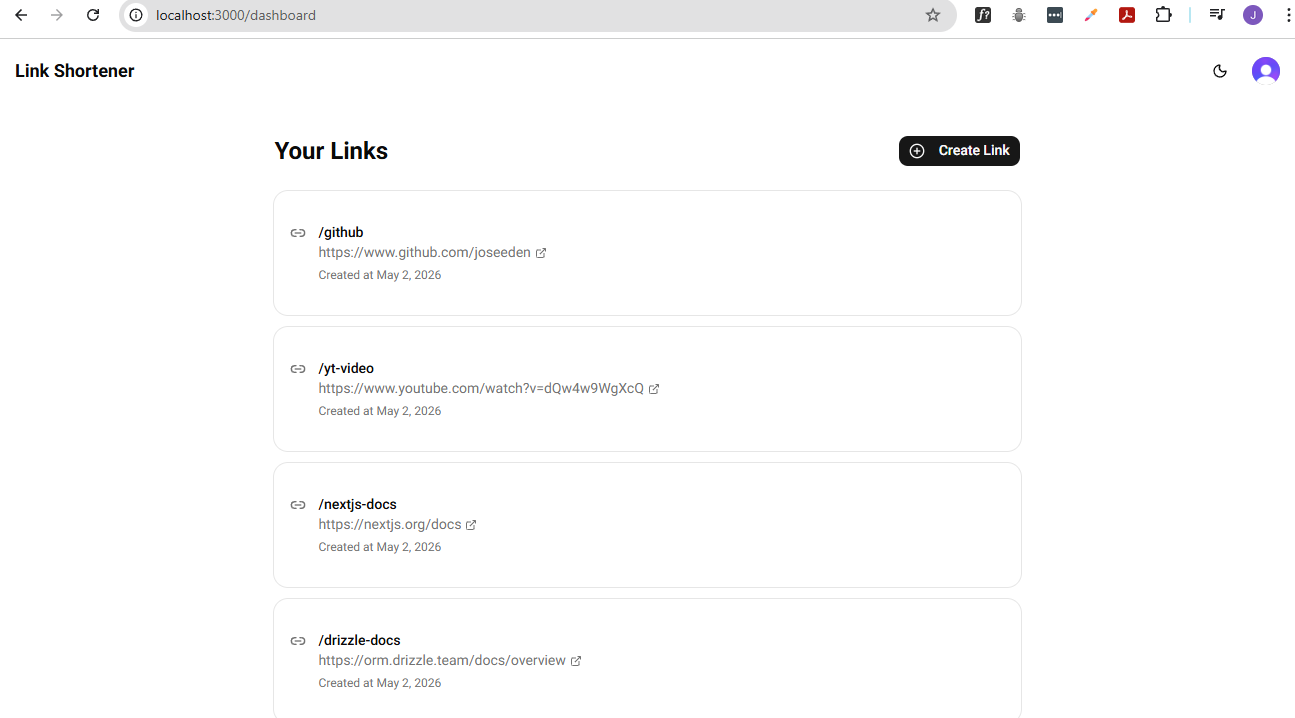
Building the Dashboard Page
The dashboard page will display a list of all the shortened links created by the user, along with some basic analytics such as the number of clicks for each link.
This section requires two logic components:
- A data fetching component that retrieves the list of links created by the user from the database
- A data mutation component which allows users to create, update, and delete links directly from the dashboard page.
Data Fetching
To start with, we will create the data fetching component. Open a new conversation in Copilot Chat and provide the prompt below,
Note: When you press enter, it should automatically use the instructions-generator agent to generate the instructions file.
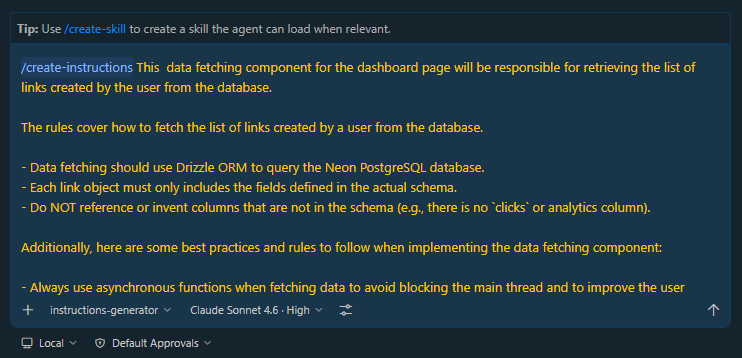
/create-instructions This data fetching component for the dashboard page will be responsible for retrieving the list of links created by the user from the database.
The rules cover how to fetch the list of links created by a user from the database.
- Data fetching should use Drizzle ORM to query the Neon PostgreSQL database.
- Each link object must only includes the fields defined in the actual schema.
- Do NOT reference or invent columns that are not in the schema (e.g., there is no
clicksor analytics column).Additionally, here are some best practices and rules to follow when implementing the data fetching component:
Always use asynchronous functions when fetching data to avoid blocking the main thread and to improve the user experience on the dashboard page.
ALWAYS use server components to fetch data. This ensures that the data fetching logic is executed on the server side, which improves performance and security by keeping sensitive database queries away from the client side.
NEVER use client components for data fetching. Do not use
useAuthor any other client-side Clerk hook to obtain the user ID.ALWAYS place helper functions for fetching data in the
/datadirectory at the project root. This directory does not exist yet and must be created alongsideapp,db, andlib. These functions are designed to handle all interactions with the database and can be reused across different components and pages.All helper functions in the
/datadirectory must use Drizzle ORM for database interactions. NEVER use raw SQL strings or any ORM other than Drizzle.Always import db from
@/dband table definitions (e.g., links) from@/db/schema. All imports must use the@/path alias. This keeps imports consistent across the entire codebase regardless of file depth, and ensures the correct modules are used (index.tsx for the database client and schema.ts for table definitions and types). Never use relative paths (e.g., ../../db) or import from the wrong file.NEVER define custom TypeScript interfaces for database results. Always use the inferred types exported from schema.ts (e.g., Link, NewLink). Never use
any. The types should always be automatically derived by Drizzle directly from the schema definition.Helper functions should handle potential errors that may occur during database interactions. On error, the function should throw the error rather than swallowing it silently, allowing the calling component to handle it appropriately.
Once it's done, you should see the new instruction file for data fetching:
docs
├── auth.md
├── data-fetching.md
├── database.md
└── ui.md
Data Mutation
Next, we will create the data mutation component. Open a new conversation in Copilot Chat and provide the prompt below.
Note: When you press enter, it should automatically use the instructions-generator agent to generate the instructions file.
/create-instructions Document the data mutation conventions for this project. This covers data mutation conventions only. Do not modify the instructions for data fetching.
The rules cover how all create, update, and delete operations are performed in the application.
Rules:
ALL data mutations must be implemented as Next.js Server Actions. Never perform mutations directly in client components or route handlers.
Server action files must be named
actions.tsand must include'use server'as the first line of the file. This tells Next.js that the file (or function) should be treated as a server action, meaning it will only run on the server, can access secrets, and can perform mutations securely.Server action files must be colocated in the same directory as the component that invokes them (e.g.,
app/dashboard/actions.tsfor actions used by the dashboard page).Server actions must only be called from client components. Client components that call server actions must include
'use client'as the first line of the file.All data passed into a server action must have explicit TypeScript types. NEVER use the
FormDataTypeScript type. NEVER useany.All incoming data must be validated inside the server action using Zod before any database operations are performed. If validation fails, return
{ error: string }immediately with a descriptive message.Every server action must check for an authenticated user as its first step, before validation and before any database operations. Use
const { userId } = await auth()imported from@clerk/nextjs/server. This is the current and recommended import for Clerk v4+ and Next.js 13/14/16, and should be correct for all current and foreseeable versions.If Clerk ever changes the import path in a future release, update the code and instructions to use the new, modern path. If
userIdisnull, return{ error: 'Unauthorized' }immediately.Database operations must NOT be performed directly inside server actions using Drizzle queries. All database interactions must be delegated to helper functions located in the
/datadirectory. Server actions import and call these helpers; they should not call db directly or contain raw Drizzle queries themselves.Server actions must NEVER throw errors. All outcomes, both success and failure, must be communicated by returning a typed result object. Use
{ error: string }for failures and{ success: true }for successes.After a successful mutation, call
revalidatePathimported fromnext/navigationwith the relevant path (e.g.,revalidatePath('/dashboard')) so the UI reflects the updated data. This must happen before returning{ success: true }.All imports must use the
@/path alias to ensure it always points to the correct location, starting from project root. Never use relative paths.
After it's done, you should see the new instruction file for data mutation:

```bash
docs
├── auth.md
├── data-fetching.md
├── data-mutation.md
├── database.md
└── ui.md
The Dashboard Page
Now that we have the specific instructions for both data fetching and data mutations, we can now start building our dashboard page.
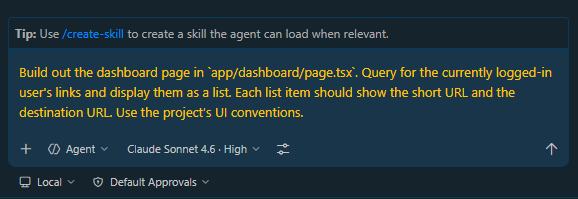
Open a new conversation, set the mode to Agent, and provide the prompt below.
It is recommended to specify the exact file to edit. There is a risk that the agent may not edit the correct file, especially in a Next.js project where multiple pages can exist (e.g., app/page.tsx, app/dashboard/page.tsx, etc.). The agent might guess based on context, but it is not guaranteed to always pick the intended file.
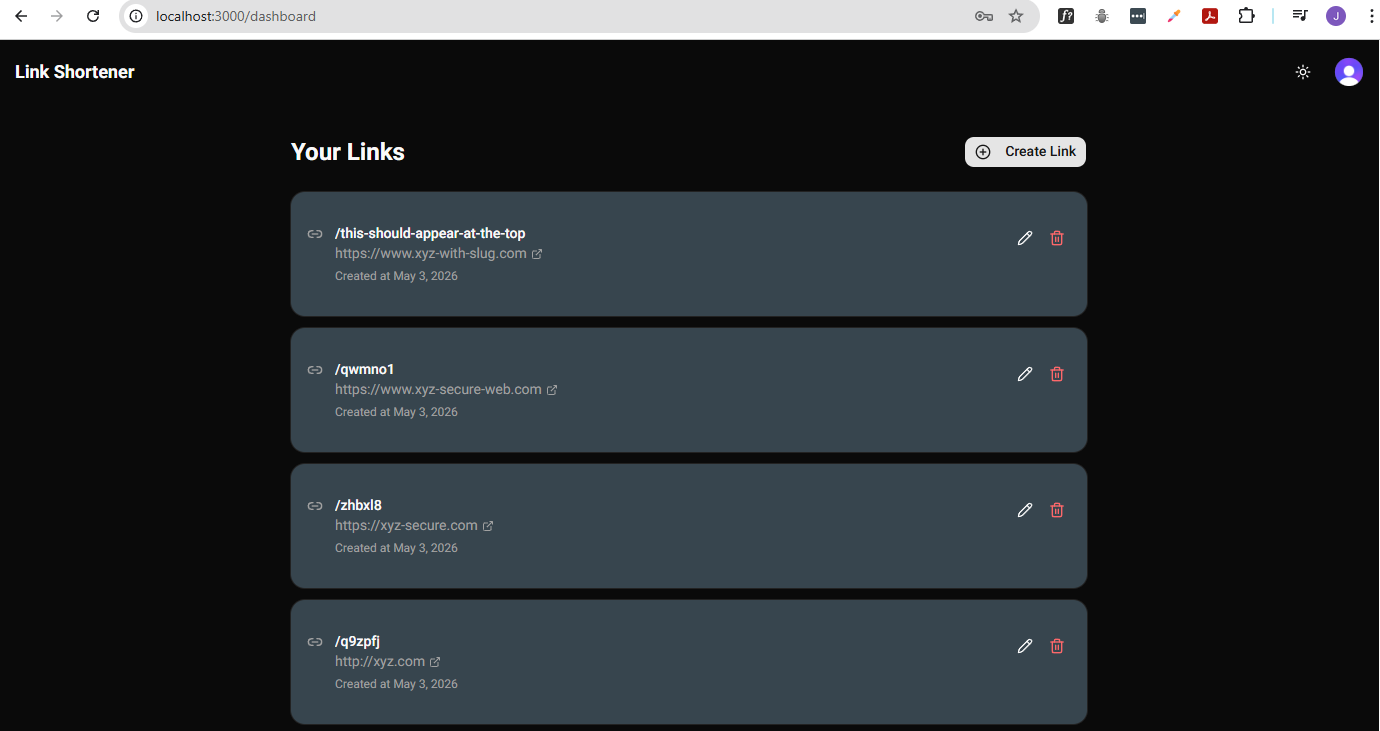
Build out the dashboard page in
app/dashboard/page.tsx. Query for the currently logged-in user's links and display them as a list. Each list item should show the short URL, the destination URL, and the "Created at" date. Use the project’s UI conventions.
The agent may use a Card component in the design, which is not yet created. It might ask you to allow it to add the Card component to the project.
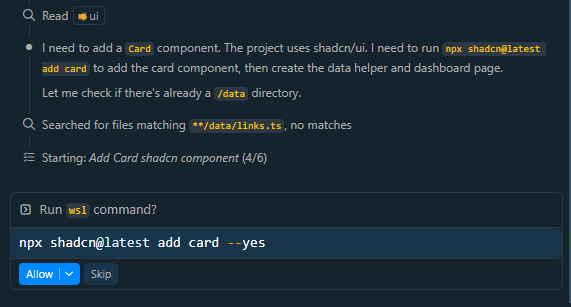
Alternatively, the agent might opt for a simple layout without the Card component, such as using <div> elements styled with Tailwind CSS classes. Based on out styling guidelines:
Use Tailwind CSS utility classes and avoid recreating primitives that shadcn already provides.
For list layouts, the agent may use semantic HTML elements with Tailwind, since there is no dedicated shadcn list component to utilize or override.
Going back to Copilot chat, the agent was able to successfully add the Card component and create the helper function and the dashboard page.
app/dashboard/
└── page.tsx

data/
└── links.ts
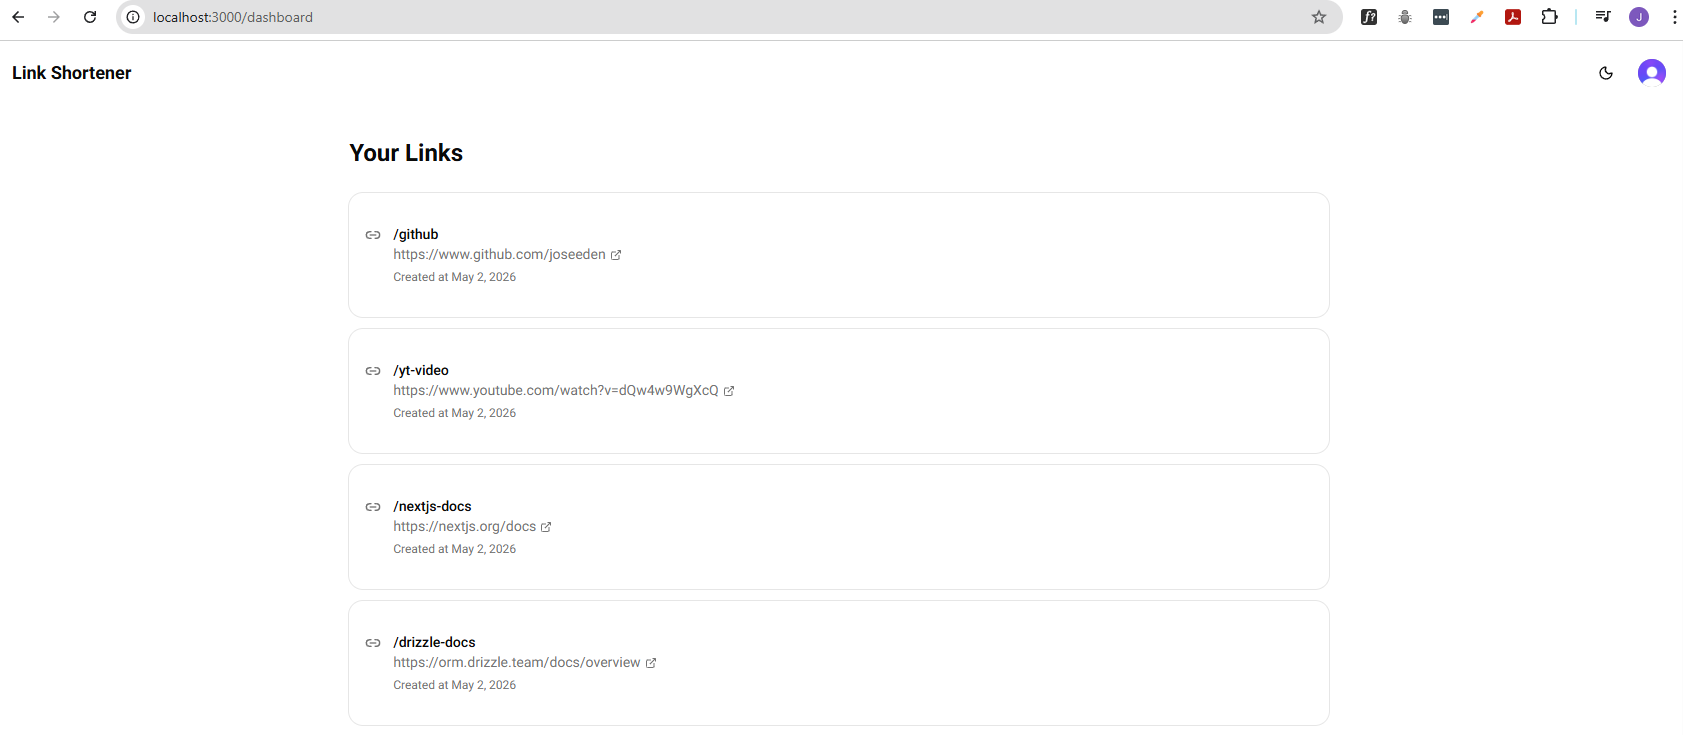
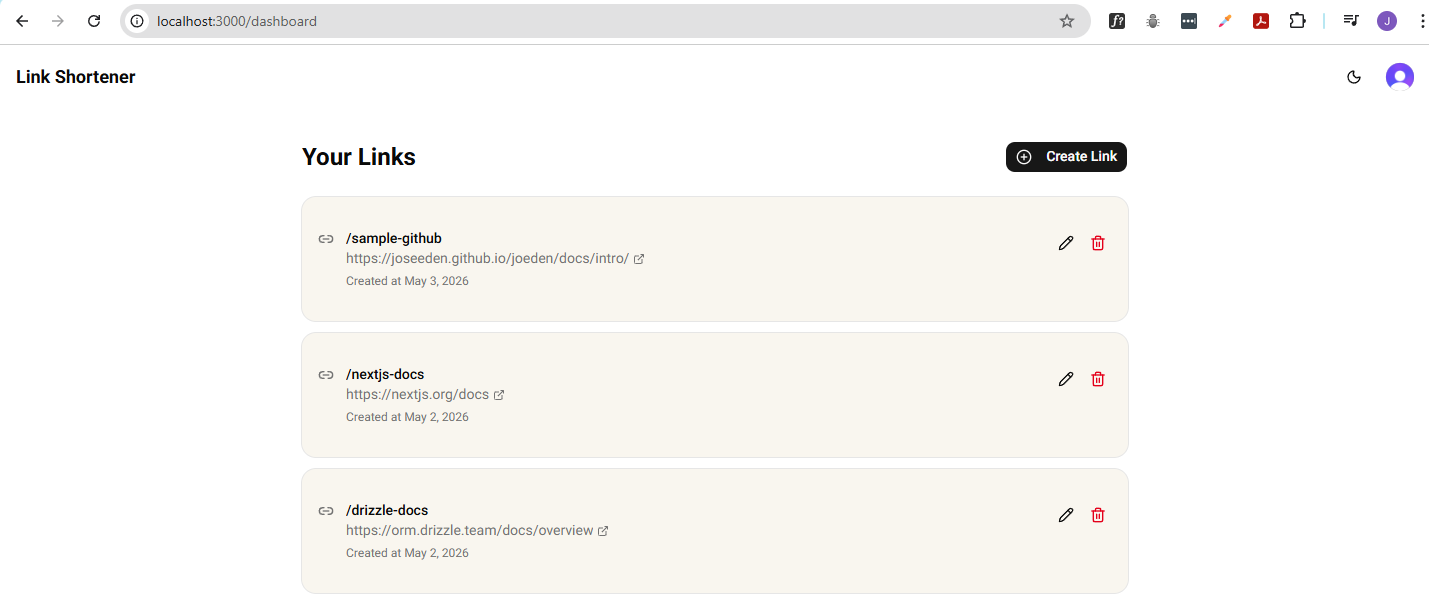
Next, run the development server to see the dashboard page in action.
npm run dev
Open a web browser and confirm that the dashboard page is rendering correctly and displaying the list of links for the logged-in user.
CRUD and Redirect Links
This step involves implementing the create, update, and delete operations for the links directly from the dashboard page, as well as implementing the redirect functionality when accessing a shortened URL.
Create Shortened Links
Open a new conversation in Copilot chat, set mode to Agent, and provide the prompt below:
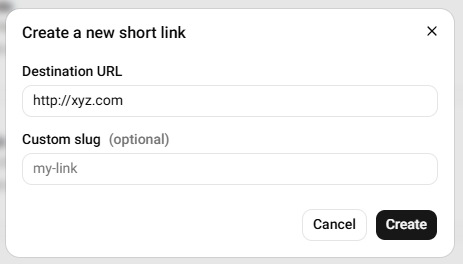
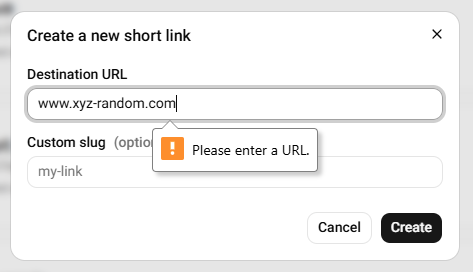
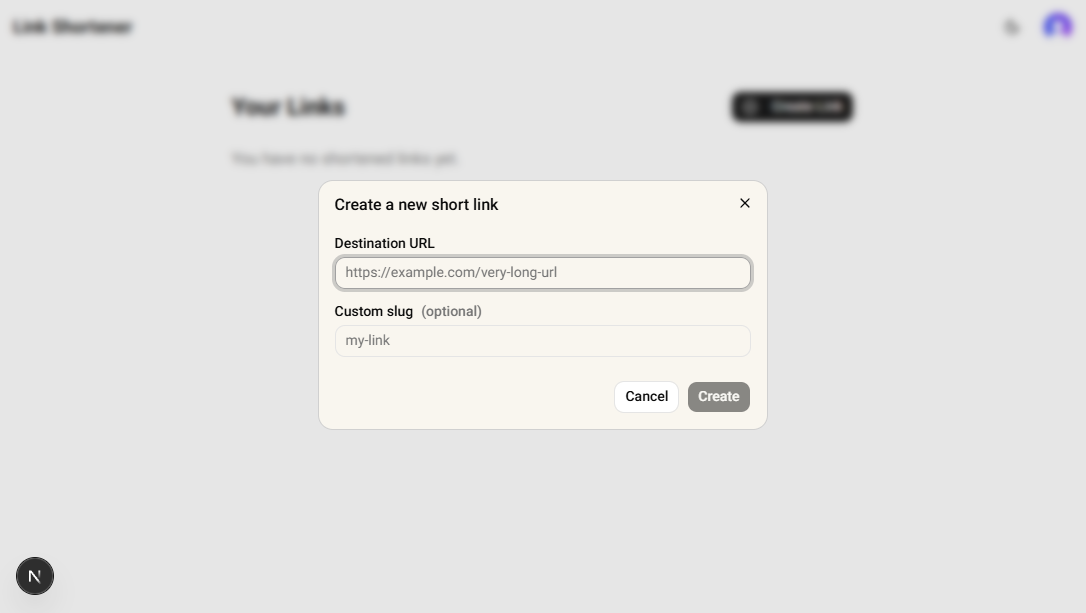
Implement a "Create Link" feature accessible from the dashboard page. Add a button that opens a modal dialog containing a form to input the destination URL (required) and an optional custom slug (which can be left blank).
If the custom slug is blank, the backend should generate a random slug automatically.
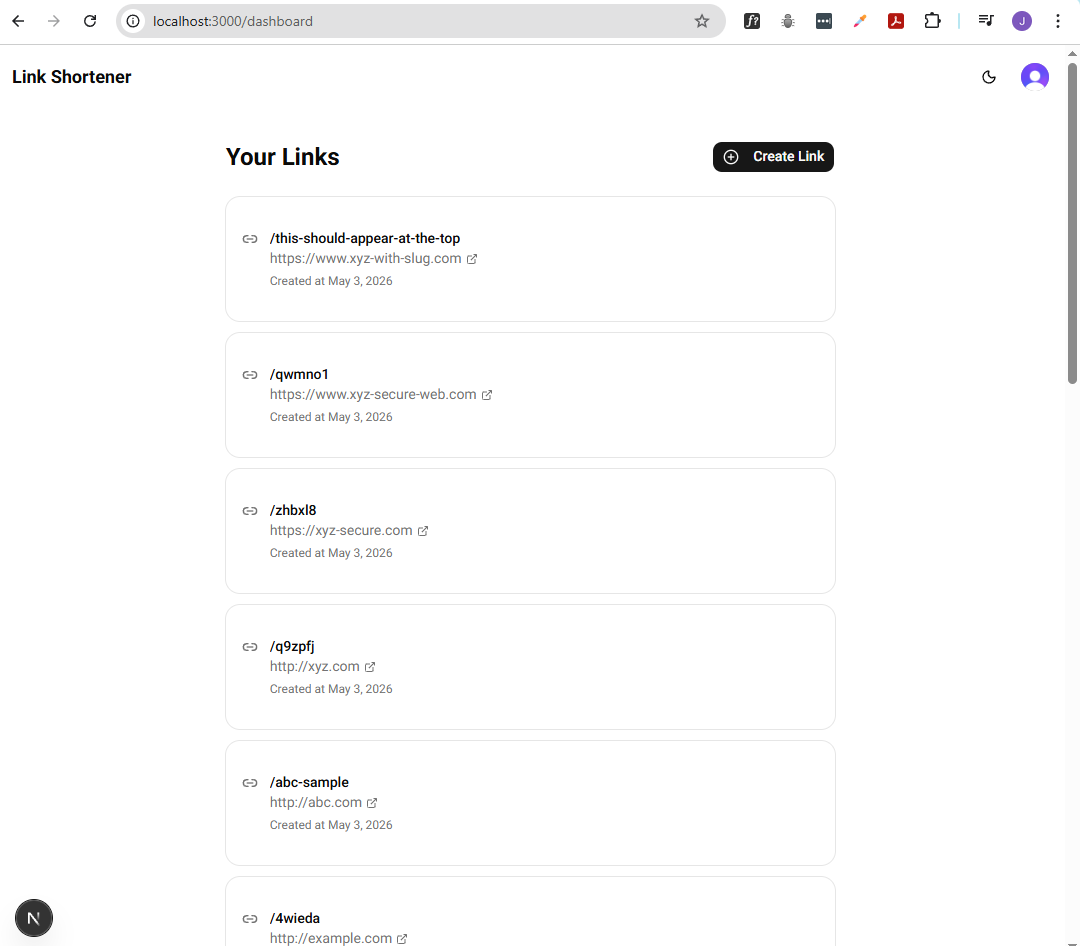
On successful submission, the modal should close, and the new link should appear at the top of the dashboard list with a success notification. The list of links should always be sorted from newest to oldest.
The agent may ask you to allow it to install tools such as:
- zod
- shadcn components (e.g., Dialog, Sonner, Label, Button, Input)
After these are installed, it will proceed to implement the "Create Link" feature, which includes:
- Adding a "Create Link" button on the dashboard page
- Using a modal dialog that contains a form
- The form is used to input the destination URL and optional custom slug
Once its done, you should see the following files created/updated:
app
├── layout.tsx

app/dashboard/
├── actions.ts
└── page.tsx

components
├── CreateLinkModal.tsx

data/
└── links.ts
Note: Make sure to review the code changes done by the agent. DO NOT blindly accept all changes without review, as the agent can make mistakes or introduce bugs.
After reviewing the code changes, run the development server:
npm run dev
In the web browser, log in and confirm that the "Create Link" button works as expected.
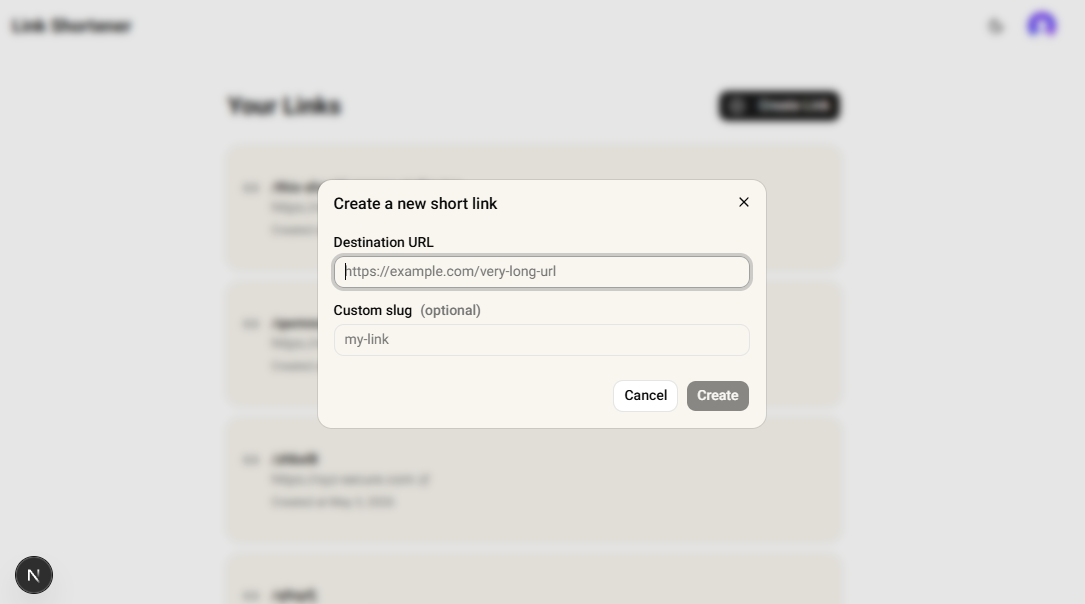
When you click the button, it should open a modal dialog where you can input the destination URL and optional custom slug.

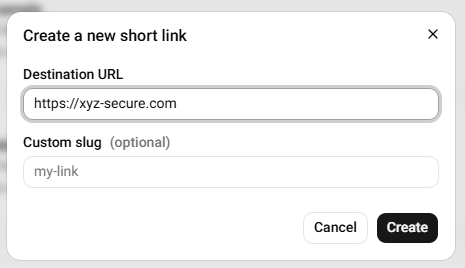
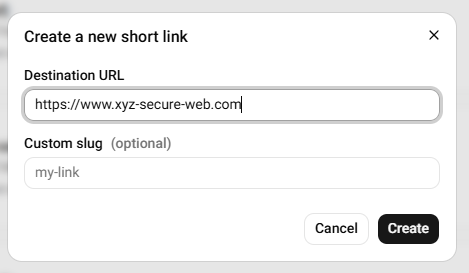
Note that the destination URL follows a format and has to start with http or https. If you try to submit a URL that doesn't follow the format, the form will show a validation error message.
Using http (valid):
Using https (valid):
Including www (valid):
Without http/https (invalid):
With custom slug (optional):

Upon successful submission, the modal should close, and the new link/s should appear at the top of the dashboard list.
UPDATE: I've updated the card colors and modal colors in both light mode and dark mode to improve the visual design and ensure better contrast and readability.
Prompt:
Update the card and modal background colors for both light and dark mode.
- In light mode, set the card and modal backgrounds to "Bone White" (#F9F6EE).
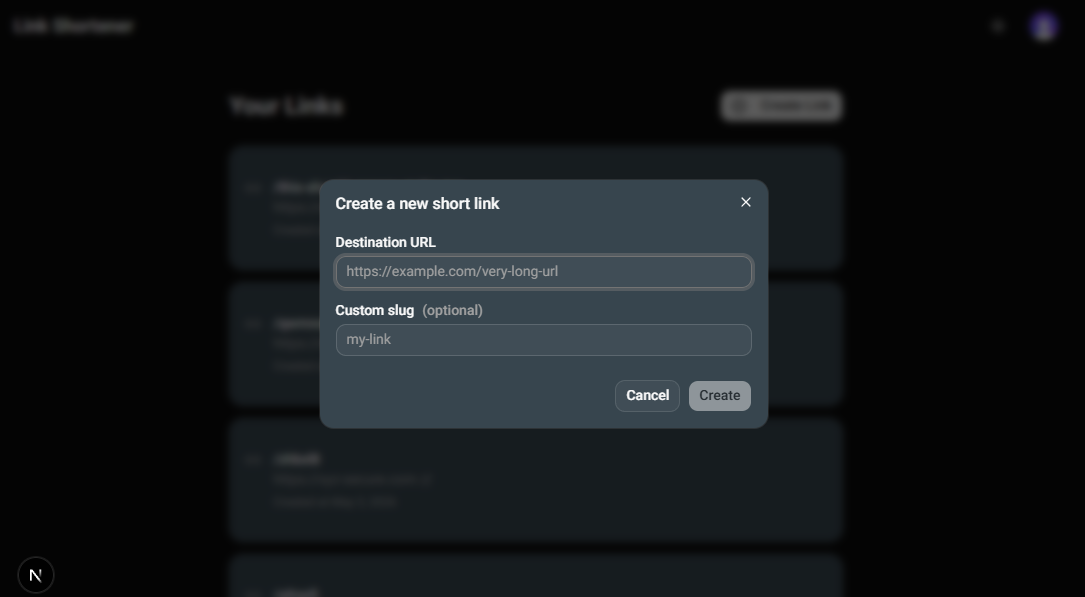
- In dark mode, set the card and modal backgrounds to "Charcoal Black" (#36454F).
Apply these colors via the CSS variables
--cardand--popoverin the Tailwind theme, so all cards and modal dialogs use these backgrounds in both themes.
Light mode:
Dark mode:
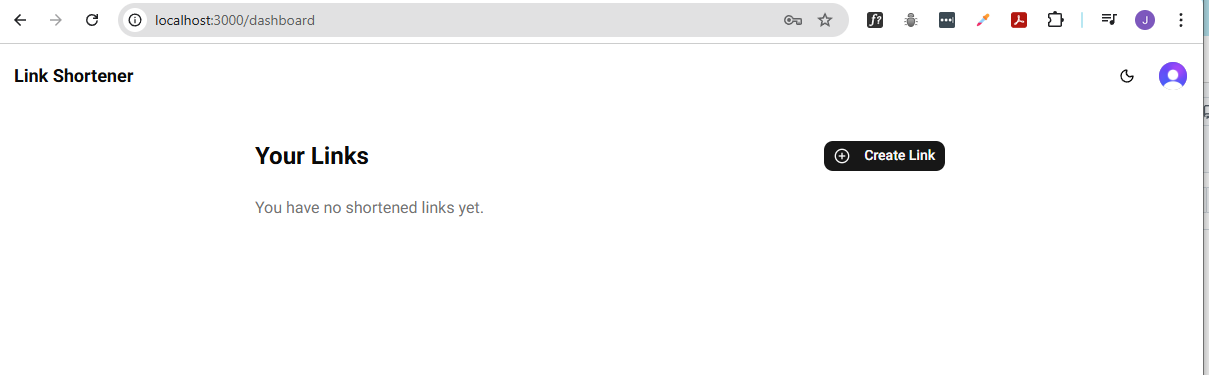
Additional: After signing up for a new account, the user is taken to their dashboard. If there are no links yet, a message saying "You have no shortened links yet" appears below the "Your Shortened Links" header.

When Create Link is clicked:
Edit and Delete Links
Open a new conversation in Copilot chat, set mode to Agent, and provide the prompt below:
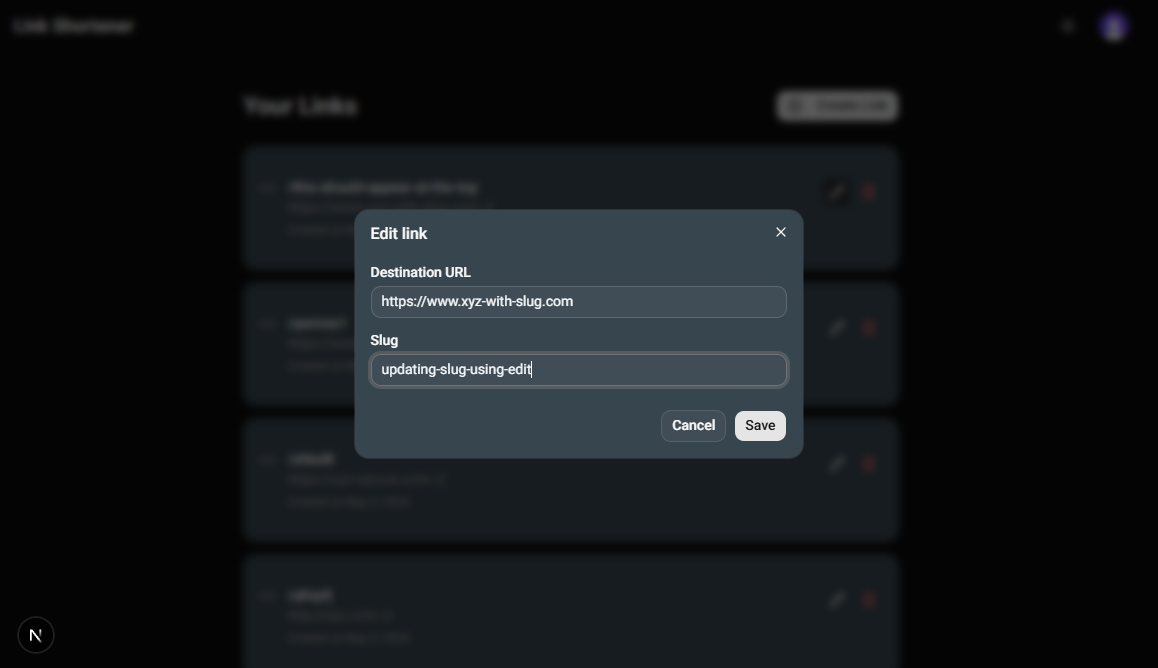
Implement "Edit" and "Delete" features for each link item on the dashboard page:
Add an "Edit" button for each link.
- When clicked, open a modal dialog (centered, blocking background).
- Allow the user to update editable fields (e.g., destination URL, title).
- The modal should have "Cancel" and "Save" buttons.
- On cancel, close the modal with no changes.
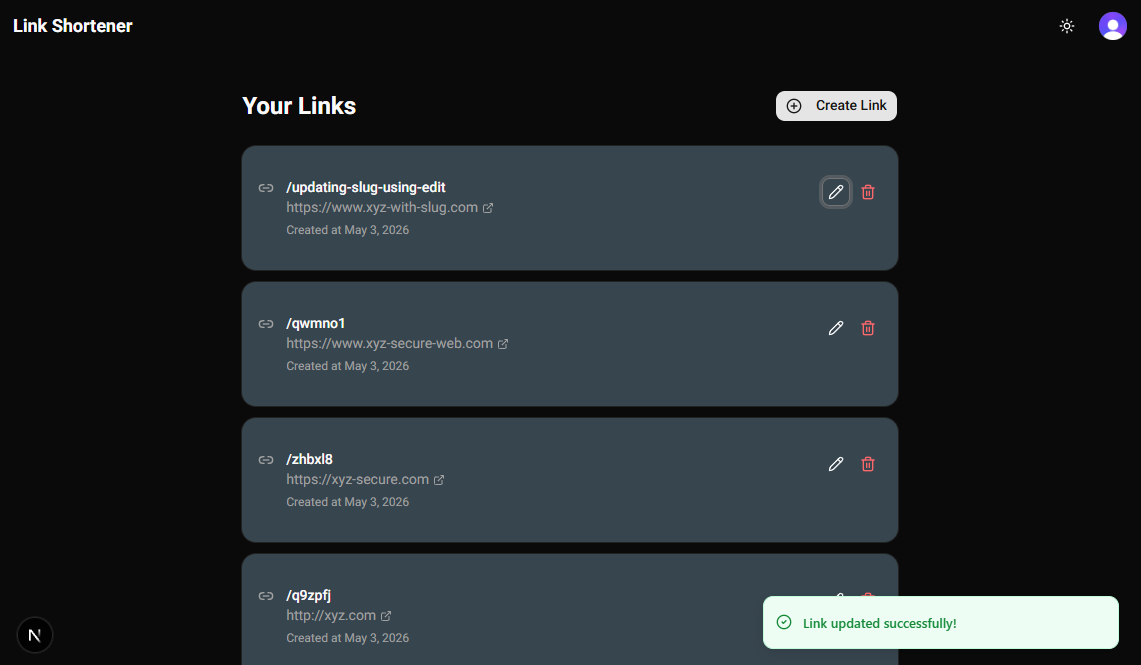
- On save, update the link and refresh the dashboard list.
- Show a success or error toast as appropriate.
Add a "Delete" button for each link.
- When clicked, open a confirmation dialog asking the user to confirm deletion.
- If confirmed, delete the link, refresh the dashboard list, and show a toast notification.
- If canceled, close the dialog with no action.
Ensure proper loading states and error handling for both actions.
The agent may prompt you to allow it to install dependencies, like shadcn tools (Alert-dialog, etc.). Once its done, the following files will be created/updated:
app/dashboard/
├── actions.ts
└── page.tsx

components
├── DeleteLinkDialog.tsx
├── EditLinkModal.tsx

data/
└── links.ts
Note: Make sure to review the code changes made by the agent. DO NOT blindly merge the PR without reviewing the changes, as the agent may make mistakes or introduce bugs. After reviewing the code changes, run the development server:
npm run dev
Verify the updates in your web browser. After signing in, you should see all link items, each with edit and delete buttons.
Clicking the Edit button opens a modal dialog:
The link is updated successfully:
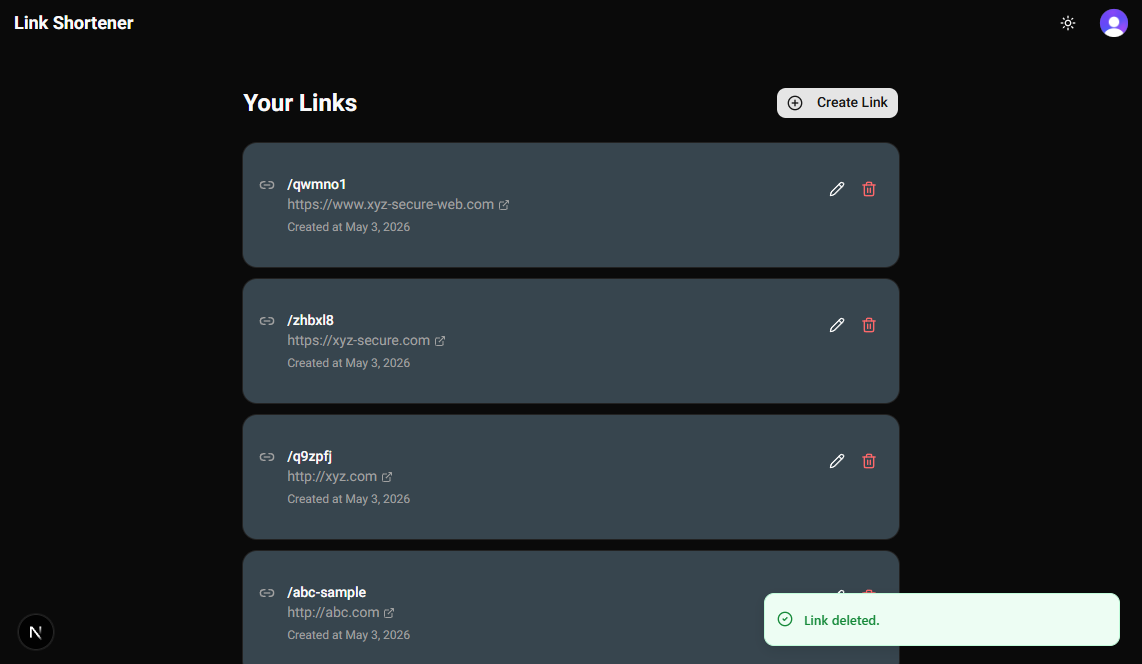
Deleting the same link item:
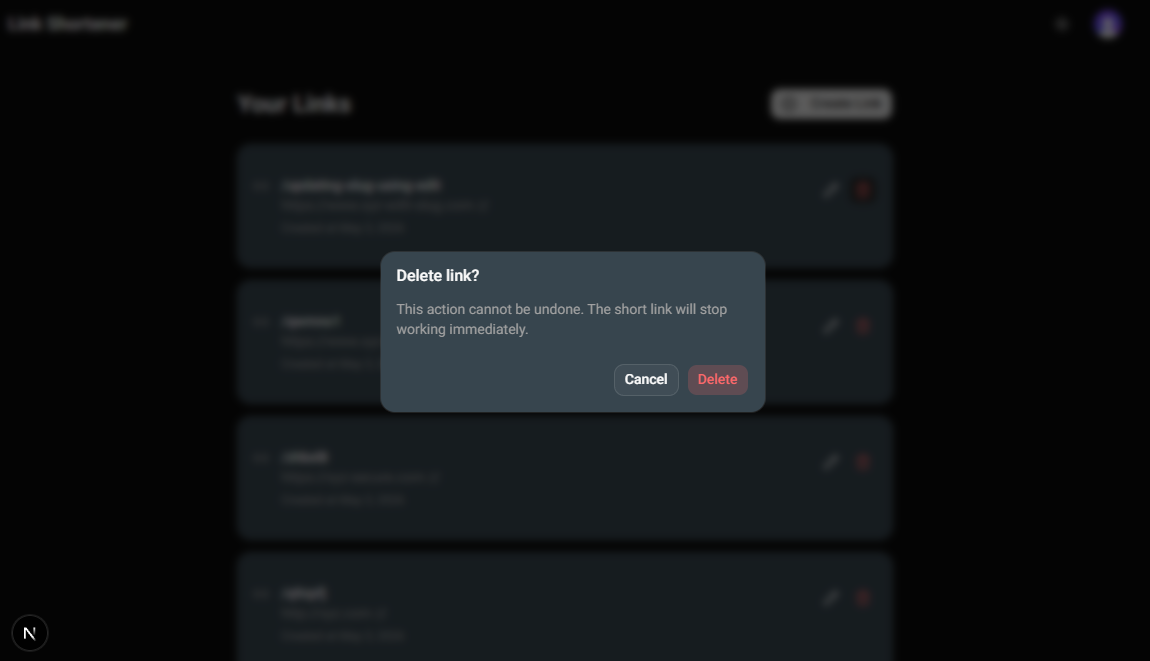
The link is deleted successfully:
Redirect Links
The final functionality that we will implement is the redirect when accessing a shortened URL. The API route will look up the slug in the database and perform a redirect to the original URL if it finds a match.
Open a new conversation in Copilot chat, set mode to Agent, and provide the prompt below:
Implement the redirect function for each link item so that visiting
/{slug}(e.g.,/github) redirects to the original URL, without affecting/dashboardor other app routes.For Database/schema changes:
- Do not use
drizzle-kitCLI commands to generate or apply migrations.- Use Neon MCP server tools to apply schema changes directly to the database.
- Still update schema.ts to keep the TypeScript types in sync with the database.
Routing and API:
- Implement an API route handler (e.g.,
/api/redirect/[slug]) that performs the redirect logic.- Configure
next.config.tsso that requests to/{slug}are internally rewritten to/api/redirect/[slug].- Ensure the
/{slug}route only matches valid slug patterns.- The rewrite should only apply to valid slugs to avoid conflicts with other routes.
- The rewrite must not affect
/dashboard,/, or any other defined pages/routes.Whenever the route handler is hit:
- Only accept GET requests; return a
405 Method Not Allowedfor other methods.- Extract the slug from the request parameters.
- Validate and sanitize the slug.
- Query the database for a link with the matching slug.
If a link is found:
- Atomically increment the click count for that link in the database.
- Redirect the user to the original URL using a 301 (permanent) or 302 (temporary) HTTP status code.
- Default to 302 unless the link is marked as permanent.
- The redirect should be performed using an HTTP redirect response.
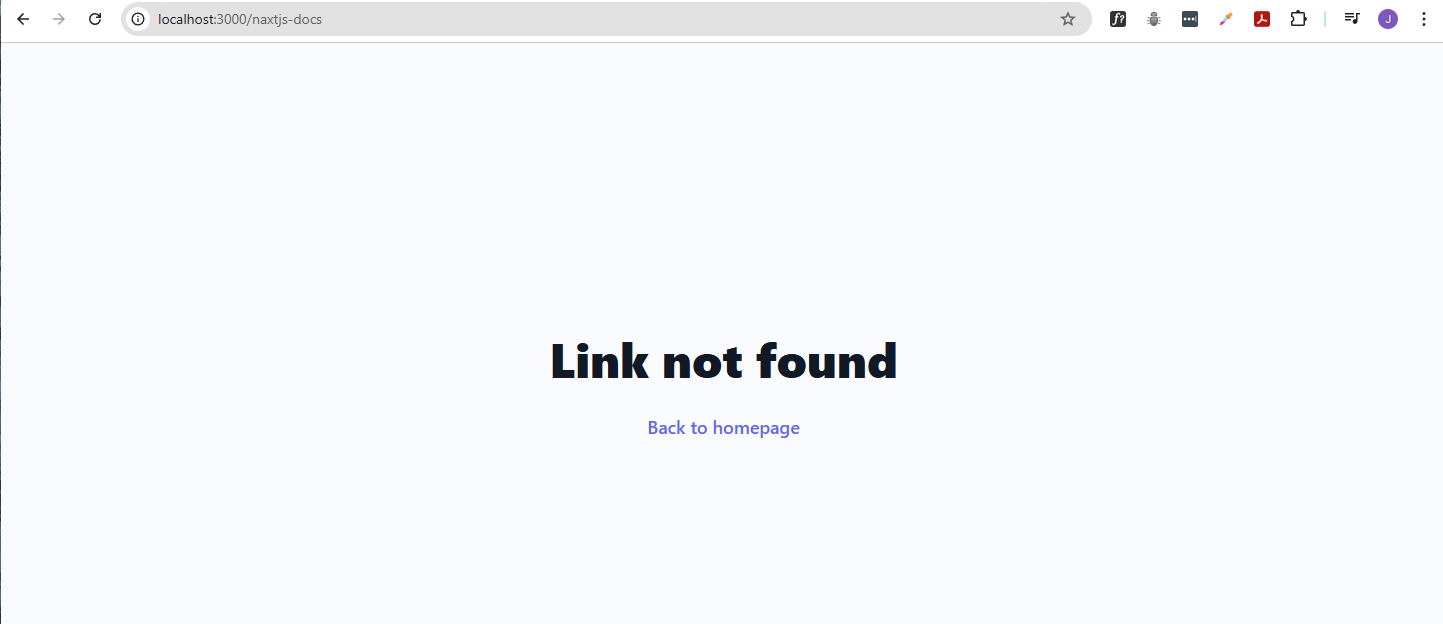
If no link is found:
- Return a 404 response with an HTML page displaying the message “Link not found”
- The text should be in large bold text, centered on the page, and styled in a user-friendly manner.
- It should also include a link back to the homepage.
Handle any potential errors gracefully, log them, and return appropriate error responses.
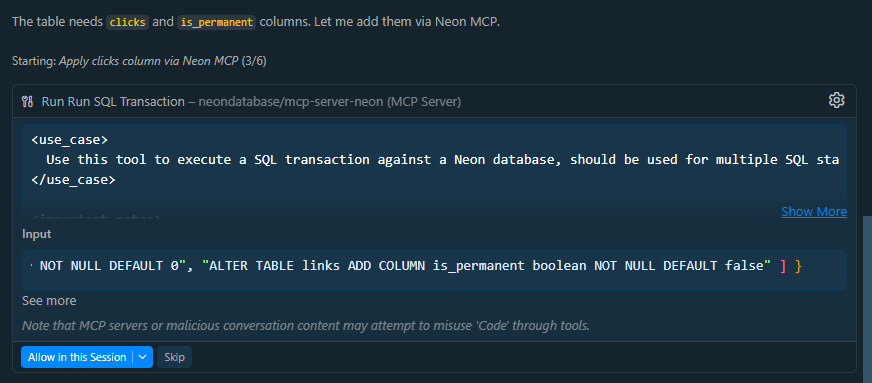
Behind the scenes, the agent will handle click tracking and manage permanent or temporary redirect flags. Implementing these features may require schema changes, which should be applied using the Neon MCP Server.
Note that the agent may request your permission to execute SQL commands directly on the database.
Once its done, it will show the updated/created files:
app/api/redirect/
└── [slug]
    └── route.ts

data/
└── links.ts

db/
├── schema.ts

next.config.ts
Note: Make sure to review the code changes done by the agent. DO NOT blindly accept all changes without review, as the agent can make mistakes or introduce bugs.
After reviewing the changes, rerun the development server and verify in the browser by going to one of the shortened URLs:
For example:
http://localhost:3000/nextjs-docs
Redirects to:

If we try to access a non-existent slug, it returns the "Link not found" message along with a link back to the homepage.
http://localhost:3000/naxtjs-docs
Ready to Go Live
But first, we need to ensure that the application is secured and safe to be used in production.
Email Verification
In development, Clerk allows us to use test email addresses that don't require actual email verification. However, in production, we need to set up an email provider to send real verification emails to users.
To set up email verification in production:
-
Log in to Clerk dashboard and select your application.
-
Go to Configure → User & Authentication → Email.
-
Enable Verify at sign-up and choose Email verification code.
-
Enable Restrict changes.
-
Under Sign-in with email, enable Email verification code.
-
Click Save.

-
Go to the Password tab, enable Client Trust, then click Save.
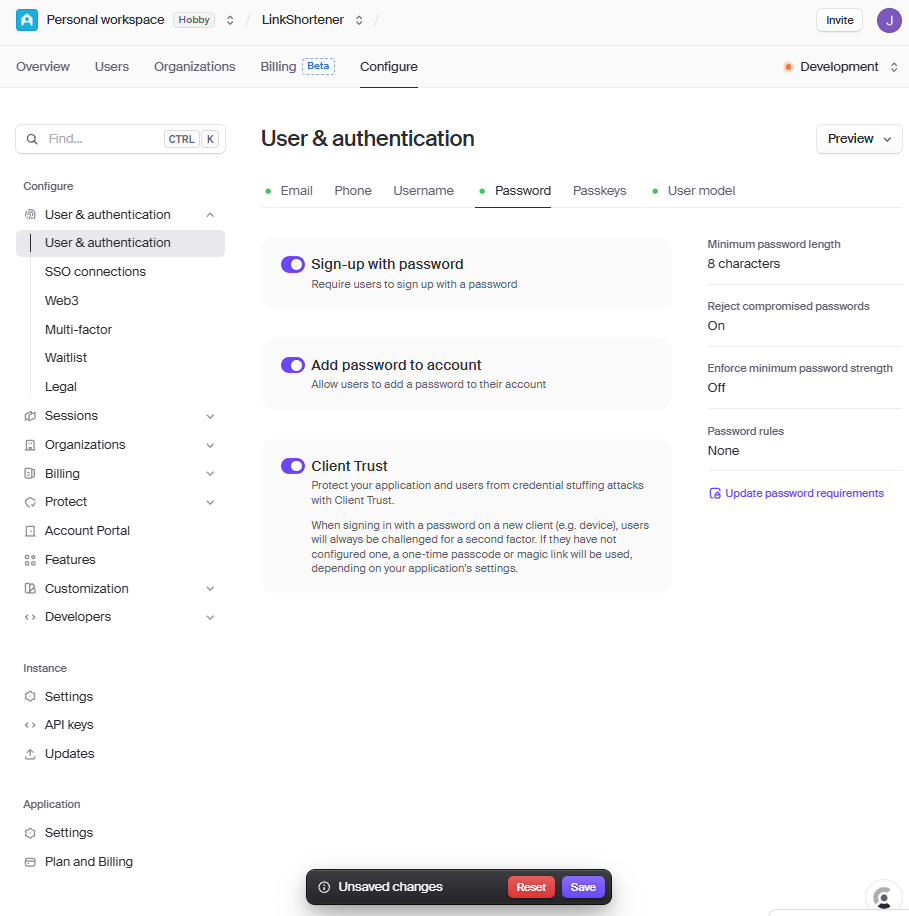
-
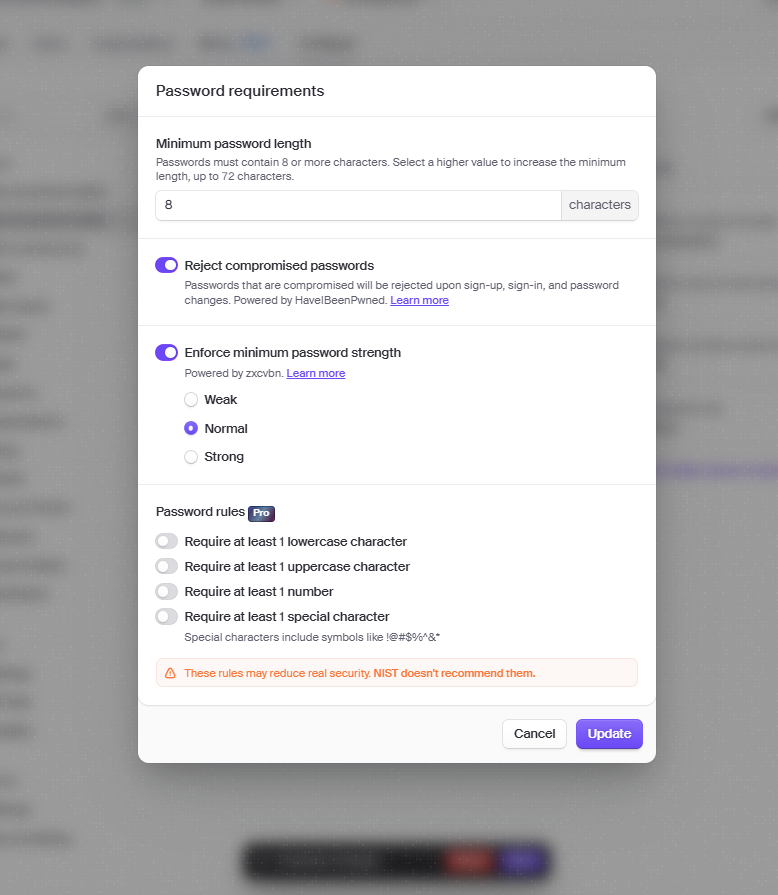
Still in Password, click Update password requirements.
Enable Enforce minimum password length, then click Update → Save.
To verify, navigate to the app in the browser and sign up.
-
It will open a popup window asking you to verify your email address.
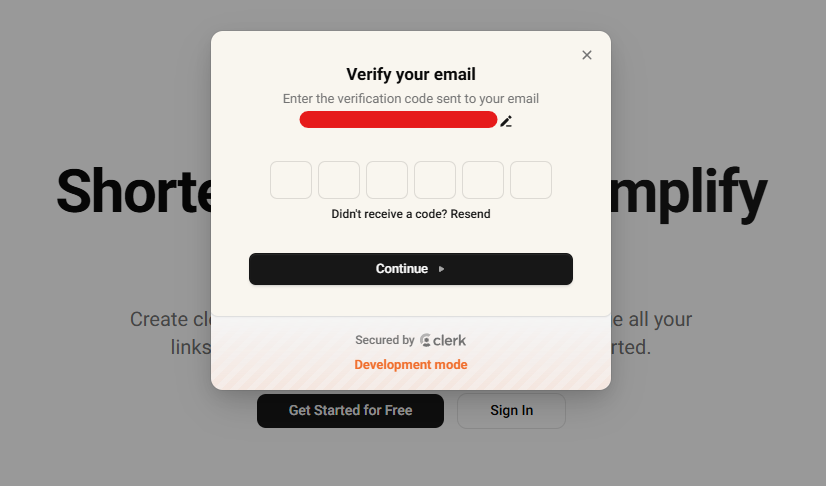
-
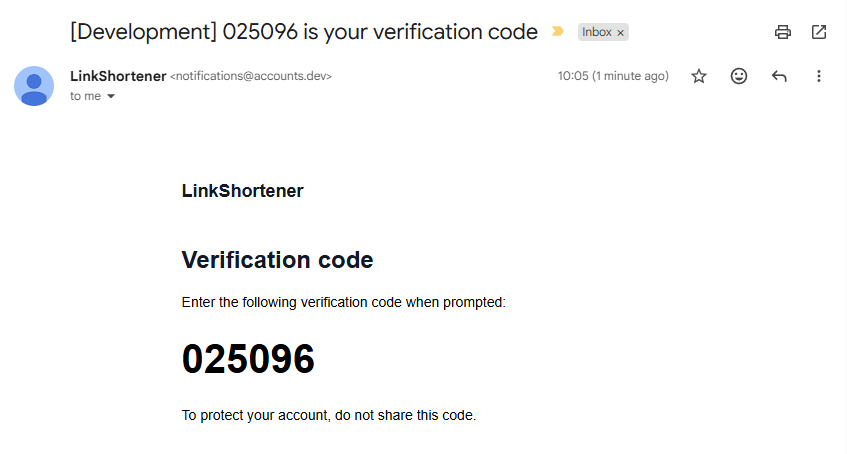
Check your email inbox for the verification code:
-
Go back to the popup window, enter the verification code, and click Verify.
After successfully signing up, you will be redirected to your dashboard.
Exclude .env from Git Tracking
Currently, the project is set up to use environment variables from a .env file, which works well for local development. However, when deploying to Vercel, we need to set these environment variables in the Vercel dashboard to ensure that our application can access them in the production environment.
-
Add
.envto.gitignoreif it’s not already there.## .gitignore.env* -
Create a
.env.examplefile for documentation.Commit and push to Github.
## .env.exampleNEXT_PUBLIC_CLERK_SIGN_IN_FORCE_REDIRECT_URL=/dashboardNEXT_PUBLIC_CLERK_SIGN_UP_FORCE_REDIRECT_URL=/dashboardNEXT_PUBLIC_CLERK_PUBLISHABLE_KEY=ENTER_PUBLISHABLE_KEY_HERECLERK_SECRET_KEY=ENTER_SECRET_KEYDATABASE_URL=ENTER_DATABASE_URL_HERESEED_USER_ID=ENTER_SEED_USER_ID_HERE
Hosting the Application
There are many free hosting options that support Next.js applications, such as:
- Vercel
- Netlify
- AWS
- Render
- Railway
For this project, I've decided to use Vercel because of its seamless integration with Next.js, easy deployment process, and built-in support for environment variables and serverless functions.
-
Sign-up for a free account here: Vercel
-
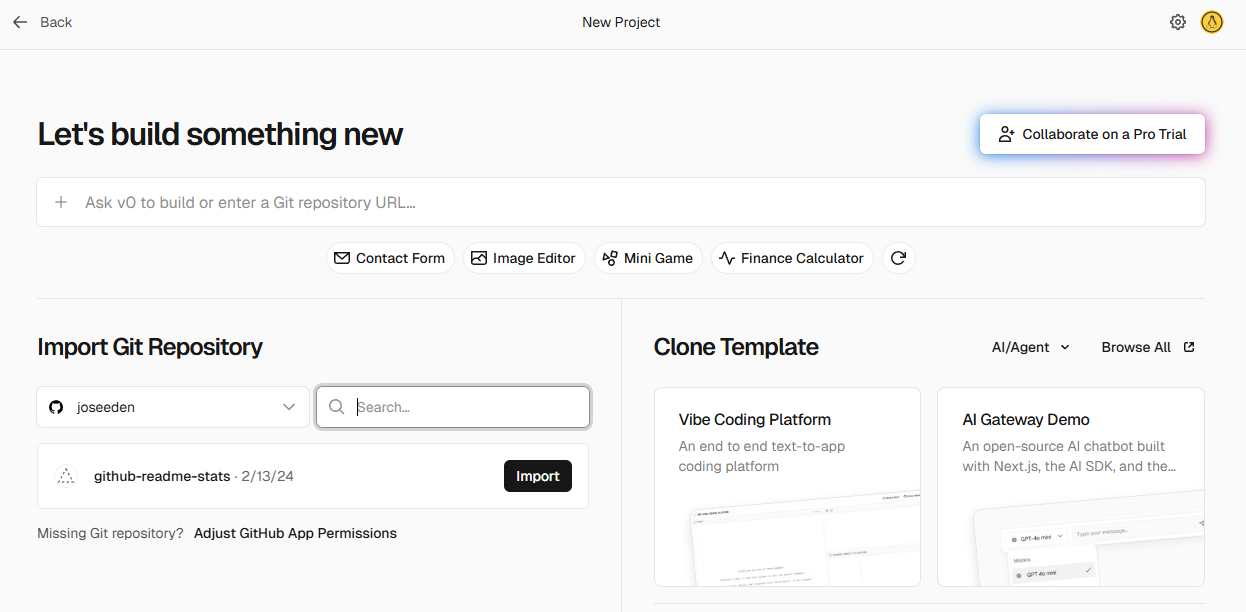
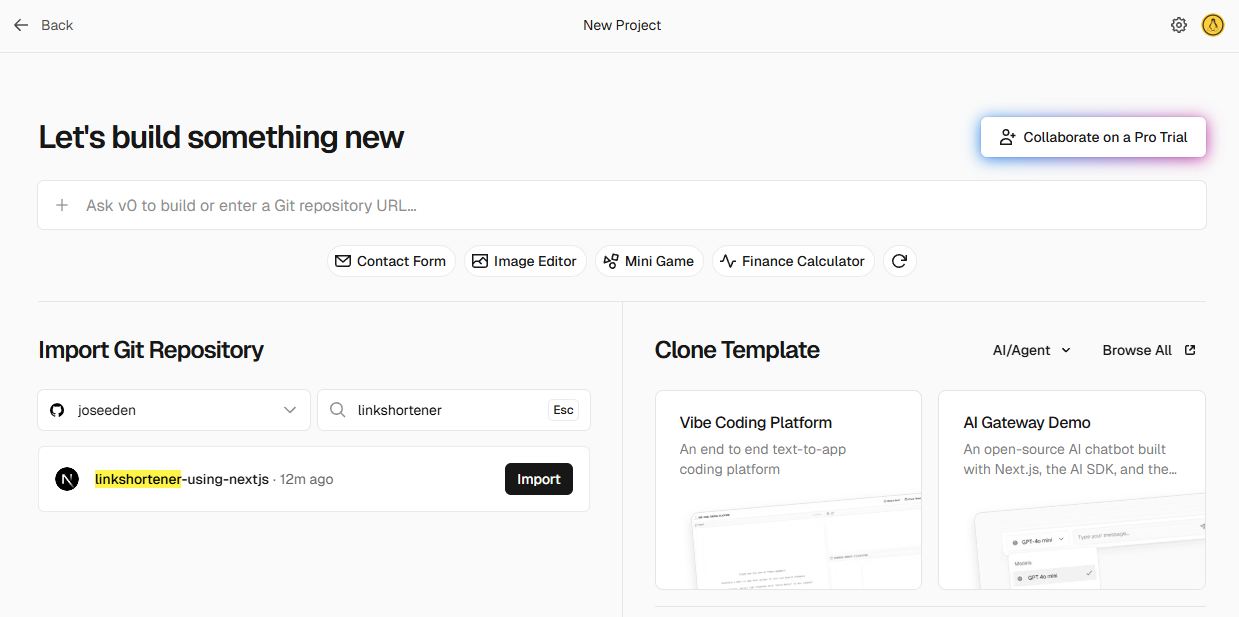
Click New Project and import your GitHub repository.
-
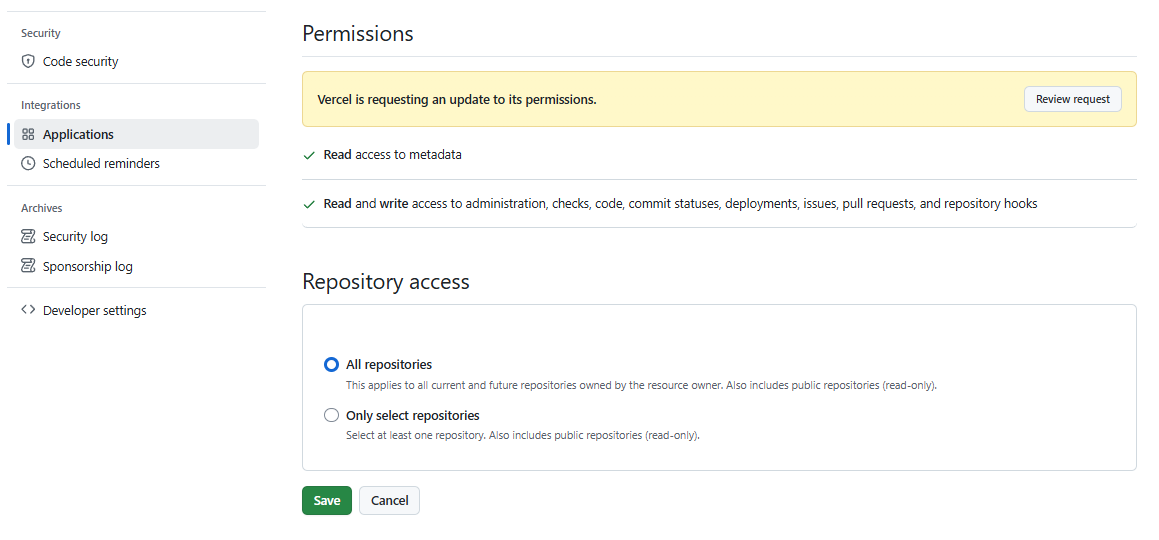
If the repositories doesn't appear, adjust the permissions in GitHub.
When you click Adjust permissions, it will redirect you to your Github account.
Choose All repositories for repository access and click Save.
-
Go back to Vercel and click Refresh. Your repository should now appear in the list. Click Import next to your repository.
-
In the project settings, it will automatically set the branch to
mainand use Next.js as the preset.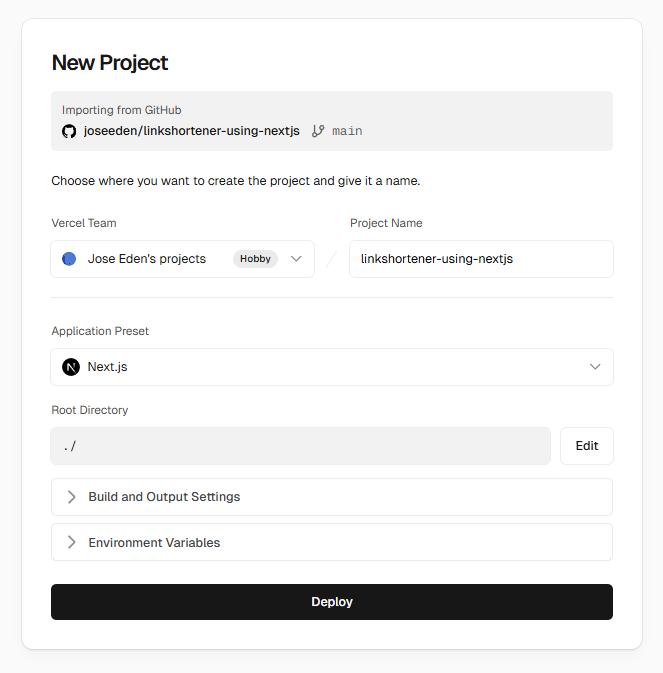
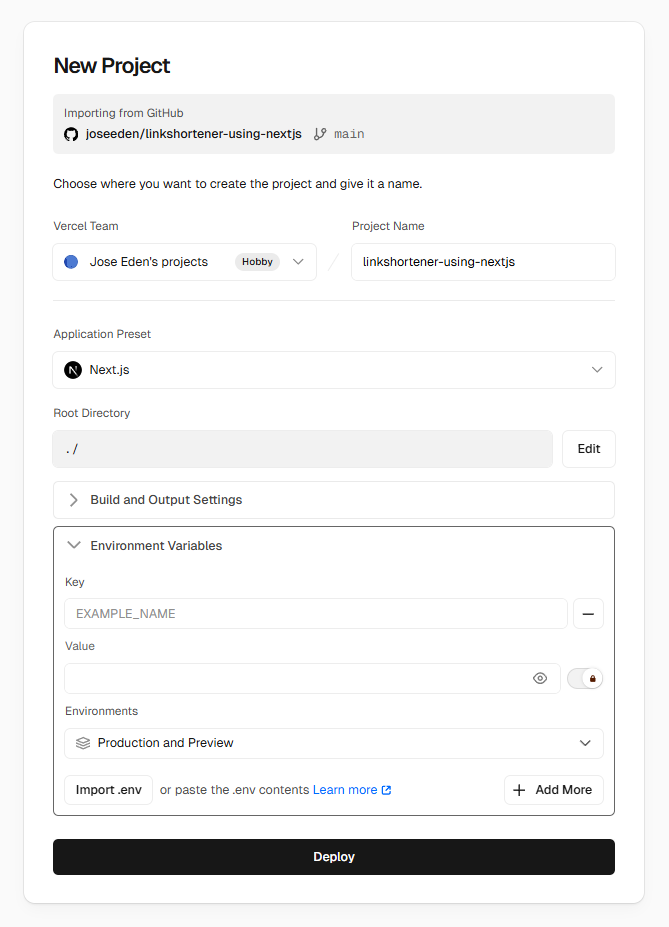
-
Open Environment Variables and add the necessary environment variables from your
.envfile. Make sure to set the correct values for each variable.UPDATE: You can also choose Import .env, select the
.envfile, and it will auto-populate the environment variables for you.Once all the environment variables are set, click Deploy.
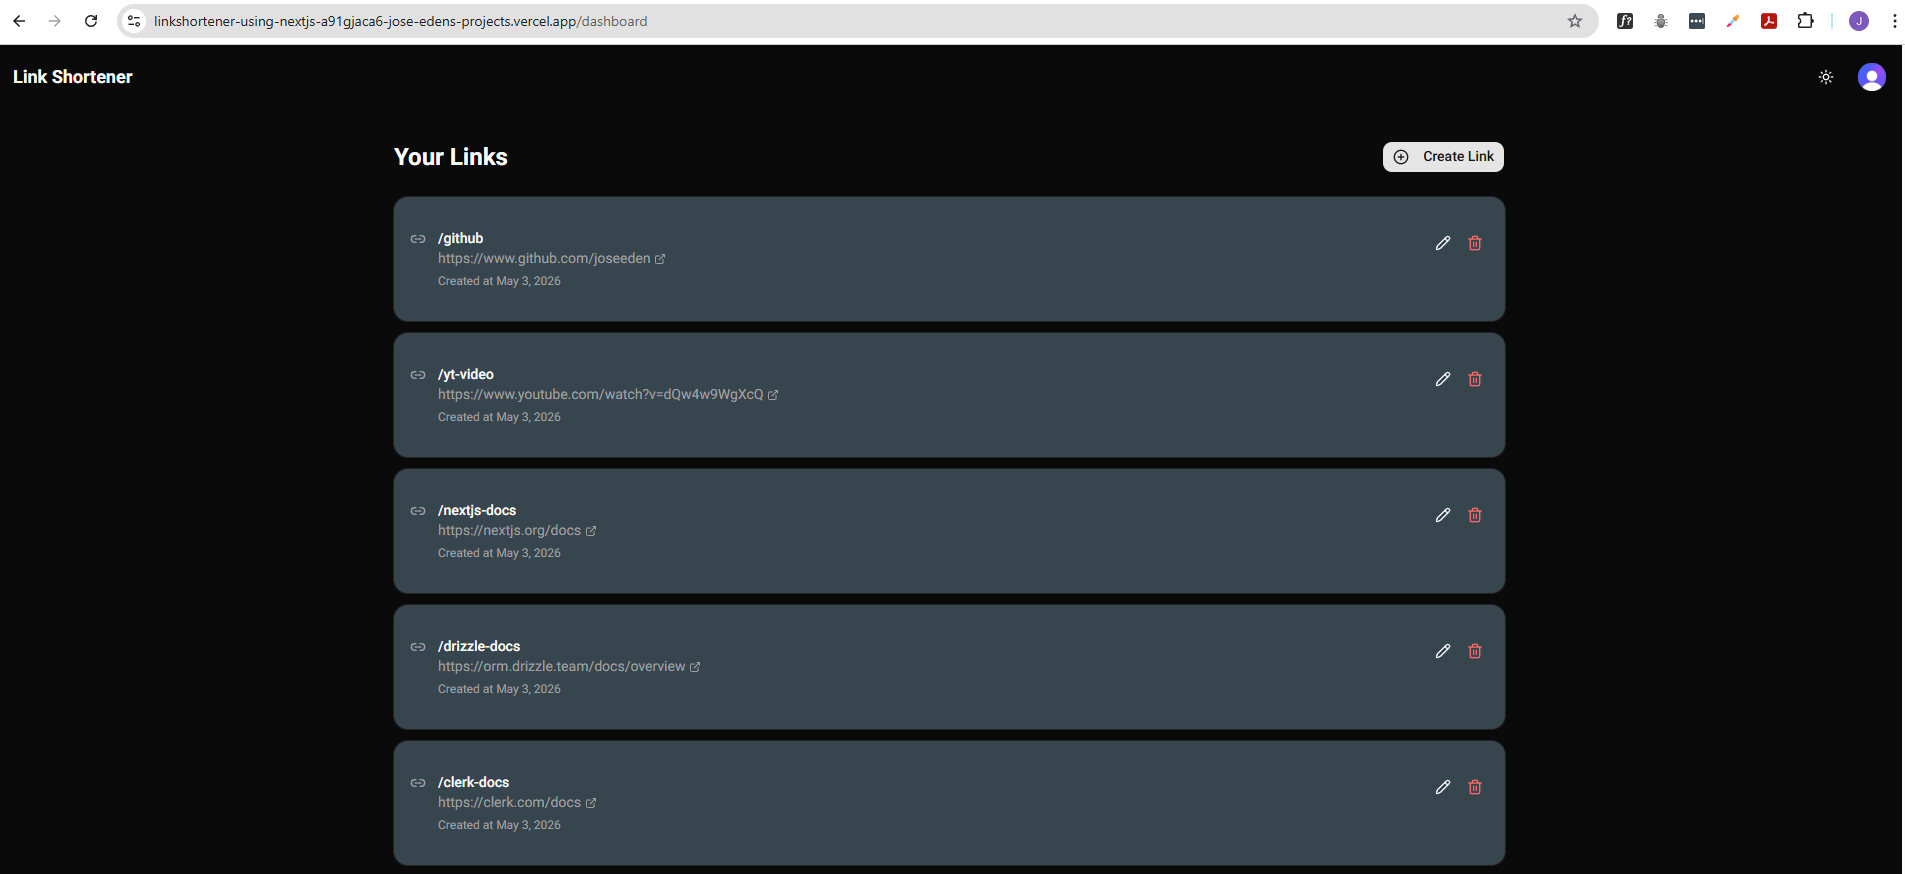
-
After the deployment is complete, click Visit to see your live application.
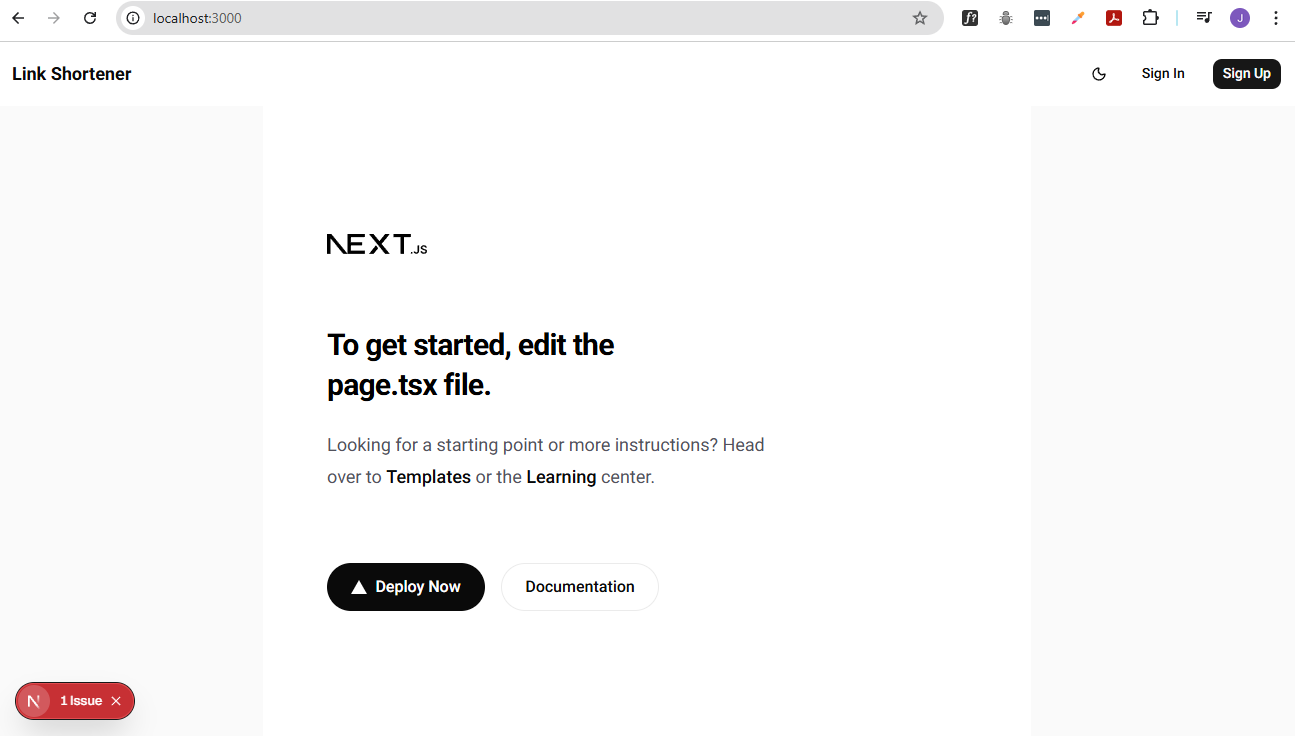
Application is now live.

Testing the Application
To test the application in production, sign up for a new account using the live URL and verify that all core features are functioning as expected:
- Email verification
- Creating links
- Editing links
- Deleting links
- Redirecting shortened URLs
Testing with dummy data: Seeding is a manual process that can be executed locally or through a one-time script, rather than being included in the production build. To seed the production database:
-
Log in to Clerk and retrieve the user ID associated with your email address
-
Update the SEED_USER_ID value in your local .env file
-
Run the seed script locally to populate the production database
npx tsx db/seed.ts
After running the script:
- Check the Neon database to confirm that the seed data was successfully inserted
- Verify the live application to ensure that the seeded links appear correctly in the dashboard
Troubleshooting
Node.js Version Error
You may encounter this error during setup:
You are using Node.js 18.20.5. For Next.js, Node.js version ">=20.9.0" is required.
Error running typegen: Error: next typegen exited with code 1
    at ChildProcess.<anonymous> (/home/joseeden/.npm/_npx/cc2145a2fe1558fa/node_modules/create-next-app/dist/index.js:74:204521)
    at ChildProcess.emit (node:events:517:28)
    at maybeClose (node:internal/child_process:1098:16)
    at ChildProcess._handle.onexit (node:internal/child_process:303:5)
Success! Created linkshortener at /path/to/linkshortener
The project was created successfully, but the failure happened after scaffolding, during the type generation step.
The real problem is this line:
You are using Node.js 18.20.5. For Next.js, Node.js version ">=20.9.0" is required.
So your app exists, but it won’t run properly until you upgrade Node.
-
Verify current environment.
node -vnpm -vnpx --versionExample output:
joseeden@TOWER-1:submodules$ node -vv18.20.5joseeden@TOWER-1:submodules$ npm -v10.9.2joseeden@TOWER-1:submodules$ npx --version10.9.2 -
Since the project got created successfully, check what got installed:
cd /path/to/linkshortenercat package.json | grep nextExample output:
joseeden@TOWER-1:linkshortener$ cat package.json | grep next"dev": "next dev","build": "next build","start": "next start","next": "16.2.4","eslint-config-next": "16.2.4",Alternative verification:
npm list nextExample output:
joseeden@TOWER-1:linkshortener$ npm list nextlinkshortener@0.1.0 /path/to/linkshortener└── next@16.2.4 -
In my case, I have Node 18.20.5 installed, which is not compatible with Next.js 16.2.4.
Node: 18.20.5 ❌ (too old)npm / npx: fineNext.js: 16.2.4 → requires Node ≥ 20.9.0Next.js v16 simply doesn’t support Node 18 anymore. I have to upgrade Node to version 20.9.0 or higher if I want to use Next.js v16 properly.
Simply upgrade Node:
nvm install 20nvm use 20node -v -
Optional: Set Node 20 as default so you don’t fall back to 18 later:
nvm alias default 20Optional project-level safety:
echo "20" > .nvmrcSo anytime you enter:
nvm useIt will automatically switch to Node 20.
Output:
Found '/path/to/linkshortener/.nvmrc' with version <20>Now using node v20.20.2 (npm v10.8.2) -
After upgrading Node, do a clean reinstall of dependencies (required).
cd /path/to/linkshortenerrm -rf node_modules package-lock.jsonnpm installnpm run dev
Hot Reload Not Working with WSL
If you’re using WSL and your project files are stored under /mnt/c/..., you may encounter issues with hot reload not working properly when running the development server.
What this means: When you make changes to your code, the browser does not automatically refresh to reflect those changes (even though you refresh the browser itself).
Possible solutions (No. 3 is what I ultimately use)
-
Edit the
package.jsonfile and update thedevscript to set theWATCHPACK_POLLINGtotruewhen running the development server.This forces Webpack to use polling to watch for file changes, which can be more reliable in certain environments like WSL.
{"name": "linkshortener","version": "0.1.0","private": true,"scripts": {"dev": "WATCHPACK_POLLING=true next dev","build": "next build","start": "next start","lint": "eslint"},....warningThis fix did not work when running
npm run dev. It actually caused the hydration mismatch error in the browser. -
Move the project files into the Linux filesystem (e.g., under
/home/username/...) instead of the Windows filesystem (/mnt/c/...).This is the recommended solution for WSL users, as it provides better performance and compatibility with development tools.
Simple rule of thumb: If you’re using WSL, always keep your project files in the Linux filesystem to avoid issues with file watching and hot reload.
Project location Hot reload Stability /home(WSL)✅ perfect ✅ best /mnt/c(Windows)❌ flaky ⚠️ meh /mnt/c+ polling✅ works ⚠️ unstable -
Closing the old terminal running the dev server and opening a new one.
When
npm run devis ran, it spawns multiple processes in the terminal. If I need to re-run the command, I would have to get the PID of each of those processes and runsudo kill -9 <PID>.Instead of manually killing each one, I can simply close the terminal and open a new one, which effectively kills all the processes related to the old dev server and allows me to start fresh and run
npm run devagain without any issues.This is what I ended up doing since I already have multiple Copilot sessions running and moving the files to a new directory would mean deleting those sessions.
React Hydration Mismatch
You may see an issue in the web browser when you run the development server.
When you click the issue details, you may see a hydration mismatch error like this:
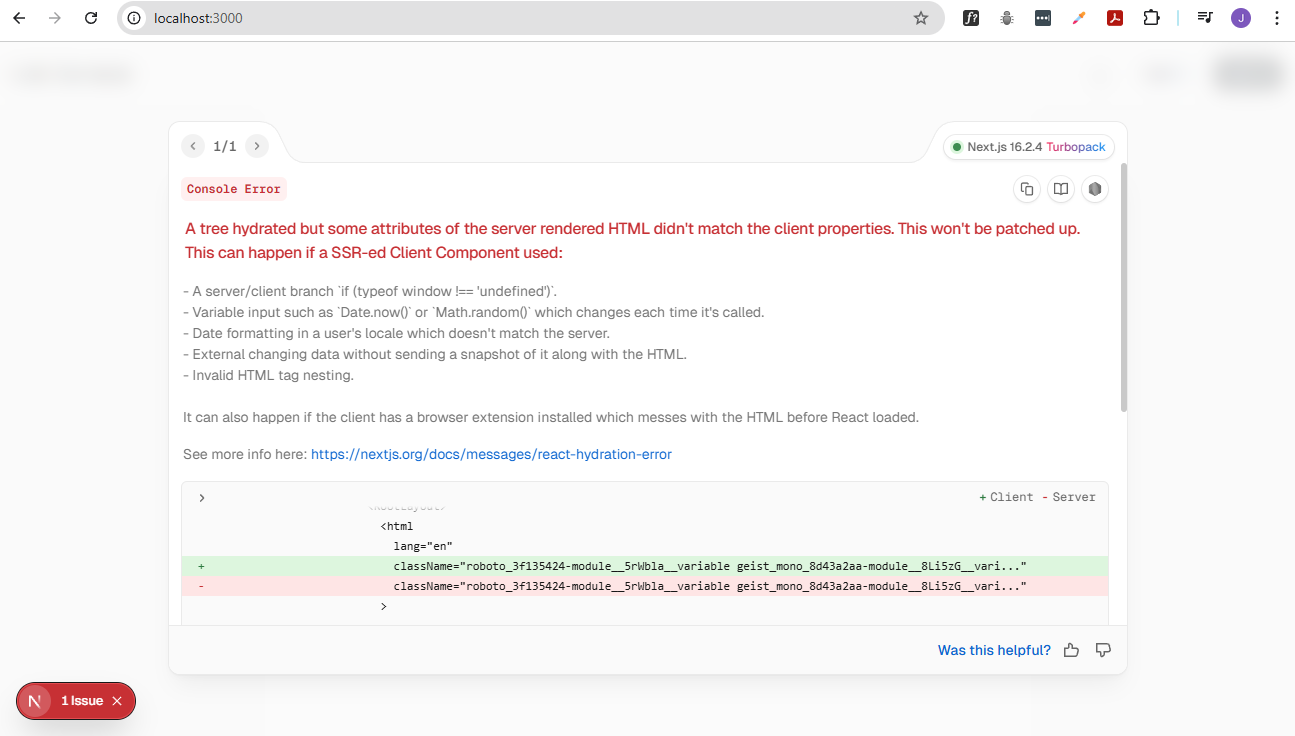
This is a classic React hydration mismatch in Next.js, and the diff already points to the real issue:sn
+ Client className="roboto_... geist_mono_..."
- Server className="roboto_... geist_mono_..."
At first glance they look identical, but React is telling you they’re not exactly the same string at runtime. The problem is almost certainly coming from dynamic font class generation (e.g. next/font) in the layout.tsx.
className={`${roboto.variable} ${geistMono.variable} h-full antialiased`}
Those .variable values are generated at build/runtime, and if anything causes them to differ between server and client, hydration breaks.
The easiest fix is to revert the fix for Hot Reload Not Working with WSL issue and use use next dev:
{
  "name": "linkshortener",
  "version": "0.1.0",
  "private": true,
  "scripts": {
    "dev": "next dev",
    "build": "next build",
    "start": "next start",
    "lint": "eslint"
  },
  ...
}
Since I've already have multiple Copilot sessions and moving the files to a new directory would mean deleting those sessions, I chose to simply kill the old terminal running the npm run dev and open a new terminal and re-run the same command (closing the old terminal effectively kill all the processes, which is better than stopping the processes individually).
UPDATE: This did not fully solved the issue as I still see the hydration error in the browser when I run npm run dev. The fix I did was to update the ./app/layout.tsx file and move the font variable classes from <html> to <body>.
Before:
return (
  <html
    lang="en"
    className={`${roboto.variable} ${geistMono.variable} h-full antialiased`}
  >
    <head>
      <script
        ....
      />
    </head>
    <body className={"min-h-full flex flex-col"}>
After the fix:
return (
  <html
    lang="en"
    className="h-full antialiased"
  >
    <head>
      <script
        ....
      />
    </head>
    <body className={`min-h-full flex flex-col ${roboto.variable} ${geistMono.variable}`}>
This solved the initial hydration mismatch error in the browser BUT now it's complaining about the dark class on the <html> element. The script in <head> adds the dark class to <html> on the client, but on the initial server render, it is not present. This causes a mismatch.
Best practice:
- Avoid adding classes to
<html>with client-only scripts to prevent hydration mismatches. - Instead, use a React effect to set the theme class after hydration.
- Additionally, use a theme provider that handles SSR/CSR consistency.
Fix:
Let the ThemeProvider component handle the dark mode logic and class management. Then remove the <script> in <head> that adds the dark class to <html>. This way, the theme class will be applied consistently on both server and client without causing hydration issues.
Before:
return (
  <html
    lang="en"
    className="h-full antialiased"
  >
    <head>
      <script
        dangerouslySetInnerHTML={{
          __html: `
            (function() {
              var t=localStorage.getItem('theme');
              if (t === 'dark'||(t===null && window.matchMedia('(prefers-color-scheme: dark)').matches)) {document.documentElement.classList.add('dark')}
            })()`,
        }}
      />
    </head>
After the fix:
return (
  <html
    lang="en"
    className="h-full antialiased"
  >
    <head />
Closed the terminal to kill all the processes related to the old dev server, then opened a new terminal and ran npm run dev again.
This solved the issue BUT now it caused the fonts to revert back to Times New Roman. See Hydration Mismatch and FOUT section below for the fix.
Hydration Mismatch and FOUT
When a hydration mismatch occurs, React discards the server-rendered HTML and re-renders the app on the client. This can cause a flash of unstyled text (FOUT) if the initial HTML does not have the correct font classes or styles, so the browser uses the default font (like Times New Roman) until React finishes rendering and applies the correct classes.
However, if you are using a CSS variable for your font (e.g., --font-roboto from next/font), you must set the font-family on the body element (not html) in your global CSS.
This is because the font variable class (e.g., .roboto_xxxxx-variable) is applied to <body>, so the variable is only available there and its descendants. Setting it on <html> will not work and will cause a fallback to Times New Roman.
@layer base {
  * {
    ....
  }
  body {
    @apply bg-background text-foreground;
    font-family: var(--font-roboto), system-ui, sans-serif;
  }
}
Sign-in briefly redirects to homepage before dashboard
After sign-in or sign-up via a Clerk modal, the app briefly shows the homepage (/) before redirecting to /dashboard. The correct behavior is to go directly to /dashboard.
Root causes:
-
Clerk's modal, after sign-in, does a client-side navigation back to the current page (
/) before any redirect fires. -
Server-side redirect via
auth()only fires on a full server request.It does not prevent the client from briefly painting
/after modal close. -
Props like
afterSignInUrl/afterSignUpUrlare not valid Clerk v7 props.they get forwarded to child DOM elements (e.g.
Button), causing React warnings and no redirect effect.
Three layers of fix were applied:
-
Environment variables (
.env) — highest priority, recommended by Clerk docsNEXT_PUBLIC_CLERK_SIGN_IN_FORCE_REDIRECT_URL=/dashboardNEXT_PUBLIC_CLERK_SIGN_UP_FORCE_REDIRECT_URL=/dashboard -
Added
ClerkProviderprops inapp/layout.tsx<ClerkProviderappearance={{ theme: shadcn }}signInForceRedirectUrl="/dashboard"signUpForceRedirectUrl="/dashboard"> -
Used
forceRedirectUrlon allSignInButton/SignUpButtoncomponentsThe correct Clerk v7 prop is
forceRedirectUrl(notafterSignInUrl— that doesn't exist in v7 and leaks to DOM children).// app/page.tsx and app/layout.tsx<SignInButton mode="modal" forceRedirectUrl="/dashboard"><Button>Sign In</Button></SignInButton><SignUpButton mode="modal" forceRedirectUrl="/dashboard"><Button>Sign Up</Button></SignUpButton> -
Added server-side guard in
app/page.tsxexport default async function Home() {const { userId } = await auth()if (userId) redirect('/dashboard')// ...} -
Utilized
AuthRedirectclient component ( eliminates the flash entirely)The above layers handle server requests and new page loads but the flash still occurs because the page content renders briefly on the client before Clerk's state updates. The fix is a
'use client'component that wraps all page content and blocks rendering until Clerk confirms the user is not signed in.components/AuthRedirect.tsx** (new file):'use client'import { useAuth } from '@clerk/nextjs'import { useRouter } from 'next/navigation'import { useEffect } from 'react'export function AuthRedirect({ children }: { children: React.ReactNode }) {const { isSignedIn, isLoaded } = useAuth()const router = useRouter()useEffect(() => {if (isLoaded && isSignedIn) {router.replace('/dashboard')}}, [isLoaded, isSignedIn, router])// Render nothing until Clerk has loaded and confirmed user is NOT signed in.if (!isLoaded || isSignedIn) return nullreturn <>{children}</>}app/page.tsx** - wrap all content with<AuthRedirect>:// Beforereturn (<main className="flex flex-1 flex-col">{/* page content */}</main>)// Afterreturn (<AuthRedirect><main className="flex flex-1 flex-col">{/* page content */}</main></AuthRedirect>)Why this works:
AuthRedirectreturnsnullwhileisLoadedis false (Clerk resolving) or whileisSignedInis true (redirect pending). The page content is completely blocked from rendering in either case, a just-signed-in user never sees it.
What does NOT work:
| Approach | Why it fails |
|---|---|
afterSignInUrl / afterSignUpUrl on SignInButton | Not valid Clerk v7 props — forwarded to DOM child, causing React warnings |
asChild on SignInButton / SignUpButton | Clerk buttons don’t support asChild — results in a TypeScript error |
asChild on Button with <span> child | Passes Clerk props to <span>, causing the same React DOM warning |
Server-side auth() redirect alone | Only fires on full server requests, not after client-side modal close |
AuthRedirect returning null without wrapping children | Page content still renders while redirect is pending |