Deploy Serverless Application using Jenkins
Overview
Using Jenkins to deploy a serverless application simplifies automation and enables continuous integration and delivery (CI/CD) for efficient deployment.
- Trigger deployments on code changes
- Use AWS SAM CLI or AWS CLI for build and deploy steps
- Set environment variables for AWS access
- Add testing and validation before deployment
To deploy an AWS Serverless Application Model (SAM) application manually first, you can check out the previous lab on AWS SAM.
Pre-requisites
Accounts needed:
On your local computer and on the Jenkins server, install:
If you are using Ubuntu 22.04, you might only be able to install Python 3.10.
The SAM template.yaml is using Python 3.12 as runtime. If you want to use a different Python version in your Jenkins server, you need to change the runtime.
If you're using EC2 instance for the Jenkins server, make sure the security group:
- Allows SSH from within the subnet
- Allows SSH from your IP
- Allows 5000 from your IP
- Allows 8080 from
0.0.0.0/0
You may encounter some network connectivity issues when connecting to the Linux machines and when attempting to trigger the webhook.
- SSH connections (from local to Linux machines) - uses port 22
- Access Jenkins UI (from local to Jenkins) - uses port 8080
- Access application UI (from local to Prod) - uses port 5000
- Trigger webhook (from Github to Jenkins) - uses port 8080
If specifying your IP doesn't work, you can use a wider range like 0.0.0.0.
Fork the Repository
The sample project can be found here:
https://github.com/joseeden/test-aws-sam-hello-app
In August 2021, Github removed support for using your account password from the cli. You can either use Personal Access Tokens (PAT) or SSH keys.
After you sign in to Github, fork the repo and confirm the details. Clone it to your local computer.
Configure Web Hook
On your Github repository, go to Settings > Webhooks > Add webhook. Specify the payload URL as:
http://<jenkins-ip>:8080/github-webhook/
Specify the details and click Update webhook.
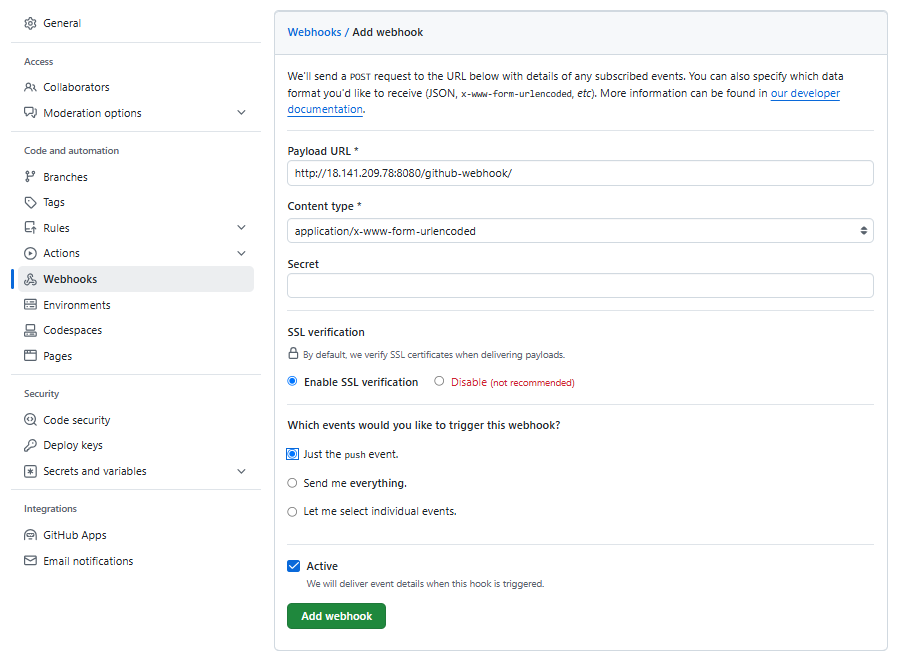
Once you configure the pipeline in the succeeding steps, you can check the Recent Deliveries.
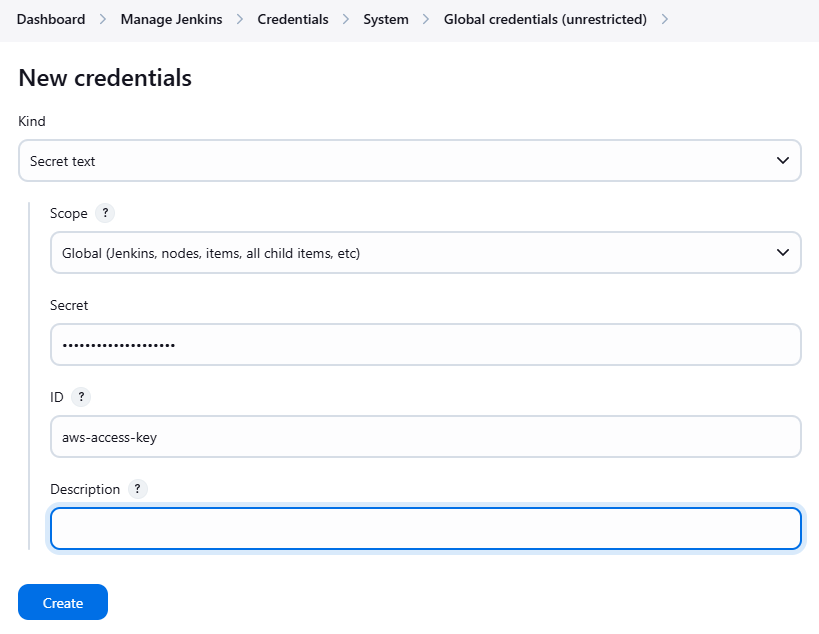
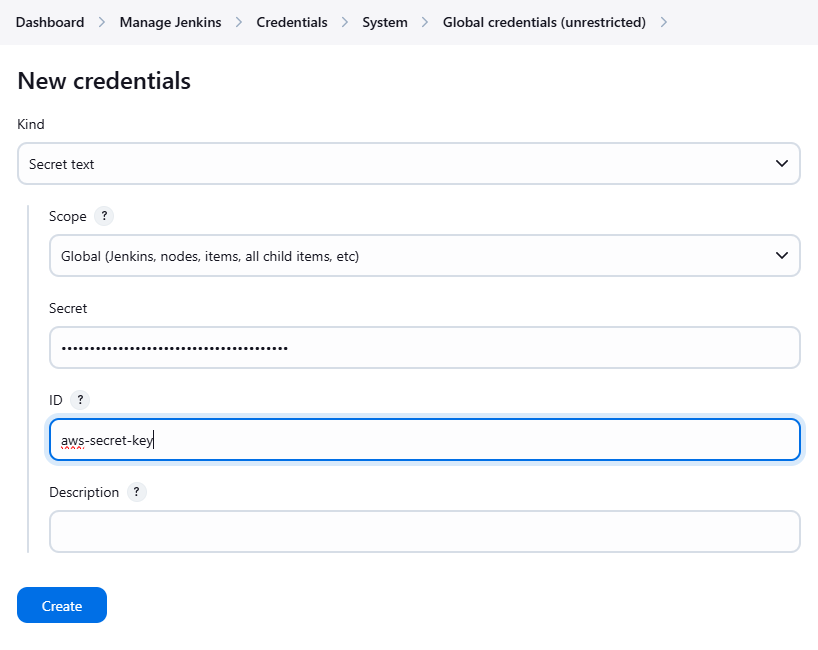
Generate Access Keys
To use the Jenkins server, first create an IAM user in the AWS Console and generate access keys for that user. Attach the AdministratorAccess policy to this user temporarily to ensure they have the necessary permissions to run. Once you generate the key, you should have the following:
- AWS Access Key
- AWS Secret Key
For more information, see IAM Users and Access Keys.
Configure Credentials on Jenkins
On the Jenkins dashboard, go to:
Manage Jenkins > Credentials > global > Add credentials
Configure the following details. For the Secret field, enter the AWS Access key generated from the previous step. Click Create.
Add a second credentials with the following details. Enter the AWS Secret key associated with the AWS Access key. Click Create.
Pipeline Stages
The pipeline steps:
- Checkout code
- Install dependencies
- Test code
- Build code (
sam build) - Deploy code (
sam deploy)
Note that the Jenkins server will need the AWS Credentials.
Setup the Pipeline
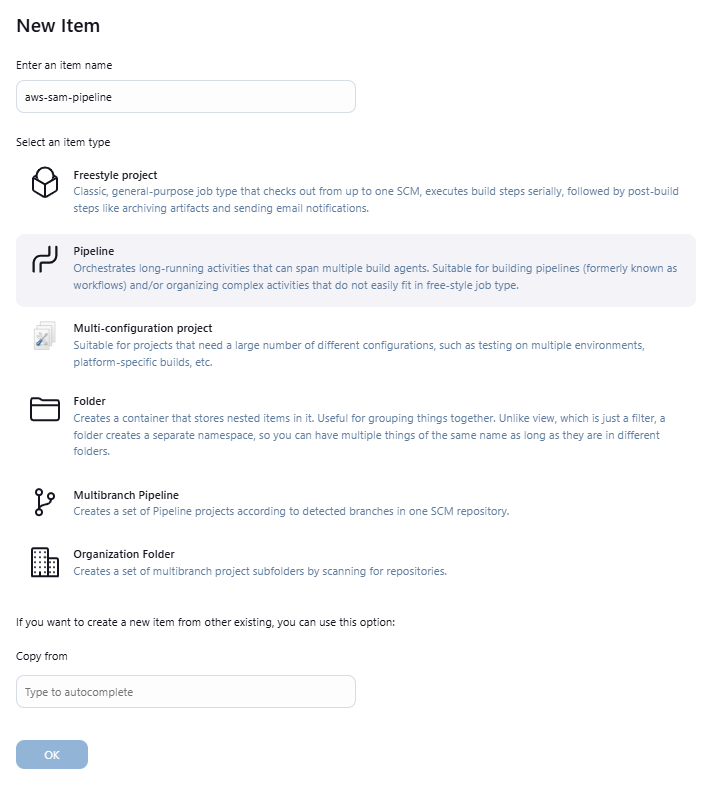
Back on the Jenkins dashboard, click New Item and enter "aws-sam-pipeline" for the Item name. Select Pipeline and click OK.
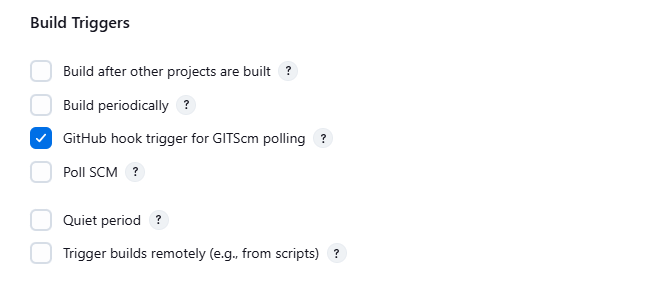
Check the box for the following and then click Save.
Build Triggers > Github hook trigger for GITScm polling
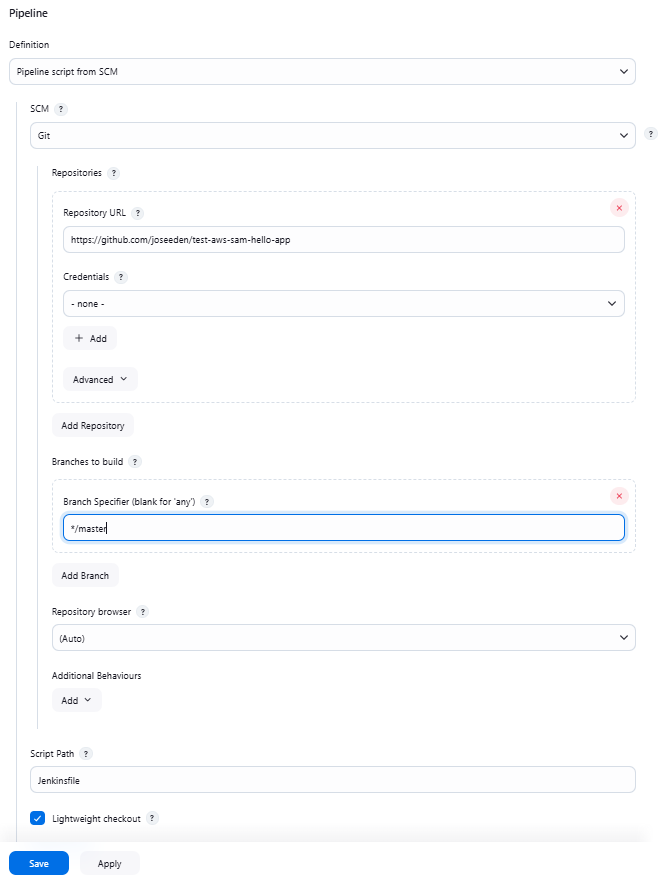
Next, configure the pipeline section. Note the branch name. The common name is main but your branch could be using master. You can also specify a different branch name here.
Click Create afterwards.
Pipeline > Pipeline script from SCM > SCM > Git > Repository URL > Enter URL
Set the branch to main
Set the ScriptPath > Jenkinsfile
Create the Jenkinsfile
Create the Jenkinsfile inside the project directory.
See file here: Jenkinsfile
Commit and Push
Back in your local machine, commit and push the changes you did.
git add .
git commit -m "Added Jenkinsfile. Testing webhook"
git push
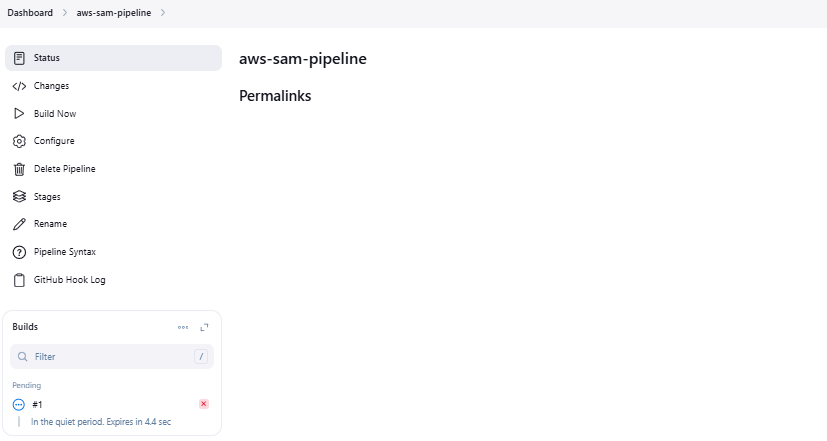
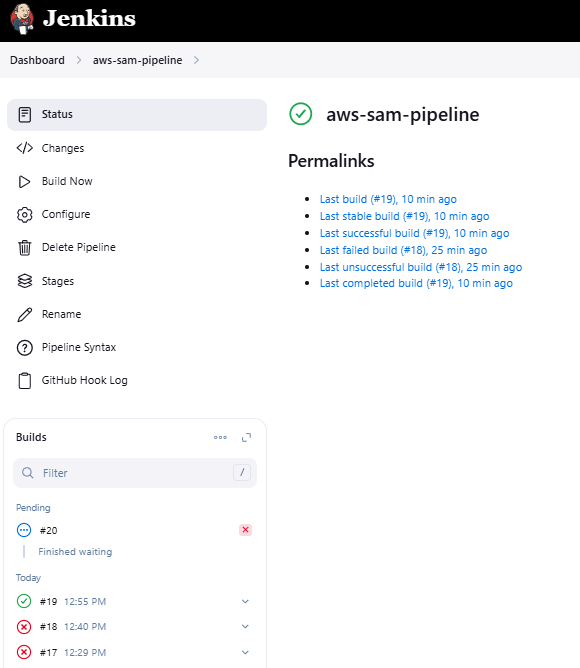
Go to the your job in the Jenkins dashboard. You should now see a job getting triggered. If successful, you should see a green check mark.
To see the logs, click the build and go to Console Output:
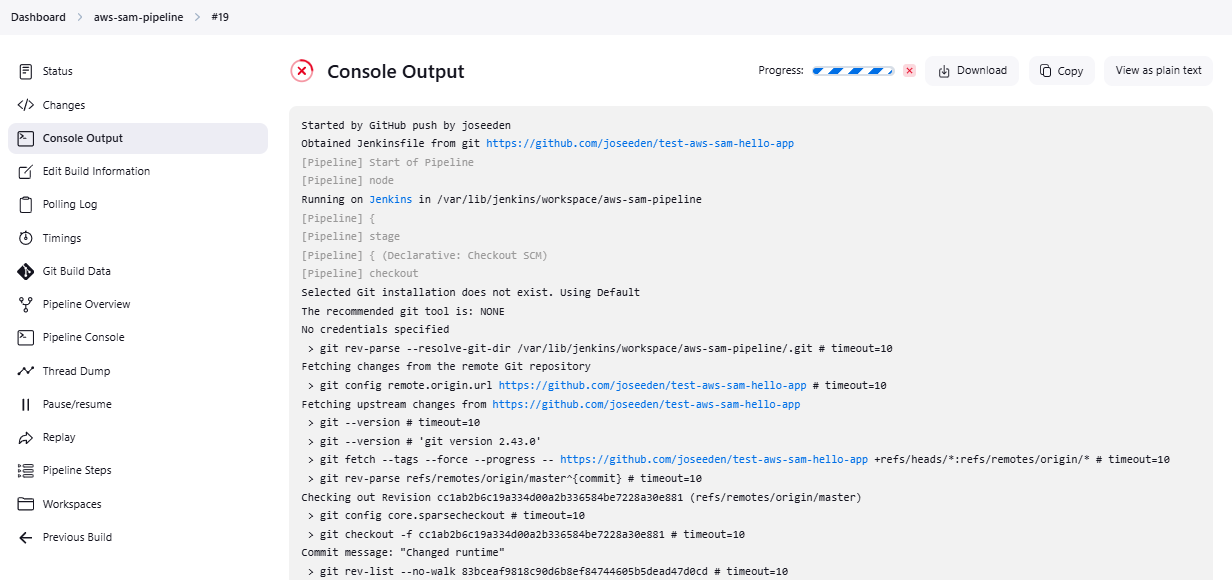
Scroll down to the bottom of the console output. If the deployment was successful, you should see:
CloudFormation outputs from deployed stack
-------------------------------------------------------------------------------------------------
Outputs
-------------------------------------------------------------------------------------------------
Key                 HelloWorldFunctionIamRole
Description         Implicit IAM Role created for Hello World function
Value               arn:aws:iam::841234567890:role/lambda-app-
HelloWorldFunctionRole-t5rDcBkC9uNs

Key                 HelloWorldApi
Description         API Gateway endpoint URL for Prod stage for Hello World function
Value               https://m9q48nk801.execute-api.us-east-1.amazonaws.com/Prod/hello/

Key                 HelloWorldFunction
Description         Hello World Lambda Function ARN
Value               arn:aws:lambda:us-east-1:841234567890:function:lambda-app-
HelloWorldFunction-S19DzuZbdDov
-------------------------------------------------------------------------------------------------


Successfully created/updated stack - lambda-app in us-east-1
Copy the HTTPs URL, open a web browser, and paste the URL.

Test the App
Go back to the project directory and open hello_world/app.py. Change "hello world v2" to "Happy weekend!"
import json

# import requests


def lambda_handler(event, context):


    return {
        "statusCode": 200,
        "body": json.dumps({
            "message": "Happy weekend!",
            # "location": ip.text.replace("\n", "")
        }),
    }
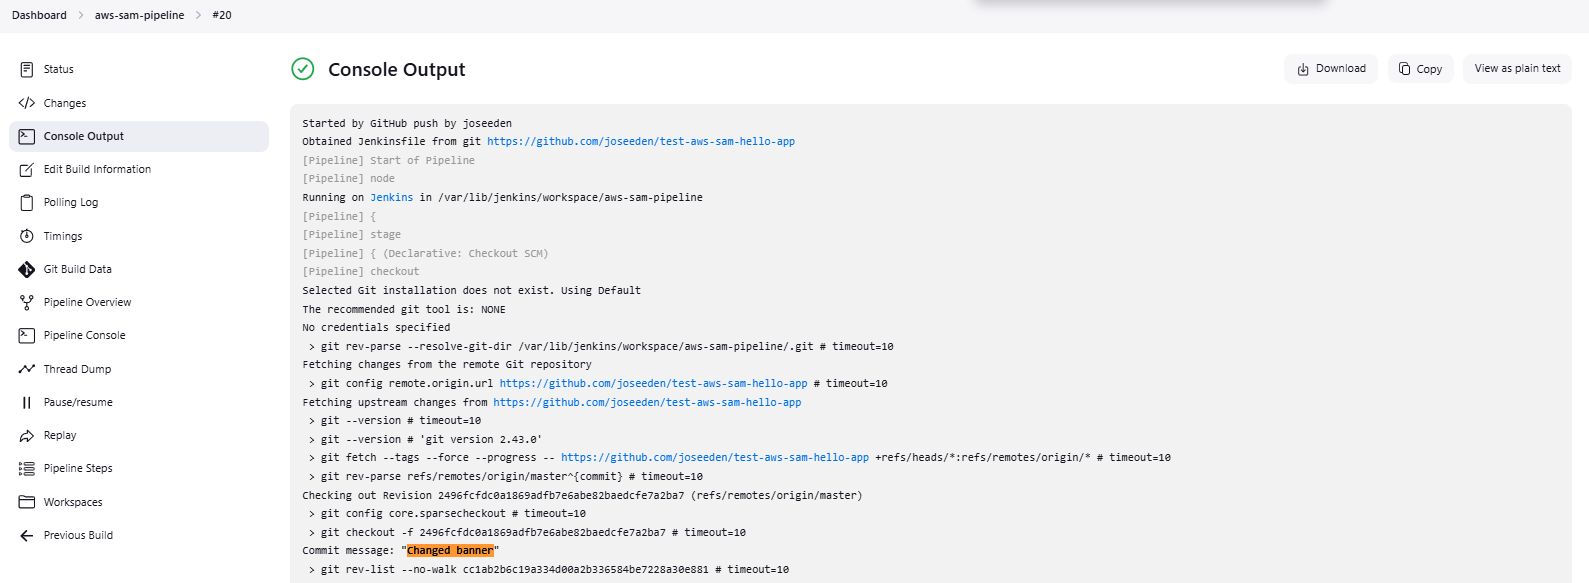
Commit and push.
git add .
git commit -m "Changed banner"
git push
Back in the Jenkins dashboard, a new build is triggered.
Click the build and see the console output.
Open the web browser and refresh. The new banner message should appear.

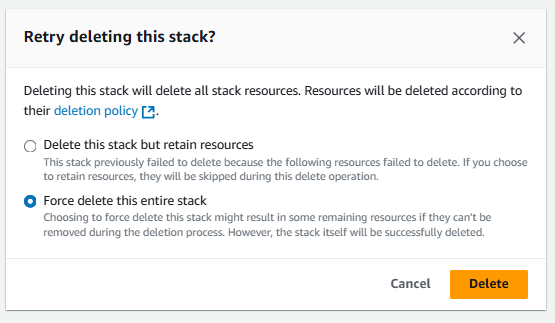
Cleanup
The AWS SAM will use CloudFormation to provision the resources. On the AWS Console, go to CloudFormation and click Stacks. Two resources should be created.

We need to delete both resources after testing. Select the Lambda resource first and then click Delete. After it's deleted, do the same to the AWS SAM resource.
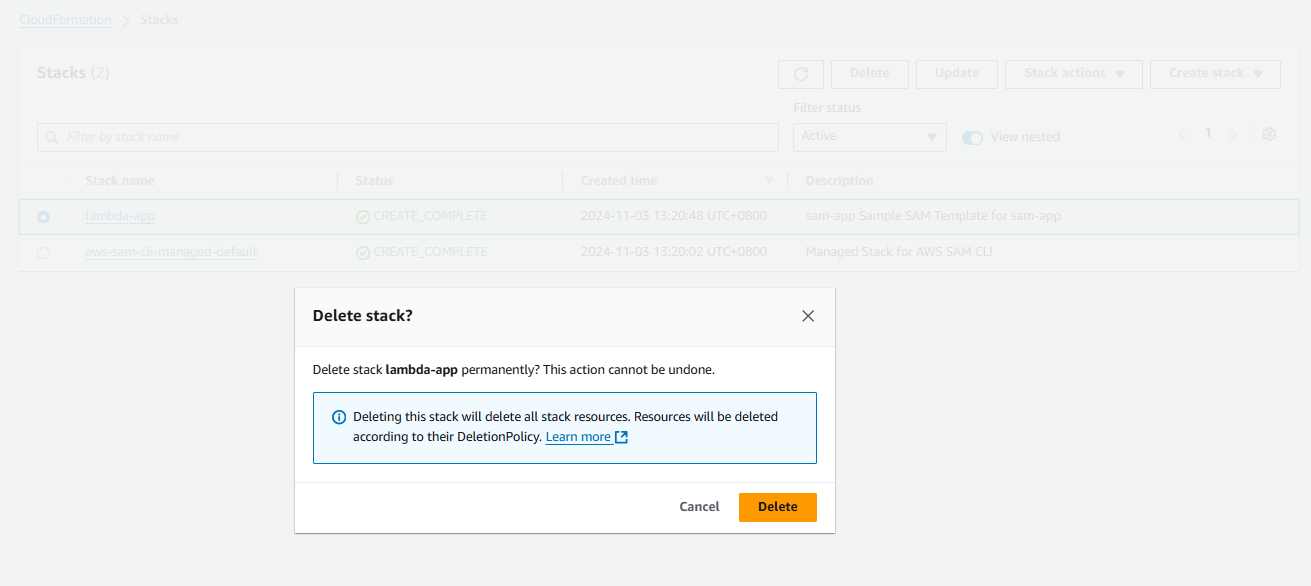
For the AWS SAM resource, you may need to select the force delete option.