Using Packstack [OUTDATED]
Overview
Packstack is an automated installer that uses Puppet scripts to deploy OpenStack quickly on a single machine or small lab environment.
Packstack was designed and maintained for older OpenStack releases (up through Ussuri/Train/Wallaby era). In recent years:
- The Packstack CLI has lost many features (like answer file generation).
- Upstream support has dropped in newer OpenStack versions.
- It’s not actively supported on modern EL9/EL10 stacks.
The modern recommended approaches to deploy OpenStack are:
- OpenStack Ansible
- Kolla-Ansible/Kolla-Operator
- TripleO/RDO Director
System Requirements
Basic requirements:
- Minimum 16GB RAM recommended
- Minimum 20GB disk space
- 64 Bit CPU with virtualization support
A few notes:
- Increase disk space if you plan to run multiple virtual machines
- The CPU must support hardware virtualization
- Enable virtualization in BIOS before installation
While 16GB RAM is recommended, a small lab can run with about 4GB to 6GB RAM but with limited performance.
Install VirtualBox
The lab deploys OpenStack inside a virtual machine on VirtualBox. The VM uses CentOS 8 or AlmaLinux 8 as the operating system, which provides a stable base for the OpenStack installation.
For more information, please see Setting up VirtualBox.
Prepare the system
-
Login to the virtual machine:
ssh <user>@<vm-ip>If you have added the SSH keys, you can run:
ssh -i ~/.ssh/<name-of-your-key> <user>@<vm-ip> -
Before setting the locale, install the
glibclanguage packs.Minimal images usually don’t include them.
sudo dnf install -y glibc-langpack-enIf you want full locale support:
sudo dnf install -y glibc-all-langpacksVerify locale exists:
localectl list-locales | grep en_USOutput:
en_US.utf8 -
Set locale values in
/etc/environmentto avoid language related issues.sudo localectl set-locale LANG=en_US.UTF-8Check current settings
localeOutput:
LANG=C.UTF-8
LC_CTYPE="C.UTF-8"
LC_NUMERIC="C.UTF-8"
LC_TIME="C.UTF-8"
LC_COLLATE="C.UTF-8"
LC_MONETARY="C.UTF-8"
LC_MESSAGES="C.UTF-8"
LC_PAPER="C.UTF-8"
LC_NAME="C.UTF-8"
LC_ADDRESS="C.UTF-8"
LC_TELEPHONE="C.UTF-8"
LC_MEASUREMENT="C.UTF-8"
LC_IDENTIFICATION="C.UTF-8"
LC_ALL= -
Services like
firewalldandNetworkManagercan interfere with networking.Check the status first:
sudo systemctl status firewalldStop the Firewalld to prevent installation conflicts and keeps network configuration simple.
sudo systemctl stop firewalld
sudo systemctl disable firewalld
sudo systemctl status firewalld -
Next, disable
NetworkManagerand enable the traditional network service.infoIf you are using AlmaLinux 9, don't disable
NetworkManagerSkip this step and proceed to step 6.Verify the
NetworkManagerservice:sudo systemctl status NetworkManagerIf it's running, stop it:
sudo systemctl stop NetworkManager
sudo systemctl disable NetworkManager
sudo systemctl enable network
sudo systemctl start network
sudo systemctl status network
Using the basic network service provides a simpler configuration for OpenStack.
If you get an this error:
Failed to enable unit: Unit file network.service does not exist.It means that the OS doesnt not include
network.serviceand you will need to install the legacy scripts. See Installnetwork-scripts. -
Verify the network settings.
For AlmaLinux 8:
The interface
enp0s3should have static IP, gateway, and DNS configured.cat /etc/sysconfig/network-scripts/ifcfg-enp0s3Output:
...
BOOTPROTO=none
...
IPADDR=192.168.1.130
PREFIX=24
GATEWAY=192.168.1.1
DNS1=8.8.8.8
For AlmaLinux 9:
The network profiles are stored by
NetworkManagerin keyfile format in the /etc/NetworkManager/system-connections/` directory:$ ls -la /etc/NetworkManager/system-connections/
total 8
drwxr-xr-x. 2 root root 60 Feb 14 11:16 .
drwxr-xr-x. 7 root root 134 Feb 14 11:10 ..
-rw-------. 1 root root 290 Feb 14 11:16 enp0s3.nmconnection
-rw-------. 1 root root 208 Feb 14 11:16 enp0s8.nmconnectionChecking the network configuration for
enp0s3:sudo cat /etc/NetworkManager/system-connections/enp0s3.nmconnectionOutput:
[ipv4]
address1=192.168.1.130/24
dns=8.8.8.8;
gateway=192.168.1.1
method=manualinfoBOOTPROTO=noneis equivalent tomethod=manualin AlmaLinux 9. -
Disable SELinux permanently by editing the configuration file.
The variable
SELINUXmust be set todisabled.sudo vi /etc/selinux/configChange:
SELINUX=disabledReboot the system and verify SELinux status.
sudo reboot
getenforce
Output:
Disabled
Install Packages and Repositories
With prerequisites done, install repositories and required tools before running Packstack.
-
Enable the CRB Repo.
EL9 uses the CRB (CodeReady Builder) repository for additional packages.
sudo dnf config-manager --set-enabled crbNote: EL9 (“Enterprise Linux 9”) is shorthand for the RHEL-based ecosystem built on Red Hat Enterprise Linux 9. This includes:
- RHEL 9 (Red Hat Enterprise Linux)
- AlmaLinux 9
- Rocky Linux 9
- Oracle Linux 9
- CentOS Stream 9
All EL9 systems share the same package base, kernel family, and compatible repositories.
-
Install
dnf-utilsand 'epel-release`The variable
dnf-utilsprovides repository configuration commands.sudo dnf install -y dnf-utilsepel-releaseenables Extra Packages for Enterprise Linux (EPEL), which provides additional packages not included in the base repos.sudo dnf install -y epel-release -
Install the RDO release (for OpenStack):
For AlmaLinux 9, install the OpenStack repository:
sudo dnf install -y centos-release-openstack-antelopeVerify the repository installation:
dnf repolist all | grep -i openstackOutput:
centos-openstack-antelope                     CentOS-9 - OpenStack ante enabled
centos-openstack-antelope-source              CentOS-9 - OpenStack ante disabled
centos-openstack-antelope-test CentOS-9 - OpenStack ante disabled -
Enable repositories and update packages.
sudo dnf config-manager --set-enabled centos-openstack-antelope
sudo dnf update -y
sudo reboot
Install and Run Packstack
After updating packages, install Packstack and run an all in one OpenStack deployment. Packstack uses Puppet scripts to automate setup and reduce manual configuration.
-
Install Packstack.
sudo dnf install -y openstack-packstack -
Check the network interfaces.
Before running Packstack, confirm your network interface and IP address. Packstack will configure networking for OpenStack, so it’s important that the correct interface is used.
ip addr showHere,
enp0s3represents the main physical interface. This interface will be mapped to external connectivity (ext-net) in OpenStack.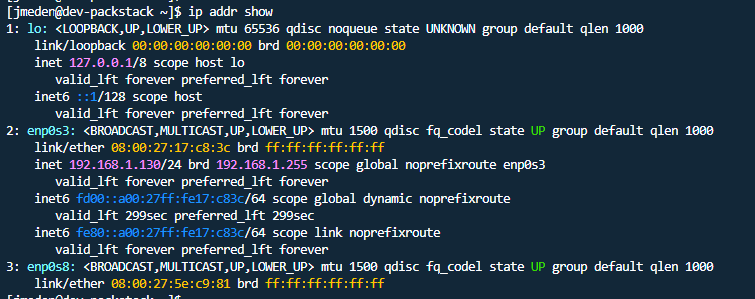
-
Run Packstack interactively.
sudo packstack --allinoneThe installer will ask:
- Which interface is the external network (enp0s3)
- Admin passwords
- Which services to install
For a lab deployment, you can simply accepts the default settings.
Installation may take 30 to 60 minutes depending on system resources. After completion, OpenStack services will be installed, configured, and started automatically.
ABANDONING THIS GUIDE
During the deployment of OpenStack, I switched across three different operating systems due to compatibility and support limitations. Below summarises the findings and reasons for discontinuing the Packstack-based approach.
1. CentOS Stream 8
I initially started with CentOS Stream 8 because it was historically aligned with RDO-based OpenStack deployments and commonly referenced in older Packstack documentation.
- Began deployment using RDO repositories
- Encountered repository and release compatibility issues
- No actively maintained/forward-looking OpenStack releases for EL8
Due to lifecycle limitations and shrinking support coverage, CentOS Stream 8 was not suitable for a sustainable OpenStack lab environment.
2. AlmaLinux 8.10
I then switched to AlmaLinux 8.10 as a drop-in EL8 replacement with extended support and better stability compared to CentOS Stream 8.
- Supported legacy
network-scriptsconfiguration - Some OpenStack RDO builds technically usable
- Allowed partial compatibility with certain RDO builds
However:
- RDO packages are officially maintained for CentOS Stream and RHEL
- AlmaLinux EL8 is not the primary target for RDO validation
- Increasing dependency and repository inconsistencies
Although more stable than CentOS Stream 8, AlmaLinux 8.10 still inherits EL8’s declining OpenStack support landscape, which also makes it unsuitable for long-term deployment goals.
3. AlmaLinux 9.7
After encountering lifecycle and repository limitations on EL8 distributions, I switched to AlmaLinux 9.7 to align with a newer, long-term supported Enterprise Linux platform. The goal was to verify whether Packstack could still function reliably on EL9.
- Attempted deployment using
packstack --allinone: - Deployment failed during Puppet execution
Error encountered:
Error: (pymysql.err.OperationalError) (1045,
"Access denied for user 'nova'@'dev-packstack' (using password: YES)")
Root cause analysis:
- Packstack was designed primarily for CentOS 7 and CentOS 8
- It is not fully supported on EL9 distributions
AlmaLinux 9 introduces:
- Newer MariaDB versions
- Updated Python stack
- Different system defaults
- Stricter SELinux policies
As a result, Packstack on EL9 environments is unreliable and not recommended.
Final Decision
Given the compatibility limitations and lifecycle concerns:
- EL8 is effectively sunset for modern OpenStack releases
- Packstack is legacy-oriented and not aligned with EL9
- EL9 is the current long-term supported platform
Having said, I decided to stop using Packstack and move to Kolla-Ansible on AlmaLinux 9, which better supports modern OpenStack deployments and long-term maintenance.
[ABANDONED] Verify Network Changes
Packstack modifies network interfaces and creates Open vSwitch bridges. Understanding these changes ensures external connectivity works correctly.
- Check interfaces and bridges
- Verify external bridge configuration
- Confirm physical interface changes
Check interfaces again after installation.
ip addr show
Output:
- New bridges created
- Physical interface without IPv4 address
- Bridge holding main IP
Open the interface configuration file to inspect changes. The variable enp0s3 should appear as an OVS port attached to bridge br-ex.
sudo vi /etc/sysconfig/network-scripts/ifcfg-enp0s3
Confirm it is configured as an Open vSwitch port. This shows Packstack automatically configured networking.
Inspect external bridge configuration. The variable br-ex represents the external Open vSwitch bridge.
sudo vi /etc/sysconfig/network-scripts/ifcfg-br-ex
Expected values include:
DEVICETYPE=ovs
TYPE=OVSBridge
IPADDR=192.168.0.11
The bridge now holds the IP address instead of the physical interface, which allows OpenStack networking to function correctly.
[ABANDONED] Create External Network and Subnet
After installation, create external networking so instances can reach the outside world. The goal is to allow floating IP assignment and external connectivity.
- Load admin credentials
- Create external network
- Create public subnet
Load admin credentials using the variable keystonerc_admin.
source keystonerc_admin
Create an external network. The variable ext-net represents the external physical network mapping.
openstack network create ext-net \
--external \
--provider-network-type flat \
--provider-physical-network ext-net
This command defines a flat external network used by instances for outbound connectivity.
Create a public subnet with an allocation range. Variables such as START_IP, END_IP, and GATEWAY_IP represent your external network values.
openstack subnet create public-subnet \
--network ext-net \
--subnet-range 192.168.0.0/24 \
--allocation-pool start=192.168.0.100,end=192.168.0.200 \
--gateway 192.168.0.1
Instances can now receive public IP addresses from this range and communicate externally.