Inventories and Configuration
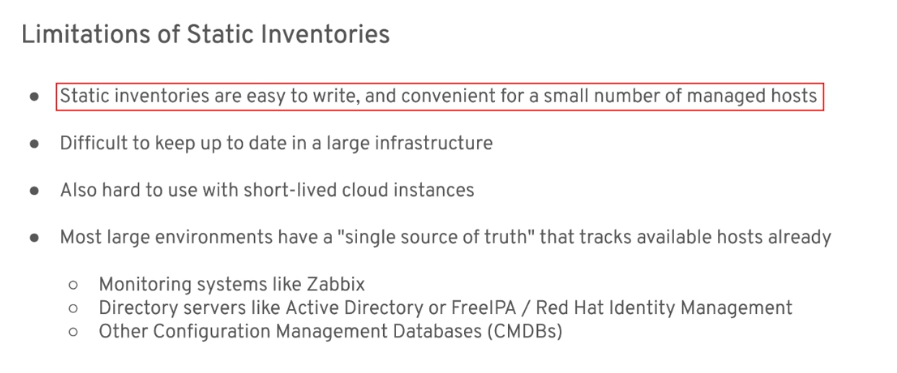
Static Inventories
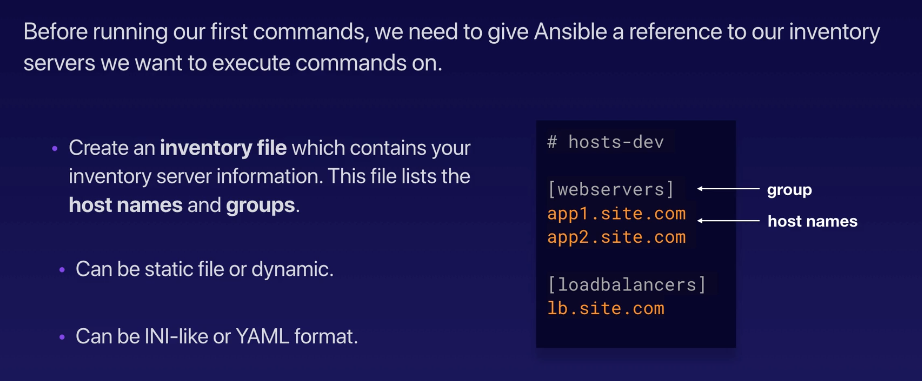
Creating the inventory file
# edendev.inv

[webservers]
tstsvr1
tstsvr2
tstsvr3
tstsvr4

[loadbalancers]
lb1

[local]
localhost   ansible_connection=local
To check hosts, there are two ways:
joseeden@EdenJose:one$ ansible-inventory -y --list
all:
  children:
    loadbalancers:
      hosts:
        lb1:
          ansible_host: 13.228.99.157
    local:
      hosts:
        localhost:
          ansible_connection: local
    ungrouped: {}
    webservers:
      hosts:
        app1:
          ansible_host: 13.251.146.254
        app2:
          ansible_host: 122.248.203.239
        app3:
          ansible_host: 52.76.189.254
        app4:
          ansible_host: 54.255.28.202
[joseeden@EdenJose: inventories]$ ansible -i edendev.inv --list-hosts all
  hosts (6):
    tstsvr1
    tstsvr2
    tstsvr3
    tstsvr4
    lb1
    localhost
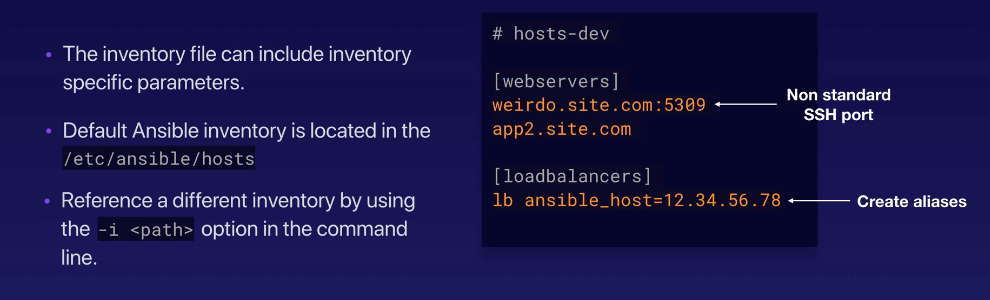
We use the "-i" flag to specify which inventory file to use. We can also specify in the ansible config file the path for the inventory file. This way. we won't need to use the "-i" parameter.
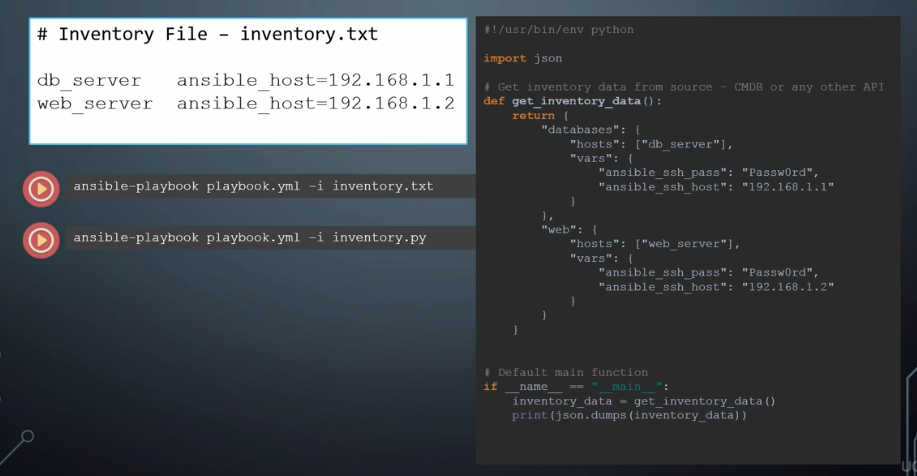
Dynamic Inventories
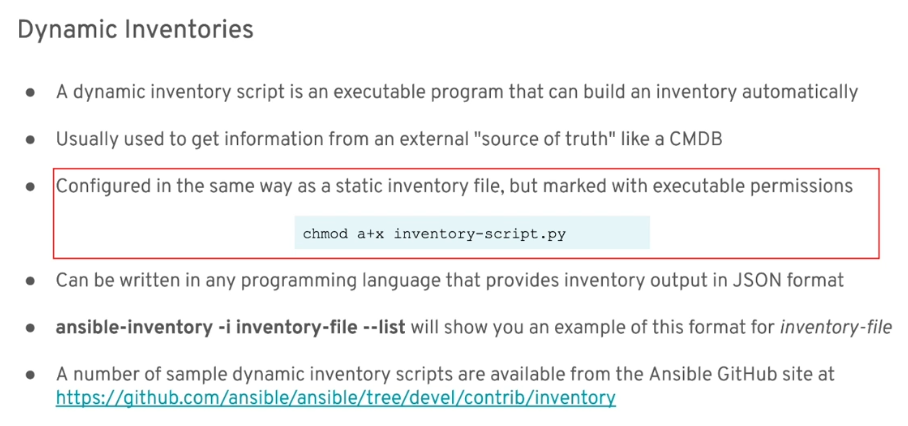
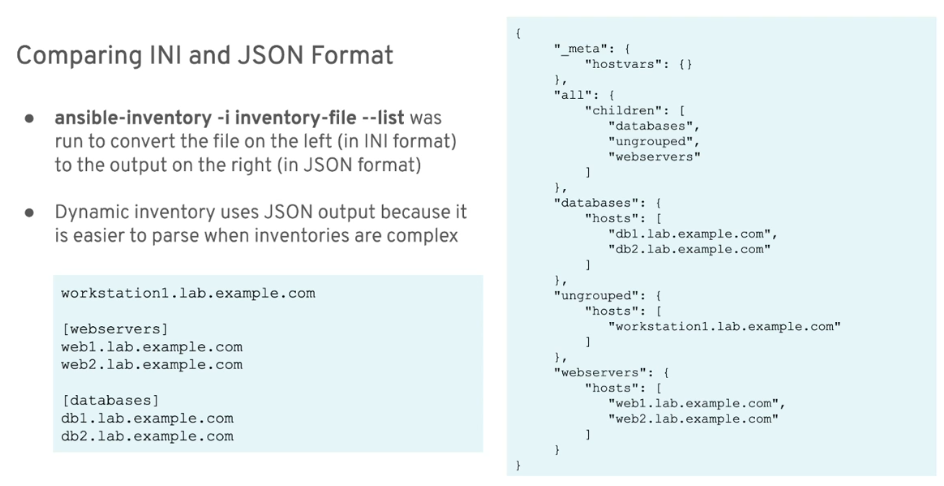
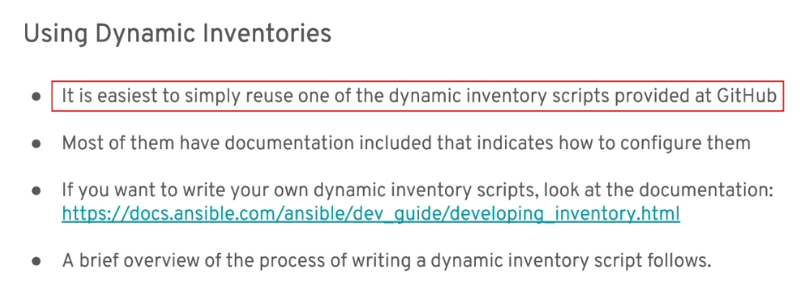
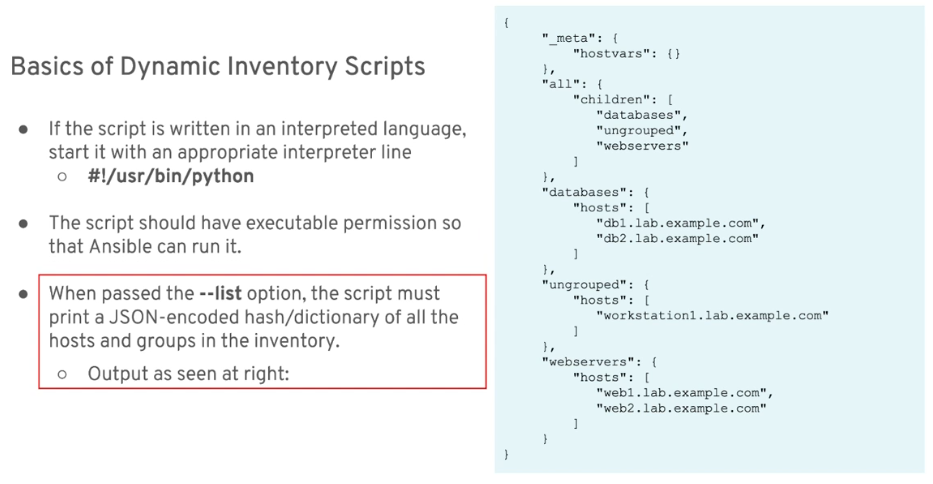
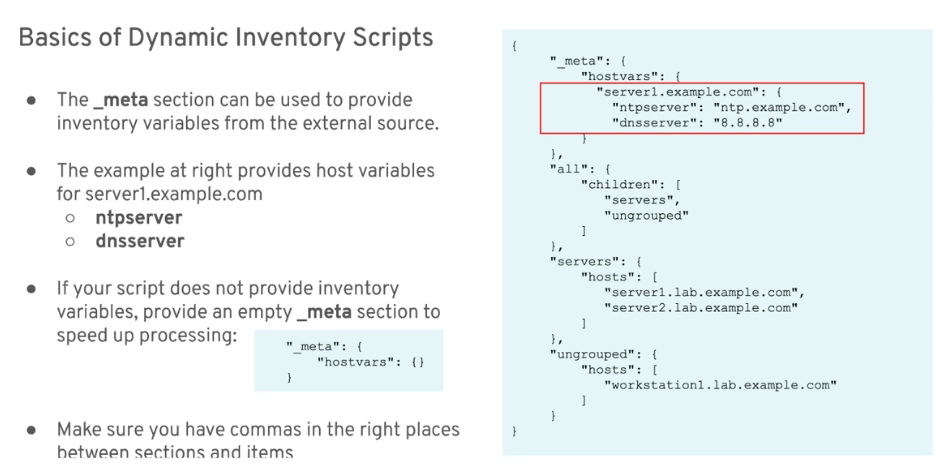
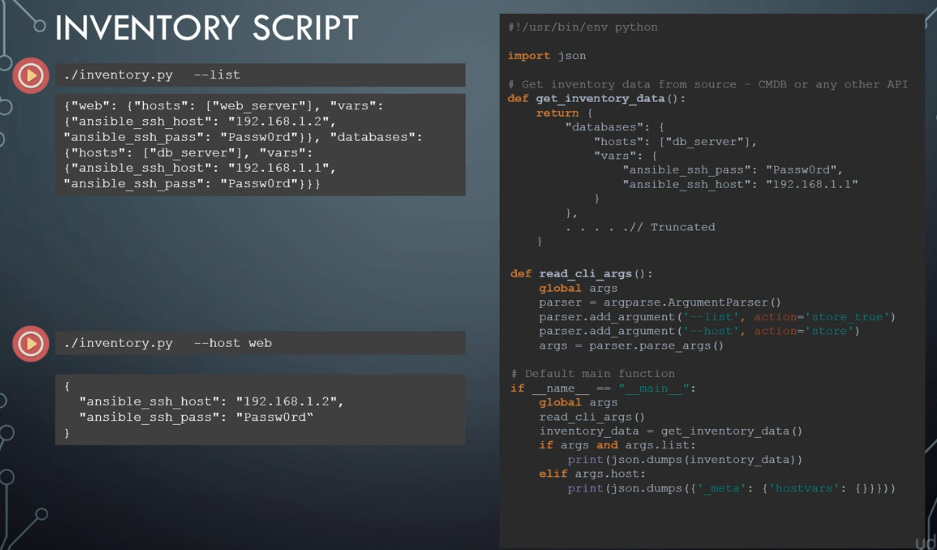
Basics of Dynamic Inventories
Examples

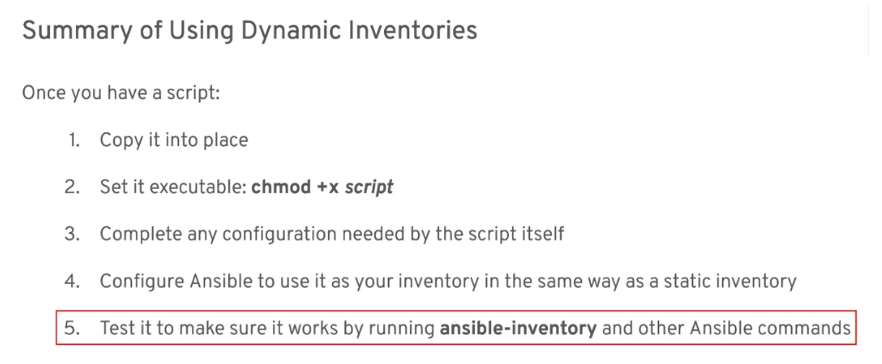
Summary
Inventory Variables
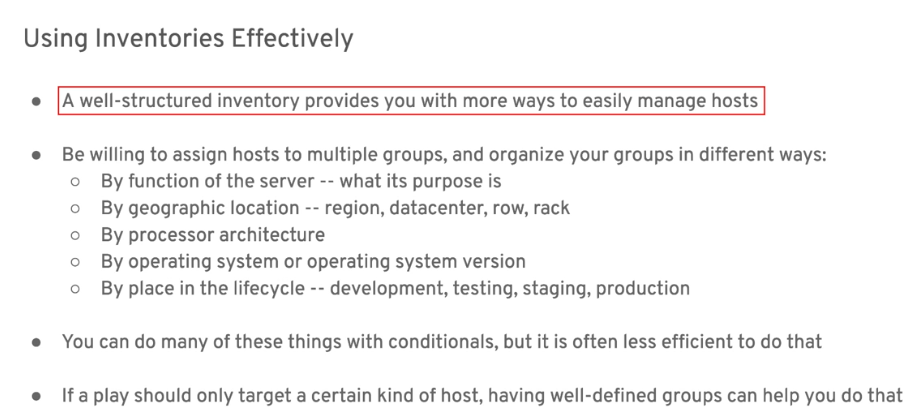
Effective Inventories
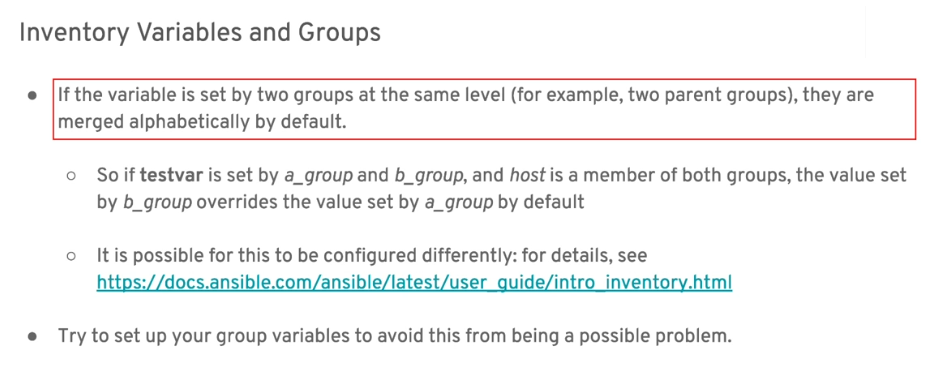
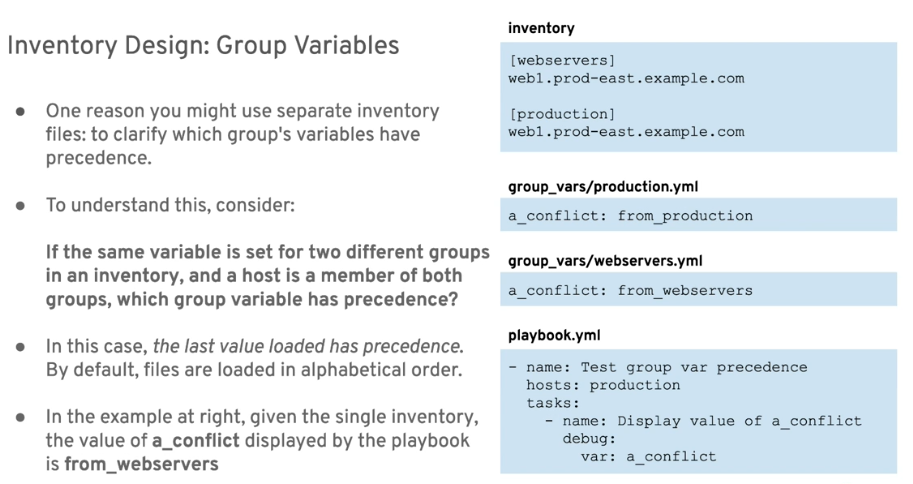
Variables and Groups

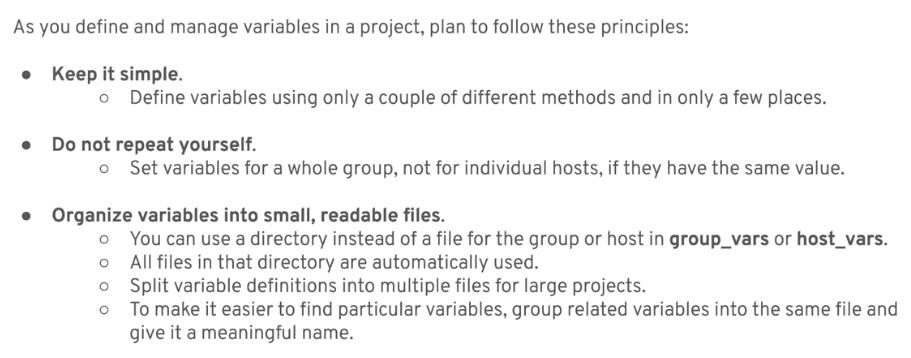
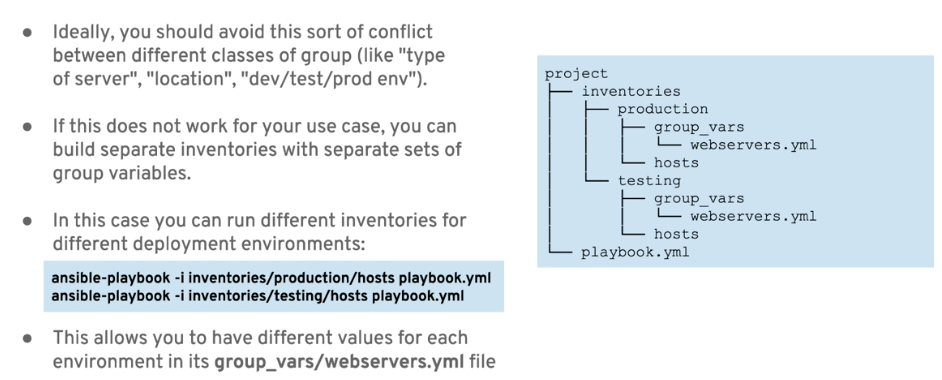
Keeping it Organized
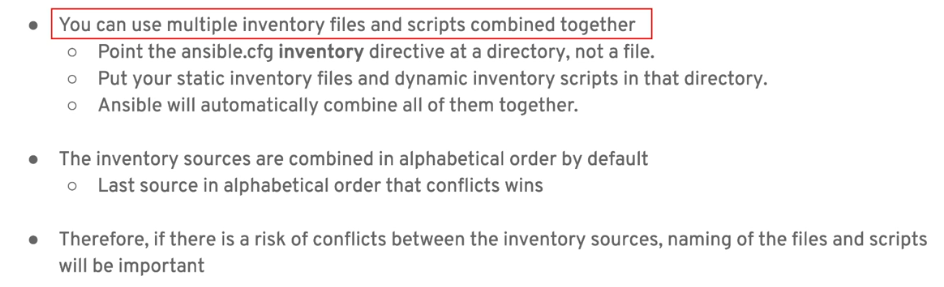
Multiple Inventory Sources
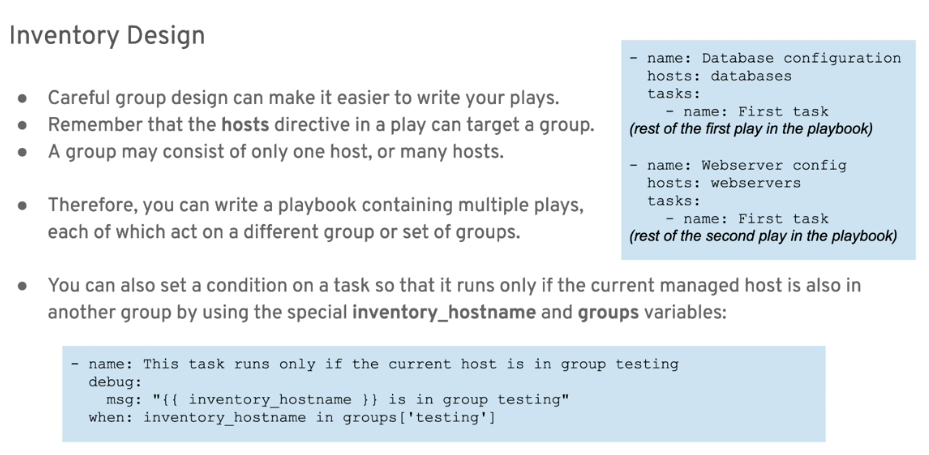
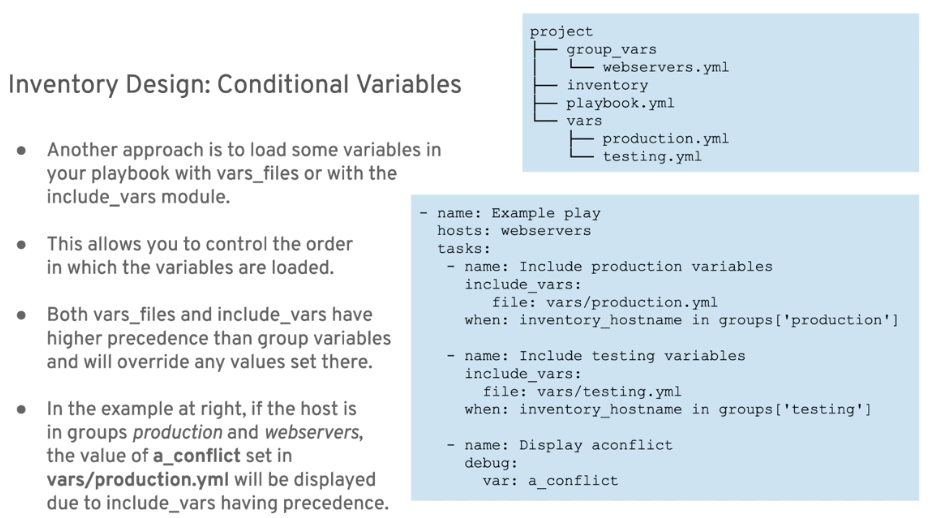
Inventory Design
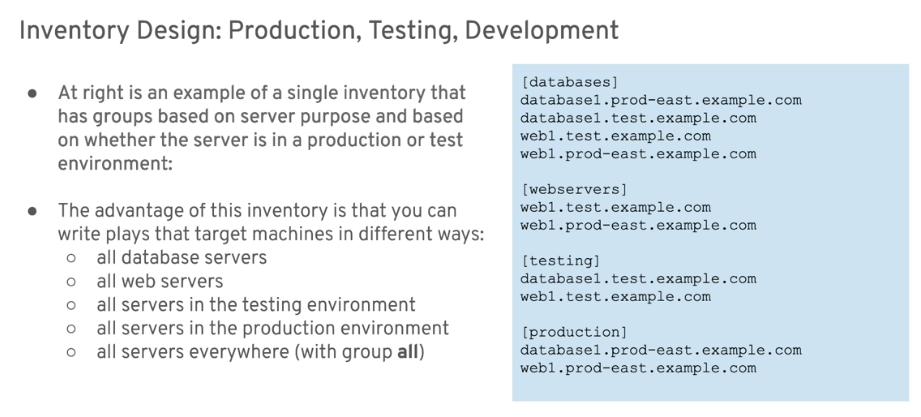

Separate by environment
Conditional Variables
Ansible Configuration File
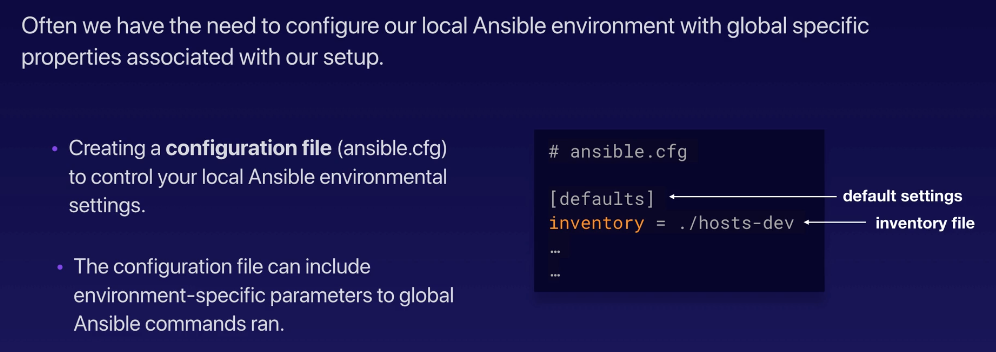


We can configure the config file to make our configurations global by exporting the ANSIBLE_CONFIG variable on the terminal. This is secure since the variable would disappear when we close the terminal.
Now, editing the ansible.cfg file.
$ vim ansible.cfg
[defaults]
inventory = ~/proj-ansible/one/inventories/edendev.inv
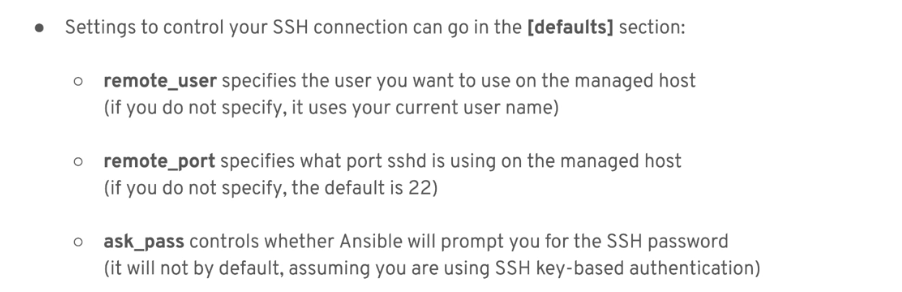
remote_user = eden
We'll be editing and adding more variables in this config file as we proceed through the rest of the labs. To check the final ansible.cfg file, you can proceed to the Adding more on the ansible.cfg section.
If we try to list the hosts again without the '-i' parameter,
$ ansible --list-hosts all
  hosts (6):
    tstsvr1
    tstsvr2
    tstsvr3
    tstsvr4
    lb1
    localhost
To see what's modified in the ansible.cfg file,
ansible-config dump --only-changed
Some final notes:
# Link: https://raw.githubusercontent.com/ansible/ansible/devel/examples/ansible.cfg

#-----------------------------------------------------------
# Since Ansible 2.12 (core):
# To generate an example config file (a "disabled" one with all default settings, commented out):
#               $ ansible-config init --disabled > ansible.cfg
#
# Also you can now have a more complete file by including existing plugins:
# ansible-config init --disabled -t all > ansible.cfg

# For previous versions of Ansible you can check for examples in the 'stable' branches of each version
# Note that this file was always incomplete  and lagging changes to configuration settings

# for example, for 2.9: https://github.com/ansible/ansible/blob/stable-2.9/examples/ansible.cfg
ansible-config
Another useful tool the ansible configurations that's currently setup in your machine is through the use of ansible-config tool.
# List down and search for the configuration parameter
$ ansible-config list
Before anything else, Make sure Nodes trust the Master
Before we run any commands, we have to make sure the hosts devices trusts the master when it presents the ssh keys to them. We first start with generating ssh keys. Leave the defaults for the succeeding questions, or you can also set the passphrase for increased security.
$ ssh-keygen
The command above returns the location of the saved ssh keys:
Your identification has been saved in /home/joseeden/.ssh/id_rsa
Your public key has been saved in /home/joseeden/.ssh/id_rsa.pub
The id_rsa.pub is the public key that you'll be working with. You can check out the keys:
$ ls .ssh
authorized_keys  id_rsa  id_rsa.pub
Before copying the ssh keys onto the hosts machine, make sure that ssh is enabled on those machines. Checking on the both hosts:
$ sudo apt install -y openssh-server
$ sudo yum install -y openssh-server
Back on the master, try copying the ssh keys onto the host-ubuntu
ssh-copy-id .ssh/id_rsa.pub tstsvr1
ssh-copy-id .ssh/id_rsa.pub tstsvr2
ssh-copy-id .ssh/id_rsa.pub tstsvr3
ssh-copy-id .ssh/id_rsa.pub tstsvr4
If you get the error below, you can try these steps.
/usr/bin/ssh-copy-id: INFO: Source of key(s)
to be installed: ".ssh/id_rsa.pub"
/usr/bin/ssh-copy-id: INFO: attempting to log in with the new key(s), to filter out any that are already installed
/usr/bin/ssh-copy-id: INFO: 1 key(s) remain to be installed -- if you are prompted now it
is to install the new keys
If all goes well, you should be seeing confirmation that the ssh key was copied to the hosts
SImilarly, you can just copy the contents of the id_rsa.pub in the master then go to the hosts and paste it inside the authorized_keys file.
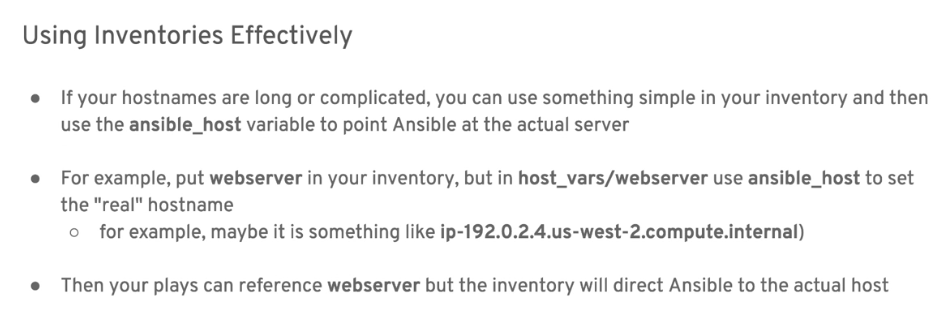
Adding aliases
Editing the edendev/inv,
# edendev-inv

[webservers]
app1    ansible_host=tstsvr1
app2    ansible_host=tstsvr2
app3    ansible_host=tstsvr3
app4    ansible_host=tstsvr4

[loadbalancers]
lb1     ansible_host=lb1

[local]
localhost   ansible_connection=local
Encountered a ProxyError when I was trying to check if the loadbalaancer is proxying the requests to the four backend web servers. After a whoel day troubleshooting, I found out that the inventory shoul be using the elastic IPs of the Nodes.
Changing the edendev/inv,
[webservers]
app1    ansible_host=13.251.146.254
app2    ansible_host=122.248.203.239
app3    ansible_host=52.76.189.254
app4    ansible_host=54.255.28.202

[loadbalancers]
lb1     ansible_host=13.228.99.157
Checking the hosts again,
joseeden@EdenJose:one$ ansible --list-hosts webservers
  hosts (4):
    app1
    app2
    app3
    app4
joseeden@EdenJose:one$ ansible --list-hosts loadbalancers
  hosts (1):
    lb1