DigitalOcean
Overview
You can use DigitalOcean to create and manage cloud resources for your lab work.
- Go to DigitalOcean and sign up for an account
- Add a payment method
- Follow the on-screen setup steps
- Complete any additional verification if required
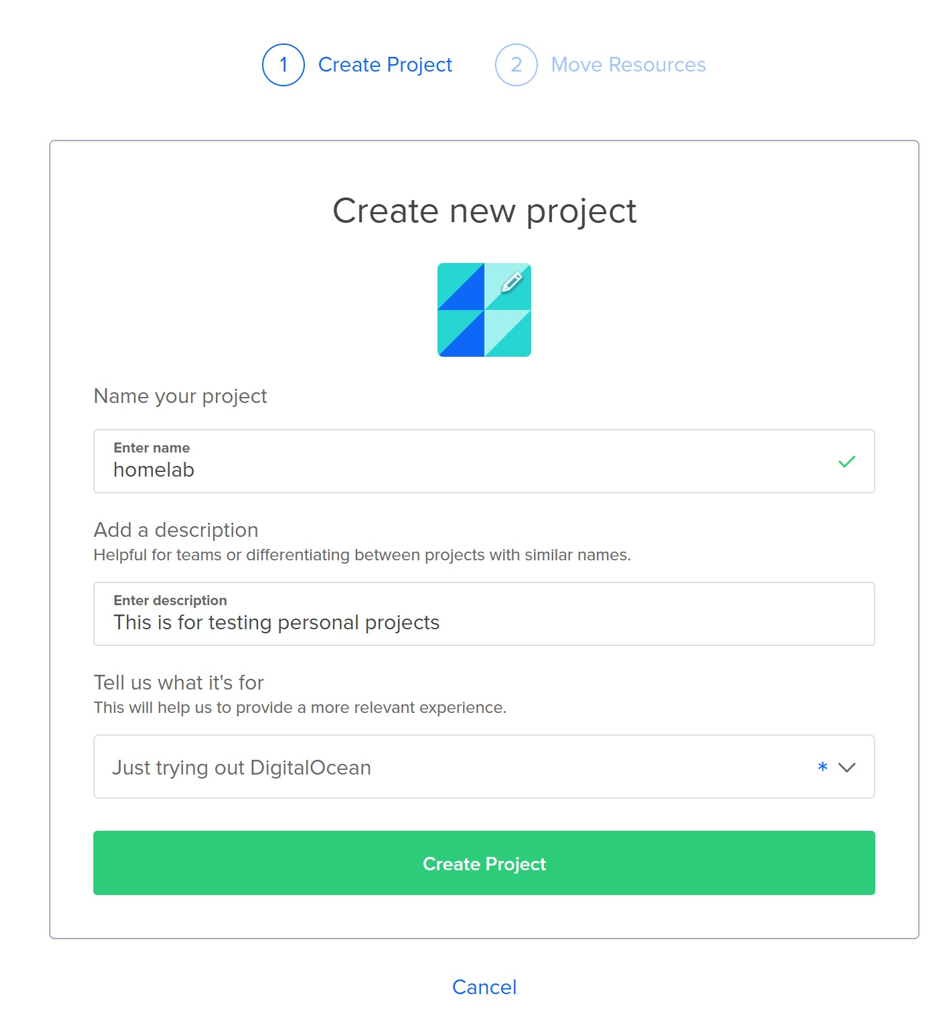
Create a Project
A project helps you organize related resources in DigitalOcean.
- Go to Projects in your DigitalOcean dashboard
- Click New Project
- Enter a name and description
- Click Create Project
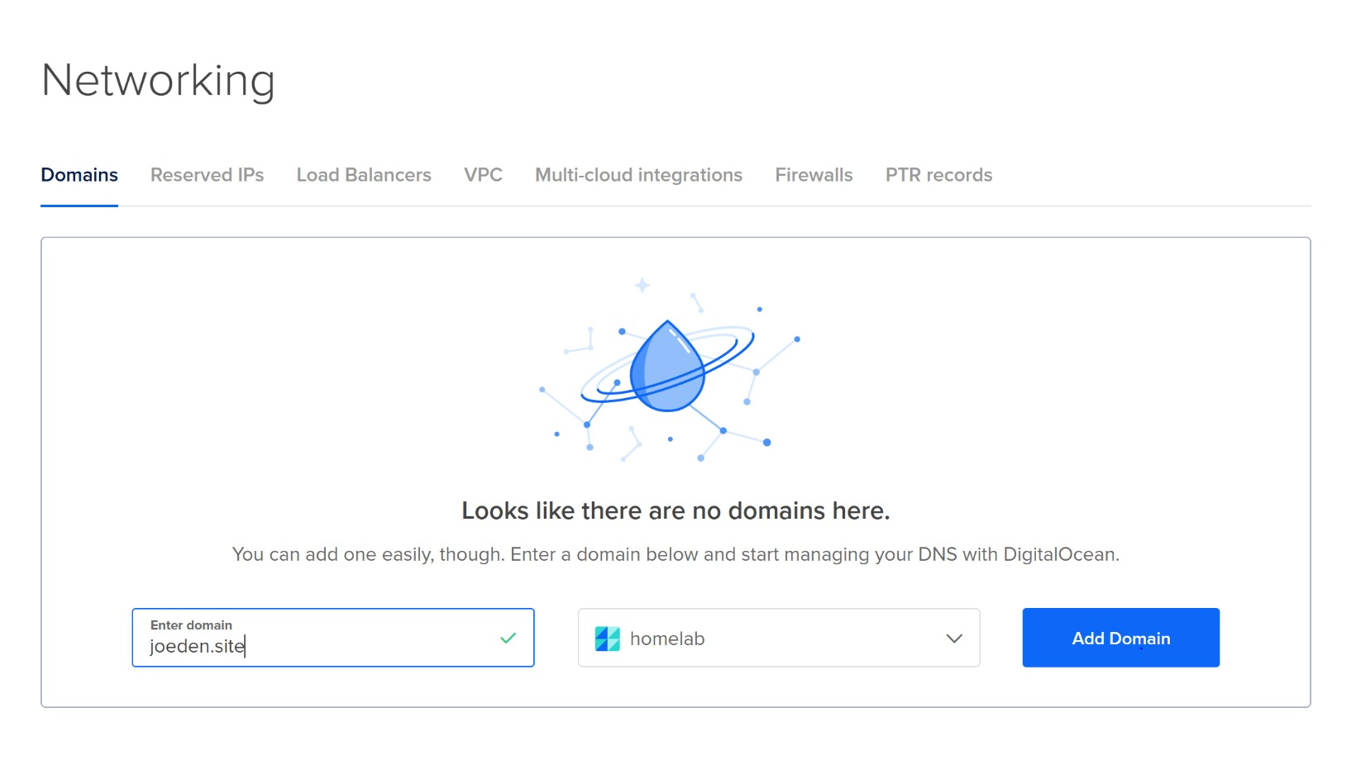
Adding a Domain
You can add your domain to manage DNS records in DigitalOcean.
Note: You need to already own a domain or purchase one first.
- Go to Networking > Domains
- Enter your domain name
- Click Add Domain
Use DO Name Servers
To manage your domain’s DNS with DigitalOcean, you need to point it to DigitalOcean’s name servers. This is done by updating your domain’s settings at your registrar (where you bought your domain).
DigitalOcean is not a domain registrar and does not sell domains.
Update your registrar’s name server settings to:
ns1.digitalocean.com
ns2.digitalocean.com
ns3.digitalocean.com
This process is often called “using custom name servers”. For step-by-step instructions, see Update Your Domain’s Delegation
After setting up the nameservers, the next step is setup yoru DNS records in DigitalOcean.
You can change your domain’s custom nameservers at the registrar as many times as you want. There’s no hard limit from registrars like Namecheap, GoDaddy, etc.
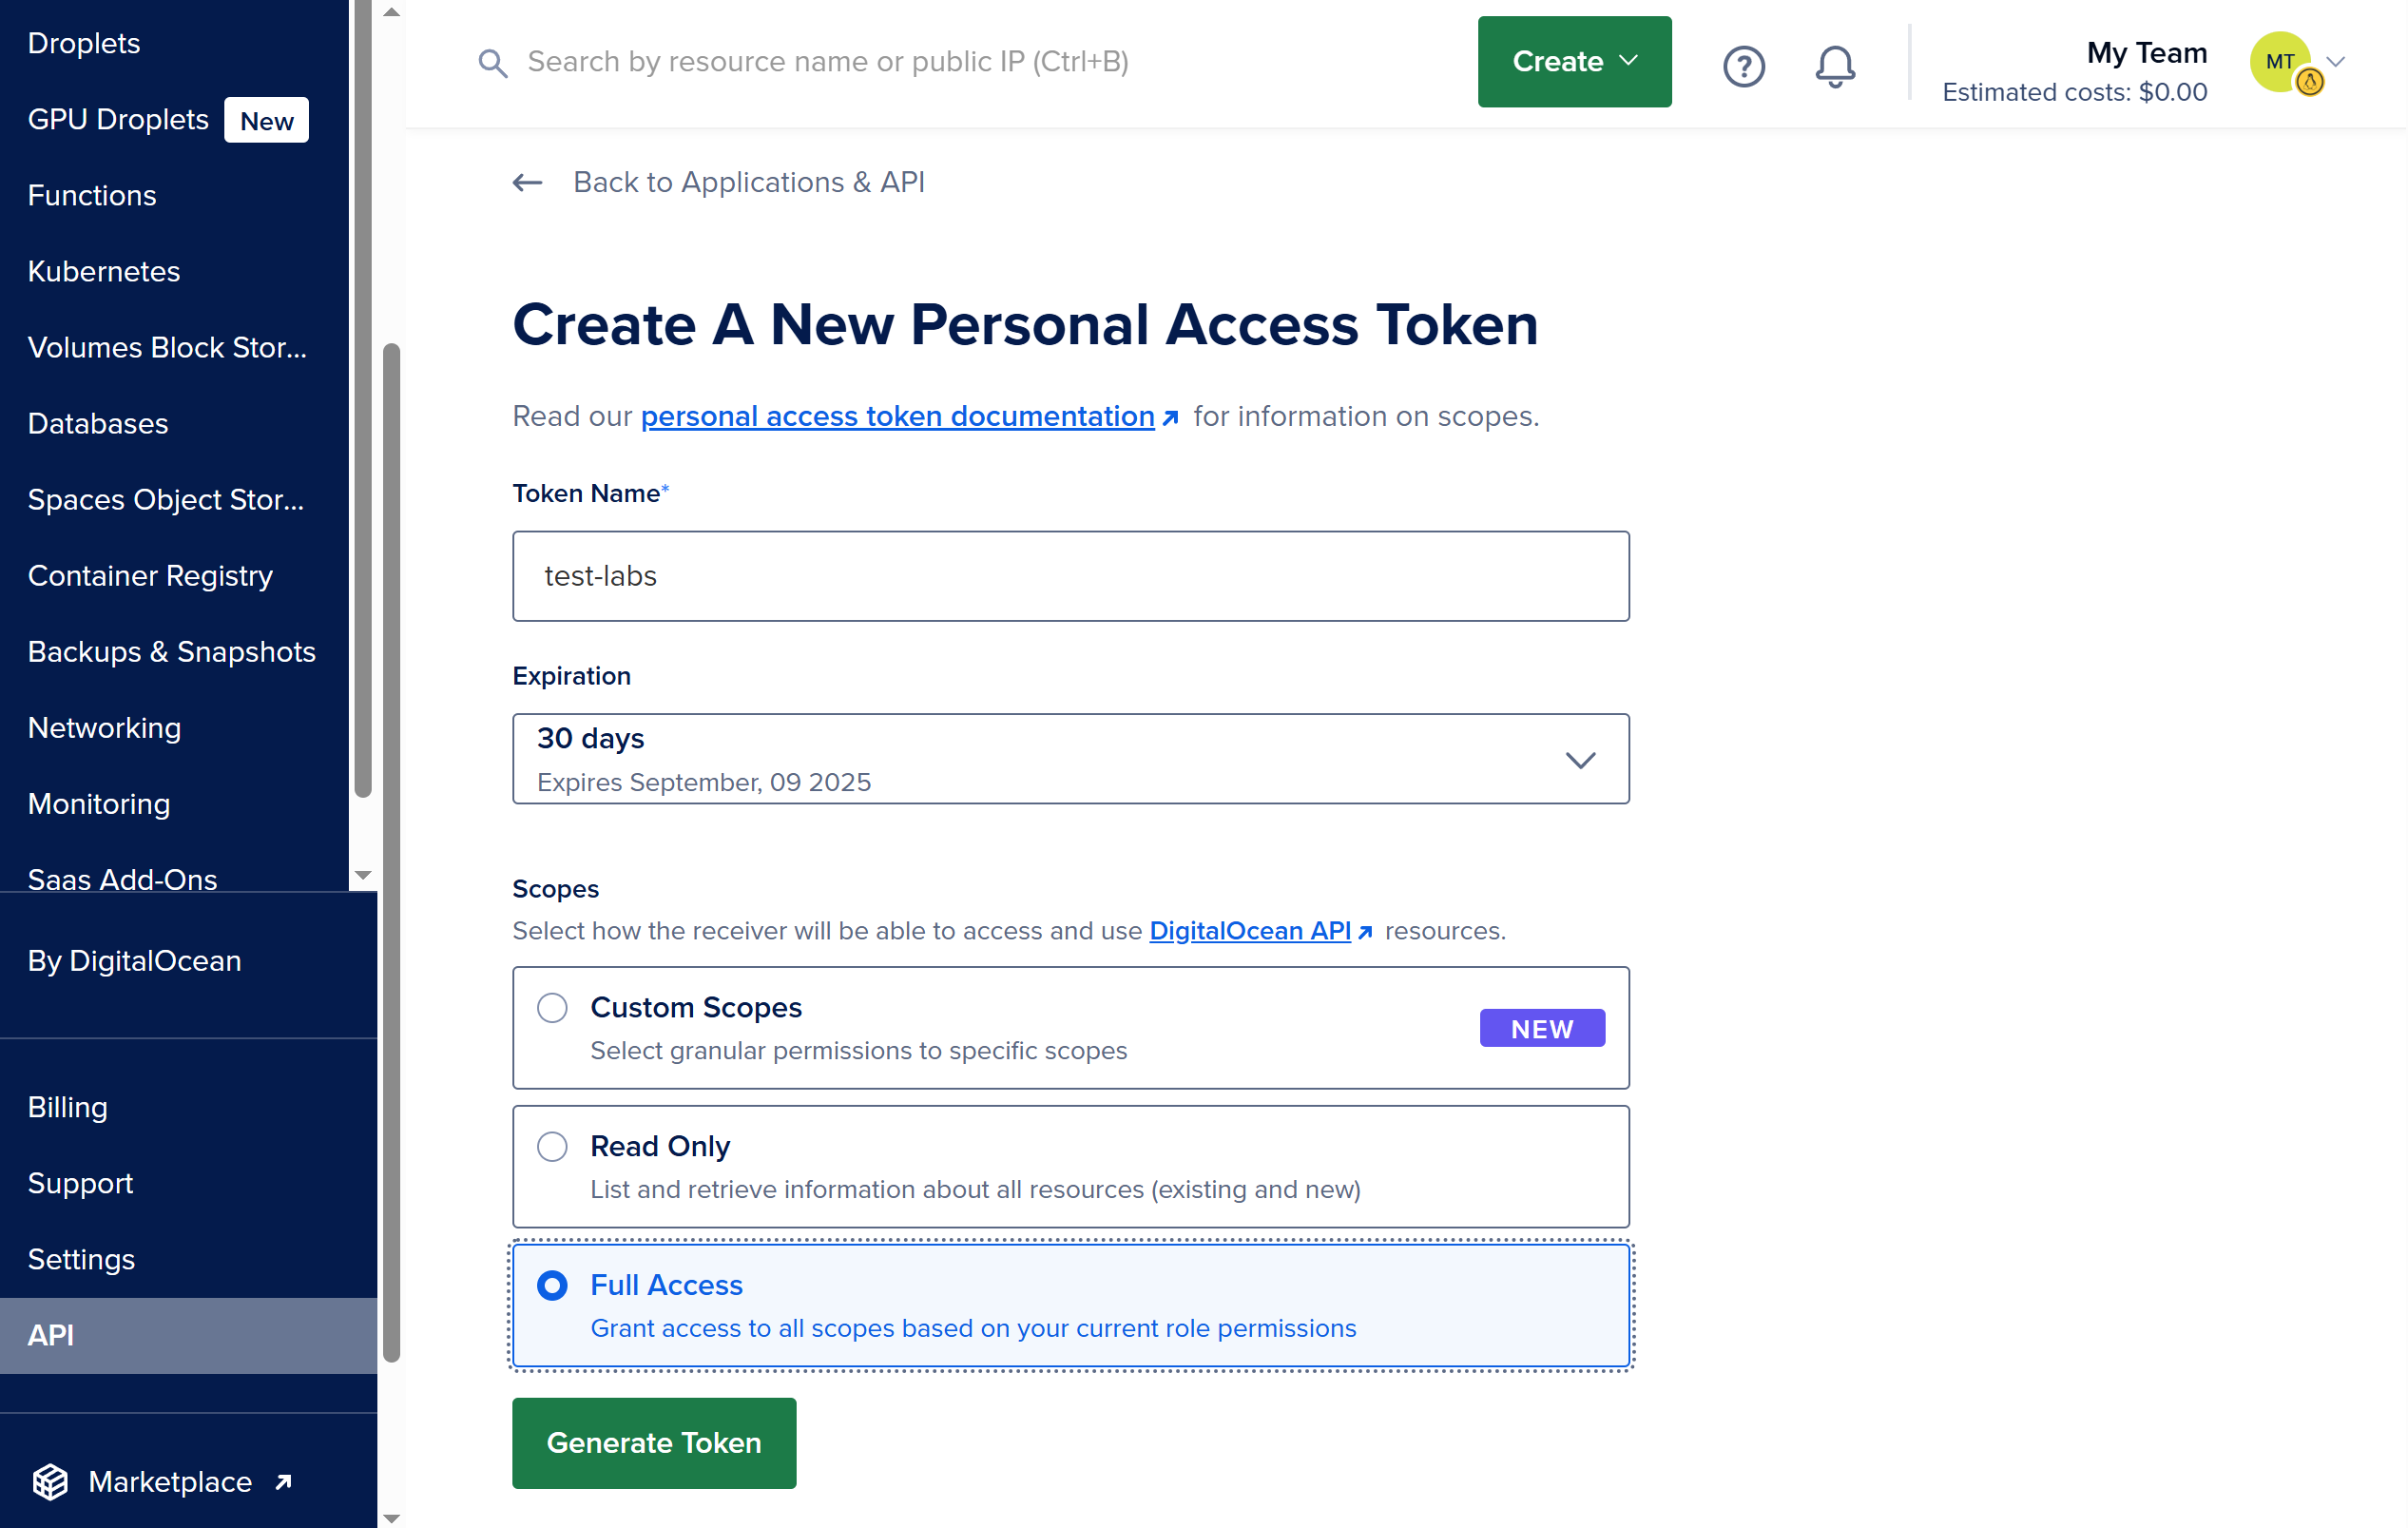
Generate Personal Access Token
To use DigitalOcean’s API, you need to create an API token with the right permissions. Follow these steps:
- Go to your DigitalOcean dashboard > API
- Click Generate New Token
- Enter a name for the token
- Set an expiration date
- Choose the scopes (permissions)
- Click Generate Token
For labs, you can set the scope to Full Access. After doing the lab, make sure to delete the token.