Manage Domain with Cloudflare
Purpose
This KB outlines the steps on how to move DNS management for a domain registered at Name.com to Cloudflare using the free Cloudflare plan. It includes recommended Cloudflare settings, email-related DNS guidance, troubleshooting tips, a rollback plan, and a short FAQ.
Moving DNS to Cloudflare gives you CDN, DDoS protection, simplified SSL, caching and optional WAF/protection features.
The registrar remains Name.com, you only change the domain's authoritative nameservers to Cloudflare's nameservers.
Prerequisites
- Access to the Name.com account where the domain is registered.
- Cloudflare account (free plan is sufficient).
- Access to your origin hosting (optional but recommended: confirm whether origin supports HTTPS).
- A list of current DNS records (A, AAAA, CNAME, MX, TXT, SRV, etc.) or access to export/view them at Name.com.
High-level Steps
- Add site to Cloudflare and import DNS records
- Confirm and add any missing DNS records (especially email-related records)
- Update nameservers at Name.com to the two nameservers Cloudflare provides
- Wait for propagation and confirm the site is "Active" in Cloudflare
- Tune SSL, security, and performance settings
Steps
1. Add the Domain to Cloudflare
-
Go to https://dash.cloudflare.com and sign in/sign up.
-
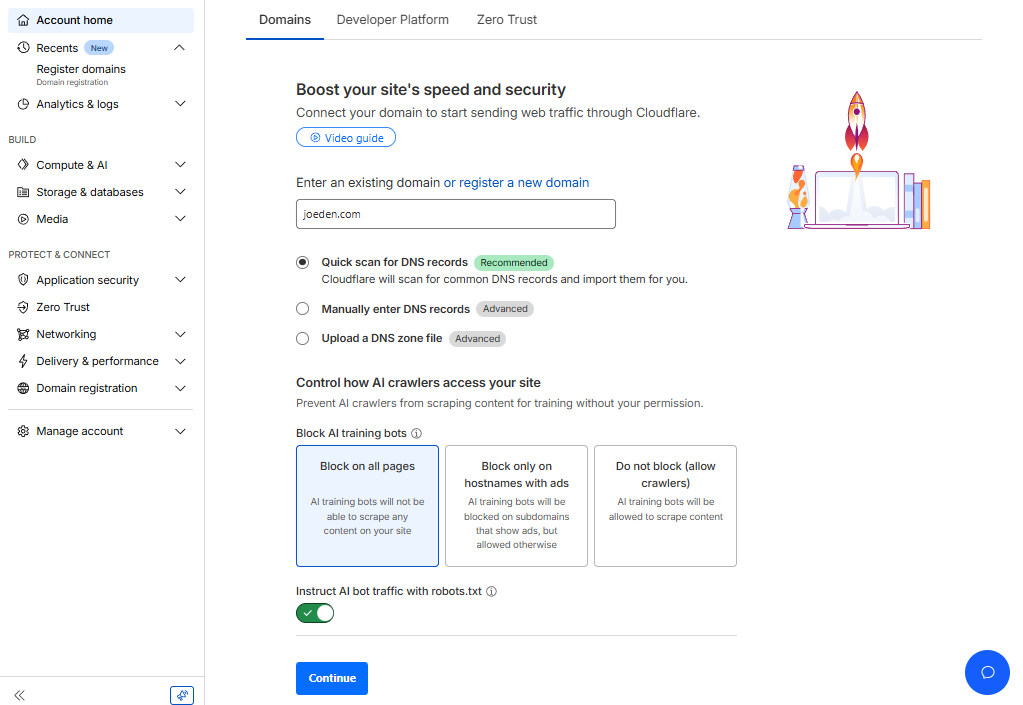
On the Cloudflare dashboard, click Add a site.
-
Enter your domain name and select Quick scan for DNS records.
-
Click Continue.
-
Choose the Free plan when prompted.
-
Cloudflare will scan existing DNS records. Wait for the scan to complete.
2. Review and Confirm DNS Records
-
Cloudflare shows the DNS records it discovered:
- A / AAAA records (point to your server IPs)
- CNAME records
- MX records (email)
- TXT records (SPF, domain verification)
- DKIM (for email signing) and DMARC records
- Any SRV records used by services (e.g., Teams, VoIP)
-
If any record is missing, add it manually (click Add record).
ImportantImportant: For email to continue working, ensure all MX and related TXT/DKIM records are present before switching nameservers.
-
Decide which records should be proxied through Cloudflare:
- Orange cloud (proxied): HTTP/HTTPS web traffic (gains CDN + security)
- Grey cloud (DNS-only): mail (MX), subdomains required for SMTP, many non-HTTP services, and some verification endpoints
-
Typical rule: leave MX, IMAP/SMTP (A records for mail servers), and other mail-related records as grey cloud (DNS-only).

-
Click Continue Activation.
-
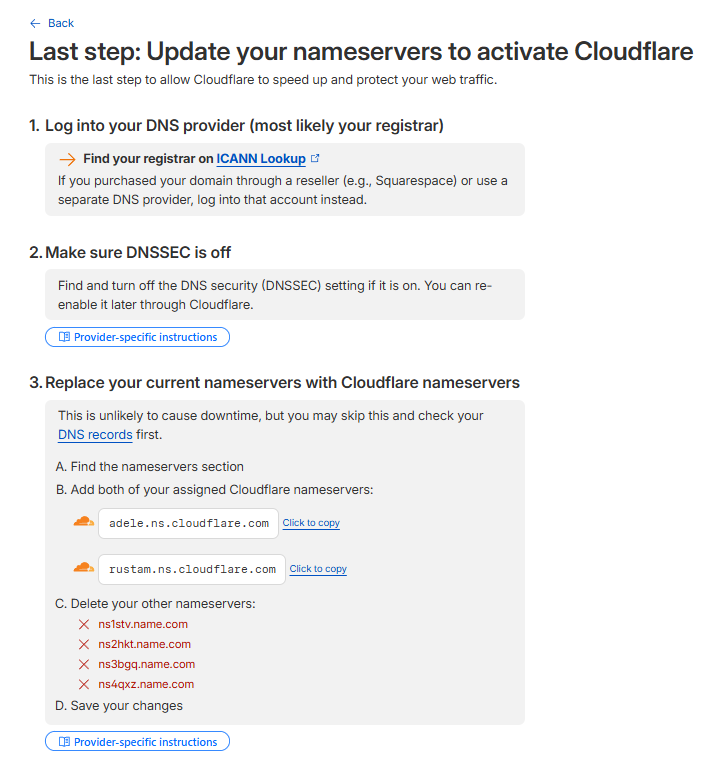
After confirming DNS records, Cloudflare will show the two authoritative nameservers it wants you to use.
-
Copy both values exactly.
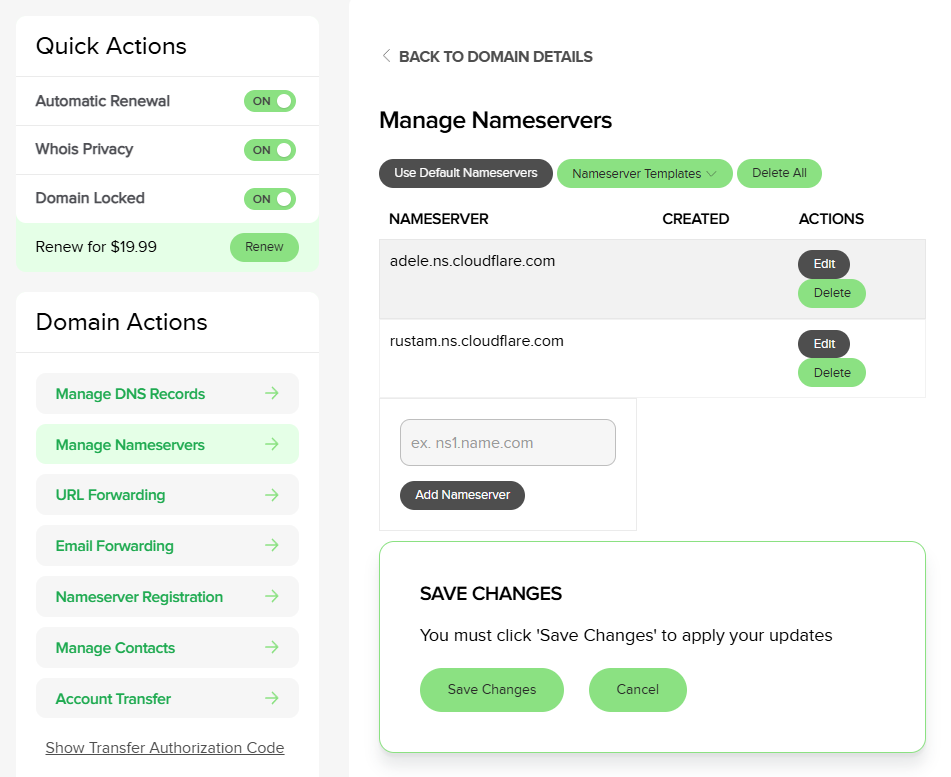
3. Update Nameservers at Name.com
-
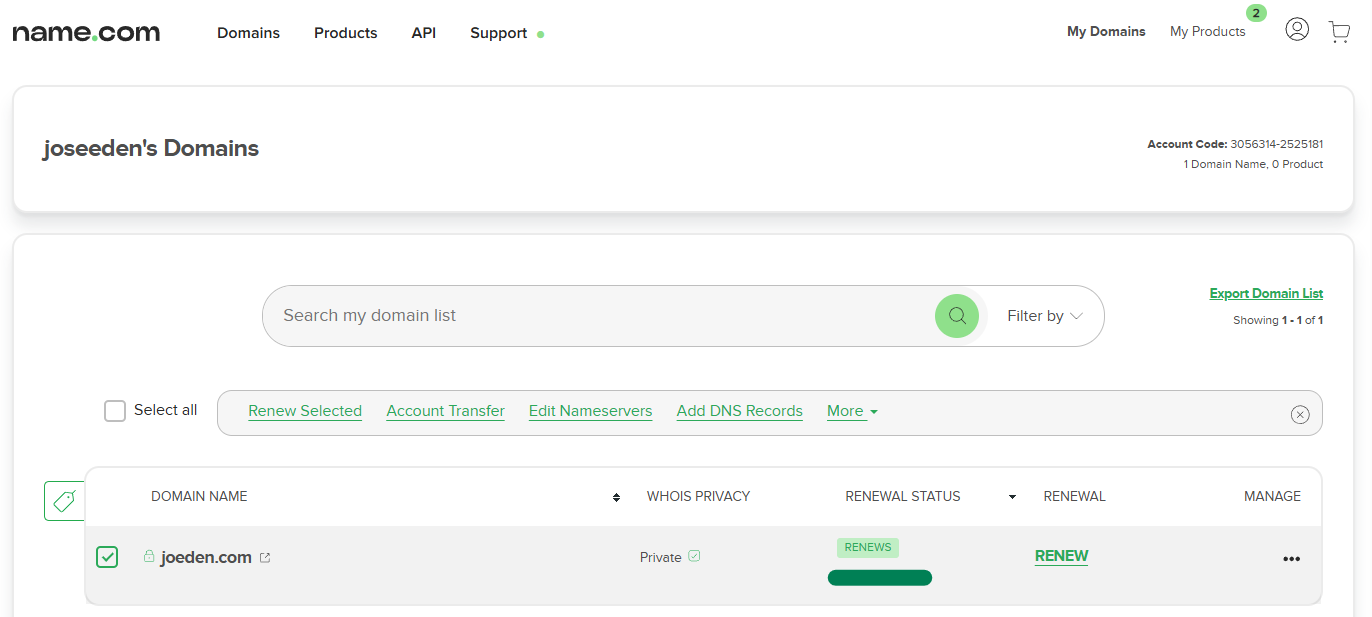
Sign in to your Name.com account: https://www.name.com
-
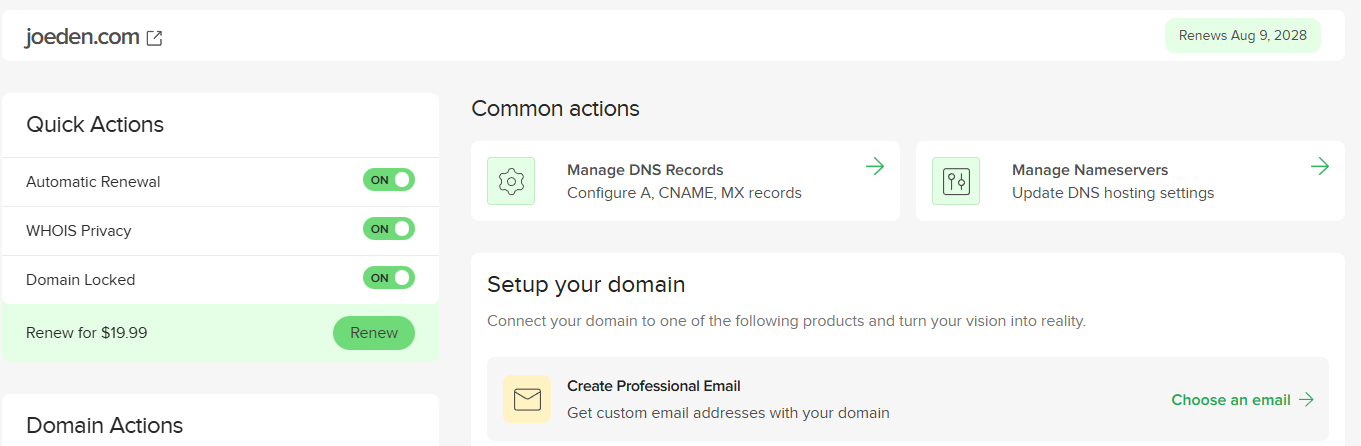
From the dashboard, find My Domains and click the domain you want to manage.
-
Click Manage Nameservers for that domain.
-
Delete the registrar default nameservers.

-
Paste the two Cloudflare nameservers provided earlier into the two nameserver fields.
-
Click Save changes.
Name.com UI variationsSome Name.com pages label this area as Nameservers or Registrar DNS.
If Name.com offers a built-in DNS editor and you are moving DNS to Cloudflare, you'll replace the current nameservers with the Cloudflare ones (this disables Name.com DNS editor because authoritative DNS will now be Cloudflare).
-
Back in Cloudflare, make sure to click Continue.
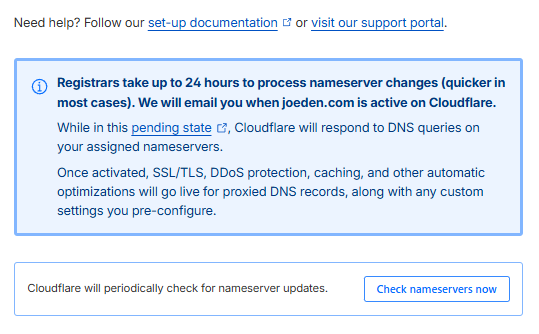
4. Wait for Nameserver Propagation
-
Cloudflare will show the domain as Pending Nameserver Update until it detects the new nameservers at the global registry.
-
Propagation usually completes in 5–30 minutes but can take up to 24–48 hours in rare cases.
-
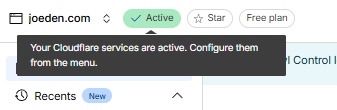
Once the nameserver change is visible, the site status changes to Active.
-
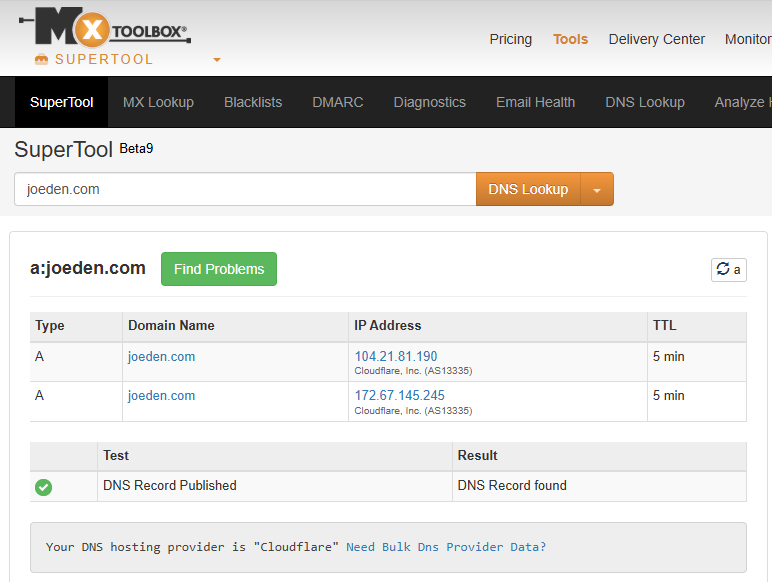
Verify using Mxtoolbox to confirm the NS records match Cloudflare's nameservers.
5. Set SSL/TLS mode and Verify origin certificate
-
Go to Cloudflare Dashboard → SSL/TLS → Overview.
-
Choose a mode:
- Full (recommended) if your origin has a valid TLS certificate (self-signed is acceptable for Full but not Full (Strict))
- Full (Strict) if your origin has a certificate issued by a trusted CA or Cloudflare Origin CA
- Flexible if your origin does not support HTTPS (not recommended — can cause redirect loops and security gaps)
-
(Optional) Generate and install a Cloudflare Origin Certificate on your origin server and select Full (Strict) for the best security.
6. Configure Cloudflare Settings (Recommended)
-
DNS:
- Keep web site A/CNAME records proxied (orange cloud).
- Keep MX and mail server records DNS-only (grey cloud).
-
SSL/TLS:
- Minimum TLS version: 1.2 or 1.3
- Enable HTTP Strict Transport Security (HSTS) only after testing (Hard to undo).
-
Security → WAF & Firewall:
- Free plan: enable basic managed rules and block obvious malicious traffic patterns.
- Create firewall rules for admin paths (e.g.,
/wp-admin) and restrict by IP if possible.
-
Speed → Caching:
- Browser Cache TTL: choose per your application
- Enable Brotli (Compression) and Auto Minify (JS/CSS/HTML) if desired
-
Page Rules:
- Free plan: limited number
- Use them for redirects, caching overrides, or forcing HTTPS.
-
Network:
- Enable HTTP/2 and HTTP/3 (if available) for better performance.
7. Email specifics (Very important)
- Keep MX records unchanged and DNS-only (grey cloud)
- Keep any SPF, DKIM and DMARC TXT records intact.
- If SPF is missing, add them in Cloudflare before nameserver switch.
- If your mail uses a host like
mail.example.com, ensure the A record formailis grey cloud (Cloudflare does not proxy SMTP.)
Useful Commands
-
Check NS records (expect Cloudflare NS):
dig NS example.com +short -
Check A record:
dig A example.com +short -
Query a specific resolver (Google DNS):
dig NS example.com @8.8.8.8 +short
Troubleshooting
-
Website not reachable after switching nameservers
- Check DNS records in Cloudflare.
- A record must point to correct origin IP and be proxied (orange) if you want Cloudflare protection.
- Use
dig +short example.com Aanddig +short example.com NSto verify. - Temporary DNS propagation: test with
nslookupordigagainst 1.1.1.1 and 8.8.8.8 to confirm global status.
-
Email broken after move
- Most likely cause: missing MX or mail-server A record
- MX record points to a host that is orange-clouded (proxied).
- Set mail-related records to DNS-only.
-
Redirect loops or mixed content after enabling SSL
- If your origin serves HTTP and Cloudflare is set to Flexible, you may get redirect loops.
- Switch to Full or Full (Strict) after enabling HTTPS at origin.
-
DNS records missing from Cloudflare
- Add them manually in Cloudflare DNS.
- Check the Name.com DNS page for records you may have missed.
Rollback Plan
- In Cloudflare: Keep DNS records as-is (they will remain authoritative once NS revert).
- At Name.com: Replace the Cloudflare nameservers with the former nameservers (Name.com defaults or your hosting provider nameservers).
- After the change, wait for propagation.
- Your domain will stop using Cloudflare features and return to the old DNS provider.
Common FAQ
-
Do I have to transfer my domain registration from Name.com to Cloudflare to use Cloudflare?
No. You only need to change nameservers. Your domain registration stays at Name.com unless you choose to transfer registration.
-
Will changing nameservers break email?
Not if you copy MX and mail-related records correctly into Cloudflare before switching. Keep mail records DNS-only.
-
How long does propagation take?
Typically 5–30 minutes. Up to 24–48 hours in rare cases.
-
Is Cloudflare free for basic protection?
The Free plan includes CDN, basic DDoS protection, WHOIS Redaction/Privacy, DNS, and limited security features.