Probably Important: Development
Overview
This project is a note-taking application called "Probably Important".
The app is designed for authenticated users who need a simple place to write, organize, search, and share notes.
The planned stack includes:
| Tool | Used For |
|---|---|
| Next.js | App framework |
| Bun | Runtime |
| TypeScript | Type safety |
| Tailwind CSS | Styling |
| better-auth | Authentication |
| Prisma | Database access |
| Neon PostgreSQL | Database storage |
| TipTap | Rich text editing |
Core Features
These are the main features planned for the app.
- Create, edit, and delete notes.
- Store a title, content, and timestamp for each note.
- Render notes in a list for quick browsing.
- Search notes by title or content.
- Restrict access so each user only sees their own notes.
- Share notes publicly through a unique URL.
The app will provide rich text formatting options:
- Bold, Italic, and Underline
- Headings
- Bullet and Numbered Lists
- Links
- Blockquotes
- Horizontal Separator Lines
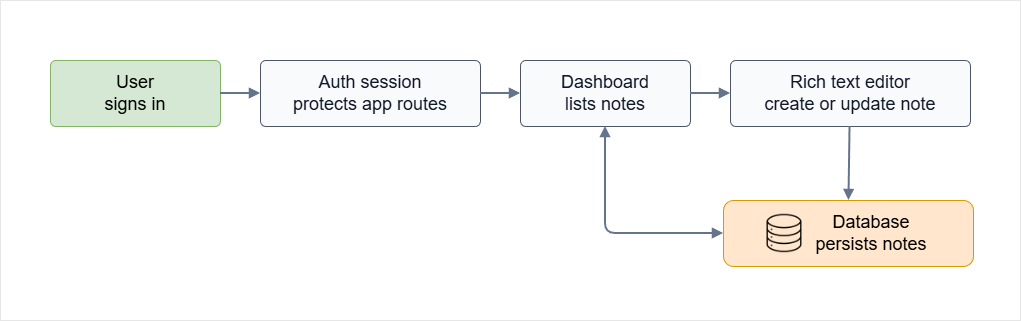
Application Flow
The diagram below gives a quick view of how the main app flow connects authentication, the dashboard, the editor, and note storage.
Prerequisites
Environment Setup
Create the Project
Create the project directory that will contain the note-taking application.
Note: Do not navigate into the project directory.
mkdir project-probably-important
Create the application using the Next.js generator.
Make sure to specify the new project directory you just created.
bun create next-app project-probably-important
You can choose the default settings for now, if prompted.
The Next.js generator automatically creates the initial project structure and installs the required dependencies.
Note: These files are generated and do not need to be created manually.
project-probably-important/
├── app/
├── public/
├── package.json
├── bun.lock
├── tsconfig.json
├── next.config.js
├── eslint.config.mjs
├── postcss.config.mjs
└── README.md
The project is stored in GitHub at: Probably-Important
Start the Development Server
Move into the project directory:
cd project-probably-important
Run the application:
bun run dev
Output:
Local: http://localhost:3030
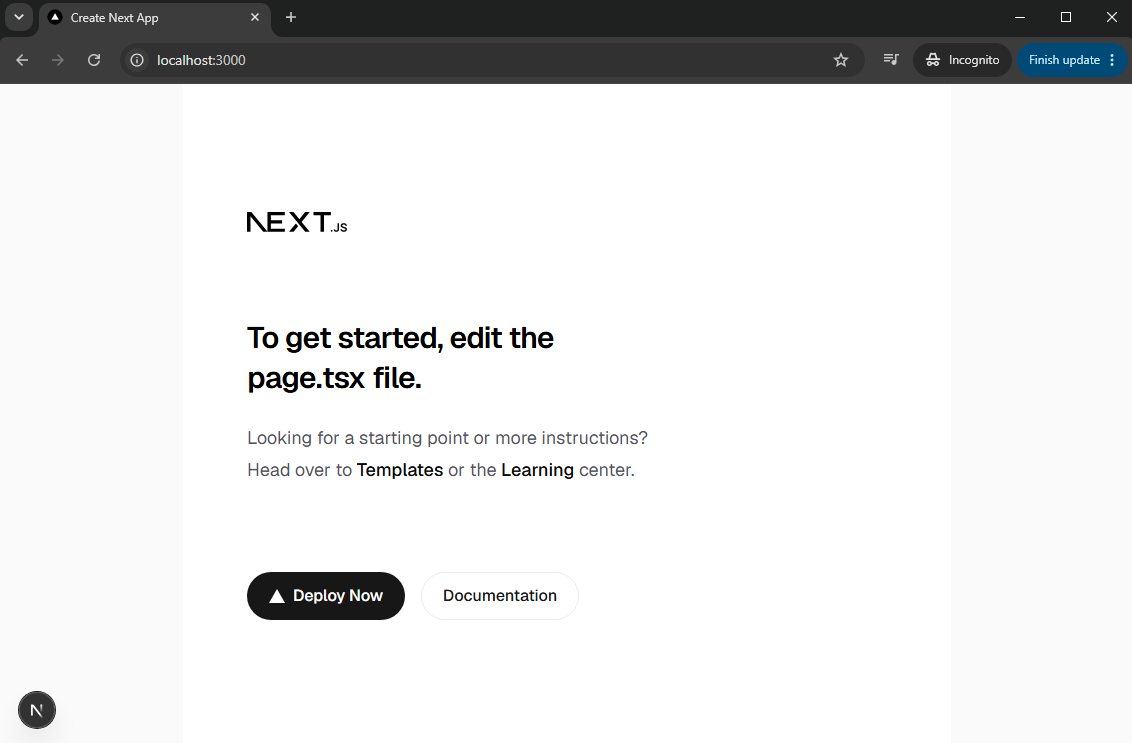
Open the application in a browser:
http://localhost:3030
Claude Build Prompt
To assist with building the app, we can use Claude as a coding assistant.
When asking Claude for help, we can use the following prompt:
I want to build a note-taking app called "Probably Important" using Next.js.
The app should allow users to create, edit, and delete notes.
Each note should have a title and content. The note should be created with a timestamp and should be displayed in a list of notes.
Notes should be created and edited using a rich text editor (using TipTap) that allows users to format their notes with bold, italic, and underline options.
The app should also have a search functionality to find notes by title or content.
Additionally, I want to implement user authentication so that users can only access their own notes.
Authenticated users should be able to:
- Login and log out
- Create new notes
- View, update, and delete their existing notes
- Search through their notes
- Share notes publicly with a unique URL
The app should be built using Next.js with Bun as the runtime.
Typescript should be used for type safety, and Tailwind CSS should be used for styling.
The backend should be implemented using Next.js API routes, and the frontend should be built with React components.
Authentication should be implemented using better-auth, and the database should be managed with Prisma and Neon PostgreSQL.
The rich editor should be implemented using TipTap, and the search functionality should be implemented using a simple text search on the database.
The basic rich text editor should support the following formatting options:
- Bold
- Italic
- Underline
- Headings
- Bullet list
- Numbered list
- Links
- Blockquote
- Horizontal separator lines
The data will be stored in a Neon PostgreSQL database, and Prisma will be used as the ORM to interact with the database.
Before implementing any code, create a
SPEC.mddocument and wait for approval.DO NOT generate application code, database migrations, configuration files, or project scaffolding until the specifications in
SPEC.mdhave been reviewed and approved.The specification should define:
- Project overview
- Functional requirements
- Non-functional requirements
- User flows
- Database schema
- Authentication flow
- API endpoints
- Frontend pages and components
- Folder structure
- Third-party dependencies
- Implementation phases
The specification should be concise, practical, and focused on the requirements described above. Avoid adding unnecessary features that are not part of the project scope.
Keep the implementation simple and production-ready. Favor straightforward solutions over advanced patterns unless they are required by the project requirements.
Note that it won't implement the application yet, it will first create the SPEC.md file that outlines the project specifications and requirements.
It is highly recommended to generate the SPEC.md file before starting the implementation of the app. This will help ensure that the project is well-defined and that all requirements are clearly understood before development begins.
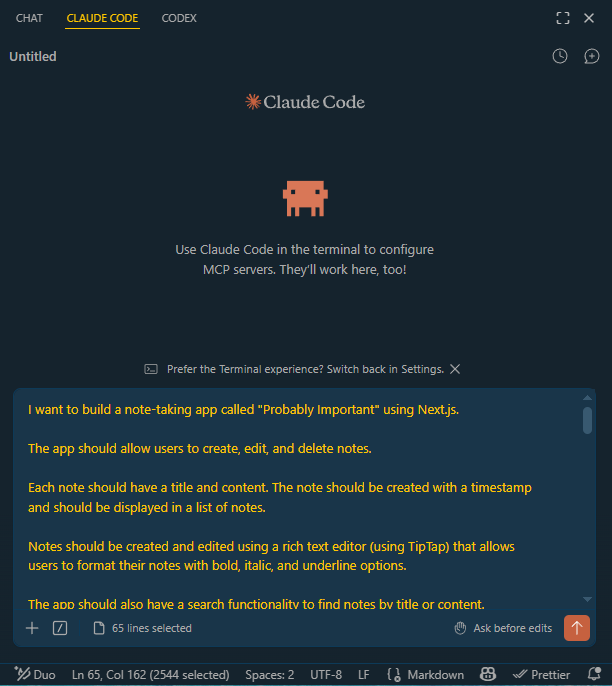
You can paste the prompt above into the Claude CLI or in the Claude Code extension in VS Code to generate the SPEC.md file.
In my case, I used the Claude Code extension in VS Code first.
After generating the SPEC.md file, you can review it and make any necessary adjustments before proceeding with the implementation of the app.
Install Project Dependencies
The generated Next.js project already includes the basic framework packages:
nextreactreact-domtypescripttailwindcss- ESLint and React/Node type packages
Based on the approved SPEC.md, the app still needs extra packages for authentication, validation, database access, and rich text editing.
| Package | Used For |
|---|---|
better-auth | User signup, login, logout, and sessions |
zod | Runtime validation for API request bodies |
prisma | Prisma CLI for schema and migrations |
@prisma/client | Database client used by the app |
@neondatabase/serverless | Neon PostgreSQL connection support |
@tiptap/react | React integration for TipTap |
@tiptap/pm | ProseMirror packages required by TipTap |
@tiptap/starter-kit | Core editor features like bold, italic, headings, lists, blockquote, and horizontal rule |
@tiptap/extension-underline | Underline formatting |
@tiptap/extension-link | Link formatting |
@types/bun | TypeScript types for Bun APIs |
Normally in JS projects, you would use npm install to add packages. However, this project uses Bun as the runtime, so we will use bun add instead.
Note 1: Mixing package managers can create multiple lockfiles, such as both bun.lock and package-lock.json.
Before running the install commands, make sure you are in the project directory:
cd project-probably-important
Install the runtime dependencies (these are the packages that the app needs to run):
bun add better-auth zod @prisma/client @neondatabase/serverless @tiptap/react @tiptap/pm @tiptap/starter-kit @tiptap/extension-underline @tiptap/extension-link
Note 2: The @prisma/client package is the Prisma database client your application code imports and uses at runtime. It is installed as a runtime dependency because it is required for the app to function properly.
Note 3: For JS projects, we do not need a Python-style virtual environment because the project dependencies are isolated in the project directory. The bun.lock file ensures that the same versions of packages are installed for all developers working on the project.
They do not overwrite global system packages, but just make sure you run the command from inside the project folder.
project-probably-important/node_modules/
project-probably-important/package.json
project-probably-important/bun.lock
Install the development dependencies (only needed during development and testing, not in production):
bun add -D prisma @types/bun
Note 4: The @prisma/client package is installed as a runtime dependency, while the prisma package is installed as a development dependency. The prisma package is only needed for generating the Prisma client and running migrations, so it is not required in production.
After the packages have been added once, another developer can install everything from package.json and bun.lock with:
bun install
You do not need to manually run every bun add command again unless you are adding new packages to the project.
Additional: Since we are using Bun as the runtime, we will need to update the package.json scripts to use bun run instead of npm run.
"scripts": {
  "dev": "bun run --bun next dev",
  "build": "bun run --bun next build",
  "start": "bun run --bun next start",
  "lint": "eslint"
},
EDIT: Since this project uses Prisma, we should avoid running Next.js with the Bun runtime. In testing, Bun and Turbopack caused issues resolving Prisma's externalized client, which can lead to 500 errors during database operations.
Keep using Bun as the package manager, but run Next with the normal Node runtime instead:
"scripts": {
  "dev": "next dev",
  "build": "next build",
  "start": "next start",
  "lint": "eslint"
},
Setting up the Claude Project
To initialize the Claude project, run the following command in the project directory:
claude init
This will create a .claude directory in the project root, which contains the configuration files for the Claude project. This will help Claude understand the project structure and provide better assistance during development.
Claude will detect the SPEC.md file and use it as a reference for the project specifications.
Finally, it also creates a CLAUDE.md file in the project root. This file will be loaded by Claude when working with the project, and it contains important information about the project structure, dependencies, and conventions.
Review the CLAUDE.md file and make any necessary adjustments to ensure that it accurately reflects the project setup and conventions.
EDIT: As good practice, I added a mention in the CLAUDE.md file to remind Claude to keep its responses short. Longer responses means more tokens used, which can lead to hitting the token limit faster and losing context.
Keep the replies extremely concise and focused on the code. Avoid unnecessary explanations or commentary. Only provide information that is directly relevant to the code. Avoid long explanations, background information, or unrelated details. Focus on the code itself and its functionality.
Using MCP
When Claude needs to check current documentation, it will often search the web directly from the main conversation. While this works, documentation pages can be very large and may contain extensive examples, migration guides, API references, and unrelated details. This can quickly consume context that would be better spent on the project itself.
This is especially common when working with fast-moving tools such as Next.js, better-auth, Prisma, Neon, Bun, and TipTap.
As an alternative, we can use an MCP server that is designed for documentation lookup. This allows Claude to search external documentation only when needed, and retrieve only the specific information needed for the current task.
Use MCP for:
- Checking the latest API syntax
- Verifying setup instructions
- Confirming framework-specific behavior
- Reviewing version-specific changes
- Avoiding outdated examples from model memory
The goal is not to copy documentation into the conversation, but to retrieve only the information required for the next implementation step. This keeps the main Claude context focused on the project files, SPEC.md, and the implementation plan.
For this project, I used Context7 as the MCP server because it is focused on current library documentation. It also has a Claude Code plugin that can add documentation lookup tools, skills, commands, and a documentation research subagent.
There are a few possible ways to use it:
| Option | When to Use |
|---|---|
| Context7 Claude Code Plugin | Recommended. Adds MCP tools, automatic docs lookup behavior, commands, and a docs-researcher agent. |
| Context7 MCP Only | Good if you only need documentation lookup through MCP without the additional plugin features. |
| Manual Web Search | Works, but can fill the main context window with large documentation pages and unrelated details. |
Inside Claude Code, install the Context7 plugin:
/plugin marketplace add upstash/context7
/plugin install context7@context7-marketplace
You can choose to install the plugin for the current project only, or for all projects.
  Install for you (user scope)
  Install for all collaborators on this repository (project scope)
> Install for you, in this repo only (local scope)     Back to plugin list
If needed, reload plugins:
/reload-plugins
You can also use the Context7 setup command from the terminal:
npx ctx7 setup --claude
Context7 can work without an API key, but the anonymous tier has lower rate limits.
For a better experience, create a free Context7 API key from the Context7 dashboard, then add it to your shell profile:
export CONTEXT7_API_KEY="your-context7-api-key"
Note that this is optional for this project.
Restart Claude Code after adding the environment variable.
To confirm the MCP server is available in Claude Code, run:
/mcp
You can also list configured MCP servers from the terminal:
claude mcp list
Output:
plugin:context7:context7: https://mcp.context7.com/mcp (HTTP) - ✔ Connected
After setup, we can now ask Claude to use Context7 for documentation lookups instead of pasting docs into the main conversation.
Use the documentation MCP server to check the current better-auth Prisma adapter setup. Return only the required imports, configuration shape, and any version-specific warnings. Do not paste the full documentation page.
While this works, it would mean adding this reminder every time you want to check documentation. A better approach is to create a subagent that can handle documentation lookup separately from the main conversation.
Using Subagents
For documentation-heavy tasks, we can use subagents so the main Claude conversation does not get polluted with long research notes. A subagent can inspect external documentation, compare options, and return a short summary to the main agent. This keeps the main thread focused on decisions and code changes instead of raw documentation.
This is useful when a task requires checking several sources before implementation. For example, better-auth, Prisma 7, Next.js 16, and TipTap may each have version-specific setup details.
If the Context7 plugin is installed, use its docs-researcher agent for this. The agent can research documentation in a separate context and return only the useful summary.
The subagent can be created at the global level to be used across projects, like this:
/home/joseeden/.claude
|
├── agents
|   └── docs-researcher
|       └── README.md
Alternatively, it can be created at the project level to be used only for this project:
/project-probably-important
|
├── .claude
|   └── agents
|       └── docs-researcher
|           └── README.md
To ensure that Claude always use the subagent for documentation lookups, we can add a note in the CLAUDE.md file:
When checking documentation, ALWAYS use the
docs-researcheragent to perform the lookup. Return only the relevant summary and implementation guidance. Avoid pasting large documentation pages into the main conversation.
Using Skills
Skills are reusable instructions that help Claude handle specific types of tasks consistently. They can be used to guide common workflows such as documentation lookup, code review, or framework-specific implementation steps.
Like subagents, skills can be created at the global level to be used across projects, or at the project level to be used only for this project.
/home/joseeden/.claude
|
├── agents
|   └── skills
|       └── modern-best-practice-react-components
|           └── SKILL.md
For this project, we'll create a skill that guides Claude to build React components using modern best practices.
Implementation
Database Setup
The application uses a serverless Postgres database hosted on Neon, which is a cloud-based Postgres service that provides a free tier for small projects.
Go to the Neon website to sign up for a free account: https://neon.com/
After signing up, click Create database and choose region closest to you:
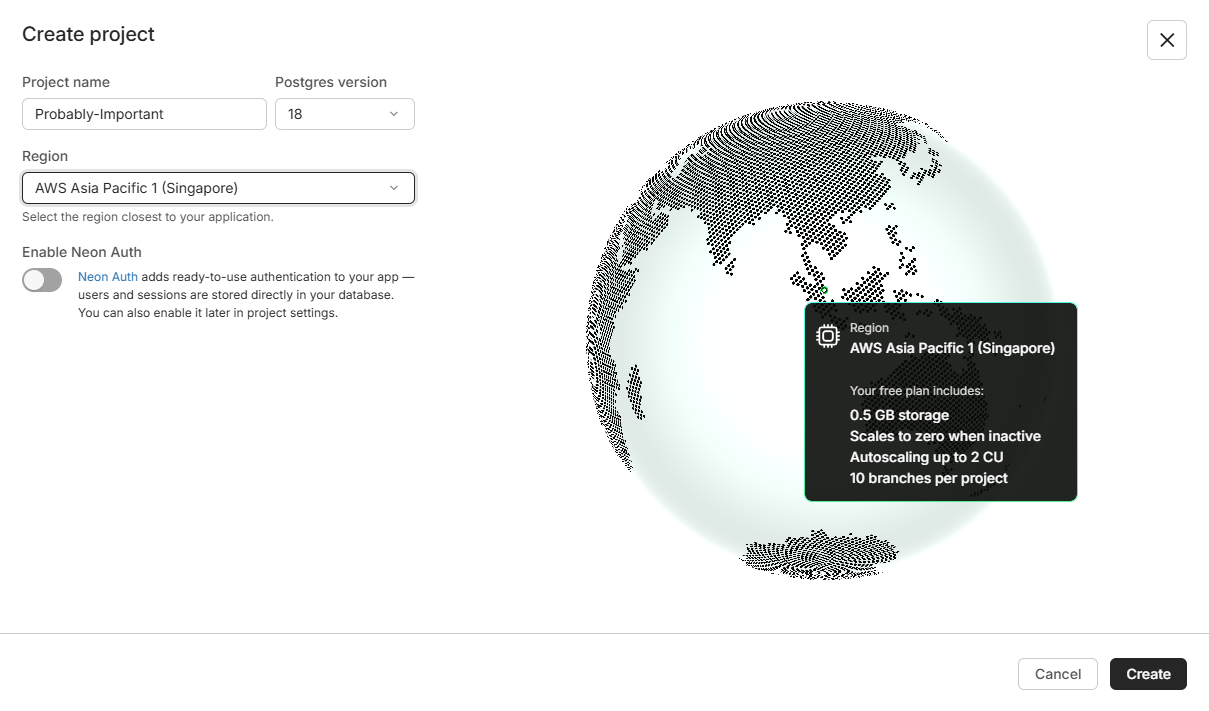
This provides an NPX command for connecting to your database using the Neon CLI, along with a connection string that can be used with any Postgres client.
postgresql://******************************************************?sslmode=require...
Create a .env.local file in the project root and add the following environment variables:
DATABASE_URL="postgresql://...?...sslmode=require..."
BETTER_AUTH_SECRET="generate-a-long-random-secret"
BETTER_AUTH_URL="http://localhost:3030"
For the BETTER_AUTH_SECRET, you can generate a long random string using a password generator or a command like openssl rand -hex 32.
openssl rand -base64 32
NOTE: The BETTER_AUTH_URL value should match the exact origin used by the development server. Since thee app will be run on port 3030, the value is http://localhost:3030. If you use a different port later, update BETTER_AUTH_URL to match it before testing signup or login.
Initial App Structure
To start the implementation of the app, we can use instruct Claude Code to generate code snippets based on the approved SPEC.md file.
Using the Claude CLI, use /plan to create a plan first without generating any code yet.
Prompt:
/plan Build the "Probably Important" app based on the approved
SPEC.mdfile.Start with setting up the core route structure and the main pages for the app.
Use dummy message content in the page.tsx files for now, and focus on creating the basic layout and navigation.
Implement a single /auth route for email and password authentication using better-auth.
EDIT: Claude may decide to use separate routes for login and signup, which is fine. In my case, I want a single /auth route.
It will list the steps to implement the app, and it will ask you some questions about the project. Review the plan and answer the questions. Once you are satisfied with the plan, you can approve it and Claude will start generating code snippets based on the plan.
Since better-auth is used here, it will ask you to select the database type. Choose PostgreSQL:
  1. Local SQLite now
     Set up Prisma with a local SQLite dev DB...
❯ 2. Neon Postgres now
     Full SPEC stack now. Requires you to provide a Neon DATABASE_URL in .env....
  3. Config only, no live DB
     Wire up the better-auth instance, /api/auth route....
  4. Type something.
When prompted for the page routes to implement, choose the full spec tree (if its an available option):
Which page routes should I scaffold as dummy pages now (alongside the working /auth route)?

❯ 1. Full SPEC tree
     Scaffold /, /auth, /notes/new, /notes/[id...
  2. Core only
     Scaffold just / (dashboard), /auth, and /notes/[id]...
  3. Type something.
For /auth route, choose the option that recommendes a single /auth route for both login and signup (this is aligned with the approved SPEC.md file):
How should the /auth page work?

❯ 1. Combined toggle
     One /auth page with a toggle/tab switching between Sign in and Sign up...
  2. Sign-in only + link
     /auth is sign-in; sign-up is a secondary mode....
  3. Type something.
It will return all your answers and ask you to confirm.
Once you confirm, it will generate the code snippets for the app based on the approved SPEC.md file.
Review your answers

 ● better-auth needs a database to store users/sessions. How should I handle the DB for this step so auth actually works?
   → Neon Postgres now
 ● Which page routes should I scaffold as dummy pages now (alongside the working /auth route)?
   → Full SPEC tree
 ● How should the /auth page work?
   → Combined toggle

Ready to submit your answers?

❯ 1. Submit answers
  2. Cancel
When prompted to execute, you can choose from the following options:
Claude has written up a plan and is ready to execute. Would you like to proceed?

  1. Yes, and use auto mode
❯ 2. Yes, manually approve edits
  3. Tell Claude what to change        shift+tab to approve with this feedback
The options may differ depending on the version of Claude you are using. In my case, I chose option 2 to manually approve edits.
There maybe a couple of steps where Claude will ask you to confirm before proceeding. This is to ensure that the generated code aligns with your expectations and the approved SPEC.md file.
If you want Claude to generate the code without asking for approval, you can choose option 1 to use auto mode. However, this may result in code that does not align with your expectations or the approved SPEC.md file.
Once the code snippets are generated, you can review them and make any necessary adjustments before proceeding with the implementation of the app.
But first, test the app by running the development server:
PORT=3030 bun run dev
Note: You can change the port as needed, but make sure to update BETTER_AUTH_URL in .env.local accordingly
Access the app in your browser at:
http://localhost:3030
After the initial route structure is in place, the next step is to connect the application to the real authentication and database layer.
Auth and Database Access
After the initial route structure is in place, the next step is to connect the application to the real authentication and database layer.
This step focuses only on the foundation:
- Prisma should connect to the Neon PostgreSQL database
- better-auth should use Prisma for users and sessions
- Shared database/auth helpers should live in the root-level
libfolder.
At this stage, we'll avoid building the note CRUD features, editor, search, or public sharing flow. Those features will depend on the auth and database setup, so it is better to get this layer working first.
We'll use Claude to generate the code snippets for the auth and database access.
Prompt:
Implement authentication and database access based on the approved
SPEC.mdfile.Use Prisma with Neon PostgreSQL. Do not use SQLite, Drizzle, or raw SQL.
Add a
libfolder in the project root for shared authentication and database utilities.Create:
lib/db.tslib/auth.tsIn
lib/db.ts, export a Prisma Client singleton nameddb. It should use theDATABASE_URLenvironment variable through Prisma’s normal datasource configuration inprisma/schema.prisma.In
lib/auth.ts, configure better-auth using the Prisma adapter and thedbclient fromlib/db.ts.Also create or update
prisma/schema.prismawith the required better-auth models and the app-ownedNotemodel fromSPEC.md.Focus only on authentication setup, database access, and the Prisma schema. Do not implement any API routes, frontend pages, or other features at this time.
After Claude generates the code, review the changed files before testing. For this step, the important files are:
lib/db.tslib/auth.tsprisma/schema.prismaapp/api/auth/[...all]/route.ts
If the files look aligned with the prompt, generate the Prisma client and apply the database migration:
bun run db:generate
bun run db:migrate
EDIT: If you get this error:
error: script "db:migrate" exited with code 130
This might mean that Prisma sees the database and migration history are disagreeing. Since this is a development database, the clean fix is usually:
-
Reset the database to clear all data and migration history.
This will drop and recreate the database schema from the current migration files.
bunx prisma migrate reset -
Generate a new migration from the current Prisma schema, which should now be in sync with the empty database.
bun run db:generatebun run db:migrate
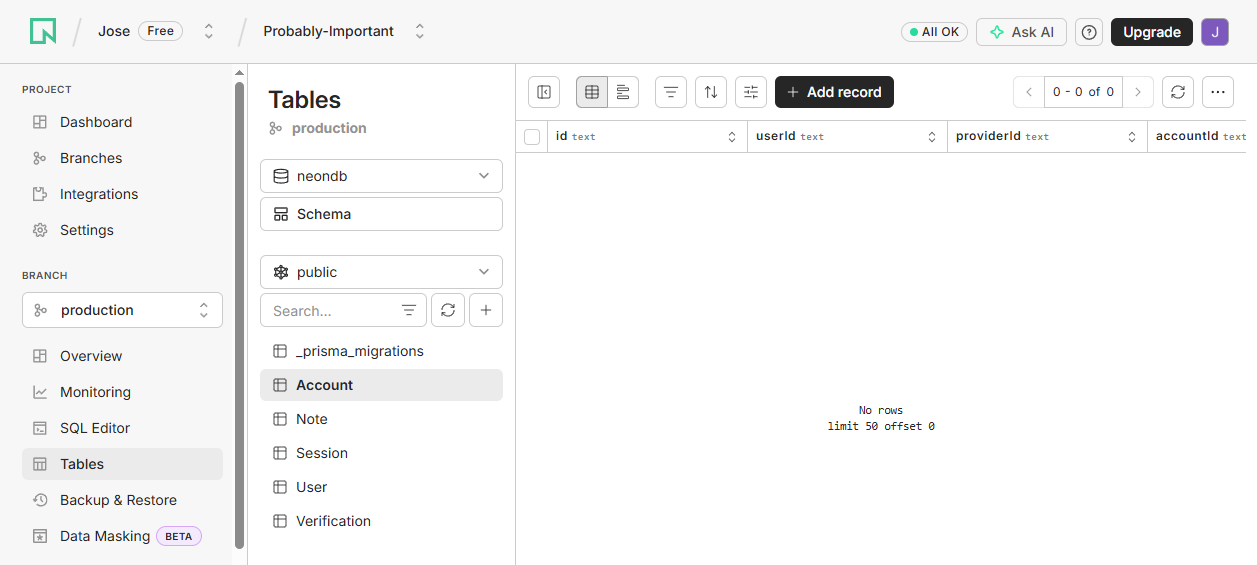
Once the migration is applied successfully, you should see the new tables in the database (in your Neon dashboard), including the User table for better-auth and the Note table for the app.
If the development server is not already running, start it again:
PORT=3030 bun run dev
Open the app in the browser:
http://localhost:3030/auth
Create a test account from the auth page, then sign out or open a private browser window and try signing in with the same email and password. If signup and login both work without a 500 error, the auth route is talking to better-auth correctly.
UPDATE: You may notice there are already three notes in the dashboard. These are hardcoded placeholder notes, not database records yet. This is expected at this stage because the note CRUD flow has not been implemented.
For reference, these hardcoded notes are configured in the dashboard page.tsx file.
const dummyNotes = [
  { id: "1", title: "Welcome to Probably Important", updatedAt: "Just now" },
  { id: "2", title: "Ideas worth keeping", updatedAt: "Yesterday" },
  { id: "3", title: "Grocery list", updatedAt: "2 days ago" },
];
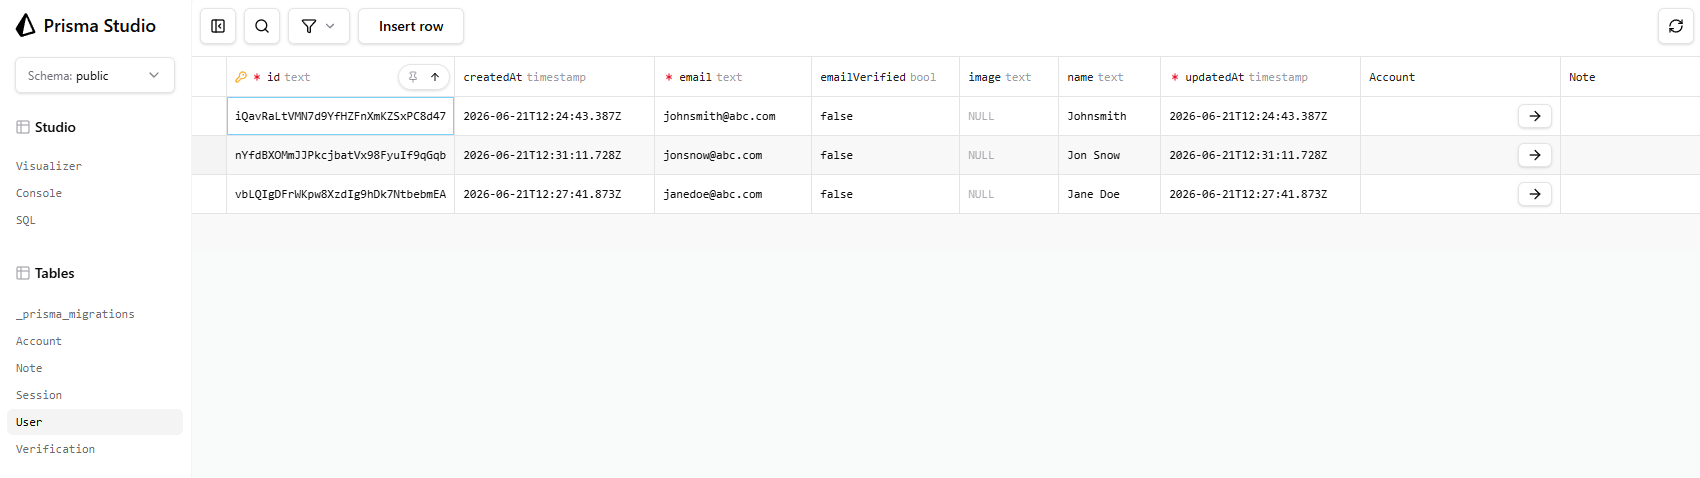
To confirm that the database is also being written to, open Prisma Studio:
bun run db:studio
Output:
Prisma Studio is running at: http://localhost:51212
Open the provided URL in the browser to access Prisma Studio, which is a visual interface for interacting with your database.
Check that the new user appears in the User table, and that better-auth has also created the related auth records such as sessions or accounts.
Protected App Routes
Once signup and login work, the next step is to protect the authenticated parts of the app. This makes the dashboard and note routes behave like private application pages instead of public pages.
For this project, use /dashboard as the authenticated dashboard route. If the generated dashboard currently lives at /, move or recreate that dashboard page at /dashboard and update the redirects, links, and route protection consistently.
We'll use Claude to generate the code snippets for route protection.
Prompt:
/plan After successful login, redirect users to the authenticated dashboard route.
Use
/dashboardas the authenticated dashboard route. If the current dashboard page lives at/, move or recreate it at/dashboardand update all redirects, links, and route protection consistently.Protect the dashboard route and all note-related routes so only authenticated users can access them. If an unauthenticated user tries to visit one of these routes, redirect them to
/auth.Keep the public share route accessible without authentication.
Add route protection in a way that fits modern Next.js.
This project uses Next.js
proxy.ts, notmiddleware.ts, so update the existing root-levelproxy.tsif request-level route protection is needed.Do not create a
middleware.tsfile.Use server-side route checks where stronger per-page authorization is needed, but do not rely on a client-side layout component as the only protection.
After the plan is generated, wait for review before implementing it.
Make sure to review the generated plan. If it is aligned with the project routes, you can proceed to implementing the route protection.
After the code is generated, test the behavior in a private browser window.
Note: If you are using the same browser window for testing, you can try refreshing the page or logging out after testing login. You can also use an incognito/private window to avoid session conflicts.
- Visit the dashboard route without logging in.
- Confirm that the app redirects to
/auth. - Log in with the test account.
- Confirm that the app redirects back to the
/dashboard. - Confirm that note-related routes are blocked when logged out.
Dashboard and Create Flow
Once route protection is in place, the dashboard can serve as the main workspace for authenticated users. This step introduces the application header, the Add Note navigation link, and the initial note creation workflow.
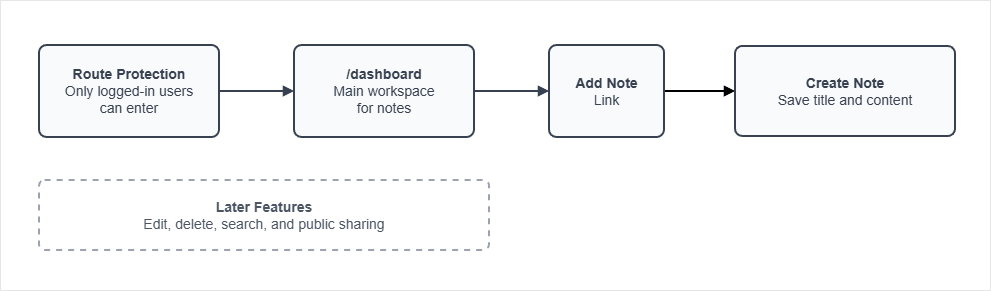
The focus at this stage is limited to the dashboard, navigation, and creating notes. Features such as editing, deleting, searching, and public note sharing will be implemented later.
Prompt:
/plan Finish the first note creation flow.
On
/dashboard, add one clear "Add Note" link or button that points to/notes/new.If the app header already has a "New Note" or "Add Note" link, remove that duplicate from the header and keep the create-note entry point in the dashboard body only.
Build the
/notes/newpage with a simple form for note title and content. TipTap will be added in a later step, so use a basic text area for now.Add a server-side create-note action or route handler. The write operation must:
- Run on the server
- Validate the current session
- Associate the new note with the authenticated user
After creating the note, redirect the user to the created note page at
/notes/[id].Update the note detail page so it loads the created note from the database and displays the note title and content. Do not leave placeholder text such as "Read-only note content will render here."
Update the dashboard so it loads the logged-in user's notes from the database and shows the newly created note in the list.
Keep this step focused only on creating notes. Do not implement edit, delete, search, public sharing, or the rich text editor yet.
After the plan is generated, wait for review before implementing it.
After the code is generated, test the create-note flow:
-
Re-run the dev server if it's not already running:
PORT=3030 bun run dev -
Navigate to the app in your browser and log in.
-
Go to
/dashboard. -
Confirm that the Add Note link is visible.
-
Click Add Note and confirm it opens
/notes/new. -
Create a note with a title and content.
-
Confirm that the app redirects to the created note page.
-
Confirm that the note page shows the title and content you entered.
-
Go back to
/dashboard. -
Confirm that the new note appears in the dashboard list.
-
Confirm that the saved note belongs to the logged-in user.
Rich Text Editor
Once the basic note creation flow is working, upgrade the content field to use a rich text editor. This step should improve the existing /notes/new page without changing the route, redirect, or dashboard behavior that already works.
Prompt:
/plan Upgrade the existing new-note page to use TipTap.
Keep the existing note title field, create-note server action, redirect to
/notes/[id], note detail rendering, and dashboard note list behavior.Replace only the basic content text area with a TipTap rich text editor.
Include a formatting toolbar with bold, italic, underline, headings, bullet lists, numbered lists, links, blockquotes, and horizontal separator lines.
Submit the TipTap HTML content through the existing create-note flow and save it to the existing
Note.contentfield.Ensure only authenticated users can access the new-note page and submit the form.
Make sure the editor, toolbar, form fields, and submit state work well in both light mode and dark mode.
After the plan is generated, wait for review before implementing it.
After the code is generated, test the rich text editor:
- Log in to the app and go to
/dashboard. - Click Add Note and enter a note title.
- Add formatted content using bold, italic, underline, headings, lists, links, blockquotes, and horizontal lines.
- Save the note.
- Confirm that the app redirects to the created note page.
- Confirm that the note page shows the formatted content correctly.
- Go back to
/dashboard. - Confirm that the note still appears in the notes list.
- Test the page in light mode and dark mode.
Edit and Delete Notes
Since note creation and rich text editing are working, the next step is to support updating and deleting existing notes.
This step should load an existing note into the editor, allow the title and content to be changed, and provide a safe delete flow with confirmation.
Prompt:
/plan Add edit and delete support for notes.
When the user clicks Edit on a note page, open the edit page for that note.
The edit page should load the existing note title and content from the database.
The title should be editable.
The note content should load into the TipTap editor so the user can update the rich text content.
Add a server-side update action or route handler that validates the current session and confirms the note belongs to the logged-in user before saving changes.
Add a Delete button for each note on the note detail page.
The Delete button should open a centered confirmation
<dialog>.
- The confirmation dialog should be visually centered in the viewport, both horizontally and vertically.
- Use the native
<dialog>element, but add explicit styling so that when it is open, the dialog appears in the center of the screen.If the user confirms deletion, remove the note from the database.
After deletion, redirect the user back to
/dashboard.Ensure users cannot edit or delete notes that do not belong to them.
Keep this step focused only on editing and deleting notes. Do not implement search or public sharing yet.
After the plan is generated, wait for review before implementing it.
After the code is generated, test edit and delete:
- Log in to the app and create a note.
- Open the note page then click Edit.
- Confirm that the title and content are loaded.
- Change the title and content.
- Save the note.
- Confirm that the updated title and content are shown on the note page.
- Go back to
/dashboardand confirm the updated title appears. - Open the note again and click Delete.
- Confirm that a centered confirmation dialog appears.
- Confirm deletion.
- Confirm that the app redirects to
/dashboard. - Confirm that the deleted note no longer appears in the dashboard list.
- Try to access the deleted note's URL and confirm that it shows a "not found" or similar message.
Code Formatting with Hooks
Before adding more features, it is useful to make formatting automatic. This keeps generated code consistent with the project style without manually running the formatter after every edit.
This step adds a formatter script and a Claude Code hook that runs the formatter after Claude edits or writes files.
Note: To test the hook from the previous section, we added a note in the prompt to use double quotes in the generated code. This should trigger the formatter to change them to single quotes, which confirms that the hook is running after edits.
Prompt:
/plan Add automatic code formatting for this project.
Install
oxfmtas a development dependency using Bun.Add a
formatscript topackage.jsonthat runsoxfmt --write ..Initialize an OxFormat config if one does not already exist.
Configure the formatter to use single quotes, including JSX single quotes.
Add a local Claude Code hook that runs the project formatter after Claude edits or writes files.
Use a
PostToolUsehook forEdit|Write.The hook command should run from
${CLAUDE_PROJECT_DIR}and should not interrupt Claude Code if formatting fails.Keep this step focused only on formatting setup. Do not change application behavior.
After the plan is generated, wait for review before implementing it.
EDIT: While Claude can perform the instructions in the prompt, I opted to set up the hook manually to ensure it is configured correctly. This also allows me to test the hook immediately after setting it up.
-
Install
oxfmtas a development dependency:bun add -D oxfmt -
Add the
formatscript topackage.json:"scripts": {..."format": "oxfmt --write ."}, -
Add a configuration files using the
bunxcommand:bunx oxfmt --initThis will create an
oxfmt.config.jsonfile in the project root. -
Update the config and enable
singleQuoteandjsxSingleQuote:// oxfmt.config.json{"$schema": "./node_modules/oxfmt/configuration_schema.json","ignorePatterns": [],"singleQuote": true,"jsxSingleQuote": true} -
This formats the project files in place.
bun run formatOutput:
$ oxfmt --write .Finished in 977ms on 34 files using 48 threads.
Note that I would have to run this manually every time I want to format the code, which can be easy to forget.
As a solution, we can add a hook in Claude Code that runs the formatter automatically after every edit or write. This way, whenever Claude generates code, it will be formatted according to the project style without needing to remember to run the formatter manually.
The hooks can be added in different places:
| Location | Scope | Purpose |
|---|---|---|
settings.json | Global | Defines hooks that apply to all Claude Code projects. |
settings.local.json | User Local | Defines hooks that apply only to your user account on the current machine. |
CLAUDE.md | Project | Defines hooks that apply only to the current project. |
.claude/hooks/ | Project / Complex | Stores more advanced hooks that require multiple files or custom logic. |
For this setup, I added the PostToolUse hook in the settings.json which will be committed to Git. This way, the formatting hook will be available to anyone who clones the project and opens it in Claude Code.
For more details on hook, see Claude Code documentation.
// settings.json

{
  "hooks": {
    "PostToolUse": [
      {
        "matcher": "Edit|Write",
        "hooks": [
          {
            "type": "command",
            "command": "cd \"${CLAUDE_PROJECT_DIR}\" && bun run format 2>/dev/null || true"
          }
        ]
      }
    ]
  }
}
UPDATE: If you are using WSL and you installed Bun there, you may need to use the WSL path for Bun in the hook command. For example:
"command": "cd \"${CLAUDE_PROJECT_DIR}\" && /home/joseeden/.bun/bin/bun run format 2>/dev/null || true"
See Hooks not working for more details.
Restart Claude Code so it reloads the hook configuration. After that, any time Claude creates or modifies files, the formatter will run automatically.
To verify the hook is working, ask Claude to make a code change that does not follow the project's formatting rules. For example, have it create a file that uses double quotes instead of single quotes. Once the file is written, the hook should automatically reformat the code.
A simple way to test this is by continuing with the public sharing feature in the next step, which requires Claude to generate new code files.
Public Sharing
After notes can be created, edited, and deleted, the next step is to let users share selected notes publicly.
This step should allow the note owner to turn sharing on or off. Public visitors should only be able to view shared notes, not edit or delete them.
Note: The prompt mentioned using double quotes for string literals in the generated code. This is to test that the formatter hook (from previous steps) is working correctly, since it should automatically convert double quotes to single quotes after the code is generated.
Prompt:
/plan Add public note sharing.
Allow the owner of a note to turn public sharing on or off.
When sharing is turned on, generate a unique public share link for the note.
Show the public share link to the note owner so it can be copied.
Unauthenticated users should be able to open the public share link and view the note title and content.
Public visitors must not be able to edit or delete the note.
When sharing is turned off, the old public share link should no longer work and should show a not found page.
Ensure only the note owner can enable or disable sharing.
Write any new or changed JavaScript, TypeScript, TSX, and JSX string literals using double quotes. Do not manually convert them to single quotes.
Keep this step focused only on public sharing. Do not implement search or other features yet.
After the plan is generated, wait for review before implementing it.
Review the generated code, then once approved, validate public sharing:
- Log in to the app.
- Create or open an existing note.
- Turn on public sharing for the note.
- Confirm that a public share link is shown.
- Copy the public share link.
- Open the link in a private browser window.
- Confirm that the note title and content are visible without logging in.
- Confirm that edit and delete actions are not available on the public page.
- Go back to the logged-in session and turn off sharing.
- Reload the public share link.
- Confirm that the link no longer works and shows a not found page.
Final Polish
After the main features are working, use this section to clean up the application before treating the project as complete.
This step should focus on quality, consistency, and small UX fixes. Avoid adding new product features here.
Prompt:
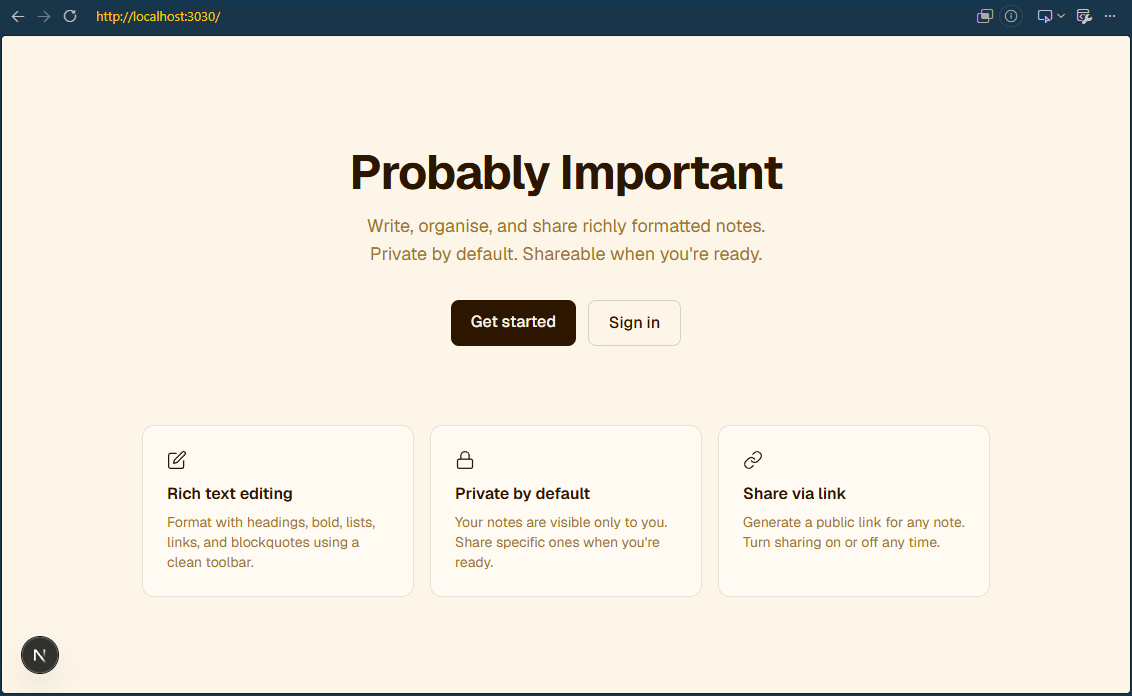
/plan Polish the Probably Important app.
Add a landing page that introduces the application, including:
- App name
- Short description
- Primary "Get Started" button that links to the authentication page
- Feature overview cards highlighting the main capabilities of the app
Review the application for UX, accessibility, responsiveness, and visual consistency issues.
Keep the current feature set unchanged. Focus on improving the existing experience rather than adding new functionality.
Review and improve the following areas:
- Landing page
- Authentication page
- Dashboard
- Note creation page
- Note detail page
- Note edit page
- Delete confirmation dialog
- Public sharing page
- Search results and empty states
Where appropriate, improve:
- Empty states
- Loading states
- Error states
- Button labels and action text
- Form validation messages
- Keyboard navigation and focus states
- Responsive layouts
- Visual consistency between pages
Ensure both light mode and dark mode are fully usable and maintain sufficient contrast.
Run linting, formatting, and tests after all changes.
Do not add new features such as:
- Folders
- Tags
- Password reset
- Email verification
- Real-time synchronization
- Advanced search
After generating the plan, wait for review and approval before making any changes.
Final validation checklist:
-
Run the formatter.
bun run format -
Run linting.
bun run lint -
Run tests, if Vitest has been configured.
EDIT: This unit testing is done on later step.
bun run test -
Build the app.
bun run build -
Start the app and test the main flows.
PORT=3030 bun run dev
Current view of the app in the browser:
Testing the Application
Using Plugins
Plugins are a powerful way to extend Claude Code's capabilities. For this project, we can use a Playwright plugin to test the application in a real browser and validate key user workflows.
Some of the most valuable browser tests for this application include:
- User signup and login
- Dashboard route protection
- Note creation
- Rich text formatting
- Editing and deleting notes
- Public note sharing
- Search functionality
Claude Code can use Playwright through either a plugin or an MCP server. The plugin approach is typically the easiest to set up because it can be installed directly from the Claude Code plugin interface.
To open the plugin manager, open Claude Code from your terminal and run:
/plugin
You can install plugins at:
- User scope if you want browser testing available across multiple projects.
- Project scope if the setup should be shared with other team members working on the project.
The Marketplaces show the official Claude marketplace but you can also add an internal marketplace URL if your organization has one.
For this project, we'll use the official Claude marketplace to install the following plugins:
| Plugin | Purpose |
|---|---|
playwright | Enables Claude to run browser-based tests and validate application workflows in a real browser. |
typescript-lsp | Provides TypeScript language support, including type checking, code navigation, and development assistance. |
If you installed the plugins at project scope, you should see it listed in the plugins section of the .claude/settings.json file inside the project folder.
// project-probably-important/.claude/settings.json

"enabledPlugins": {
  "playwright@claude-plugins-official": true,
  "typescript-lsp@claude-plugins-official": true
}
If you installed it at user scope, it will be listed in your global settings.local.json file.
// ~/.claude/settings.json

"enabledPlugins": {
  "playwright@claude-plugins-official": true,
  "typescript-lsp@claude-plugins-official": true
}
EDIT: I installed the plugins at project scope, since I was having issues when they were installed at user scope.
Browser Testing
After the plugins are installed, you can use them to test the application in a real browser.
Start the development server if it is not already running:
PORT=3030 bun run dev
We can ask Claude to test the app step by step:
Test the main application features using Playwright plugin. Use a real browser to validate the user flows and check for any issues.
The development server is running at
http://localhost:3030.Test signup, login, route protection, note creation, rich text formatting, edit, delete, public sharing, and search.
If you find an issue, explain the problem, fix it, and test the affected flow again.
It may ask for permissions like running cURL running commands, opening a browser, and accessing the local development server. Approve these permissions so it can run the tests.
Browser testing is powerful, but it can use a lot of tokens because Claude needs to inspect pages, interact with elements, and sometimes review screenshots or page snapshots.
Use it for important user flows and after larger UI changes.
After you approve the permissions, Claude will go through the script ad create the necessary configuration and test files.
It will try opening a browser, and work through the app like a user. It may create a temporary test account, sign in, visit protected routes, create notes, use the TipTap toolbar, edit and delete notes, enable a public share link, and check that the shared URL works without being logged in.
The expected output is not just "tests passed". Claude should give a short summary of what it checked and whether each flow passed or failed.
For example:
Browser validation completed.

Passed:
- Signup creates a new account and redirects to /dashboard.
- Login works with the created test account.
- /dashboard redirects unauthenticated users to /auth.
- Notes can be created, edited, and deleted.
- Rich text formatting is saved and rendered.
- Public sharing creates a share URL that works in a logged-out browser context.

Failed:
- Search input is not available on the dashboard yet.
If Claude finds a bug, the expected behavior is:
- Explain the issue briefly.
- Fix only the affected code.
- Re-test the affected browser flow.
- Summarize the final result.
In my case, Claude returned the summary of the tests, and the only failure was the edit page route returning a 404 error. After restarting the dev server, the edit test passed.
Test results summary

┌─────┬───────────────────────────────────────┬────────┐
│  #  │                 Test                  │ Status │
├─────┼───────────────────────────────────────┼────────┤
│ 1   │ Unauthenticated /dashboard → /auth    │ ✓      │
├─────┼───────────────────────────────────────┼────────┤
│ 2   │ Unauthenticated /notes/new → /auth    │ ✓      │
├─────┼───────────────────────────────────────┼────────┤
│ 3   │ Wrong password shows error            │ ✓      │
├─────┼───────────────────────────────────────┼────────┤
│ 4   │ Sign out → /auth                      │ ✓      │
├─────┼───────────────────────────────────────┼────────┤
│ 5   │ Create a note, land on note view      │ ✓      │
├─────┼───────────────────────────────────────┼────────┤
│ 6   │ Note appears in dashboard list        │ ✓      │
├─────┼───────────────────────────────────────┼────────┤
│ 7   │ Bold formatting saved (<strong>)      │ ✓      │
├─────┼───────────────────────────────────────┼────────┤
│ 8   │ H1 heading saved (<h1>)               │ ✓      │
├─────┼───────────────────────────────────────┼────────┤
│ 9   │ Edit a note title                     │ ✗ BUG  │
├─────┼───────────────────────────────────────┼────────┤
│ 10  │ Delete note via confirmation dialog   │ ✓      │
├─────┼───────────────────────────────────────┼────────┤
│ 11  │ Enable sharing, public URL accessible │ ✓      │
├─────┼───────────────────────────────────────┼────────┤
│ 12  │ Copy share URL → "Copied!"            │ ✓      │
├─────┼───────────────────────────────────────┼────────┤
│ 13  │ Disable sharing → public URL 404s     │ ✓      │
└─────┴───────────────────────────────────────┴────────┘

Bug found: Edit page 404

Reproducer: curl http://localhost:3030/notes/any-id-here/edit returns HTTP 404.

Fix: Stop and restart the dev server (bun dev). The Turbopack re-scan at startup will fully register the edit route.
Claude also created Playwright test files so the browser checks could be repeated later without manually clicking through the app every time.
The generated test files are:
project-probably-important/
├── playwright.config.ts
└── tests/
    ├── global-setup.ts
    └── app.spec.ts
The global-setup.ts file creates a temporary test user and saves an authenticated browser session. The app.spec.ts file then uses that session to test the main note workflows.
You can run the browser test suite yourself after Claude creates it.
First, make sure the development server is running:
PORT=3030 bun run dev
Then, from another terminal in the project directory, run:
bunx playwright test
The expected successful output should show the tests passing in Chromium.
Running tests using 1 worker

... passed
If a test fails, Playwright writes details into the test-results/ folder. Open the relevant error-context.md file to see what happened on the page.
project-probably-important/test-results/
Use this to decide whether the problem is:
- A real application bug
- A missing feature that has not been implemented yet
- A brittle test selector
- A local environment issue, such as the dev server,
DATABASE_URL, orBETTER_AUTH_URL
After a browser test run, validate the result manually at least once by opening the app yourself:
http://localhost:3030
Check the flows that matter most:
- Sign up with a new test account.
- Sign out and sign back in.
- Create a note.
- Add rich text formatting.
- Edit the note.
- Delete a different test note.
- Turn public sharing on.
- Open the public share URL in a private browser window.
- Turn sharing off and confirm the public URL stops working.
- Search for notes if the search feature has already been implemented.
If search has not been implemented yet, it is fine for Claude or Playwright to report it as missing. Treat that as a pending feature, not a failed browser setup.
UPDATE: I decided not to implement search yet, since it is not part of the core note creation and sharing flows. It can be added later as a separate feature.
Unit Tests with Vitest
Browser tests are useful for validating user workflows, but unit tests provide faster feedback during development.
Start by testing code that does not require a browser, such as:
- Validation schemas
- Note ownership logic
- Search helper functions
- Rich text sanitization helpers
- Utility and server action helper functions
For this project, we'll use Vitest, which is a popular JavaScript testing library.
Install it with:
bun add -D vitest
Then ask Claude Code to set it up:
/plan Set up unit testing with Vitest.
Add Vitest as the test runner for this project.
Do not use Bun's built-in test runner.
Add a
testscript topackage.jsonthat runs Vitest.Create a focused test structure for reusable validation and helper logic.
Add unit tests for the highest-risk logic first, especially:
- Validation schemas
- Authorization and note ownership checks
- Search behavior
- Reusable helper functions
Use mocks only where needed.
If server action logic is difficult to test directly, extract small helper functions that can be tested without changing application behavior.
Do not make unnecessary changes to the app's behavior or UI.
After the plan is generated, wait for review before implementing it.
It will try to create the test folder, install dependencies for the testing tool, and generate the configuration file for Vitest.
After tests are added, run:
bun run test
After running the command, Vitest should print a summary of the test files it found and whether each test passed or failed.
A successful run usually looks something like this:
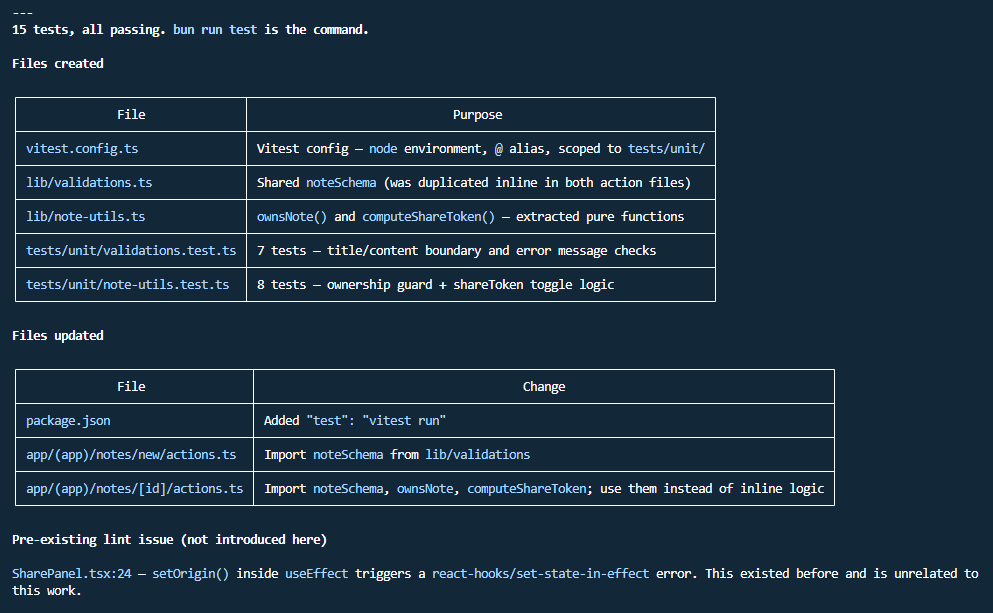
This means the unit tests completed successfully. At this point, read the test names and confirm they are testing the behavior you actually care about, not just checking that the current code returns something.
If a test fails, Vitest will show:
- The failing test name
- The file and line number
- The expected value
- The received value
- A stack trace or error message
Use that output to decide whether the failure is caused by the application code or by a bad test.
-
If the application code is wrong, ask Claude to fix the smallest affected area and run
bun run testagain. -
If the test is wrong, ask Claude to correct the test so it matches the intended behavior from
SPEC.md.
If Vitest says no tests were found, it means the setup exists but no matching test files have been created yet. In that case, ask Claude to add one small test file first, usually for validation or authorization helper logic.
Example follow-up prompt:
bun run testcompleted, but I want to review the test quality.Check the generated Vitest tests and confirm that they test the intended behavior from
SPEC.md.If any test only mirrors the current implementation without checking a real requirement, improve it.
Keep the test scope focused on unit tests. Do not add browser tests in this step.
After the unit tests pass, they become part of the normal validation checklist:
bun run lint
bun run test
bun run build
Review AI-generated tests carefully. Claude can write tests that match the current implementation too closely, even when the implementation has a bug.
Good tests should check expected behavior, edge cases, and failure cases.
Ralph Loop
The Ralph loop is a small shell script that repeatedly asks Claude Code to pick one unfinished task from prd.json, implement it, validate it, and mark the task as complete.
See Ralph Loop for more information.
The important files for this project are:
| File | Purpose |
|---|---|
ralph.sh | Runs Claude Code in a loop and gives it the project-specific prompt. |
prd.json | Stores the task list and the passes flag for each task. |
SPEC.md | Defines the approved product and technical direction for the app. |
CLAUDE.md | Gives Claude Code project-specific conventions and guardrails. |
agent-progress.txt | Stores a running memory of what happened in previous iterations. |
The agent-progress.txt file is created by the script if it does not exist yet. It gives Claude a running memory of what happened in previous iterations.
This project stores data in Neon PostgreSQL through Prisma, so any database task should use prisma/schema.prisma, lib/db.ts, and the Neon connection string in .env.local.
Running the Script
To run the Ralph script, move into the project directory:
cd project-probably-important
Make the script executable if needed:
chmod +x ralph.sh
Run the loop with a maximum number of iterations:
./ralph.sh 5
Each iteration asks Claude Code to choose one task where passes is false.
The script also supports overriding the app URL:
APP_URL=http://localhost:3030 ./ralph.sh 5
For this project, keep the local app on port 3030 so it matches BETTER_AUTH_URL and the Playwright configuration.
Ralph Prompt
The ralph.sh script sends Claude Code a project-specific prompt like this:
You are running the Ralph loop for the Probably Important Next.js app.
Project setup:
- Bun is the package manager, but Next.js runs on the normal Node runtime.
- The app uses Next.js 16, React 19, TypeScript, Tailwind CSS 4, better-auth, Prisma 7, Neon PostgreSQL, TipTap, and Playwright.
- Do not use SQLite or Bun SQLite. Persistence goes through Prisma and Neon PostgreSQL.
- Keep secrets in
.env.local. Never print or commitDATABASE_URL,BETTER_AUTH_SECRET, orBETTER_AUTH_URL.- The development app URL is
http://localhost:3030.Pick one task from
prd.jsonwherepasses=false.You do not have to go in order. Choose the best next task based on dependencies, risk, and what is already implemented.
Read
SPEC.mdandCLAUDE.mdbefore changing code. Follow the existing root-levelapp/,components/,lib/,prisma/, andtests/structure. Use Prisma models and thedbclient inlib/db.tsfor database work. Enforce note ownership on the server for every private note operation.
This keeps Ralph focused on the actual project instead of the course defaults.
It is recommended to make the prompt as specific as possible for the project. The more context you give Claude Code, the better it can implement tasks without introducing bugs or changing the intended behavior.
Validation After Each Iteration
After each task, Ralph asks Claude to run the smallest useful validation first.
For most code changes:
bun run lint
For framework, auth, database, route, or build-sensitive changes:
bun run build
For user flows:
bunx playwright test
If a validation command cannot run because the Neon database, environment variables, or dev server are not available, Claude should write the exact blocker in agent-progress.txt instead of pretending the task passed.
When a task is complete, Claude should:
- Mark only that task as
"passes": trueinprd.json. - Update
agent-progress.txt. - Commit the task if the working tree contains only the intended changes.
The Ralph loop is useful beyond this project. The reusable pattern is documented in Ralph Loop.
Troubleshooting
Hooks not working
If you used the PostToolUse hook to run a hook (e.g., formatter) after every edit or write, but it does not seem to be working, below are some places to check.
Note: The example here uses bun and oxfmt as the formatter, but the same principles apply to any hook command.
-
Confirmed the
CLAUDE_PROJECT_DIRvariable is set correctly.This isn't actually checked in the shell, since it's it's only injected by Claude Code's hook runner. It is not available in a regular shell session.
For this, you can prompt Claude to print the value of
CLAUDE_PROJECT_DIRin the hook command. For example, you can add a temporary hook that runsecho $CLAUDE_PROJECT_DIRafter every edit or write. -
Check the bun path in the hook command.
If you installed Bun in WSL, the path to the Bun binary may be different than the default
/usr/bin/env bun. Run the following command:which bunSample output:
/home/joseeden/.bun/bin/bun
In my case, I had to use the full path to the Bun binary in the hook command:
"command": "cd \"${CLAUDE_PROJECT_DIR}\" && /home/joseeden/.bun/bin/bun run format 2>/dev/null || true"