Branching
Overview
Branching lets you work on code independently without affecting the main code in the repository.
- Work on code without breaking the main branch
- Create multiple independent branches
- Safely test and experiment with changes
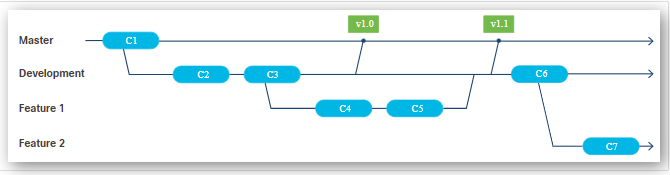
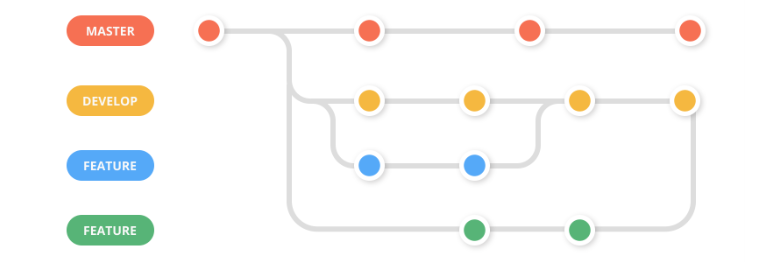
By default, a new repository starts with a branch called master. You can create additional branches to work on features or fixes without touching the main code. Each branch is independent, so changes in one branch do not affect others unless you choose to merge them.
Branches can be local or remote, and they can be deleted when no longer needed.
- Local branches exist on your machine
- Remote branches are shared with others
- Unused branches can be removed
Local branches are useful for trying out changes. If the changes work, you can keep and merge them. If not, you can delete the branch. Merging is optional, so unfinished work does not affect the main code.
Although branches are often shown as separate lines, they are simply references to specific commits. This makes Git efficient and easy to manage.
Each branch works like its own environment.
- Has its own commit history
- Has its own staging area
- Has its own working directory
When you switch between branches, your working files and staged changes update to match that branch, while the internal Git data remains unchanged.
Using branches instead of working directly on the main branch helps prevent accidental changes and keeps the code stable while allowing flexible development.
git branch
The git branch command will output a list of branches. If you haven't created any other branches, there is only one branch in the output of your command. The default branch for any Git repository is usually master, though you can change which branch is the default if needed.
git branch
Sample output:
* master
If you have multiple branches, the output will look like this:
* master
  development-abc
  reporting
  feature-main
The * next to master shows which branch you're currently on. Checking out a branch means choosing where your changes will apply. Since you’re on master, any changes will affect that branch until you switch to another.
You can have multiple branches stemming from the master which will have the similar code in it. From there you can work on your own feature branch while others can work on other feature branches.
HEAD
In Git, HEAD points to your current branch or commit.
When you create a repository, HEAD usually points to the main branch, like master or main. If you create and switch to a new branch, HEAD will point to that branch, so new commits go there.
To create and switch to a new branch, use:
git checkout -b new-branch
Output:
Switched to a new branch 'new-branch'
Common Commands
-
Create a branch:
git branch [new-branch] -
List the branches (the asterisk denotes the current branch):
git branchOr
git branch --list -
List the branches, including both local and remote branches.
git branch -a -
Switch to another branch.
git checkout [branch name] -
Create a new branch and switch to it.
git checkout -b [branch name] -
Switch to the branch last checked out.
git checkout - -
Rename a local branch.
git branch -m [old branch name] [new branch name] -
Delete a branch.
git branch [branch name] -d -
Clone a remote branch and switch to it.
git checkout -b [branch name] origin/[branch name] -
Compare two branches:
git diff branch-a branch-b -
Delete a remote branch.
git push origin --delete [branch name] -
Clone a remote branch and switch to it.
git checkout -b [branch name] origin/[branch name] -
Discard changes to a file.
git checkout -- [file-name.txt]
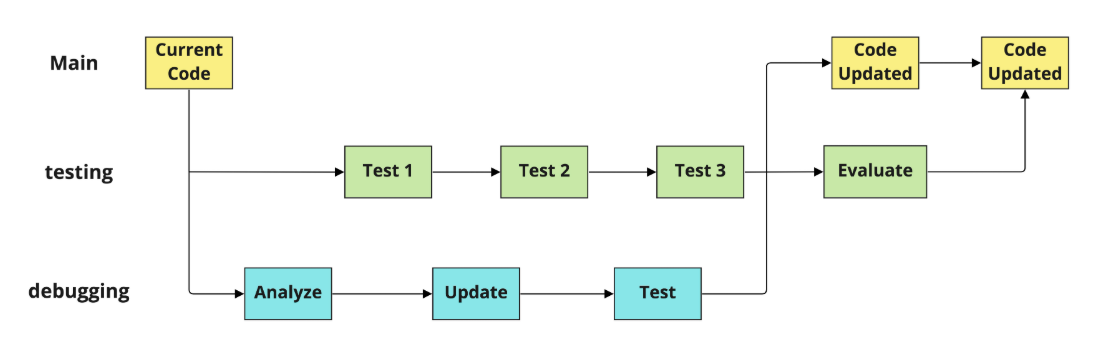
Merging Branches
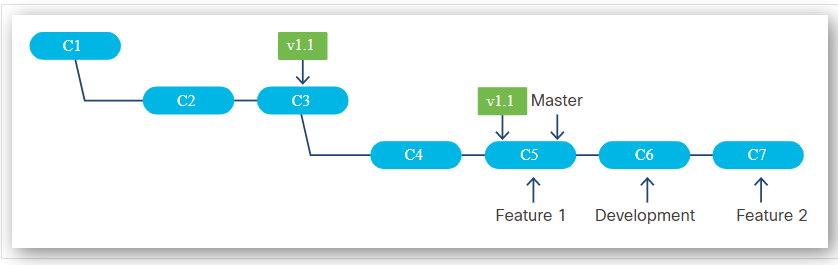
When branches are created, they can diverge as changes are made independently. To combine changes from one branch (source) into another branch (target), you can perform a merge.
During a merge:
- Git applies the commits from the source branch to the target branch.
- Only the target branch is modified; the source branch stays the same.
Sample Scenario
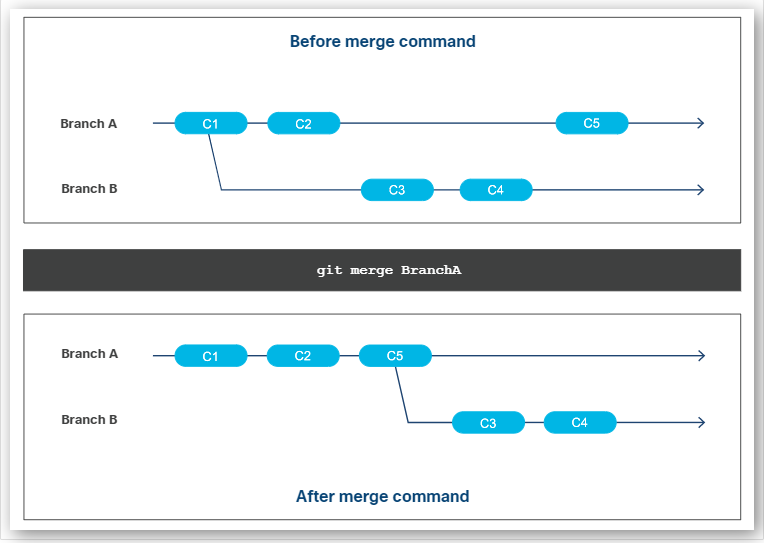
- Branch B is created from Branch A at
commit#1. - Branch A gets
commit#2. Branch B does not receive this change. - Branch B gets
commit#3andcommit#4. Branch A does not receive these changes. - Branch A gets
commit#5. Branch B does not receive this change. - Now both branches have diverged by two commits each.
To update Branch B with changes from Branch A (commit#2 and commit#5):
- Branch A ➔ source branch
- Branch B ➔ target branch
- Git applies the changes to Branch B without changing Branch A.
Since the commits were on different files, Git can merge them automatically. This is called a fast-forward merge.
Fast-forward Merge
A fast-forward merge happens when Git can automatically apply commits from the source branch to the target branch without conflicts. This usually occurs when:
- Different files were changed in the branches.
- Or the same file was edited, but on different lines.
In this case, Git integrates the commits by simply moving the pointer of the target branch to the latest commit of the source branch. No new merge commit is created.
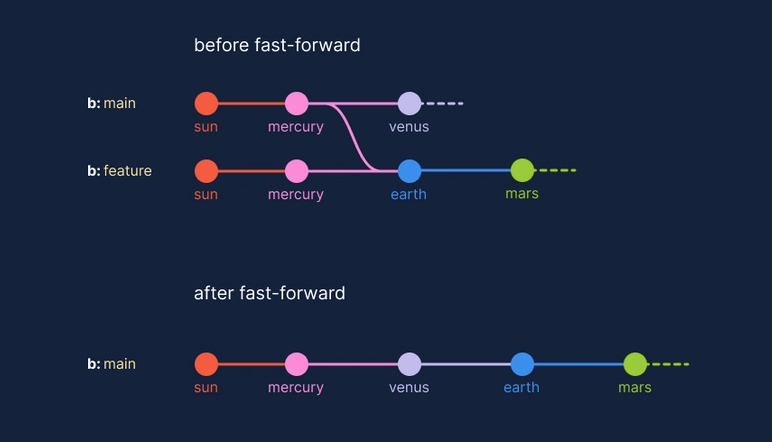
Fast-forward merges are the easiest and cleanest type of merge, but they only work if Git can combine all commits without any conflicts.
Merge Conflicts
If the same file is modified in both branches, Git may not be able to perform a fast-forward merge. This creates a merge conflict, where Git cannot automatically combine changes. In this case, the user must manually resolve conflicts.
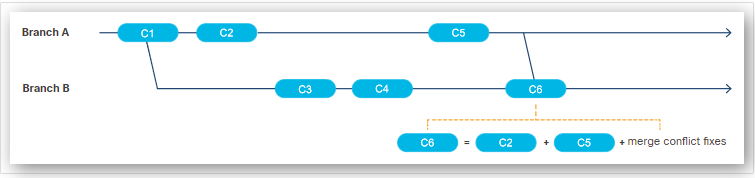
Once fixed, a new commit is created on the target branch containing both the merged changes and the conflict resolution.
Performing a Merge
Git provides the git merge command to combine branches:
git merge
To merge a branch into your current branch:
git merge <branch-name>
The <'branch-name'> is the source branch to merge into your current (target) branch.
To merge a branch into a branch that is not currently checked out:
git checkout <target-branch-name>
git merge <source-branch-name>
To merge multiple branches into your current branch:
git merge <branch-name-1> <branch-name-2> ... <branch-name-n>
This type of merge is called an octopus merge.