Starter Notes
The Problem With Duplicating YAML Files
Using separate YAML files for each environment can get messy fast.
- People often copy the same YAML to different folders
- Only change a few fields like
replicasfor each one - Easy to forget a file or make a mistake when updating
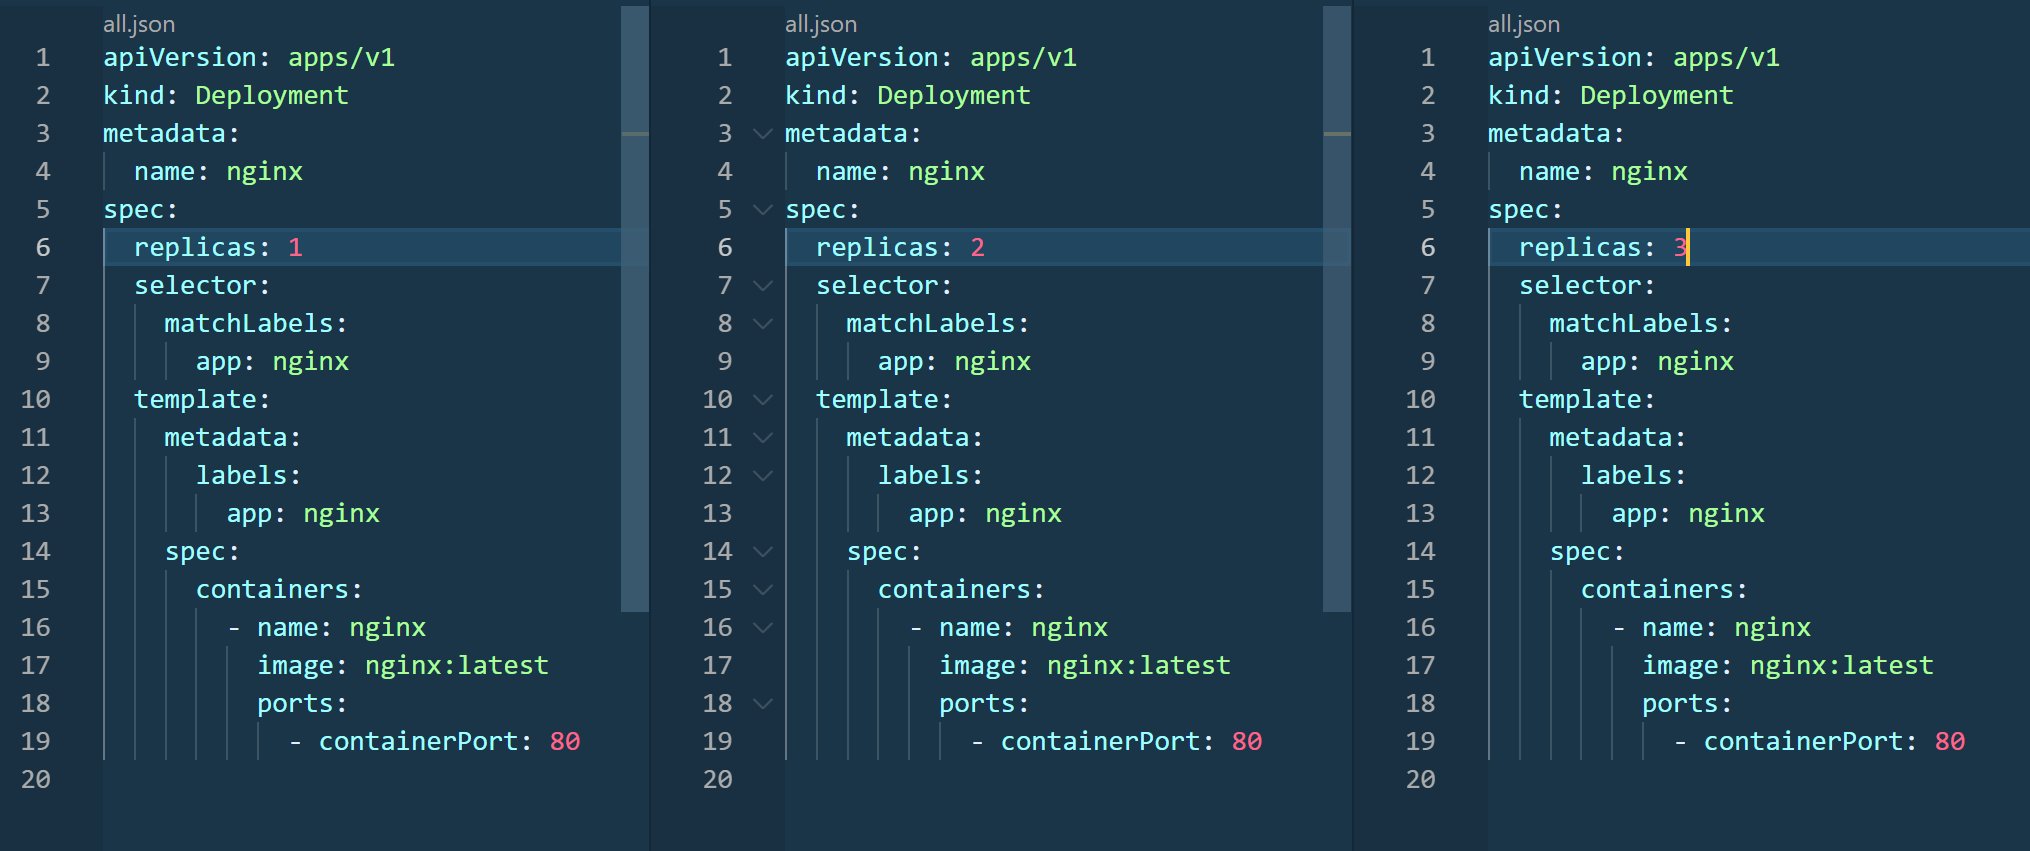
Say you want different numbers of NGINX pods per environment.
- 1 pod for development
- 2 pods for staging
- 5 pods for production
You'd need to copy and edit the same deployment YAML for each case.
You can have the three NGINX dpeloyments per environment:
dev
└── nginx-1.yml
staging
└── nginx-2.yml
prod
└── nginx-3.yml
To apply each one, you can simply run:
kubectl apply -f dev/
kubectl apply -f staging/
kubectl apply -f prod/
While this will work, this is not he most optimal approach and can be prone to errors.
A Better Way With Kustomize
Kustomize makes it easy to reuse Kubernetes configs by letting you update only the parts that need to change.
- Use one base file for shared values
- Add overlays for each environment
- Everything stays in plain YAML, no templates needed
This means you don’t copy full files for every environment, you only change what’s different.
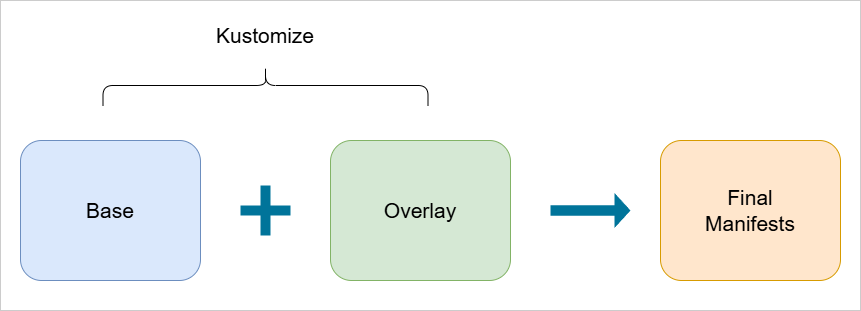
Base and Overlays
Kustomize is based on two main ideas: base and overlay.
- Base is the main config shared across environments
- Overlay is the custom part for each environment
With this setup, you avoid copying everything and just tweak what’s needed.
Below is a sample base file. This is a main config which will be identical across all your environments. It sets the default settings like replicas and container image.
# base/deployment.yaml
apiVersion: apps/v1
kind: Deployment
metadata:
  name: nginx
spec:
  replicas: 1
  template:
    spec:
      containers:
        - name: nginx
          image: nginx
For our dev environment, we can set small changes using overlays.
In the example below, we keep the default replicas: 1, so the base is enough. But if needed, we can still override values like this:
# overlays/dev/deployment.yaml
apiVersion: apps/v1
kind: Deployment
metadata:
  name: nginx
spec:
  replicas: 1
Similarly, the staging and prod environment can also have their overlays.
# overlays/staging/deployment.yaml
apiVersion: apps/v1
kind: Deployment
metadata:
  name: nginx
spec:
  replicas: 2
# overlays/prod/deployment.yaml
apiVersion: apps/v1
kind: Deployment
metadata:
  name: nginx
spec:
  replicas: 3
With this setup, you only define your base once and create small, focused changes in each overlay. Kustomize helps you avoid repeating yourself and keeps your configs simple and clean.
Folder Structure
You can organize your files in a way that supports reuse and overrides.
base/has the shared YAMLsoverlays/has subfolders likedev,staging,prod
Each overlay folder can override specific values. This keeps things clean and easy to follow.
sample-wordpress/
├── base/
│   ├── deployment.yaml
│   └── kustomization.yaml
└── overlays/
    ├── dev/
    │   └── kustomization.yaml
    ├── staging/
    │   ├── deployment-patch.yaml
    │   └── kustomization.yaml
    └── prod/
        ├── deployment-patch.yaml
        └── kustomization.yaml
How Kustomize Works
When you apply an overlay, Kustomize combines the base and overlay into a full YAML.
kubectl apply -k overlays/staging/
This generates the final manifest with the correct number of replicas, without manual copying.
Kustomize also comes built-in with kubectl so no other packages are needed to be installed.
You may still want to install the kustomize cli to get the latest version since kubectl doesn't usually comes with the latest version.