TLS Challenge
Using Let's Encrypt - TLS Challenge
This time, we'll use Let's Encrypt with the TLS challenge, which happens during the TLS handshake, not over HTTP.
- No need to expose port 80 (only 443 is used)
- Everything works over secure HTTPS
- Traefik handles all the challenge logic behind the scenes
The setup is nearly the same as the HTTP challenge, but simpler in some ways since it uses only one port.
Pre-requisites
Setup a Public Cloud VM
It is recommended to perform this lab on a a VM with a public IP because you need to open port 80 to the internet.
- Your DNS records must point to the VM’s public IP.
- Let’s Encrypt can verify your site via HTTP without problems.
If you do this lab in your local Windows machine, it is likely that your machine has a private LAN IP like 192.168.x.x behind NAT.
You can definitely tweak your Windows machine’s firewall to allow inbound connections on port 80 (and 443), but this alone won’t fix the main problem if your router or network blocks/doesn’t forward that traffic.
To create a public cloud VM, you can use:
Make sure your EC2 security group allows inbound TCP traffic on:
- Port 80 (HTTP)
- Port 443 (HTTPS)
- Port 8080 (Traefik dashboard)
After launching your VM, install the necessary tools. For example, on my EC2 instance, I run:
# Install Git
sudo yum update -y && sudo yum install -y git

# Install Docker
sudo amazon-linux-extras enable docker
sudo yum install -y docker
sudo systemctl enable docker
sudo systemctl start docker
sudo systemctl status docker

# Configure DOcker
sudo usermod -aG docker ec2-user && newgrp docker

# Install Docker compsoe
sudo curl -L "https://github.com/docker/compose/releases/download/v2.20.2/docker-compose-$(uname -s)-$(uname -m)" -o /usr/local/bin/docker-compose
sudo chmod +x /usr/local/bin/docker-compose
docker-compose --version

# Initialize Docker Swarm (needed for docker stack deploy):
docker swarm init
Prepare your Domain
Before using HTTPS with Traefik, make sure you have:
- A domain name for testing
- DNS records pointing to your DNS provider
- A DNS provider supported by TraefikA DNS provider supported by Traefik
heck the supported providers list here: Traefik DNS Provider Integrations**
For example, my setup uses:
- Domain from Namecheap
- DNS hosted on DigitalOcean
After getting a domain, update its registrar settings so it points to your chosen DNS provider. If you're also using DigitalOcean, you can follow the steps here: Adding a Domain in DigitalOcean
NOTE: Make sure your domain is fully set up and pointing to your server before proceeding with the labs. Propagation can take up to 24–48 hours, sometimes longer depending on the registrar and TLD.
To verify, you can run:
dig NS yourdomain.com
dig A yourdomain.com
If you are using DigitalOcean name servers, you should see:
;; ANSWER SECTION:
yourdomain.com.     1800    IN      NS      ns1.digitalocean.com.
yourdomain.com.     1800    IN      NS      ns2.digitalocean.com.
yourdomain.com.     1800    IN      NS      ns3.digitalocean.com.

;; ANSWER SECTION:
yourdomain.com.     300     IN      A       192.0.2.123
Set Up DNS Records
Once you've changed your domain’s nameservers to your DNS provider, the next step is to add your DNS records there.
Here are the DNS records I used. You can copy them but make sure to replace with your own domain details.
| Type | Hostname | Value | TTL (seconds) |
|---|---|---|---|
| A | *.joeden.site | points to 34.201.50.100 | 30 |
| A | www.joeden.site | points to 34.201.50.100 | 30 |
| A | dashboard.joeden.site | points to 34.201.50.100 | 30 |
| A | joeden.site | points to 34.201.50.100 | 30 |
The IP 34.201.50.100 is my test machine's public IP. Point the DNS records to your machine's public IP.
The dashboard.joeden.site is used to access the Traefik dashboard.
You can also use shorthand names since they mean the same:
| Type | Hostname | Value | TTL (seconds) |
|---|---|---|---|
| A | *.joeden.site | points to 34.201.50.100 | 30 |
| A | www | points to 34.201.50.100 | 30 |
| A | dashboard | points to 34.201.50.100 | 30 |
| A | @ | points to 34.201.50.100 | 30 |
If you set this up in DigitalOcean, your DNS records should look like this:
| Type | Hostname | Value | TTL (seconds) |
|---|---|---|---|
| NS | joeden.site | points to ns1.digitalocean.com | 30 |
| NS | joeden.site | points to ns2.digitalocean.com | 30 |
| NS | joeden.site | points to ns3.digitalocean.com | 30 |
| A | *.joeden.site | points to 34.201.50.100 | 30 |
| A | www.joeden.site | points to 34.201.50.100 | 30 |
| A | dashboard.joeden.site | points to 34.201.50.100 | 30 |
| A | joeden.site | points to 34.201.50.100 | 30 |
Clone the Repository
To try out the examples, clone the project repository from GitHub.
- Github repo: joseeden/labs-traefik
Clone and move into the project directory:
git clone https://github.com/joseeden/labs-traefik.git
cd labs-traefik/04-https-tls
Project structure:
04-https-tls
├── challenge-dns
│   ├── .env
│   ├── .gitignore
│   ├── docker-compose.dns.yml
│   └── traefik.dns.yml
├── challenge-http
│   ├── docker-compose.http.yml
│   └── traefik.http.yml
├── challenge-tls
│   ├── docker-compose.tls.yml
│   └── traefik.tls.yml
└── letsencrypt
Note: Make sure the letsencrypt folder is next to the challenge folders, not inside any of them. The Docker compose files expect it there. If you move the letsencrypt folder, remember to update the Docker compose files accordingly.
Update Traefik Static Config
Just like before, we configure a certificate resolver. The only real change is switching from httpChallenge to tlsChallenge.
# traefik.tls.yml
api:
  dashboard: true
  insecure: true

providers:
  docker:
    exposedByDefault: false

log:
  level: INFO

entryPoints:
  web:
    address: ":80"
  websecure:
    address: ":443"
  traefik:
    address: ":8080"

# Challenge TLS
certificatesResolvers:
  myresolver:
    acme:
      email: your_email@example.com
      storage: acme.json
      tlsChallenge: true
        # # used during the challenge
        # entryPoint: web

# Dashboard router
http:
  routers:
    traefik:
      rule: Host(`dashboard.yourdomain.com`)  # or use your domain + a subdomain
      entryPoints:
        - traefik
      service: api@internal
      # middlewares:                       # DO NOT DO IN PRODUCTION
      #   - auth                           # Disables the authentication
Replace with your own email for email: so Let’s Encrypt can contact you.
You also need to update the domain with your domain.
With this config, Traefik will request certificates without needing to serve any HTTP content.
Add TLS Labels in Compose
Now apply the right labels to your app in the docker-compose.tls.yml
version: "3"

services:
  traefik:
    image: traefik:v2.3
    ports:
      - "80:80"
      - "443:443"
      - "8080:8080"
    volumes:
      - /var/run/docker.sock:/var/run/docker.sock
      - ../letsencrypt:/letsencrypt # Copy Let's Encrypt certificate locally for backing up
      - ./traefik.tls.yml:/etc/traefik/traefik.yml    # Uses tls

  catapp:
    image: mikesir87/cats:1.0
    labels:
      - "traefik.enable=true"
      - "traefik.http.routers.catapp.rule=Host(`yourdomain`)"
      - "traefik.http.routers.catapp.service=catapp"
      - "traefik.http.services.catapp.loadbalancer.server.port=5000"
      - "traefik.http.routers.catapp.entrypoints=websecure"
      - "traefik.http.routers.catapp.tls.certresolver=myresolver"
Replace yourdomain.com with your real domain
These labels tell Traefik how to route HTTPS requests and which resolver to use for TLS.
Deploy the Stack
Now deploy the new setup with TLS challenge:
docker stack deploy -c ./challenge-tls/docker-compose.tls.yml traefik
Check the logs to watch the challenge in action:
docker service logs traefik_traefik
Test in Browser and Dashboard
Visit your domain using the correct HTTPS URL:
https://yourdomain.com
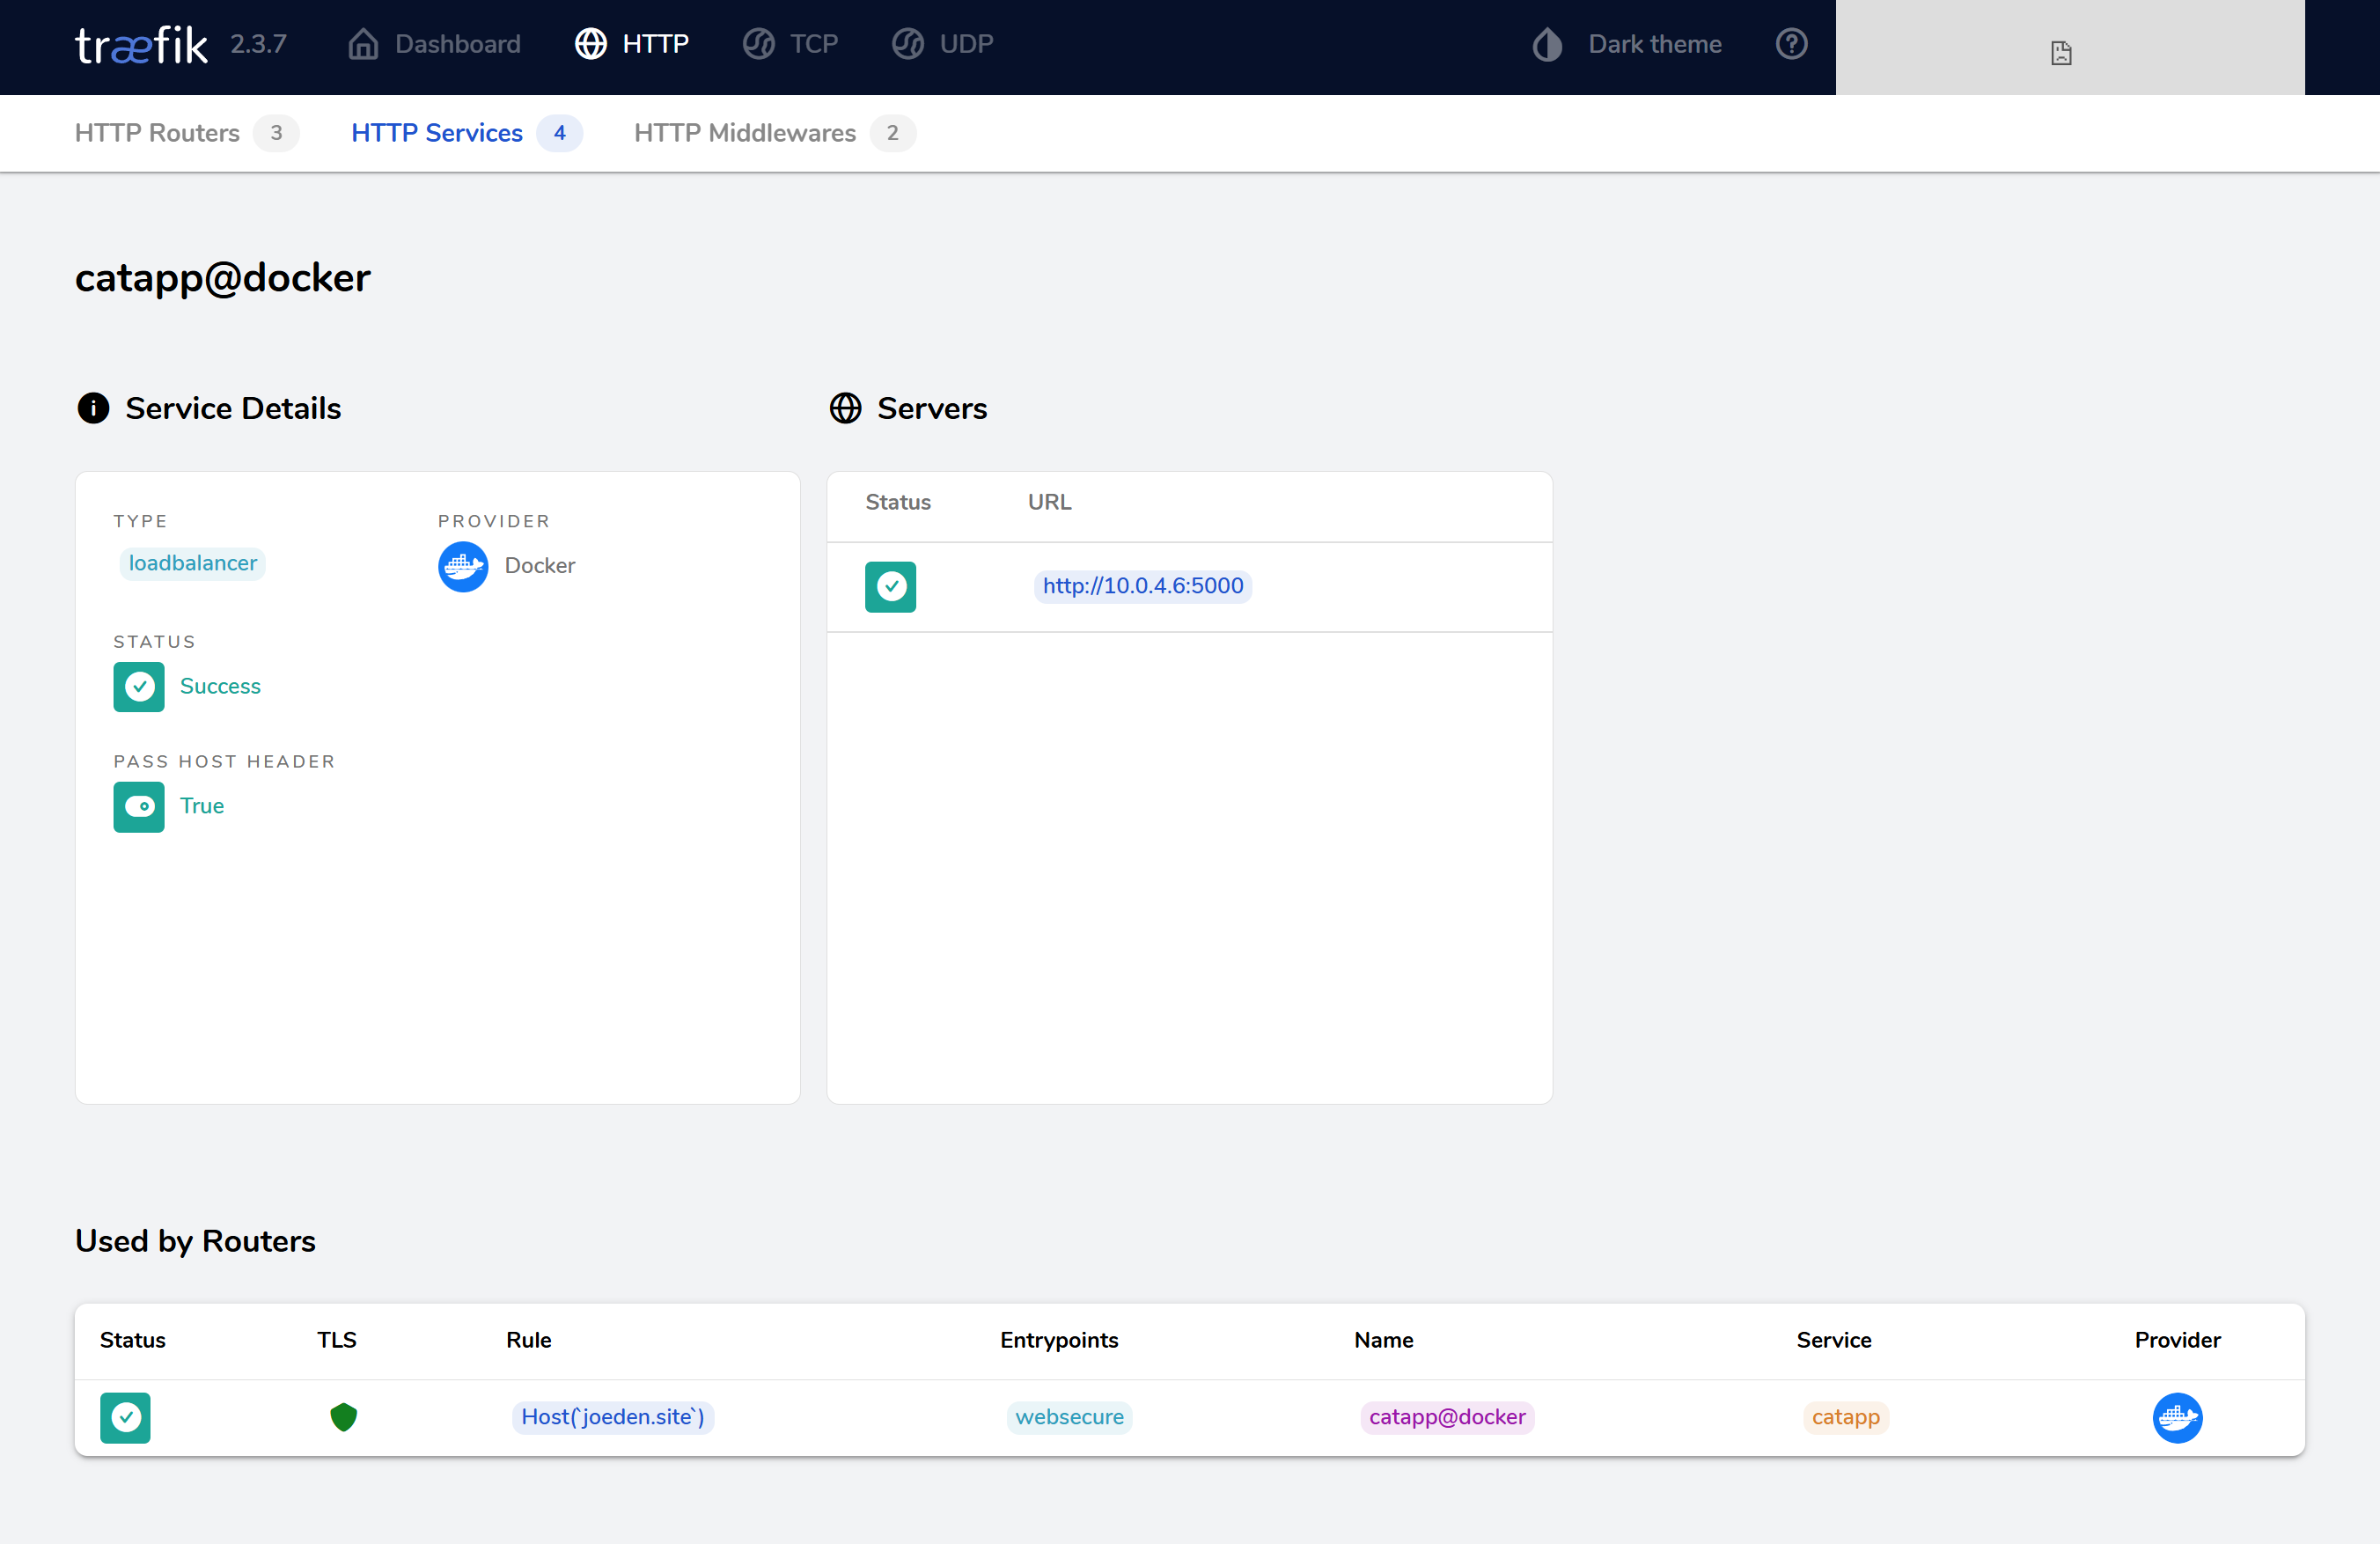
Check the Traefik dashboard at:
http://dashboard.yourdomain.com:8080
Then go to HTTP Services and select the catapp service. In the Used by Routers section, it will show TLS is enabled for the application.
Cleanup
Before proceeding to the next lab, make sure to delete the deployed stack first:
docker stack rm traefik