Setting up
Overview
This page outlines the steps to setup a minimal system using a simple virtual machine working network access.
- Download minimal iso
- Create virtual machine
- Configure network settings
- Install and verify system
VirtualBox releases updates every couple of years so it's best to rely on the official documentation on how to install VirtualBox.
For more information, please see Download VirtualBox
Download And Prepare Files
Get the minimal ISO before starting the VM setup.
- Download ISO image.
- Save file locally
Using the minimal ISO keeps installation fast and simple. Having the file ready locally avoids delays during VM creation and keeps the process smooth.
Reference:
UPDATE: Due to compatibility issues with CentOS Stream 9 and 10 and the many problems encountered during installation, I have switched to using AlmaLinux 8.10.
Create the Virtual Machine
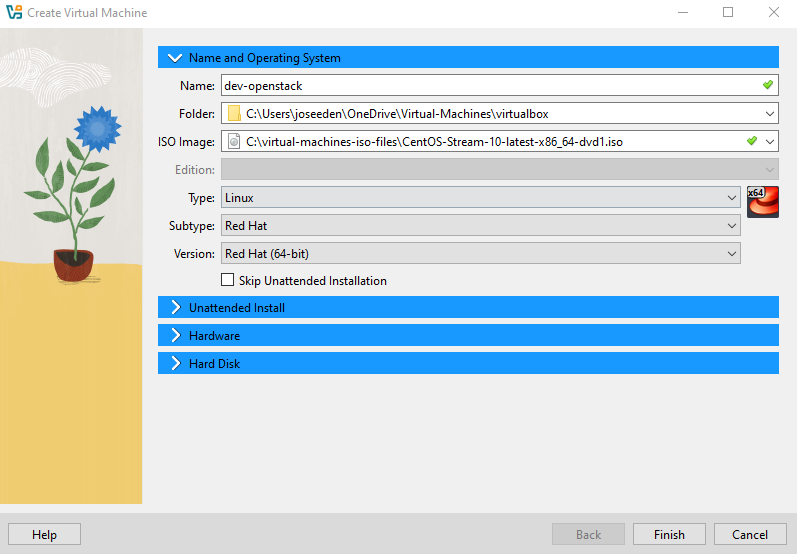
Name and Operating System
-
Open VirtualBox and click New
-
Set the VM name, the VM folder, and the ISO image
UPDATE: Due to compatibility issues with CentOS Stream 9 and 10 and the many problems encountered during installation, I have switched to using AlmaLinux 8.10.
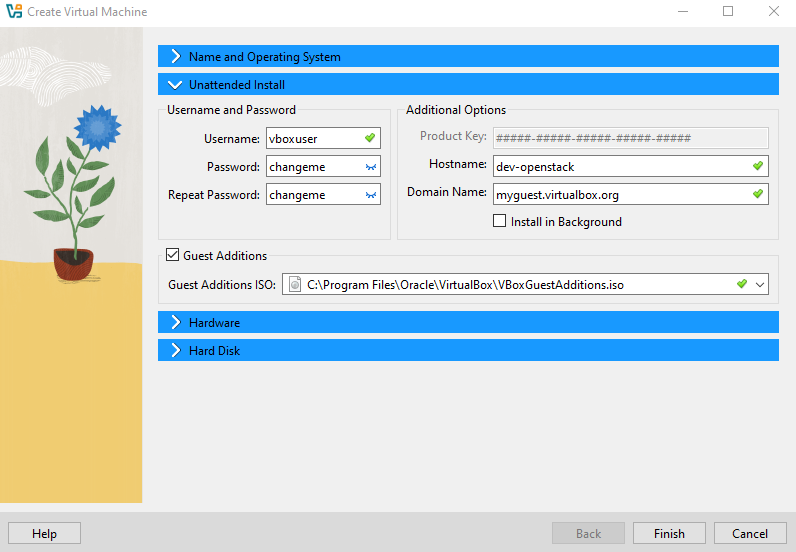
Unattended Install
-
Set the username and password
-
Enable the Guest Additions
-
Select the VBoxGuestAdditions.iso
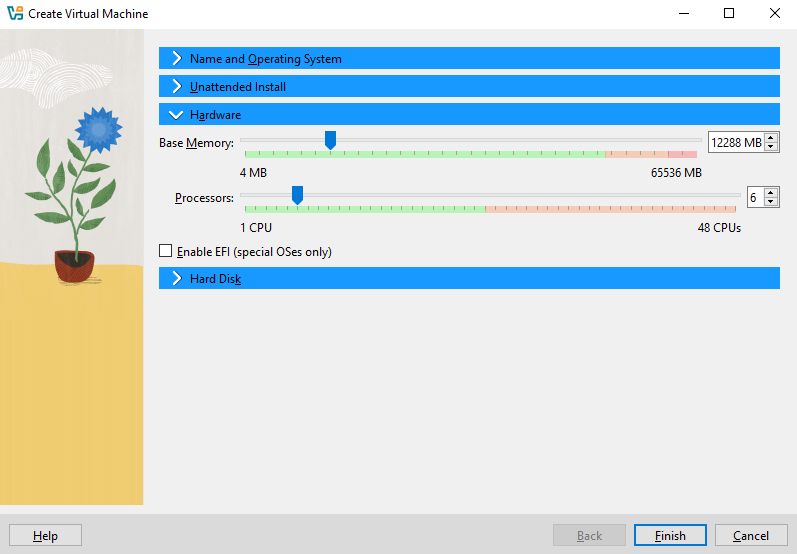
Hardware
When creating a VM, the amount of memory and CPU you assign depends on your host machine’s resources and the expected workload inside the VM.
- If your host has limited RAM, assign less memory to the VM
- Note that lesser memory may affect performance.
- Adjust CPU, memory, and disk size based on the type of lab
Recommended VM specifications (general guidance):
| Host RAM | Recommended VM RAM | vCPU | Disk | Swap |
|---|---|---|---|---|
| 8 GB | 2–4 GB | 1–2 | 20 GB | 2 GB |
| 16 GB | 4–8 GB | 2–4 | 30–40 GB | 2–4 GB |
| 32 GB | 8–12 GB | 4–6 | 40–60 GB | 4–6 GB |
| 64 GB | 12–16 GB | 6–8 | 60–80 GB | 4–8 GB |
Notes:
- VirtualBox memory is entered in MB (e.g., 12 GB = 12288 MB).
- More RAM ➔ smoother performance and faster response inside the VM.
- Adjust disk size based on the number of images, software, or lab instances
- Swap is optional but recommended for Linux VMs with smaller RAM allocations.
For a general lab, you might allocate 12 GB RAM and 6 vCPU for a single VM:
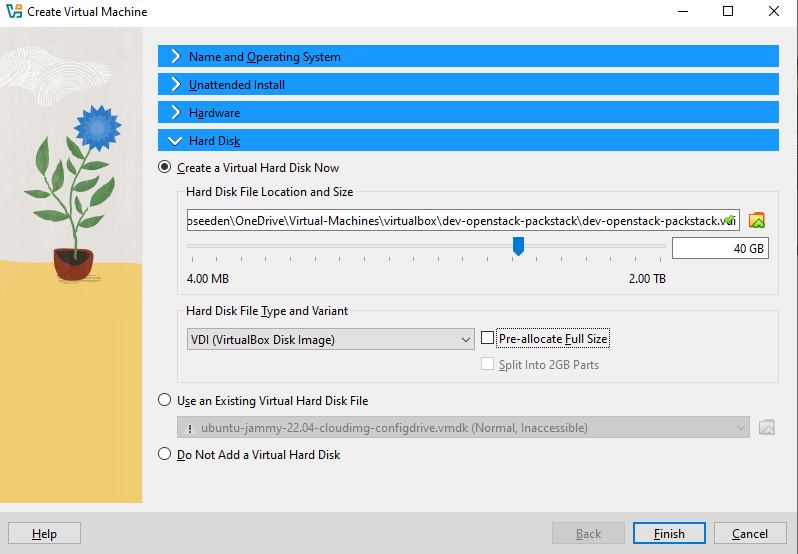
Hard Disk
For the Hard Disk, select Create a Virtual Hard Disk Now.
- The hard disk file location will be auto-selected.
- Set the disk size according to the table above.
- Enable Dynamically allocated (if there is an option)
Note that VirtualBox skips the “dynamically allocated vs fixed” option in some flows if the VM wizard detects certain defaults (sometimes depends on VirtualBox version or OS type).
Not pre-allocating lets VirtualBox grow the disk file as needed (if you wanted to change VM size later)
Once you're okay with the specs, click Finish.
You should now see the new VM created.
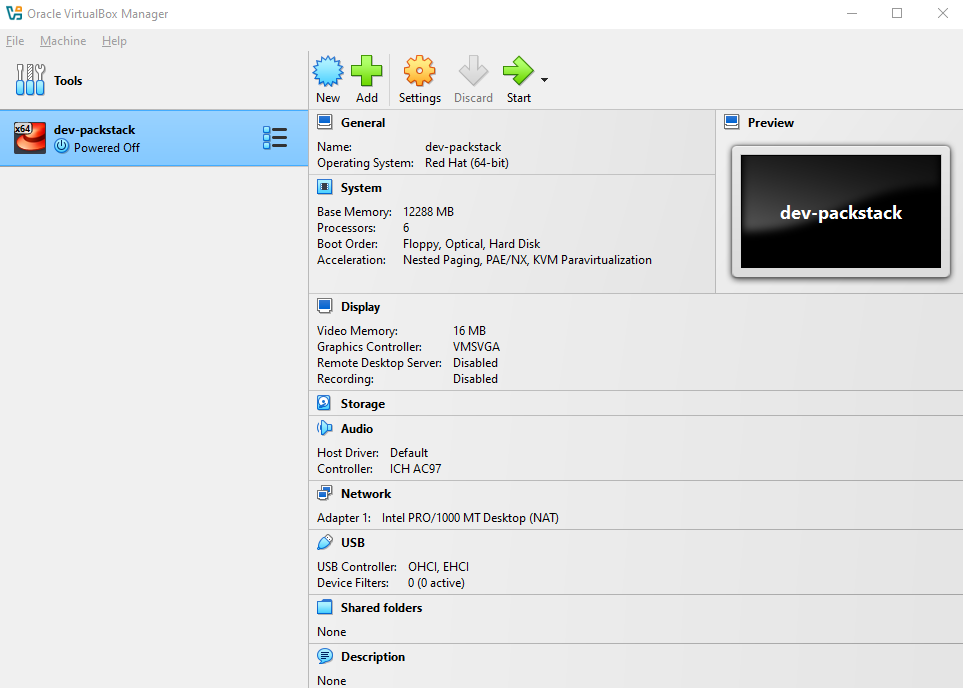
If you get this error, it means that the OS (CentOS Stream 10 or CentOS 10) is too new for VirtualBox to recognize for unattended installation. The unattended install feature only supports certain Windows versions and a limited set of Linux distributions.
This does not affect the normal operation of the VM, it only impacts automatic Guest Additions installation.
You can safely ignore this for now and install Guest Additions manually later.
Configure the VM Hardware
Select the VM and click Settings to configure networking before installation.
Network
You can assign a single network adapter or multiple adapters to your VM, depending on your lab requirements.
- For general VM setup, a single adapter (NAT) is often sufficient.
- For advanced labs or multi-VM setups, multiple adapters can be used (e.g., NAT + Host-Only, Bridged + Host-Only).
For detailed guidance on network configurations and all common adapter combinations, see the VirtualBox Networking.
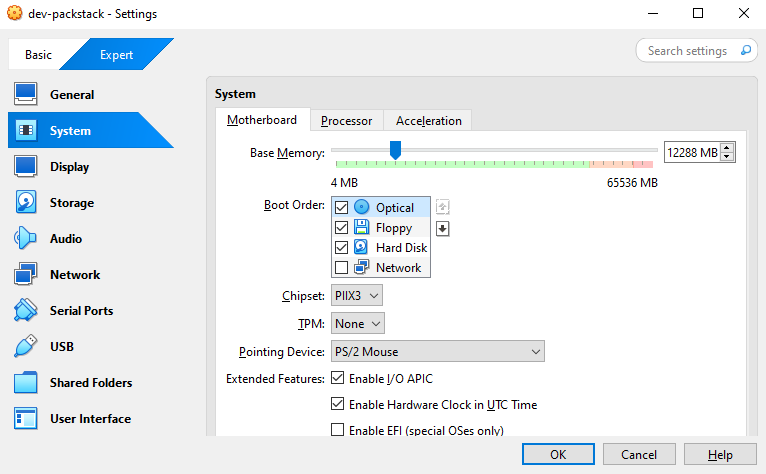
System
Go to System and ensure that Optical is set as the first boot device. You can click the arrow keys beside it to move the device.
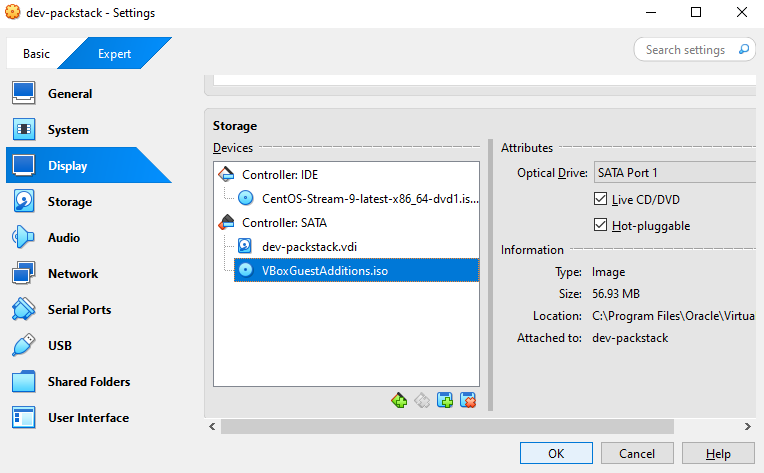
Storage
-
In Storage, click the plus button, and choose Optical Drive:
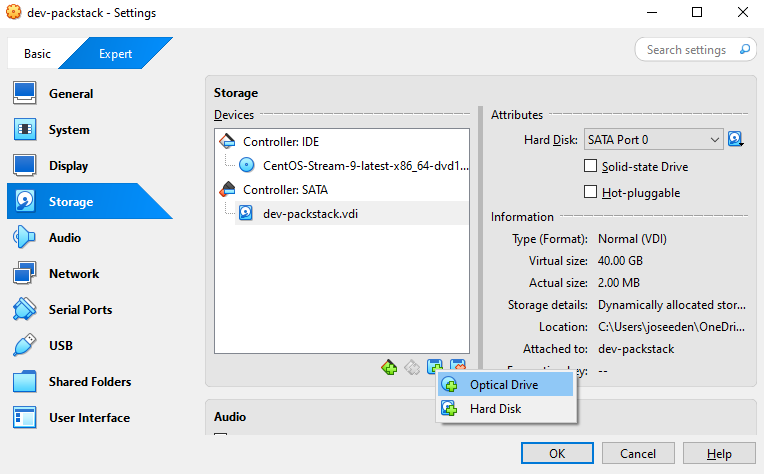
-
Select
VBoxGuestAdditions.isoand click Choose.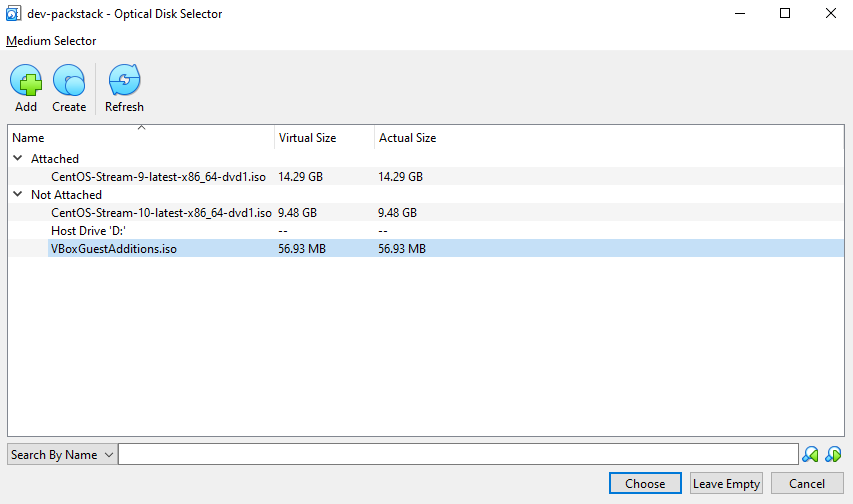
-
Make sure there are two devices under Controller: SATA.
Enable both options below:
✅ Hot-pluggable
✅ Live CD/DVD
Then click OK.
Launch VM and Install OS
Start the machine and complete the installation using the GUI installer.
Note: If you get a No bootable medium found error, please see Manually Load ISO.
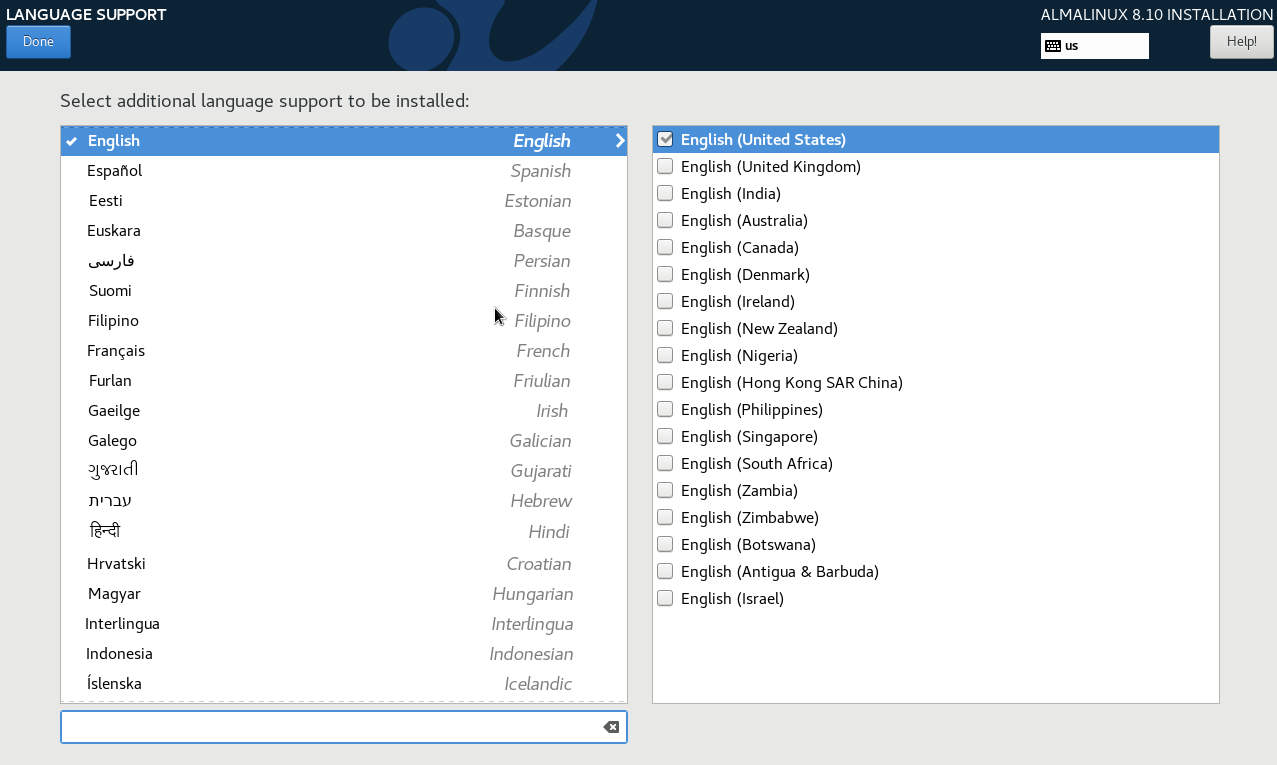
-
Select a language and click Done.
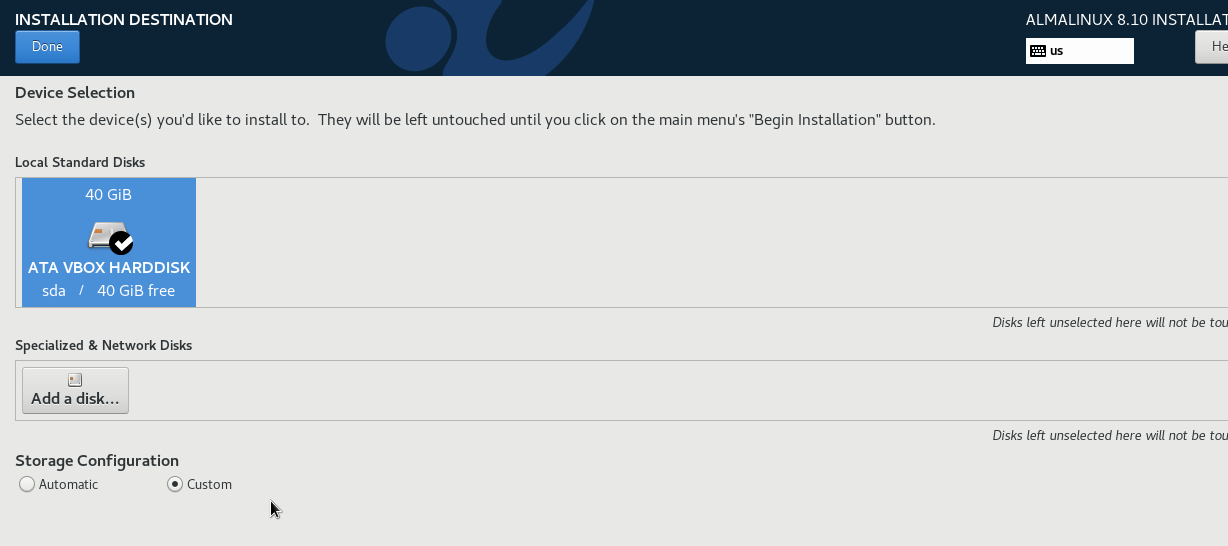
-
Click Installation Destination
-
Select the ATA VBOX Disk and click Custom, then Done.
-
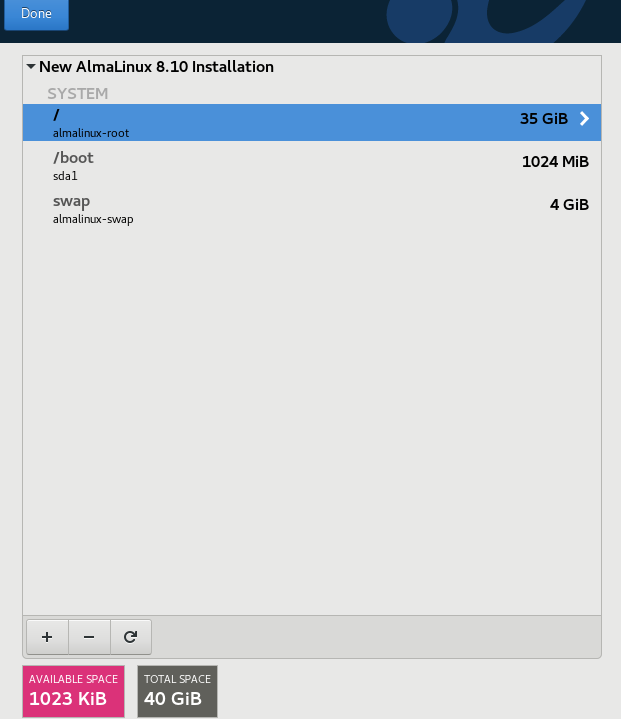
In Manual Partitioning -> Click here to create them automatically.
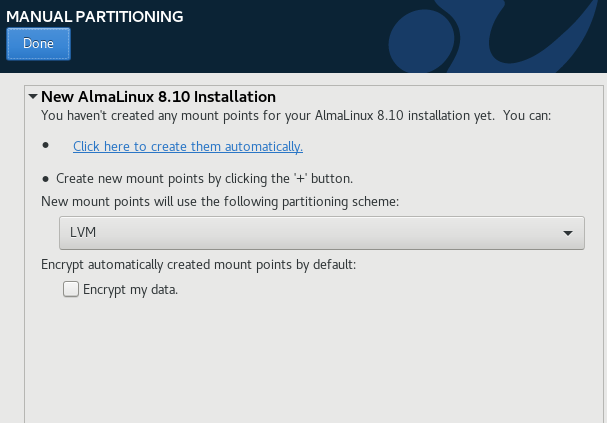
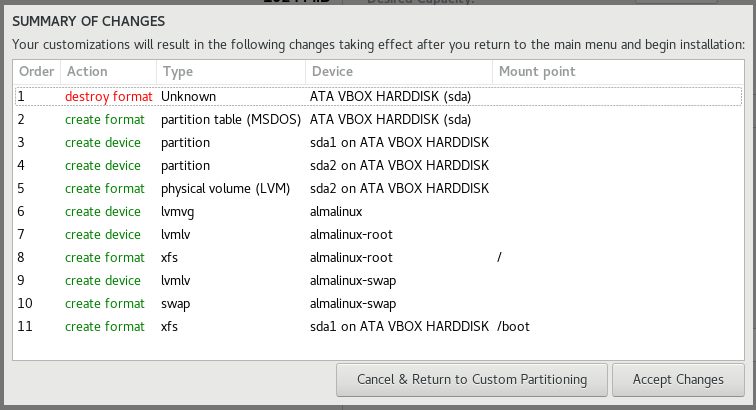
This will show the three partitions that will be created. Click Done.
Click Accept changes.
-
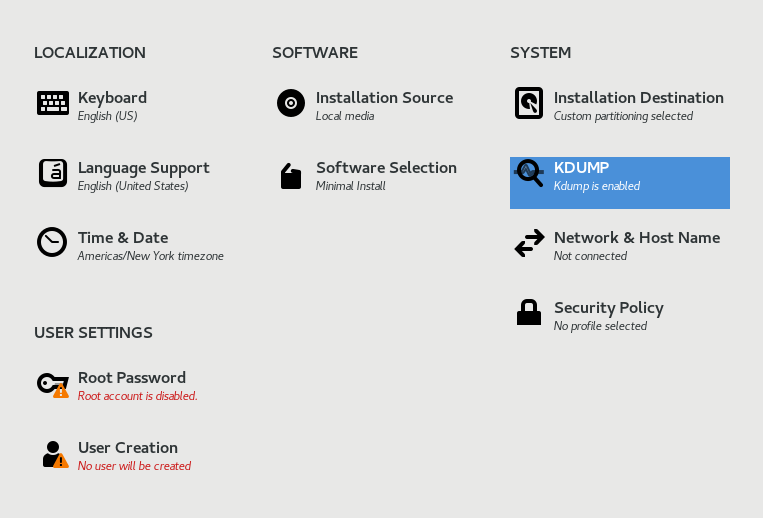
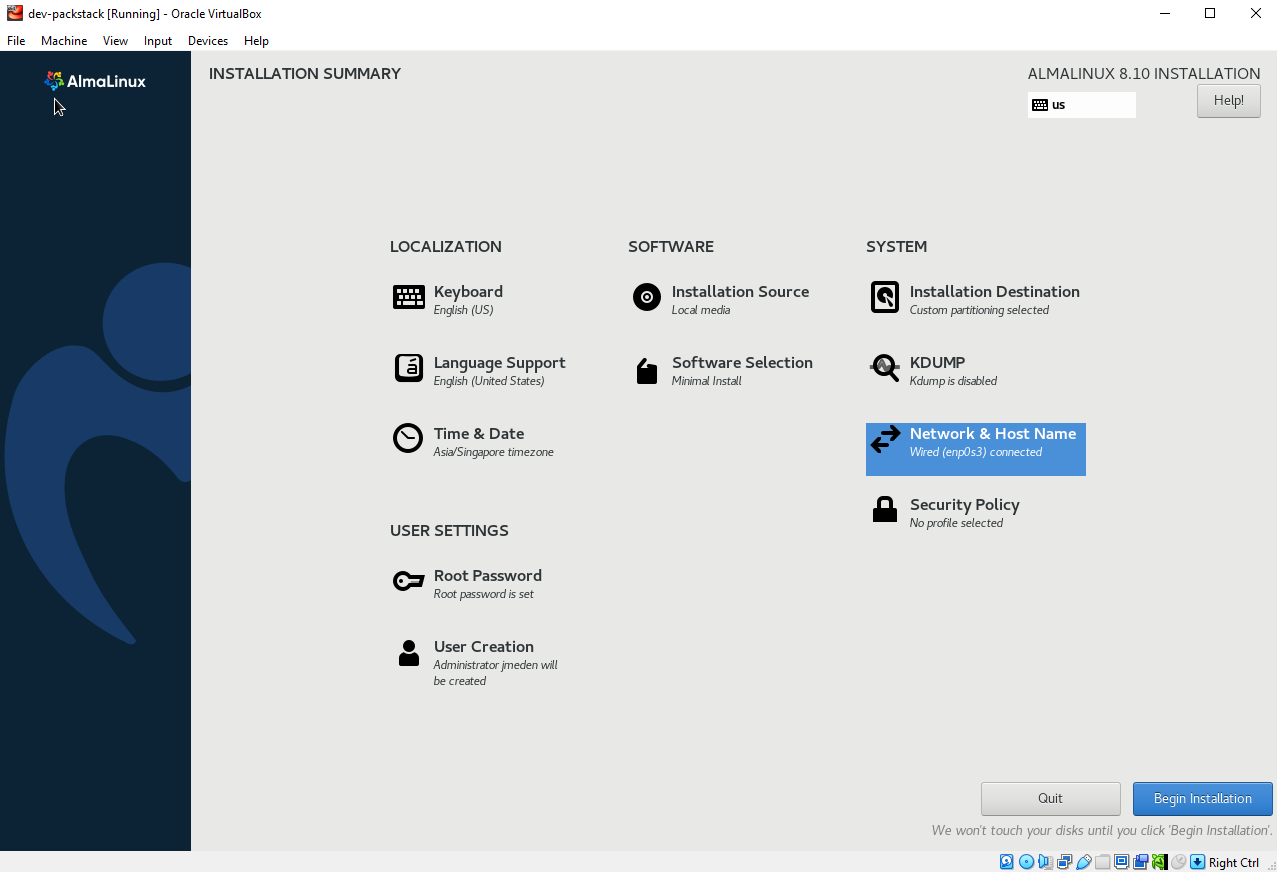
Back in the main menu, click KDUMP.
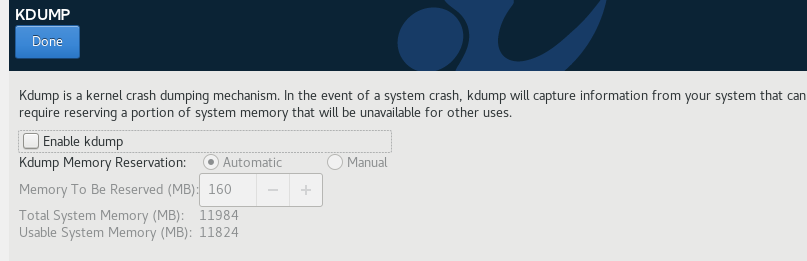
kdump is a kernel mechanism which consume some system memory, which we don't want.
Disable the kdump feature and click Done.
-
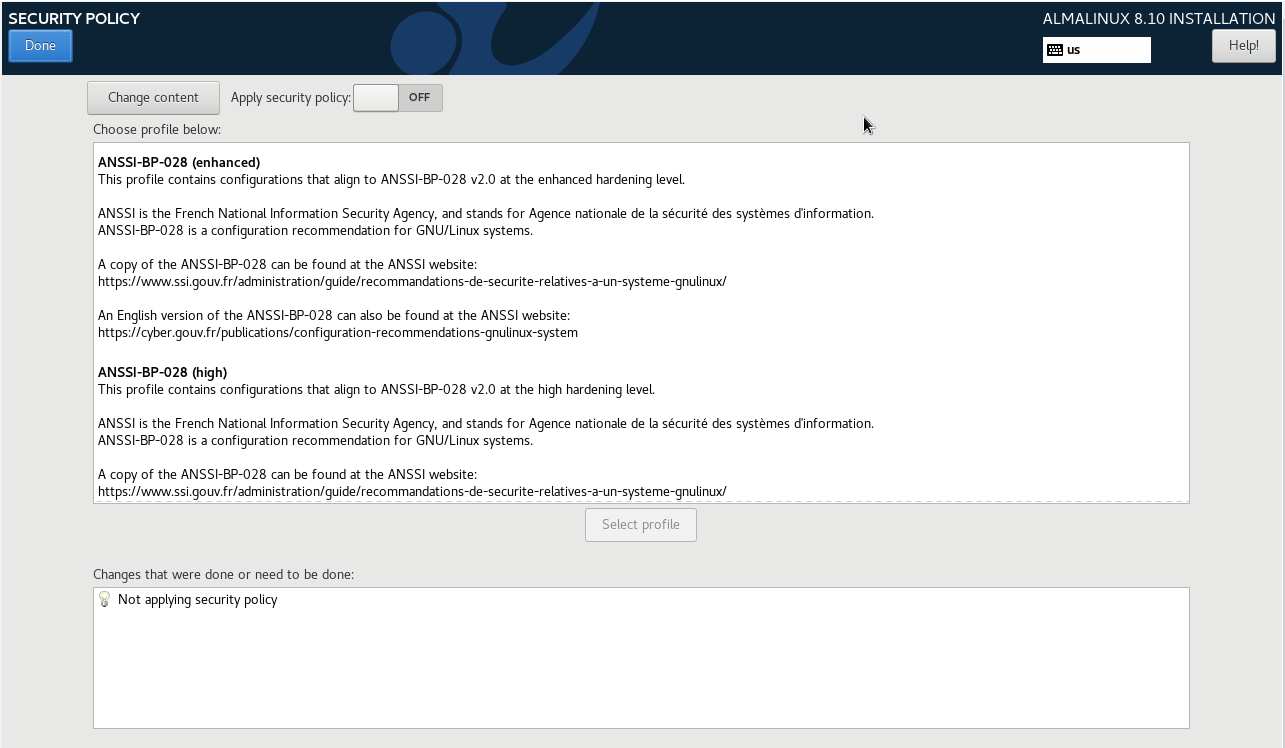
In the main menu, click Security Policy and then disable it for now.
-
Before proceeding to the next step, you need to get the IP of your host machine (not the VM).
Open command prompt and run:
ipconfigThis returns you host network info. For example:
Ethernet adapter Ethernet:Connection-specific DNS Suffix . :IPv4 Address. . . . . . . . . . . : 192.168.1.9Subnet Mask . . . . . . . . . . . : 255.255.255.0Default Gateway . . . . . . . . . : 192.168.1.1Wireless LAN adapter Wi-Fi:Connection-specific DNS Suffix . :IPv4 Address. . . . . . . . . . . : 192.168.1.8Subnet Mask . . . . . . . . . . . : 255.255.255.0Default Gateway . . . . . . . . . : 192.168.1.1Since we are using a host-only adapter mode, the VM will need to be assigned a static IP that is in the same range as your host machine.
We'll use this configuration for the VM in the next step:
IP Address: 192.168.1.130 (must be unused)Subnet: 255.255.255.0Gateway: 192.168.1.1DNS: 8.8.8.8 -
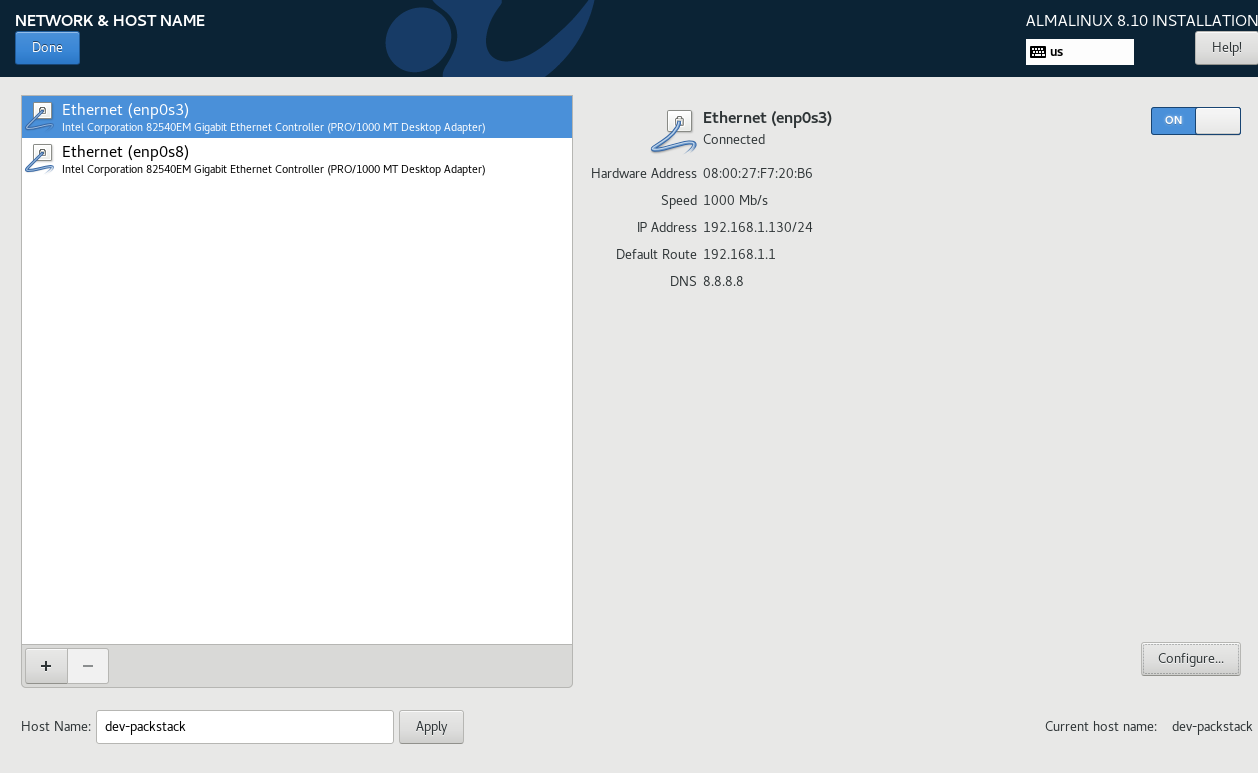
In the main menu, click Network and Hostname. There should be two interface here.
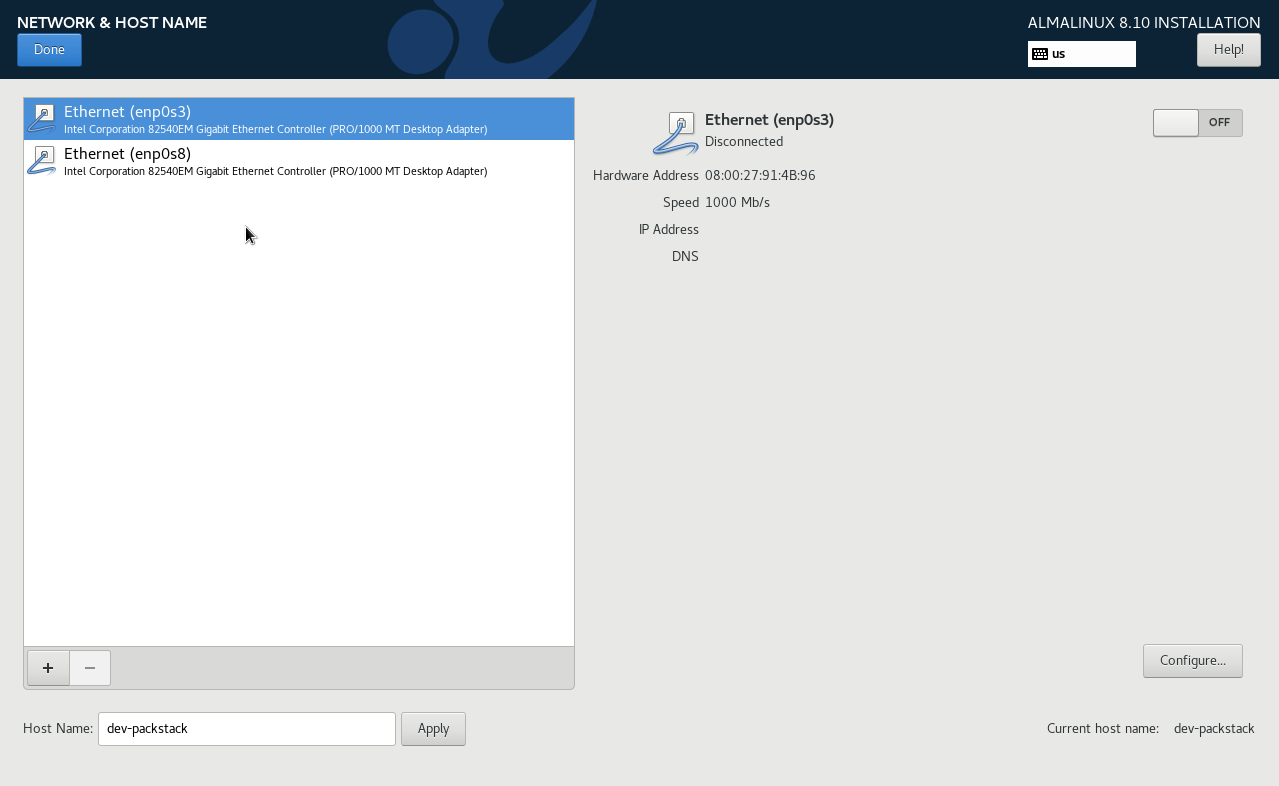
The interfaces:
Adapter Description enp0s3 First adapter, usually NAT or bridged; main network enp0s8 Second adapter; can be ignored if not needed For a simple lab setup, you only need one active interface to connect the VM to your network. Typically, you use
enp0s3.-
Set the host name ➔ Apply
-
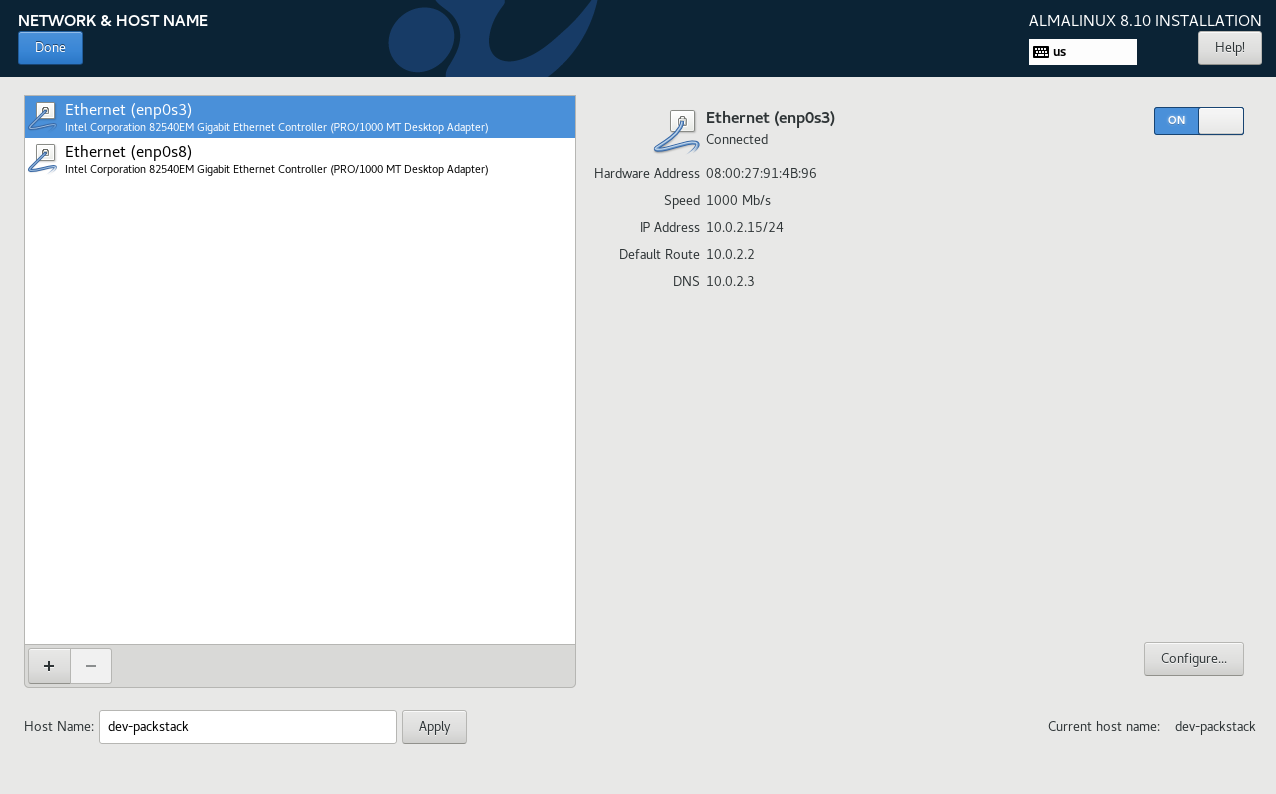
Enable the Ethernet interface (enp0s3) and click Configure
-
-
For the configuration, we'll use this:
IP Address: 192.168.1.130 (must be unused)Subnet: 255.255.255.0Gateway: 192.168.1.1DNS: 8.8.8.8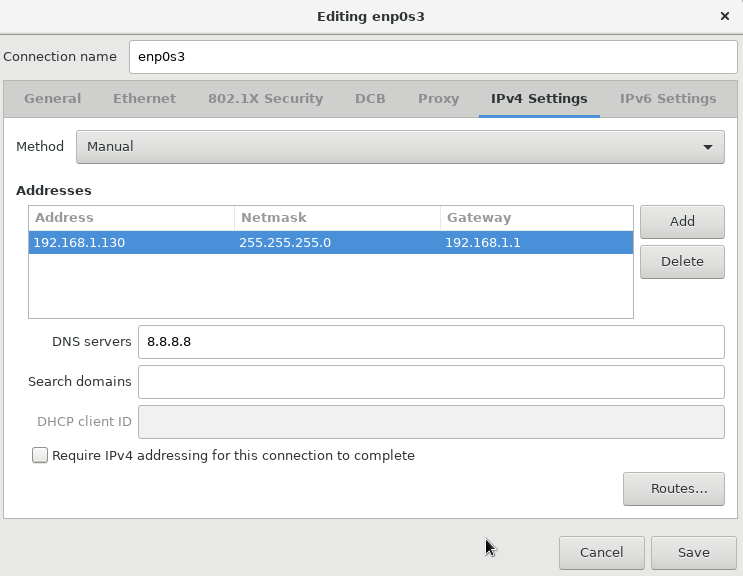
Click Save. The interface should show as Connected with its details displayed.
-
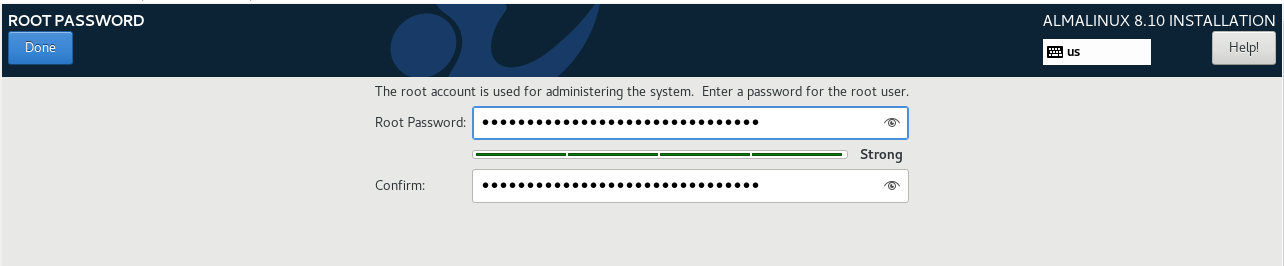
Finally, set the root password and create another user.

Provide a root password and click Done.
As best practice, create another admin user:
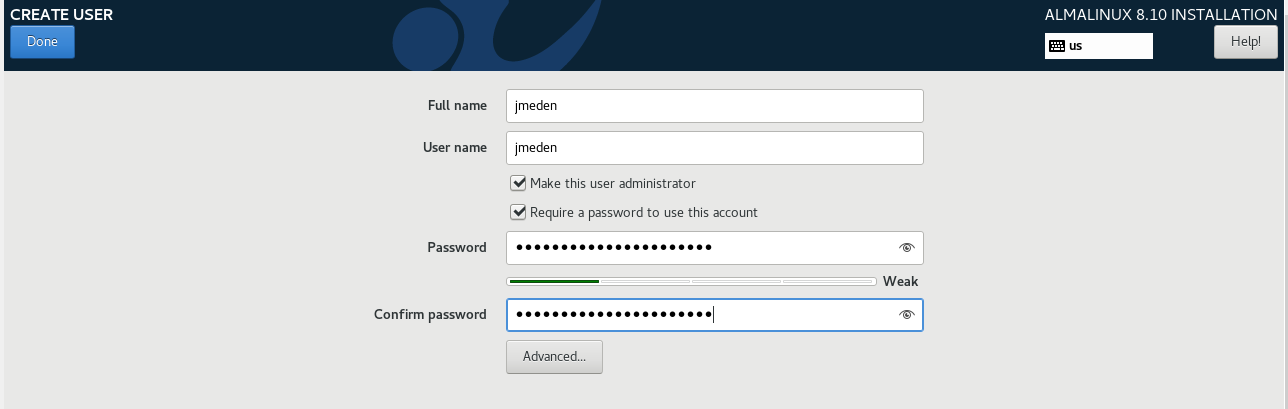
-
Back in the main menu, click Begin Installation
-
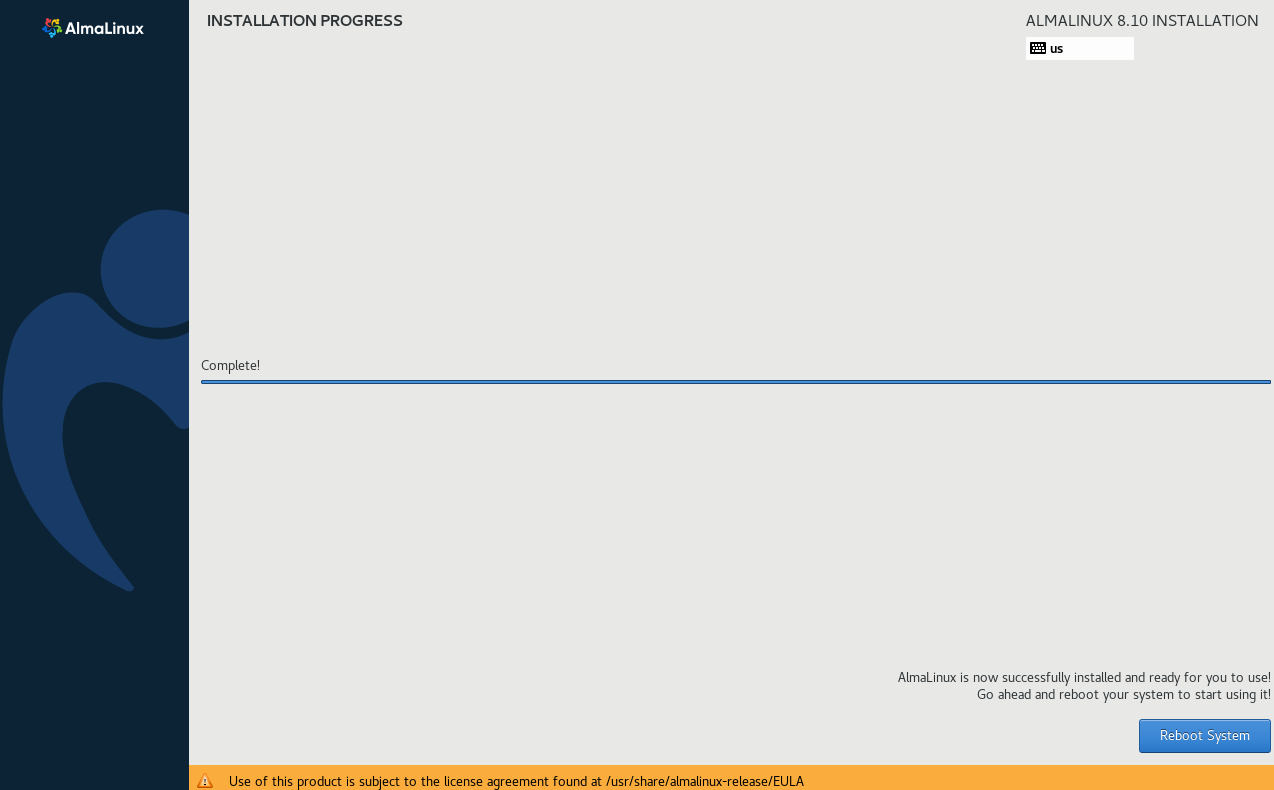
The installation will proceed and may take a few minutes. Once it’s complete, click Reboot System.
Verify Network Connectivity
Log in to the VM as root using the password you set during installation.

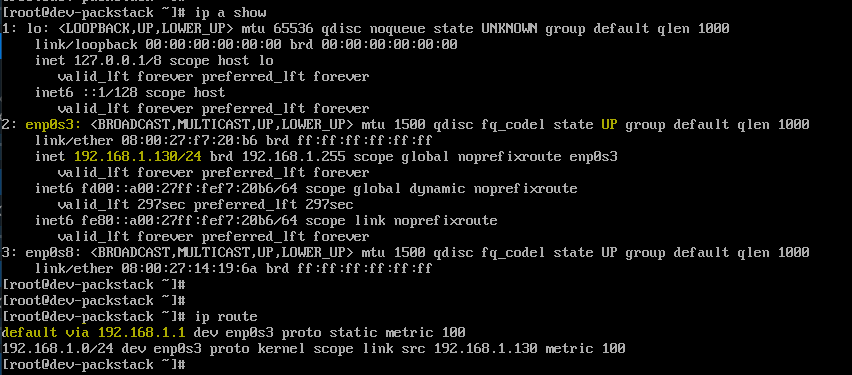
Check the status for the interface enp0s3 and confirm there's a route to the gateway:
ip a show
ip route
Test connectivity to the gateway:
ping -c 3 192.168.1.1

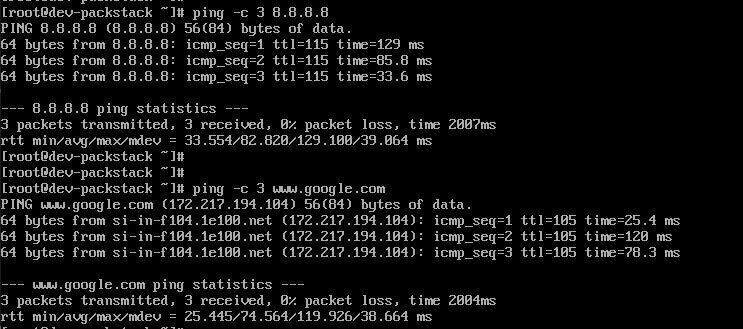
Test DNS and internet access:
ping -c 3 8.8.8.8
ping -c 3 www.google.com
Using SSH Key and Disabling Root
For minimal ISO setups (no GUI), you can typically access the VM using SSH from your host machine.
ssh <user>@<vm-ip>
Example:
ssh root@192.168.1.130
Note that password-based root login is not secure. To make it secure, switch to SSH keys and disable root login.
-
Generate an SSH key on your host machine
ssh-keygen -t ecdsaWhen prompted, provide a custom key name:
Enter file in which to save the key (/home/johnsmith/.ssh/id_ecdsa): /home/johnsmith/.ssh/vboxThis creates:
~/.ssh/vbox~/.ssh/vbox.pub -
Copy the public key to the VM (root account first)
ssh-copy-id -i ~/.ssh/vbox.pub root@192.168.1.130Enter the root password when prompted.
root@192.168.1.130's password:Number of key(s) added: 1Now try logging into the machine, with: "ssh 'root@192.168.1.130'"and check to make sure that only the key(s) you wanted were added. -
Verify passwordless SSH works.
ssh root@168.1.130You should no longer be prompted for a password.
-
Create a non-root user with sudo privileges (inside the VM)
adduser joedenpasswd joedenusermod -aG wheel joedenVerify sudo access:
su - joedensudo whoamiOutput:
root -
Back in your host machine's terminal, copy your SSH key to the new user.
ssh-copy-id -i ~/.ssh/vbox.pub joeden@192.168.1.130 -
Verify SSH login using the new user.
ssh joeden@192.168.1.130Optional
sudotest:sudo su -Make sure this works before disabling root login.
-
Disable the root login via SSH (inside the VM).
Check current setting:
sudo grep PermitRootLogin /etc/ssh/sshd_configIf it shows:
PermitRootLogin yesDisable it:
sudo sed -i 's/^#\?PermitRootLogin.*/PermitRootLogin no/' /etc/ssh/sshd_configRestart SSH:
sudo systemctl restart sshd -
(Optional but recommended) Disable password authentication.
Only perform this step after confirming SSH key login works, otherwise you may lock yourself out.
Check current settings:
sudo grep PasswordAuthentication /etc/ssh/sshd_configOutput:
#PasswordAuthentication yesPasswordAuthentication yesDisable password authentication:
sudo sed -i 's/^#\?PasswordAuthentication.*/PasswordAuthentication no/' /etc/ssh/sshd_configRestart the SSH service:
sudo systemctl restart sshdFrom your host machine, attempt to SSH into the VM:
ssh jmeden@192.168.1.130If password authentication has been successfully disabled and no valid key is present, you should see an error:
jmeden@192.168.1.130: Permission denied (publickey,gssapi-keyex,gssapi-with-mic).