Terraform
Install Terraform on WSL
To install Terraform locally (assuming you're running WSL on a Windows computer), follow the steps below.
Run an update first.
sudo apt-get update
sudo apt-get upgrade
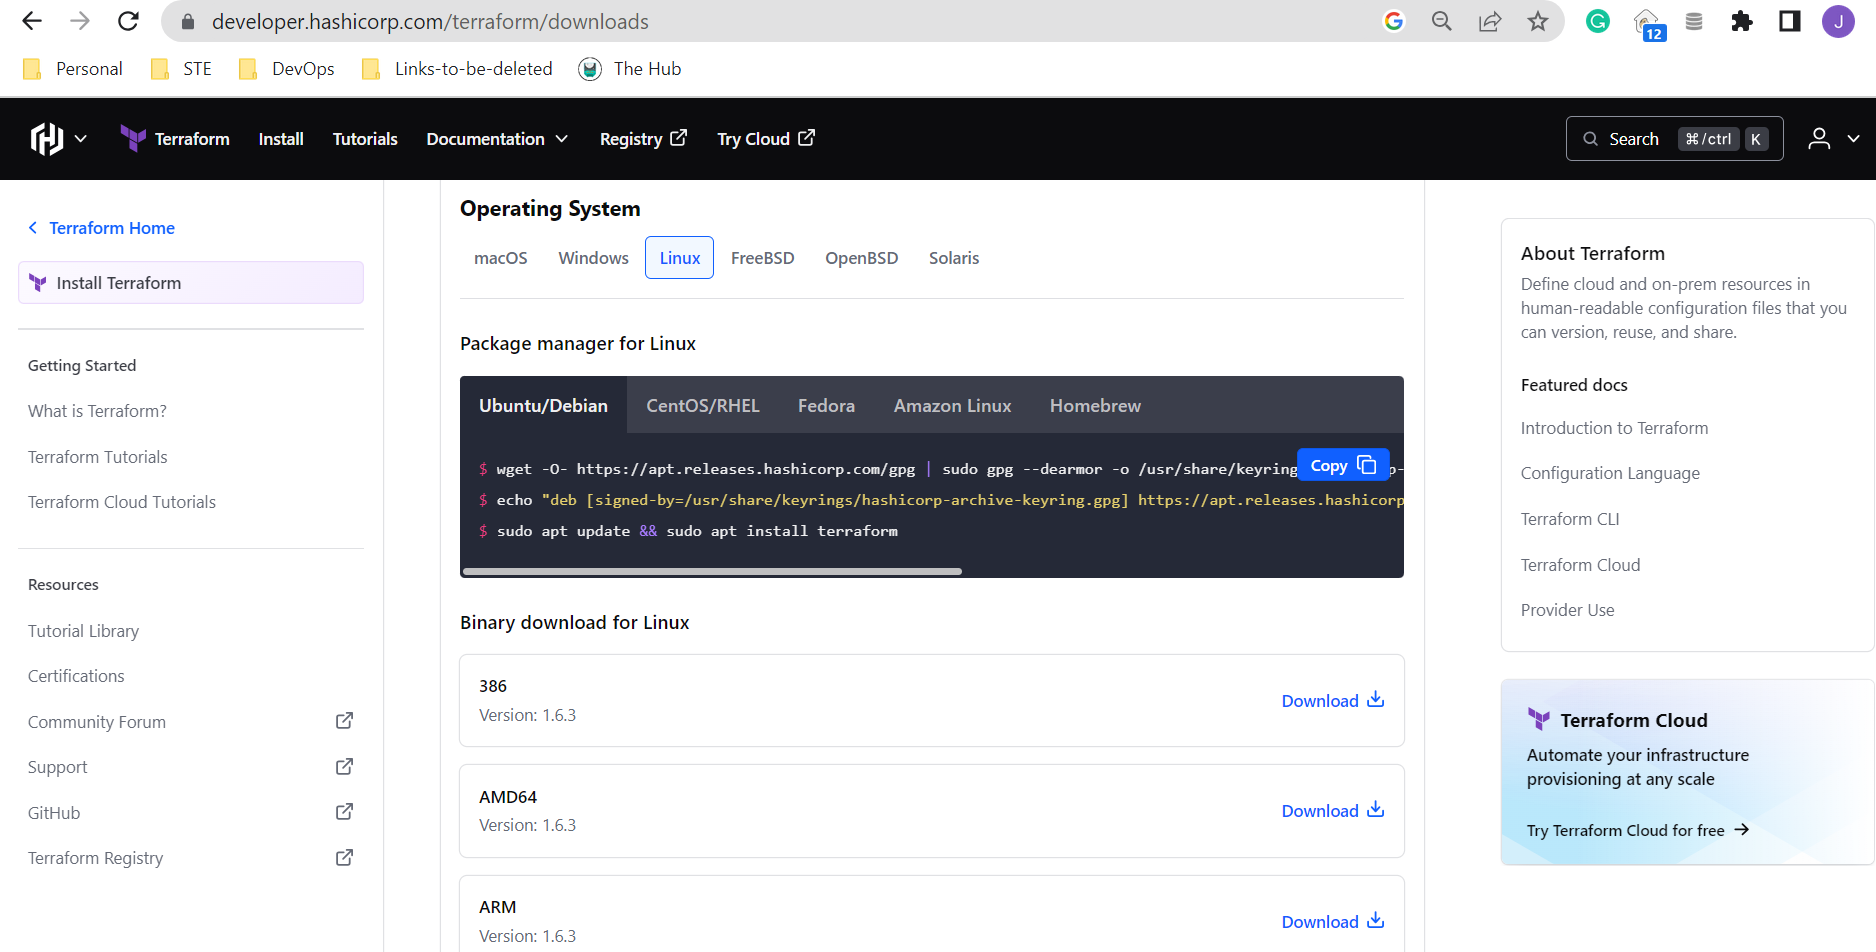
Navigate to the Terraform download page and scroll down to Binary download for Linux. Choose the version you need and click Download
In WSL, go to the directory where the zip file was downloaded.
Unzip the file and move to /usr/local/bin. Remove the zip file afterwards.
sudo mv terraform /usr/local/bin;
rm terraform*.zip;
Verify installation.
terraform -version
You should see output similar to below:
Terraform v1.6.3
on linux_386
Install Terraform on Linux
To install Terraform, we have these options:
- Use the official documentation from Hashicorp
- Run the install-terraform.sh script
After installing, verify.
terraform -v
Upgrade Terraform
In Ubuntu:
sudo apt install --only-upgrade terraform
For Github Codespaces: You can use a Terraform version manager but it won't be able to support tfenv issues. See: https://github.com/tfutils/tfenvI
Install Extensions
For this setup, we’ll use VS Code with two key extensions to make working with Terraform and AWS easier.
Terraform Extension
In the Extensions panel, search for “Terraform.” While there’s an official HashiCorp extension, it can be unstable. The Anton Kulikov version works better for most users.

Once both extensions are installed, create your working directory to start building your Terraform project.
AWS Toolkit Extension
Open the View tab, then select Extensions. Search for “AWS Toolkit” and install it.

After installation, you’ll see the AWS icon on the left panel and a Connect to AWS option in the Explorer tab.
AWS Setup
Setup IAM Credentials (AWS)
To connect Terraform with AWS, you need an IAM user that has programmatic access and enough permissions. For testing, you can use AdministratorAccess, but this is not recommended for production.
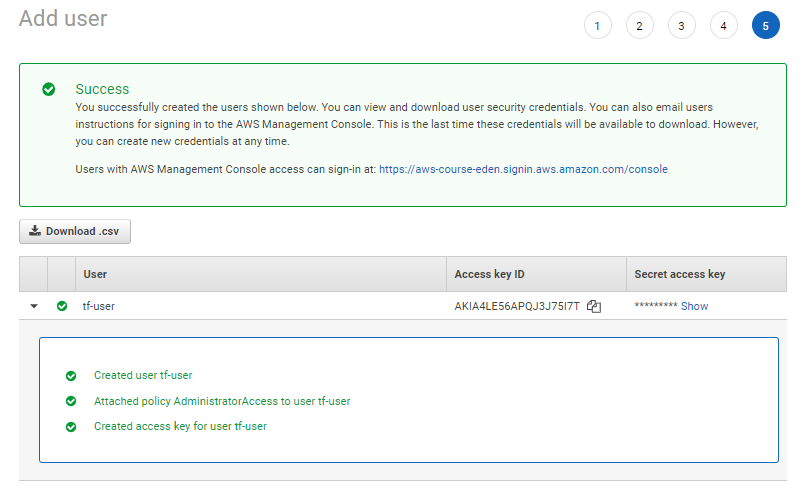
- Create a new IAM user
- Attach the AdministratorAccess policy
- Generate access keys for the user
You’ll then see the username, Access Key ID, and Secret Access Key. Click Download .csv to save these credentials.
For more details, see IAM Users, Groups, and Policies.
Configure the Credentials File
After you've installed the extension, you will need to configure the credentials profile. This will allow you to connect to your AWS account.
View --> Command Palette --> AWS: Create Credentials Profile
Populate the credentials file with the AWS Access key and secret access key from the CSV file you just downloaded earlier.

The credentials file should be created with the text below.
# Amazon Web Services Credentials File used by AWS CLI, SDKs, and tools
# This file was created by the AWS Toolkit for Visual Studio Code extension.
#
# Your AWS credentials are represented by access keys associated with IAM users.
# For information about how to create and manage AWS access keys for a user, see:
# https://docs.aws.amazon.com/IAM/latest/UserGuide/id_credentials_access-keys.html
#
# This credential file can store multiple access keys by placing each one in a
# named "profile". For information about how to change the access keys in a
# profile or to add a new profile with a different access key, see:
# https://docs.aws.amazon.com/cli/latest/userguide/cli-config-files.html
#
[vscode-dsv]
# The access key and secret key pair identify your account and grant access to AWS.
aws_access_key_id = AKIA1234ABCDEFGHIJK
# Treat your secret key like a password. Never share your secret key with anyone. Do
# not post it in online forums, or store it in a source control system. If your secret
# key is ever disclosed, immediately use IAM to delete the access key and secret key
# and create a new key pair. Then, update this file with the replacement key details.
aws_secret_access_key = xxxxxxxxxxxxxxxxxxxxxxxxxxxxxxxxxxxxxxxxxxxxx
If it doesn't exist, you can simply create a credentials file and put in the profile, access key and secret access key. For this one, I named the profile vscode-dev but you can call it whatever you like.
[vscode-dev]
aws_access_key_id = AKIA1234ABCDEFGHIJK
aws_secret_access_key = xxxxxxxxxxxxxxxxxxxxxxxxxxxxxxxxxxxxxxxxxxxxx
Back in the Explorer tab, click Connect to AWS and select the credentials profile you created. It will prompt you use US-East-1 as default region. Select Yes for now.
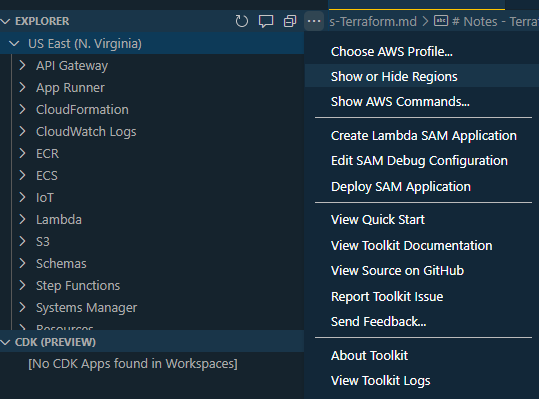
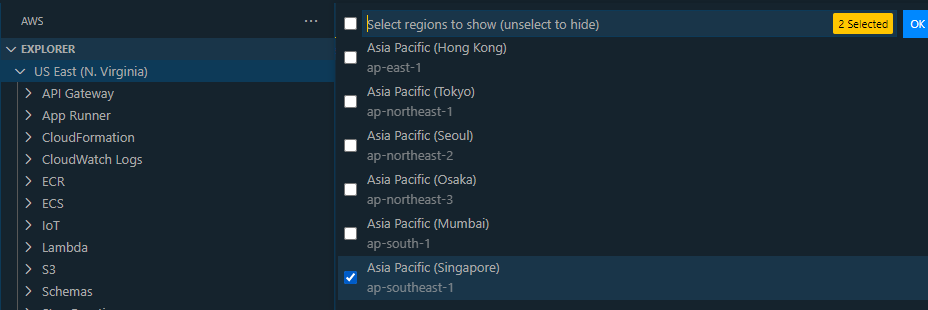
To add another region, click the three dots at the Explorer tab and select Show or hide regions.
Create the keypair
We will need a keypair to connect to our EC2 instances. You can create the keypair through any of the following methods.