Frontend
Overview
This page builds on the articles table created in the CRUD Operations page.
The complete config files can be found here: Github/test-rails-app
This page focuses on showing one article on the front end, which means handling the read part of CRUD in the browser.
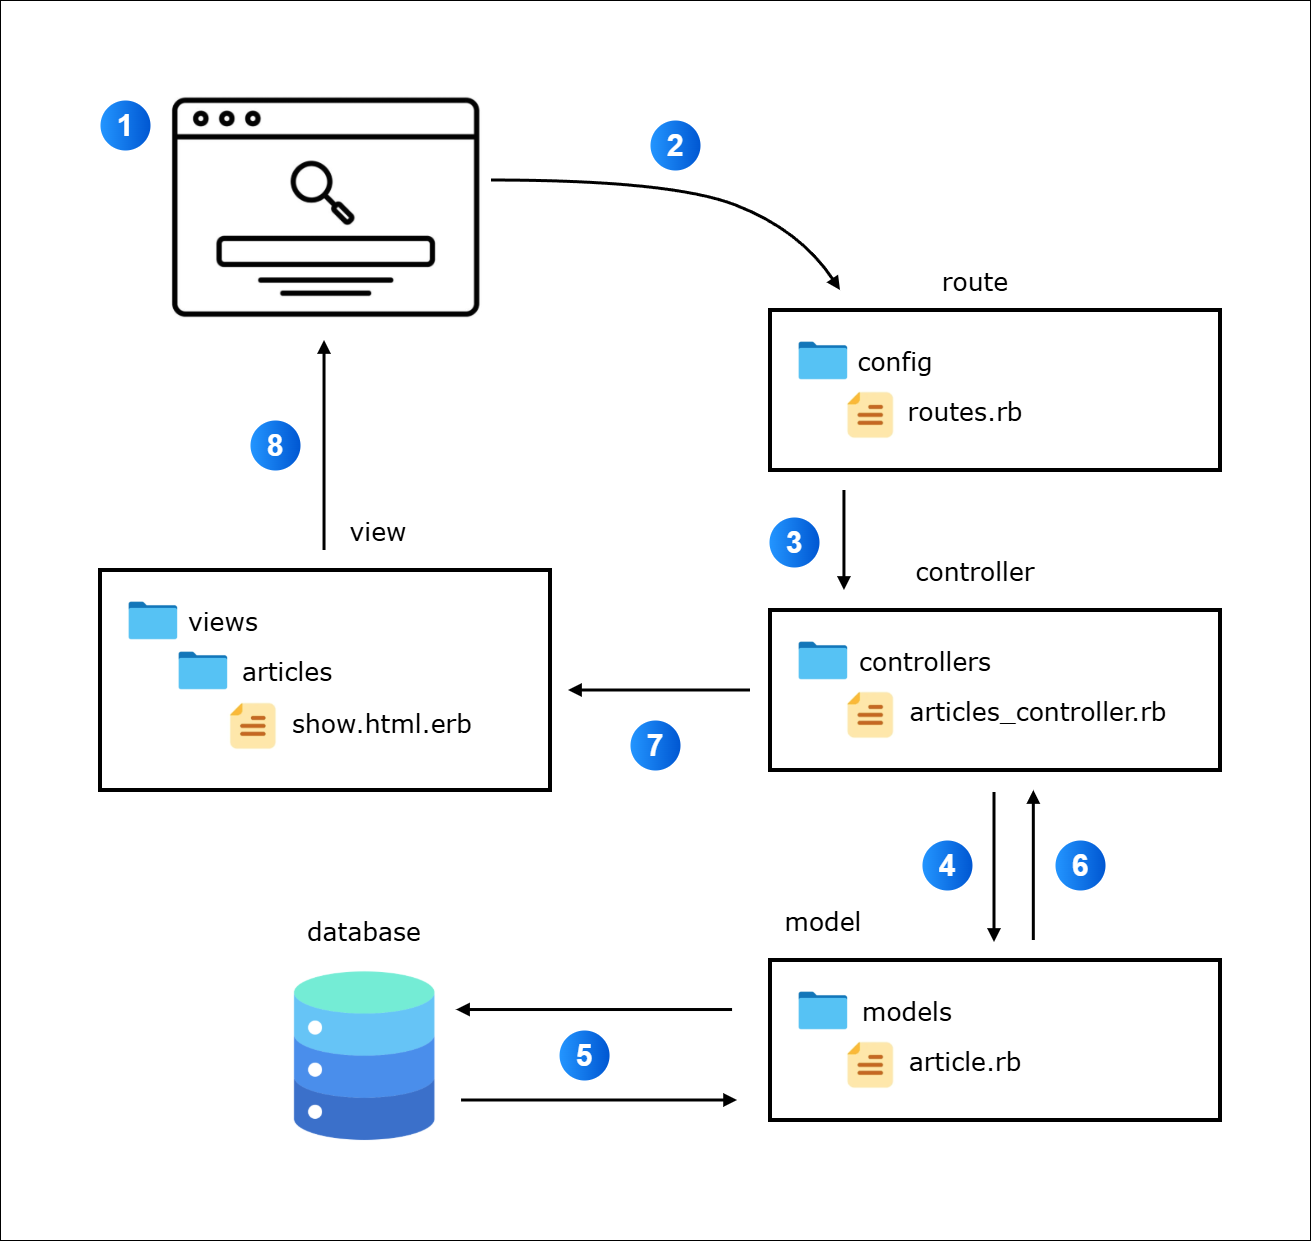
When a user visits a URL like /articles/1, Rails processes it step by step.
- The URL contains the article ID.
- The request is received by the
routes.rbfile. - The route maps the request to the controller's
showaction - The controller uses the
Articlemodel to interact with the database. - The model queries the database and retrieves the article.
- The model sends back the article to the
showaction. - The controller uses the
showview. - The view is displayed on the browser.
At the end of this flow, the view has access to the article data and can render it on the browser.
Add a show Route
We need a route that accepts an article ID and routes the request to the show action.
In the example below, we define a route where articles is the resource and show is the only action exposed.
# config/routes.rb
Rails.application.routes.draw do
  root "pages#home"
  get "about", to: "pages#about"
  get "up" => "rails/health#show", as: :rails_health_check
  resources :articles, only: [:show]
end
This generates a GET route in the form /articles/:id, which is exactly what’s needed to display a single article.
You can confirm this by checking the routes:
rails routes --expanded
Output:
Prefix            | article
Verb              | GET
URI               | /articles/:id(.:format)
Controller#Action | articles#show
Source Location   | /test-rails-app/config/routes.rb:6
Confirm the Article IDs
Before testing in the browser, it helps to know which articles exist.
For this setup, below are the articles that will be used for the articles table.
| id | title | description |
|---|---|---|
| 1 | First post | Introduction article |
| 2 | Second post | Edited description of second article |
| 3 | Third post | This is the third post |
| 4 | Fourth post | This is a 4th article that has a proper length |
| 5 | Fifth post | Testing on 5th post using "create" action |
| 6 | Sixth post | Simplify redirect to new article page |
To learn how create the table and add articles, please see the CRUD Operations page.
Article is the model representing the articles table. We can see all the articles added by opening the rails console and calling .all:
rails console
Article.all
The output shows the available records along with their IDs, which we can use in the URL.
[#<Article:0x00007b1ae8ebd998
  id: 1,
  created_at: "2023-01-11 02:17:34.505517000 +0000",
  title: "First post",
  updated_at: "2023-01-11 02:17:34.505517000 +0000",
  description: "Introduction article">,
 #<Article:0x00007b1ae8912e58
  id: 2,
  created_at: "2023-01-11 02:21:36.948319000 +0000",
  title: "Second post",
  updated_at: "2023-01-11 05:22:30.483007000 +0000",
  description: "Edited description of second article">,
 #<Article:0x00007b1ae8912d18
  id: 8,
  created_at: "2023-01-11 08:01:45.875675000 +0000",
  title: "Third post",
  updated_at: "2023-01-11 08:01:45.875675000 +0000",
  description: "This is the third post">,
 #<Article:0x00007b1ae8912bd8
  id: 9,
  created_at: "2023-01-11 08:02:52.917372000 +0000",
  title: "Fourth post",
  updated_at: "2023-01-11 08:02:52.917372000 +0000",
  description: "This is a 4th article that has a proper length">]
Right now, the route knows which controller to send the request to, but we still need to create the controller to actually handle it.
Create the Controller
Rails expects a controller to handle the request, so we need to create a app/controllers/articles_controller.rb
# app/controllers/articles_controller.rb
class ArticlesController < ApplicationController
  def show
    @article = Article.find(params[:id])
  end
end
Explanation:
@article➔ instance variable available in the view (show.html.erb)Article➔ the model class (inherits fromApplicationRecord)- .
find➔ Fetches a record by its primary key, usuallyid
In simple terms:
“Look in the
articlestable for the record whoseidmatchesparams[:id], and store it in@article.”
Regarding the params[:id], the params is a hash-like object that Rails automatically fills from the incoming request, and :id is the key in that hash representing the value from the URL defined in the routes.
From the route defined in the Add a show Route step:
$ rails routes --expanded

Prefix            | article
Verb              | GET
URI               | /articles/:id(.:format)
Controller#Action | articles#show
Source Location   | /test-rails-app/config/routes.rb:6
This links the URL ID to a database query and makes the article ready to display.
Next, we need to create a view so we can actually show the article details in the browser.
Create the View
Rails follows conventions, so the view must live in the correct folder and match the action name. Create the articles folder and the show.html.erb.
app/views/
├── articles
│   └── show.html.erb
The show.html.erb:
<%# app/views/articles/show.html.erb %>

<h1>Article details</h1>

<p>
  <strong>Title:</strong>
  <%= @article.title %>
</p>

<p>
  <strong>Description:</strong>
  <%= @article.description %>
</p>
Here, the @article comes from the controller and is used to display the title and description. The <%= %> tags tell Rails to evaluate the Ruby code and render the result in the browser.
Test in the browser
With everything wired together, we can now test the feature.
Start the Rails server locally:
rails server
Open a web browser:
http://localhost:3000/articles/1
Rails retrieves the article with ID 1 and displays its title and description.
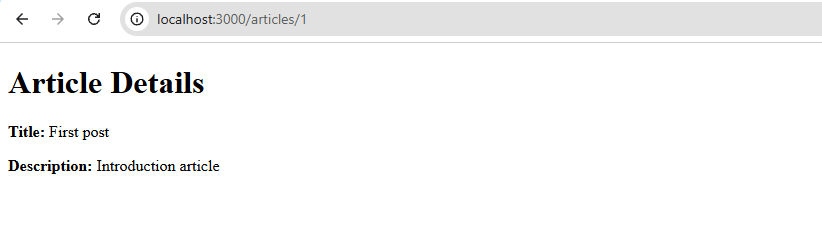
Changing the ID in the URL shows a different article.

This confirms that the show action works and that the application can display individual articles based on their IDs.
Listing Page
In this step, we want to create a simple listing page where users can see all records at once. It should show the title, description, and actions for each article.
- Route:
/articles - Controller:
indexaction inArticlesController - View: Loops through all articles and shows them in a table
Important: The index action is not automatically created. You need to add it in the controller to list all articles. Rails follows REST conventions, and the index action is the standard way to display all records of a resource.
-
First, modify the route to expose the
indexaction along withshow:# config/routes.rbRails.application.routes.draw doroot "pages#home"get "about", to: "pages#about"get "up" => "rails/health#show", as: :rails_health_checkresources :articles, only: [:show, :index]endVerify the route:
$ rails routes --expandedPrefix | articlesVerb | GETURI | /articles(.:format)Controller#Action | articles#indexSource Location | /test-rails-app/config/routes.rb:5This tells us that any
GETrequest to/articleswill be handled by theindexmethod inArticlesController. -
Add the
indexaction in the controller. The instance variable@articleswill hold all articles from the database:# app/controllers/articles_controller.rbclass ArticlesController < ApplicationControllerdef show@article = Article.find(params[:id])enddef index@articles = Article.allendend -
Create the view file
index.html.erbunderapp/views/articles:<h1>My Blog Articles</h1><table><thead><tr><th>Title</th><th>Description</th><th>Actions</th></tr></thead><tbody><% @articles.each do |row_article| %><tr><td><%= row_article.title %></td><td><%= row_article.description %></td><td>Placeholder</td></tr><% end %></tbody></table>Explanation:
<% @articles.each do |article| %>➔ loops through all articles<%= article.title %>➔ displays the article title<%= article.description %>➔ displays the article description- Placeholder is used for actions column for now
infoThe
<%and<%=tags tell Rails that the following code on the same line is Ruby code.The
%>tag signals that the Ruby code ends here and Rails should switch back to HTML.<% %>➔ runs Ruby without output<%= %>➔ runs Ruby and inserts the result into the HTML
-
If you haven't done it yet, start the Rails server locally:
rails server -
Open a web browser and visit
/articles.You should see all articles listed in a table with their title, description, and a placeholder for actions.
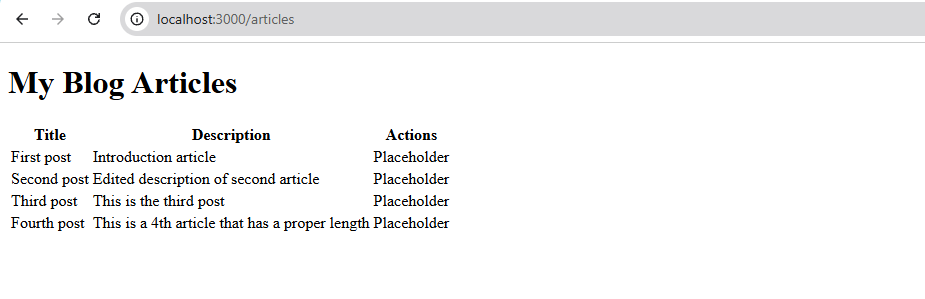
Now the articles listing page is complete and ready for further enhancements, like adding links for editing or deleting articles.
Creating New Articles
We will add a page where users can create new articles through a form. The route will be /articles/new and the form submits to the create action using a POST request.
- Route: GET
/articles/newfor the form - Route: POST
/articlesfor submitting the form - Controller actions:
newshows the form,createhandles saving the article
-
First, enable the
newandcreateroutes inconfig/routes.rb:## config/routes.rbRails.application.routes.draw doroot "pages#home"get "about", to: "pages#about"get "up" => "rails/health#show", as: :rails_health_checkresources :articles, only: [:show, :index, :new, :create]endVerify that the routes exist:
$ rails routes --expanded--[ Route 5 ]----------------------------------------------------------------------------------------Prefix |Verb | POSTURI | /articles(.:format)Controller#Action | articles#createSource Location | /test-rails-app/config/routes.rb:6--[ Route 6 ]----------------------------------------------------------------------------------------Prefix | new_articleVerb | GETURI | /articles/new(.:format)Controller#Action | articles#newSource Location | /test-rails-app/config/routes.rb:6 -
In the
ArticlesController, add thenewandcreateactions:## app/controllers/articles_controller.rbclass ArticlesController < ApplicationControllerdef show@article = Article.find(params[:id])enddef index@articles = Article.allenddef newenddef createrender plain: params[:article]endendHere,
render plain:sends a response directly to the browser without redirecting. This makes it easy to confirm that the form submission reaches thecreateaction and that the parameters are received correctly, which you’ll see in step 5. -
Create a form view at
app/views/articles/new.html.erb.For more information, please see Action View Form Helpers.
<h1>Create a New Entry</h1><%= form_with scope: :article,url: articles_path,local: true do |field| %><p><%= field.label :title %><br><%= field.text_field :title %></p><p><%= field.label :description %><br><%= field.text_area :description %></p><p><%= field.submit "Publish" %></p><% end %>Here, we are using the
form_withhelper which generates the form and sets it to submit viaPOSTusing Ajax. Instead of using AJAX, we can configure it to use normal HTTPPOSTby adding:local: trueUpdate: In Rails 7+, Turbo is enabled by default. Forms created with
form_withare submitted via Turbo unless it is explicitly disabled, so thelocaloption does not force a normal HTML request.Updated solution is to turn off Turbo:
<h1>Create a New Entry</h1><%= form_with scope: :article,url: articles_path,data: { turbo: false } do |field| %><p><%= field.label :title %><br><%= field.text_field :title %></p><p><%= field.label :description %><br><%= field.text_area :description %></p><p><%= field.submit "Publish" %></p><% end %> -
If it’s not already running, start the Rails server:
rails server -
Open a web browser and navigate to:
http://localhost:3000/articles/newEnter a title and description, then press Publish.
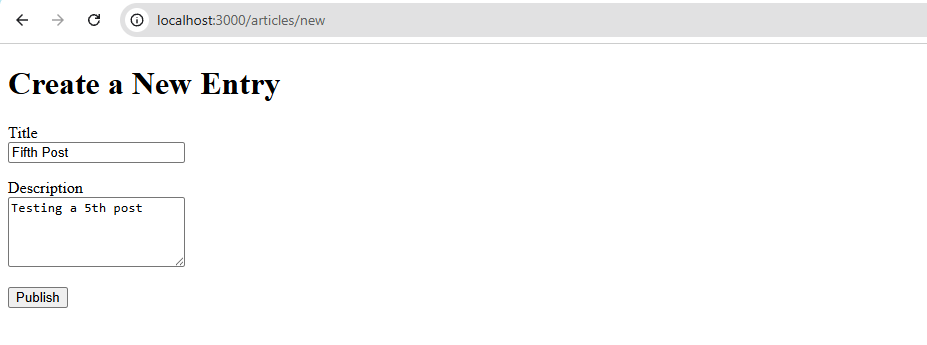
When the form is submitted, Rails sends the data in
params[:article]to thecreateaction. Sincerender plain: params[:article]is used, the browser displays the submitted value. This confirms that the request and parameters are working as expected.
At this stage, the form submission only sends the data to the create action and displays it in the browser. The article is not yet saved in the database. To actually store it, you would need to create a new Article record.
Save a New Article
Now we want to save a new article to the database. We will use strong parameters to safely allow title and description, create a new article object, save it, and then redirect to the article’s show page.
-
In
ArticlesController, update thecreateaction to create and save a newArticlerecord:## app/controllers/articles_controller.rbclass ArticlesController < ApplicationControllerdef show@article = Article.find(params[:id])enddef index@articles = Article.allenddef newenddef create@article = Article.new(params.require(:article).permit(:title, :description))@article.saveredirect_to article_path(@article)endendExplanation:
Article.newcreates a new article instance@article.savestores it in the database if validations passredirect_to @articlesends the user to the article’s show page
At this stage, using strong parameters prevents
ForbiddenAttributesErrorwhen Rails receives unpermitted fields.params.require(:article).permit(:title, :descriptionThe line above tells Rails to require a top-level key of
articleand allow only thetitleanddescriptionfrom the form to be used when creating the new article. -
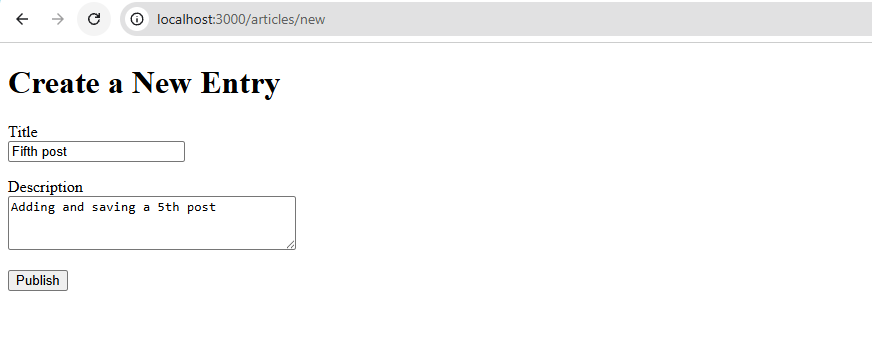
Open the new article form:
http://localhost:3000/articles/newFill in the title and description, and click Publish.
Rails saves the article to the database and redirects to the
showpage, which shows the new article: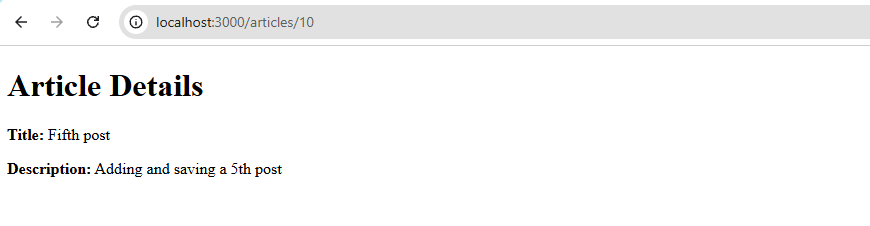
-
You can confirm that the article was saved by visiting the listing page:
http://localhost:3000/articles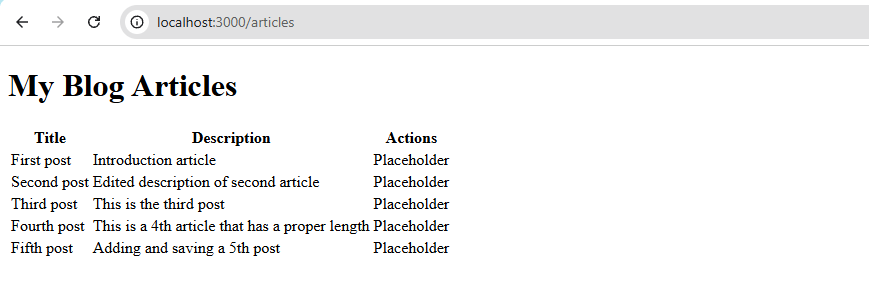
You can also check from the
rails console:$ Article.all[#<Article:0x000071c0bd6c9b08id: 1,created_at: "2023-01-11 02:17:34.505517000 +0000",title: "First post",updated_at: "2023-01-11 02:17:34.505517000 +0000",description: "Introduction article">,#<Article:0x000071c0bd6c99c8id: 2,created_at: "2023-01-11 02:21:36.948319000 +0000",title: "Second post",updated_at: "2023-01-11 05:22:30.483007000 +0000",description: "Edited description of second article">,#<Article:0x000071c0bd6c9888id: 8,created_at: "2023-01-11 08:01:45.875675000 +0000",title: "Third post",updated_at: "2023-01-11 08:01:45.875675000 +0000",description: "This is the third post">,#<Article:0x000071c0bd6c9748id: 9,created_at: "2023-01-11 08:02:52.917372000 +0000",title: "Fourth post",updated_at: "2023-01-11 08:02:52.917372000 +0000",description: "This is a 4th article that has a proper length">,#<Article:0x000071c0bd6c94c8id: 10,created_at: "2023-01-11 14:56:58.095096000 +0000",title: "Fifth post",updated_at: "2023-01-11 14:56:58.095096000 +0000",description: "Adding and saving a 5th post">]