Using Vagrant and VirtualBox
Overview
This lab demonstrates how to set up the Elastic Stack using Vagrant and VirtualBox.
You can also setup the Elastic Stack as containers.
Please see Using Docker Compose.
Pre-requisites
Setup the Virtual Machines
-
Download the Vagrant files here: Project Files - elastic.zip
-
Unzip the Files. Open Powershell and proceed to Elastic directory.
cd elastic -
Run the command below. This will create four virtual machines in VirtualBox
vagrant upIf you encounter any error, you can add the
--debugparameter:vagrant up --debugSince having multiple Virtual machines can be resource-intensive, you can modify the
Vagrantfileand comment out theconfigblocks for the other VMs. -
Run the
vagrantcommand below to list the VMs:vagrant ssh-configOutput:
Host node1HostName 127.0.0.1User vagrantPort 2222UserKnownHostsFile /dev/nullStrictHostKeyChecking noPasswordAuthentication noIdentityFile C:/virtual-machines/elastic/.vagrant/machines/node1/virtualbox/private_keyIdentitiesOnly yesLogLevel FATALPubkeyAcceptedKeyTypes +ssh-rsaHostKeyAlgorithms +ssh-rsaHost node2HostName 127.0.0.1User vagrantPort 2200UserKnownHostsFile /dev/nullStrictHostKeyChecking noPasswordAuthentication noIdentityFile C:/virtual-machines/elastic/.vagrant/machines/node2/virtualbox/private_keyIdentitiesOnly yesLogLevel FATALPubkeyAcceptedKeyTypes +ssh-rsaHostKeyAlgorithms +ssh-rsaHost node3HostName 127.0.0.1User vagrantPort 2201UserKnownHostsFile /dev/nullStrictHostKeyChecking noPasswordAuthentication noIdentityFile C:/virtual-machines/elastic/.vagrant/machines/node3/virtualbox/private_keyIdentitiesOnly yesLogLevel FATALPubkeyAcceptedKeyTypes +ssh-rsaHostKeyAlgorithms +ssh-rsaHost node4HostName 127.0.0.1User vagrantPort 2202UserKnownHostsFile /dev/nullStrictHostKeyChecking noPasswordAuthentication noIdentityFile C:/virtual-machines/elastic/.vagrant/machines/node4/virtualbox/private_keyIdentitiesOnly yesLogLevel FATALPubkeyAcceptedKeyTypes +ssh-rsaHostKeyAlgorithms +ssh-rsa -
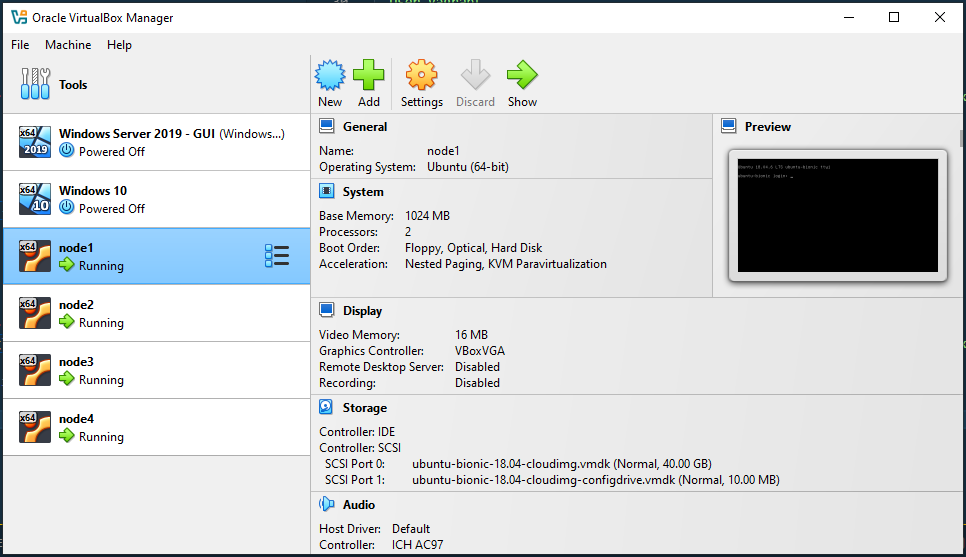
Open VirtualBox. You should see all VMs running.
-
To login to the node, run:
vagrant ssh node1
Install Elasticsearch 8.17
On Node 1, switch to root user and perform the steps below:
-
Download and install the public signing key:
wget -qO - https://artifacts.elastic.co/GPG-KEY-elasticsearch | sudo gpg --dearmor -o /usr/share/keyrings/elasticsearch-keyring.gpg -
Install the
apt-transport-httpspackage on Debian before proceeding:sudo apt-get updatesudo apt-get install -y apt-transport-https -
Save the repository definition to
/etc/apt/sources.list.d/elastic-8.x.list:echo "deb [signed-by=/usr/share/keyrings/elasticsearch-keyring.gpg] https://artifacts.elastic.co/packages/8.x/apt stable main" | sudo tee /etc/apt/sources.list.d/elastic-8.x.list -
Install the Elasticsearch Debian package
sudo apt-get update && sudo apt-get install -y elasticsearch -
Configure Elasticsearch configuration file.
sudo vi /etc/elasticsearch/elasticsearch.ymlSpecify the following:
node.name: node-1network.host: 0.0.0.0discovery.seed_hosts: ["127.0.0.1"]cluster.initial_master_nodes: ["node-1"]infoThe
cluster.initial_master_nodesmay already be set at the end of the file. Confirm first to avoid duplicate fields. -
Enable and start the service.
sudo systemctl daemon-reloadsudo systemctl enable --now elasticsearchsudo systemctl status elasticsearch -
Reset the password for the
elasticuser./usr/share/elasticsearch/bin/elasticsearch-reset-password -i -u elasticPress
ywhen prompted and then provide your new password.Please confirm that you would like to continue [y/N]yEnter password for [elastic]:Re-enter password for [elastic]:Password for the [elastic] user successfully reset.If you encounter the error below, you may need to adjust the heap size.
ERROR: Failed to determine the health of the cluster. Unexpected http status [503], with exit code 65 -
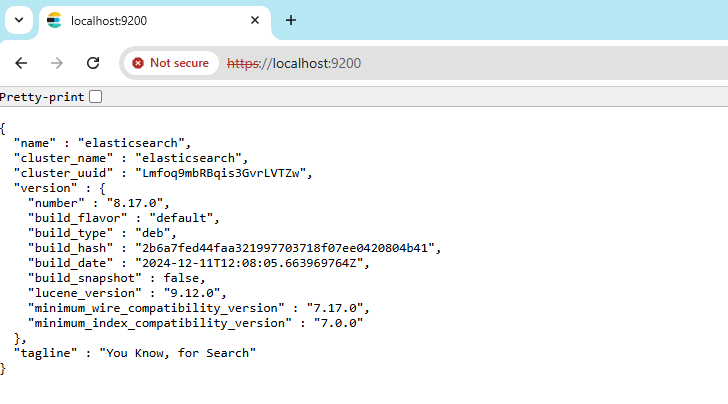
Verify the access:
curl -k -u elastic:<add-password> $ELASTIC_ENDPOINT:9200Output:
{"name" : "elasticsearch","cluster_name" : "elasticsearch","cluster_uuid" : "Lmfoq9mbRBqis3GvrLVTZw","version" : {"number" : "8.17.0","build_flavor" : "default","build_type" : "deb","build_hash" : "2b6a7fed44faa321997703718f07ee0420804b41","build_date" : "2024-12-11T12:08:05.663969764Z","build_snapshot" : false,"lucene_version" : "9.12.0","minimum_wire_compatibility_version" : "7.17.0","minimum_index_compatibility_version" : "7.0.0"},"tagline" : "You Know, for Search"} -
Another way to verify access: Open a web browser in your computer (host) and navigate to:
$ELASTIC_ENDPOINT:9200/It will prompt you to enter the username and password. If successful, you should see the same output.
Tune Down the Memory (Optional)
Since we're using virtual machines on a Windows computer, we can set the memory limit used by Elasticsearch.
-
Login to Node 1 and edit the config file:
sudo vi /etc/default/elasticsearch -
Set the max and minimum memory to 512MB. Save afterwards.
ES_JAVA_OPTS="-Xms512m -Xmx512m" -
Restart the service.
sudo systemctl restart elasticsearchsudo systemctl status elasticsearch
Adjust the Heap Size
The heap size for Elasticsearch is dependent on the available resources of your virtual machine (VM), and configuring it correctly is critical for optimal performance.
General Rule: The Elasticsearch heap size should be set to 50% of the total available memory, up to a maximum of 32GB. Never exceed 50% of the machine's RAM to ensure enough memory is left for the operating system and filesystem caching.
If your VM has less than 4GB of RAM, setting the heap to 1GB is a reasonable starting point. To check your memory:
df -h
Sample output:
Filesystem      Size  Used Avail Use% Mounted on
tmpfs           392M  988K  391M   1% /run
/dev/sda1        39G  3.3G   36G   9% /
To update the heap size:
- Open the JVM options file:
sudo vi /etc/elasticsearch/jvm.options
-
Adjust these values based on your VM's memory. For example:
-
If your VM has 2GB RAM:
-Xms1g-Xmx1g -
If your VM has 4GB RAM:
-Xms2g-Xmx2g
-
-
Restart Elasticsearch:
sudo systemctl restart elasticsearchsudo systemctl status elasticsearch
Configure SSL on Elasticsearch
When configuring SSL/TLS for secure communication between Elasticsearch and clients, it is important to trust the Certificate Authority (CA) certificate to ensure the authenticity of the server.
For more information, please see SSL Configuration.
Share the Certificate to Other VMs (Optional)
If you want other VMs to trust the Elasticsearch SSL certificate, you need to share the CA certificate. This allows them to securely connect to Elasticsearch using the same certificate.
For more information, please see Sharing the Certificate.
Sample Search Index
Create the Shakespeare dataset below. This will be used to test how Elasticsearch index data with various fields.
This is taken from Sundog's Elasticsearch Course. . The structure has been update for Elasticsearch 8
{
  "mappings": {
    "properties": {
      "speaker": {
        "type": "keyword"
      },
      "play_name": {
        "type": "keyword"
      },
      "line_id": {
        "type": "integer"
      },
      "speech_number": {
        "type": "integer"
      }
    }
  }
}
First, store the Elasticsearch endpoint and credentials in variables:
ELASTIC_ENDPOINT="https://your-elasticsearch-endpoint"
ELASTIC_USER="your-username"
ELASTIC_PW="your-password"
Submit the mapping to Elasticsearch.
curl -s -u $ELASTIC_USER:$ELASTIC_PW \
-H 'Content-Type: application/json' \
-XPUT $ELASTIC_ENDPOINT:9200/shakespeare-sample \
--data-binary @shakespeare-mapping.json  | jq
It should return:
{
  "acknowledged": true,
  "shards_acknowledged": true,
  "index": "shakespeare"
}
Sample Bulk Indexing
Download the file below. This bulk indexing file contains lines from Shakespeare's plays, formatted for compatibility with Elasticsearch's Bulk API.
Run the following command to index the data into Elasticsearch:
curl -s -u $ELASTIC_USER:$ELASTIC_PW \
-H 'Content-Type: application/json' \
-XPOST $ELASTIC_ENDPOINT:9200/shakespeare/_bulk?pretty \
--data-binary @shakespeare_8.0.json | jq
After indexing, you can search for the famous line "to be or not to be" using this query:
curl -u $ELASTIC_USER:$ELASTIC_PW \
-H 'Content-Type: application/json' \
-XGET $ELASTIC_ENDPOINT:9200/shakespeare/_search?pretty -d '
{
  "query": {
    "match_phrase": {
      "text_entry": "to be or not to be"
    }
  }
}'
If the data was indexed correctly, the query should return the following result:
{
  "took" : 18,
  "timed_out" : false,
  "_shards" : {
    "total" : 1,
    "successful" : 1,
    "skipped" : 0,
    "failed" : 0
  },
  "hits" : {
    "total" : {
      "value" : 1,
      "relation" : "eq"
    },
    "max_score" : 13.889601,
    "hits" : [
      {
        "_index" : "shakespeare",
        "_id" : "34229",
        "_score" : 13.889601,
        "_source" : {
          "type" : "line",
          "line_id" : 34230,
          "play_name" : "Hamlet",
          "speech_number" : 19,
          "line_number" : "3.1.64",
          "speaker" : "HAMLET",
          "text_entry" : "To be, or not to be: that is the question:"
        }
      }
    ]
  }
}