Dev Environment in AWS Cloud
Overview
This lab builds a small AWS development environment with Terraform:
- A public Ubuntu EC2 instance
- Docker installed through user data
- Optional VSCode Remote SSH entry
The infrastructure includes:
- VPC
- Public subnet
- Internet gateway
- Route table and route table association
- Security group
- EC2 key pair
- EC2 instance
- Terraform outputs
Environment:
- Windows 10 machine as the local workstation
- VSCode and WSL
- AWS credentials configured locally
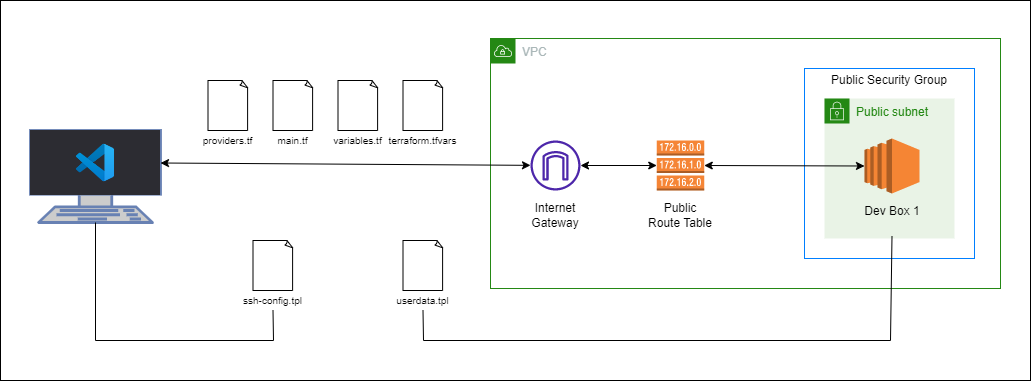
Lab Files
The finished configuration is split into a few files so the intent is easier to follow.
| File | Purpose |
|---|---|
main/provider.tf | Pins Terraform and AWS provider requirements. |
main/main.tf | Defines the VPC, subnet, routing, security group, and EC2. |
main/datasources.tf | Looks up the latest Ubuntu 22.04 AMI from Canonical. |
main/outputs.tf | Prints the EC2 public IP after apply. |
vars/variables.tf | Defines AWS profile, region, credential path, and host OS. |
template-files/userdata.tpl | Installs Docker during EC2 bootstrap. |
template-files/ssh-linux.tpl | Appends a Linux or WSL SSH config entry for the instance. |
template-files/ssh-windows.tpl | Appends a Windows SSH config entry for the instance. |
Note: Terraform only loads .tf files from the current working directory. If you run from main/, copy the variable files and templates into that directory or update the file paths in main.tf.
Prerequisites
Before running the lab, make sure the local workstation has:
- Terraform installed
- AWS credentials configured locally
- An AWS profile that can create VPC, EC2, security group, route table, and key pair resources
- An SSH key pair created locally
- VSCode Remote SSH installed if you want to connect from VSCode
Generate a local SSH key if one does not already exist.
ssh-keygen -t ed25519 -f ~/.ssh/tst-keypair
Note: The example configuration uses ~/.ssh/tst-keypair.pub for the AWS key pair and ~/.ssh/tst-keypair for SSH access.
Configure Terraform and AWS
The provider configuration sets the Terraform version, AWS provider version, region, shared credentials file, and AWS profile.
terraform {
  required_version = ">= 0.12"

  required_providers {
    aws = {
      source  = "hashicorp/aws"
      version = ">= 4.16.0"
    }
  }
}

provider "aws" {
  region                  = var.aws_region
  shared_credentials_file = var.my_credentials
  profile                 = var.my_profile
}
The values are kept in variables instead of being hardcoded into the provider block.
variable "host_os" {
  type    = string
  default = "windows"
}

variable "aws_region" {
  description = "AWS region"
  type        = string
  default     = "ap-southeast-1"
}

variable "my_credentials" {
  description = "Credentials to be used to connect to AWS"
  type        = string
  default     = "/mnt/c/Users/Eden.Jose/.aws/credentials"
}

variable "my_profile" {
  description = "Profile to be used to connect to AWS"
  type        = string
  default     = "vscode-dev"
}
Initialize the working directory before planning or applying.
terraform init
Build the Network
The network layer creates a VPC, public subnet, internet gateway, public route table, default route, and route table association. The subnet uses map_public_ip_on_launch = true so instances launched in the subnet receive a public IP.
resource "aws_vpc" "tst-vpc" {
cidr_block = "10.123.0.0/16"
enable_dns_hostnames = true
enable_dns_support = true
tags = {
Name = "tst-vpc"
}
}
resource "aws_subnet" "tst-public-subnet-1" {
vpc_id = aws_vpc.tst-vpc.id
cidr_block = "10.123.1.0/24"
map_public_ip_on_launch = true
availability_zone = "ap-southeast-1a"
tags = {
Name = "tst-public-subnet-1"
}
}
resource "aws_internet_gateway" "tst-igw-1" {
vpc_id = aws_vpc.tst-vpc.id
tags = {
Name = "tst-igw-1"
}
}
resource "aws_route_table" "tst-rt-table" {
vpc_id = aws_vpc.tst-vpc.id
tags = {
Name = "tst-rt-table"
}
}
resource "aws_route" "tst-rt-route" {
route_table_id = aws_route_table.tst-rt-table.id
destination_cidr_block = "0.0.0.0/0"
gateway_id = aws_internet_gateway.tst-igw-1.id
}
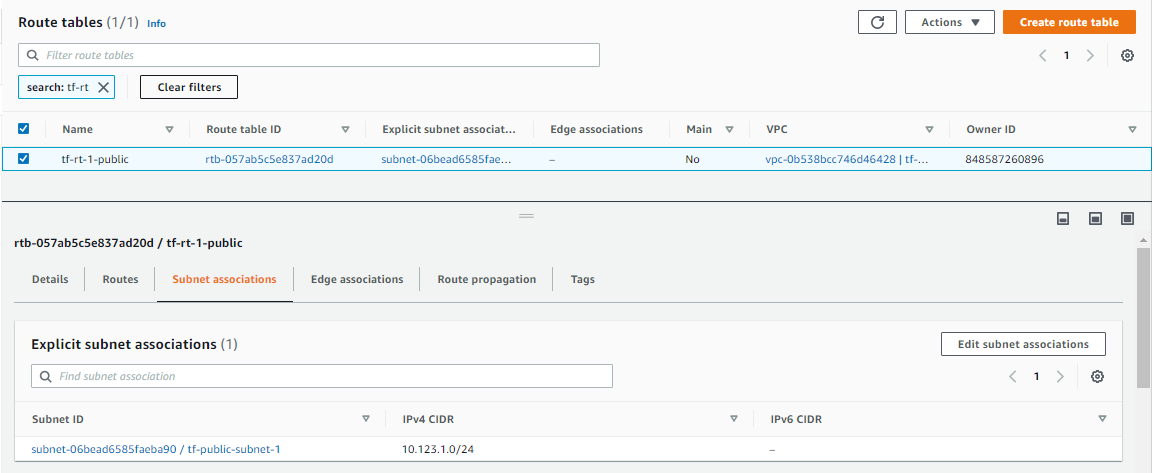
resource "aws_route_table_association" "tst-rt-assoc-1" {
subnet_id = aws_subnet.tst-public-subnet-1.id
route_table_id = aws_route_table.tst-rt-table.id
}
Run a plan first, then apply when the changes look right.
terraform plan
terraform apply -auto-approve
Verify the resources from Terraform state.
terraform state list
Expected resources at this point:
aws_internet_gateway.tst-igw-1
aws_route.tst-rt-route
aws_route_table.tst-rt-table
aws_route_table_association.tst-rt-assoc-1
aws_subnet.tst-public-subnet-1
aws_vpc.tst-vpc
You can also verify them from the AWS Console.


Add Access and Compute
The compute layer adds a security group, an AWS key pair, an Ubuntu AMI data source, and an EC2 instance.
The security group below allows all inbound traffic from one trusted public IP and all outbound traffic. For a real environment, restrict ingress to the ports you actually need, such as SSH on 22.
resource "aws_security_group" "tst-sg-1" {
name = "tst-sg-1"
description = "Allow inbound traffic"
vpc_id = aws_vpc.tst-vpc.id
ingress {
from_port = 0
to_port = 0
protocol = "-1"
cidr_blocks = ["1.2.3.4/32"]
}
egress {
from_port = 0
to_port = 0
protocol = "-1"
cidr_blocks = ["0.0.0.0/0"]
}
tags = {
Name = "tst-sg-1"
}
}
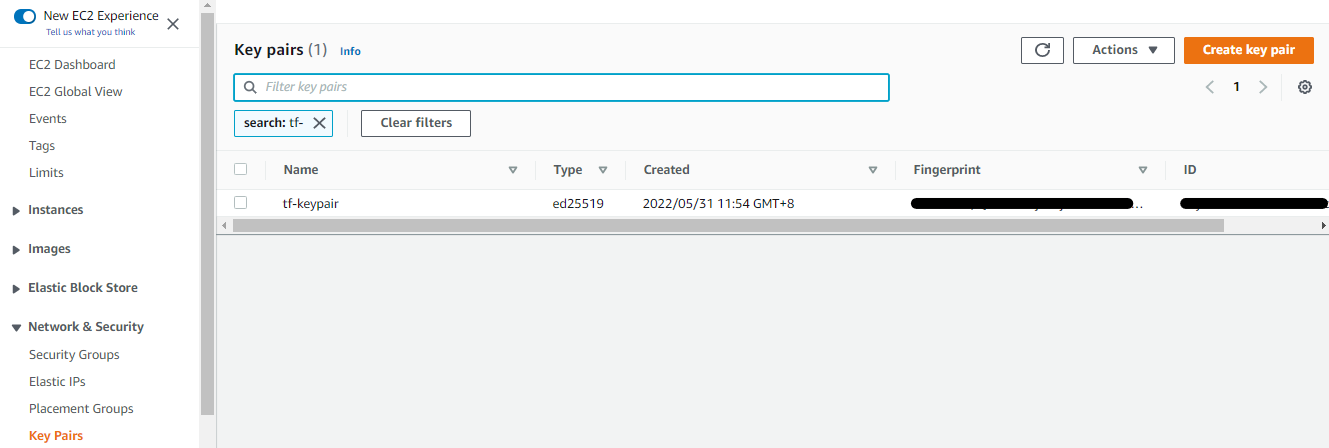
resource "aws_key_pair" "tst-keypair" {
key_name = "tst-keypair"
public_key = file("~/.ssh/tst-keypair.pub")
}
The AMI data source avoids hardcoding a specific Ubuntu AMI ID.
data "aws_ami" "tst-ami" {
  most_recent = true
  owners      = ["099720109477"]

  filter {
    name   = "name"
    values = ["ubuntu/images/hvm-ssd/ubuntu-jammy-22.04-amd64-server-*"]
  }
}
The EC2 instance is attached to the public subnet and security group, uses the generated key pair, and runs the user data script during first boot.
resource "aws_instance" "tst-node-1" {
  instance_type          = "t2.micro"
  ami                    = data.aws_ami.tst-ami.id
  key_name               = aws_key_pair.tst-keypair.id
  vpc_security_group_ids = [aws_security_group.tst-sg-1.id]
  subnet_id              = aws_subnet.tst-public-subnet-1.id
  user_data              = file("userdata.tpl")

  root_block_device {
    volume_size = 10
  }

  tags = {
    Name = "tst-node-1"
  }
}
The bootstrap script installs Docker and adds the ubuntu user to the docker group.
#!/bin/bash
sudo apt-get update -y &&
sudo apt-get install -y \
apt-transport-https \
ca-certificates \
curl \
gnupg-agent \
software-properties-common &&
curl -fsSL https://download.docker.com/linux/ubuntu/gpg | sudo apt-key add - &&
sudo add-apt-repository "deb [arch=amd64] https://download.docker.com/linux/ubuntu $(lsb_release -cs) stable" &&
sudo apt-get update -y &&
sudo sudo apt-get install docker-ce docker-ce-cli containerd.io -y &&
sudo usermod -aG docker ubuntu
Format, review, and apply the configuration.
terraform fmt
terraform plan
terraform apply -auto-approve
The instance can take a few minutes to become ready while cloud-init runs the user data script.


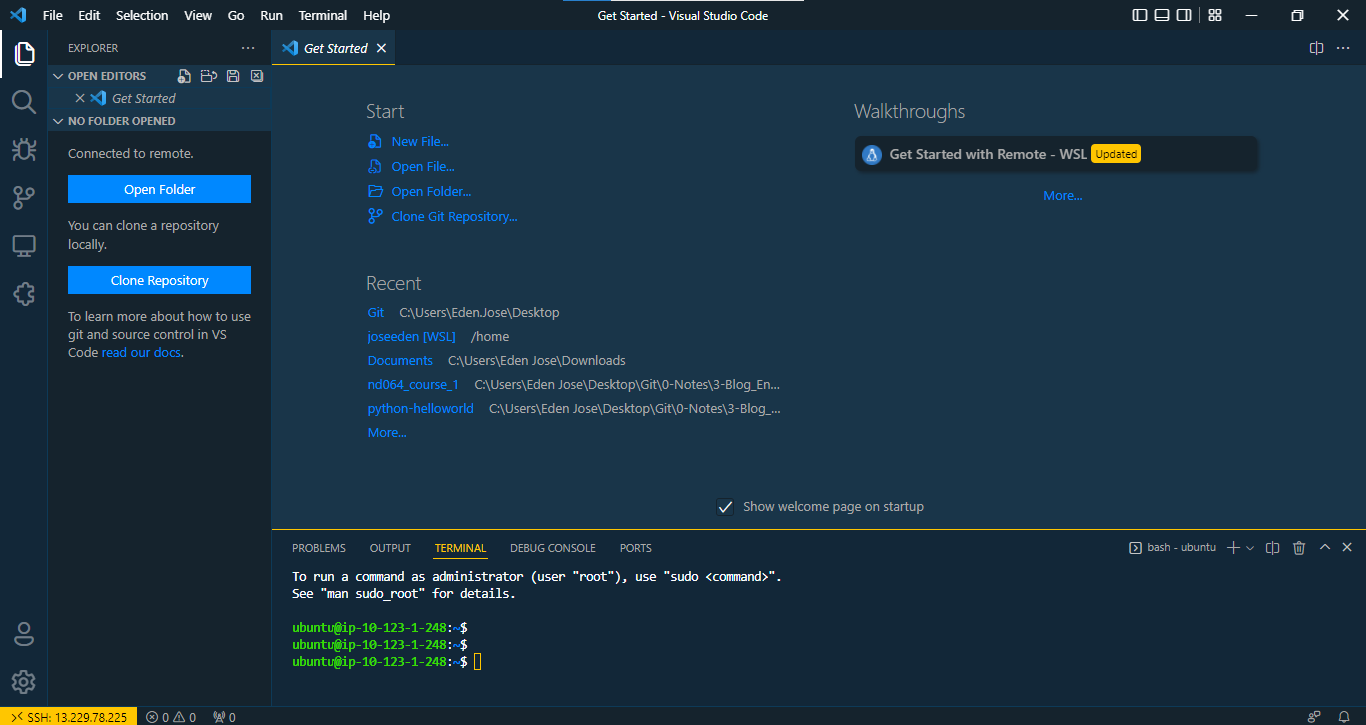
Connect to the Instance
Get the instance public IP from Terraform state or from the AWS Console.
terraform state show aws_instance.tst-node-1
Look for the public_ip value, then connect with SSH.
ssh -i ~/.ssh/tst-keypair ubuntu@13.229.78.225
Check that Docker was installed by the user data script.
docker -v
Expected output:
Docker version 20.10.16, build aa7e414
Configure VSCode Remote SSH
The lab uses templatefile with a local-exec provisioner to append an SSH host entry on the local machine.
Note: Provisioners should be used sparingly. They are useful here because the change is local workstation configuration, not infrastructure state that Terraform needs to model long term.
For WSL or Linux:
cat << EOF >> /mnt/c/Users/Eden.Jose/.ssh/config

Host ${hostname}
  HostName ${hostname}
  User ${user}
  IdentityFile ${identityfile}
EOF
For Windows:
add-content -path C:\Users\Eden.Jose\.ssh\config -value @'

Host ${hostname}
  HostName ${hostname}
  User ${user}
  IdentityFile ${identityfile}
'@
Add the local provisioner to the EC2 instance.
provisioner "local-exec" {
  command = templatefile("ssh-linux.tpl", {
    hostname     = self.public_ip,
    user         = "ubuntu",
    identityfile = "~/.ssh/tst-keypair"
  })

  interpreter = ["bash", "-c"]
}
If the instance already exists, Terraform may show no infrastructure changes. Replace the EC2 instance to rerun creation-time provisioning.
terraform apply -replace aws_instance.tst-node-1 -auto-approve
After the apply completes, confirm that the host entry was added.
cat /mnt/c/Users/Eden.Jose/.ssh/config
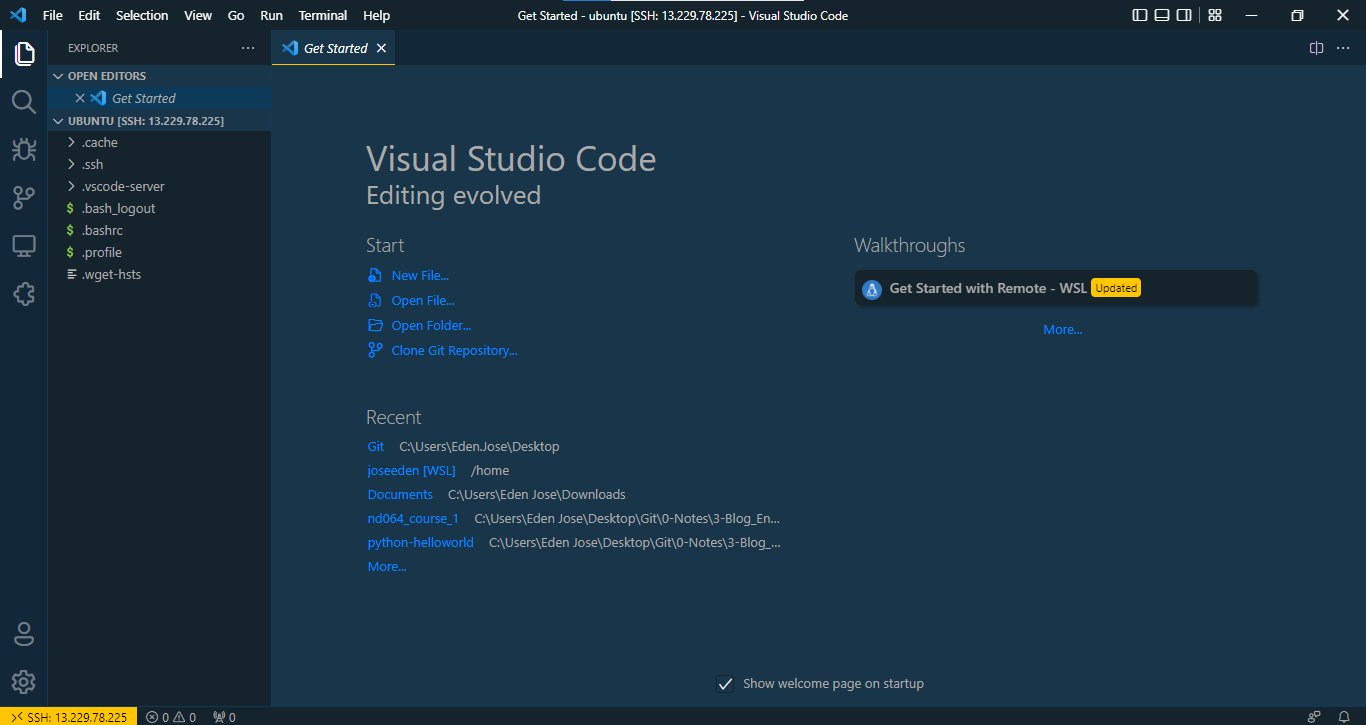
Open VSCode Remote SSH and connect to the generated host.
View > Command Palette > Remote-SSH: Connect to Host


Variables and Outputs
Terraform loads variable values in a defined order. Later sources take precedence over earlier sources.
| Source | Precedence |
|---|---|
| Environment variables | Lowest |
terraform.tfvars | Higher |
terraform.tfvars.json | Higher |
*.auto.tfvars or *.auto.tfvars.json | Higher |
-var and -var-file command-line options | Highest |
Use terraform console to inspect values while testing variable behavior.
terraform console
Example:
> var.host_os
"windows"
You can override values from a separate tfvars file.
terraform console -var-file="../vars/another.tfvars"
You can also override directly from the command line.
terraform console -var="host_os=linux"
The lab outputs the EC2 public IP.
output "tst-node-1-ip" {
  value = aws_instance.tst-node-1.public_ip
}
Apply a refresh-only operation when you only need Terraform to refresh state and recalculate outputs.
terraform apply -refresh-only
terraform output
Example output:
tst-node-1-ip = "13.229.78.225"
State and Cleanup
Terraform records managed resources in state. Use state commands when you need to inspect what Terraform is managing.
terraform state list
terraform state show aws_instance.tst-node-1
terraform show
Preview a destroy before deleting the lab.
terraform plan -destroy
Remove all resources when the lab is no longer needed.
terraform destroy -auto-approve