Logstash with MySQL
Overview
This lab focuses on integrating Logstash with MySQL to ingest data into Elasticsearch.
- Set up the MySQL server and the movie database from the dataset
- Install the JDBC connector on Logstash
- Configure Logstash to ingest data from MySQL
- Verify successful indexing in Elasticsearch
- Query the indexed data
Lab Environment
| Node | Hostname | IP Address | Port |
|---|---|---|---|
| Node 1 | elasticsearch | 192.168.56.101 | 9200 |
| Node 2 | logstash | 192.168.56.102 | |
| Node 4 | mysql | 192.168.56.104 | 3306 |
Setup details:
-
The nodes are running Ubuntu Linux 22.04
-
The nodes are created in VirtualBox using Vagrant.
-
An SSH key is generated on the Elasticsearch node
-
The Logstash node can reach Elasticsearch node via port 9200
-
The Logstash node can reach MySQL node via port 3306
Pre-requisites
- Create the nodes in VirtualBox
- Setup fileshare on the Virtual Machines
- Install Elasticsearch on node 1
- Install Logstash on node 2
- Configure SSL on Elasticsearch
- Share Elasticsearch CA cert to Logstash
- Install jq on Elasticsearch node
Install MySQL on Node 4
For the entire installation steps, please see Offlne Install - MySQL.
Download the Dataset
-
This guide uses a dataset of film reviews. Download the dataset from the link below:
-
Unzip the file and move the folder to
/tmpunzip ml-100k.zipcp -r ml-100k /tmpcd /tmp/ml-100k/ -
Verify the folder contains the datasets:
ls -laOutput:
total 15784drwxr-x--- 2 root root 4096 Dec 24 17:17 .drwxrwxrwt 11 root root 4096 Dec 24 17:17 ..-rwxr-x--- 1 root root 6750 Dec 24 17:17 README-rwxr-x--- 1 root root 716 Dec 24 17:17 allbut.pl-rwxr-x--- 1 root root 643 Dec 24 17:17 mku.sh-rwxr-x--- 1 root root 1979173 Dec 24 17:17 u.data-rwxr-x--- 1 root root 202 Dec 24 17:17 u.genre-rwxr-x--- 1 root root 36 Dec 24 17:17 u.info-rwxr-x--- 1 root root 236344 Dec 24 17:17 u.item-rwxr-x--- 1 root root 193 Dec 24 17:17 u.occupation-rwxr-x--- 1 root root 22628 Dec 24 17:17 u.user-rwxr-x--- 1 root root 1586544 Dec 24 17:17 u1.base-rwxr-x--- 1 root root 392629 Dec 24 17:17 u1.test-rwxr-x--- 1 root root 1583948 Dec 24 17:17 u2.base-rwxr-x--- 1 root root 395225 Dec 24 17:17 u2.test-rwxr-x--- 1 root root 1582546 Dec 24 17:17 u3.base-rwxr-x--- 1 root root 396627 Dec 24 17:17 u3.test-rwxr-x--- 1 root root 1581878 Dec 24 17:17 u4.base-rwxr-x--- 1 root root 397295 Dec 24 17:17 u4.test-rwxr-x--- 1 root root 1581776 Dec 24 17:17 u5.base-rwxr-x--- 1 root root 397397 Dec 24 17:17 u5.test-rwxr-x--- 1 root root 1792501 Dec 24 17:17 ua.base-rwxr-x--- 1 root root 186672 Dec 24 17:17 ua.test-rwxr-x--- 1 root root 1792476 Dec 24 17:17 ub.base-rwxr-x--- 1 root root 186697 Dec 24 17:17 ub.test
Create User Account
Login to the MySQL node and switch to root user:
-
Connect to MySQL database.
mysql -u root -p -
Create the user in MySQL. The IP Address is here the Logstash node.
CREATE USER 'operator'@'192.168.56.103' IDENTIFIED BY 'enter-password-here'; -
Grant full privileges to the user on all databases and tables.
GRANT ALL PRIVILEGES ON *.* TO 'operator'@'192.168.56.103';FLUSH PRIVILEGES;
This MySQL user will be specified in the Logstash configuration file.
Create the Database
-
Login to the MySQL node and edit the MySQL configuration file:
sudo vi /etc/mysql/mysql.conf.d/mysqld.cnfAdd or update the following line under the
[mysqld]section:local_infile=1infoThe dataset will be loaded into MySQL using the
LOAD DATAcommand on a later step.LOAD DATAis disabled by default. To enable this feature:- On the server side: Modify
mysqld.cnf. - On the client side: Use the
--local-infileflag when connecting to MySQL.
- On the server side: Modify
-
Restart MySQL to apply the changes:
sudo systemctl restart mysql -
Verify that
local_infileis enabled:SHOW VARIABLES LIKE 'local_infile';It should return:
+---------------+-------+| Variable_name | Value |+---------------+-------+| local_infile | ON |+---------------+-------+ -
Connect to MySQL with the
--local-infileoption. Provide the root password when prompted.mysql --local-infile -u root -p -
Create a database for the dataset.
CREATE DATABASE movielens; -
Create a table to store the data and define the schema.
CREATE TABLE movielens.movies (movieID INT PRIMARY KEY NOT NULL,title TEXT,releaseDATE DATE);
Import Dataset into MySQL
-
Load the dataset into the table.
LOAD DATA LOCAL INFILE 'u.item'INTO TABLE movielens.moviesFIELDS TERMINATED BY '|'LINES TERMINATED BY '\n'(movieID, title, @var3)SET releaseDATE = STR_TO_DATE(@var3, '%d-%b-%Y');Expected output:
Query OK, 1682 rows affected, 1683 warnings (0.03 sec)Records: 1682 Deleted: 0 Skipped: 0 Warnings: 1683If you encounter the error below, proceed to step 2. If there is no error, skip to step 4.
ERROR 1300 (HY000): Invalid utf8mb4 character string: '' -
(Optional) Look for special symbols like
^M,\r, or non-printable characters.cat -A u.item | lessRemove Hidden Characters: Use
trorsedto clean the file:tr -cd '\11\12\15\40-\176' < u.item > u_cleaned.itemAlternatively, remove specific carriage returns:
sed -i 's/\r//g' u_cleaned.item -
(Optional) After cleaning the file, try loading the new dataset.
LOAD DATA LOCAL INFILE 'u_cleaned.item'INTO TABLE movielens.moviesFIELDS TERMINATED BY '|'LINES TERMINATED BY '\n'(movieID, title, @var3)SET releaseDATE = STR_TO_DATE(@var3, '%d-%b-%Y');It should return...
Query OK, 1682 rows affected, 1683 warnings (0.03 sec)Records: 1682 Deleted: 0 Skipped: 0 Warnings: 1683 -
Additonal check: Ensure the movies table matches the data.
DESCRIBE movielens.movies;Output:
+-------------+------+------+-----+---------+-------+| Field | Type | Null | Key | Default | Extra |+-------------+------+------+-----+---------+-------+| movieID | int | NO | PRI | NULL | || title | text | YES | | NULL | || releaseDATE | date | YES | | NULL | |+-------------+------+------+-----+---------+-------+3 rows in set (0.01 sec) -
Validate Data.
SELECT * FROM movielens.movies LIMIT 10;Output:
+---------+------------------------------------------------------+-------------+| movieID | title | releaseDATE |+---------+------------------------------------------------------+-------------+| 1 | Toy Story (1995) | 1995-01-01 || 2 | GoldenEye (1995) | 1995-01-01 || 3 | Four Rooms (1995) | 1995-01-01 || 4 | Get Shorty (1995) | 1995-01-01 || 5 | Copycat (1995) | 1995-01-01 || 6 | Shanghai Triad (Yao a yao yao dao waipo qiao) (1995) | 1995-01-01 || 7 | Twelve Monkeys (1995) | 1995-01-01 || 8 | Babe (1995) | 1995-01-01 || 9 | Dead Man Walking (1995) | 1995-01-01 || 10 | Richard III (1995) | 1996-01-22 |+---------+------------------------------------------------------+-------------+ -
Check for errors or warnings.
SHOW WARNINGS; -
Test another query.
SELECT * FROM movielens.movies WHERE title LIKE 'Star%';Output:
+---------+------------------------------------------------+-------------+| movieID | title | releaseDATE |+---------+------------------------------------------------+-------------+| 50 | Star Wars (1977) | 1977-01-01 || 62 | Stargate (1994) | 1994-01-01 || 222 | Star Trek: First Contact (1996) | 1996-11-22 || 227 | Star Trek VI: The Undiscovered Country (1991) | 1991-01-01 || 228 | Star Trek: The Wrath of Khan (1982) | 1982-01-01 || 229 | Star Trek III: The Search for Spock (1984) | 1984-01-01 || 230 | Star Trek IV: The Voyage Home (1986) | 1986-01-01 || 271 | Starship Troopers (1997) | 1997-01-01 || 380 | Star Trek: Generations (1994) | 1994-01-01 || 449 | Star Trek: The Motion Picture (1979) | 1979-01-01 || 450 | Star Trek V: The Final Frontier (1989) | 1989-01-01 || 1068 | Star Maker, The (Uomo delle stelle, L') (1995) | 1996-03-01 || 1265 | Star Maps (1997) | 1997-01-01 || 1293 | Star Kid (1997) | 1998-01-16 || 1464 | Stars Fell on Henrietta, The (1995) | 1995-01-01 |+---------+------------------------------------------------+-------------+15 rows in set (0.00 sec)
Install the JDBC Driver
On a computer with internet access:
-
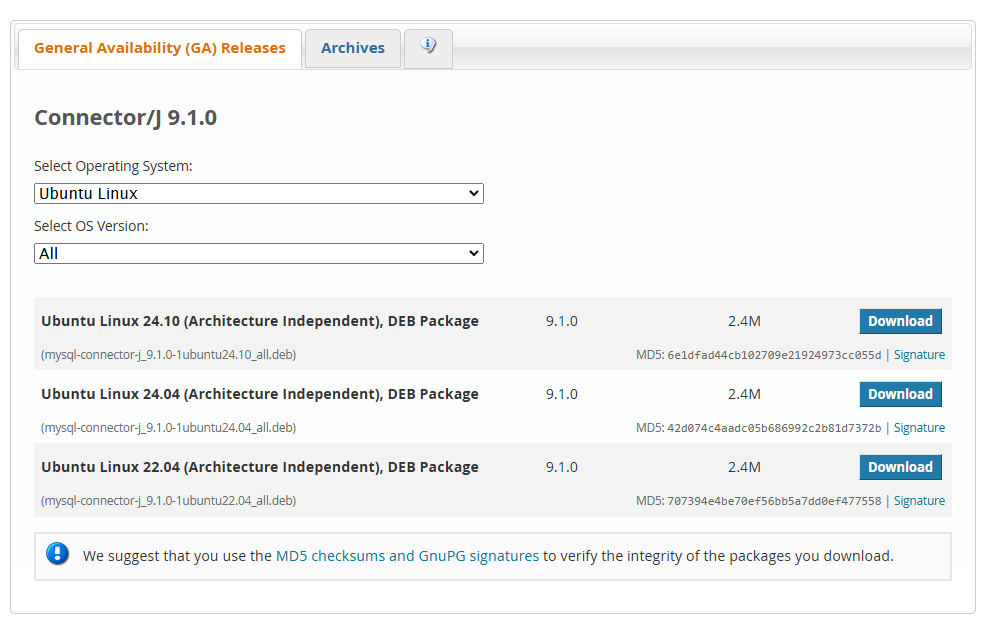
Go to MySQL Community Downloads > Select operating system > Ubuntu Linux.
-
Select the version compatible with your OS and download.
infoThis lab is using Ubuntu Linux 22.04.
-
When prompted to sign up, click No thanks, just start my download.
-
Copy the files to a local folder mapped to a fileshare in you VM.
infoFor this lab, I've mapped a local folder to
/mnt/fileshareon all VMs.
Configure Logstash
Login to the Logstash node and switch to root user:
-
Access the transferred file and copy JDBC Connector files to
/tmp.cp /mnt/fileshare/mysql/mysql-connector-j_9.1.0-1ubuntu22.04_all.deb /tmp/cd /tmp -
Install the package.
dpkg -i mysql-connector-j_9.1.0-1ubuntu22.04_all.deb -
Check if the JAR file is installed in the expected directory.
find /usr/share/java -name "mysql-connector-java*.jar"Output:
/usr/share/java/mysql-connector-java-9.1.0.jar -
Verify that the Logstash node can reach MySQL node via port 3306
$ telnet 192.168.56.104 3306Trying 192.168.56.104...Connected to 192.168.56.104.Escape character is '^]'. -
Create the
mysql.conffile.sudo vi /etc/logstash/conf.d/mysql.confUse the configuration file below:
input {jdbc {jdbc_driver_library => "/usr/share/java/mysql-connector-java-9.1.0.jar"jdbc_driver_class => "com.mysql.cj.jdbc.Driver"jdbc_connection_string => "jdbc:mysql://192.168.56.104:3306/movielens" ## address of databasejdbc_user => "operator"jdbc_password => "enter-password-here"#schedule => "* * * * *" # Adjust as neededstatement => "SELECT * FROM movies"}}output {stdout { codec => json_lines }elasticsearch {hosts => ["$ELASTIC_ENDPOINT:9200"] ## address of elasticsearch nodeindex => "movielens-sql"user => "elastic"password => "enter-password-here"## password => enter-password-heressl => truecacert => "/usr/share/ca-certificates/elastic-ca.crt" ## Shared Elasticsearch CA certificate path}}This configuration:
- Retrieves data from the movies table in a MySQL database
- Sends data to Elasticsearch
- JDBC input plugin connects to the database using the credentials
- Output plugin sends data to
movielens-sqlindex with SSL encryption.
-
Start Logstash with the updated configuration:
/usr/share/logstash/bin/logstash -f /etc/logstash/conf.d/mysql.confIf there are no errors, the output will display the dataset being ingested into Elasticsearch. Once done, you should see the following:
[INFO ] 2024-12-24 21:09:21.947 [[main]-pipeline-manager] javapipeline - Pipeline terminated {"pipeline.id"=>"main"}[INFO ] 2024-12-24 21:09:21.964 [Converge PipelineAction::Delete<main>] pipelinesregistry - Removed pipeline from registry successfully {:pipeline_id=>:main}[INFO ] 2024-12-24 21:09:21.997 [LogStash::Runner] runner - Logstash shut down.
Verify Data in Elasticsearch
Login to the Elasticsearch node and switch to root user:
-
First, store the Elasticsearch endpoint and credentials in variables:
ELASTIC_ENDPOINT="https://your-elasticsearch-endpoint"ELASTIC_USER="your-username"ELASTIC_PW="your-password" -
Verify that the
movielens-sqlindex has been created.curl -s -u $ELASTIC_USER:$ELASTIC_PW \-H 'Content-Type: application/json' \-XGET $ELASTIC_ENDPOINT:9200/_cat/indices?vOutput:
health status index uuid pri rep docs.count docs.deleted store.size pri.store.size dataset.sizeyellow open movielens-sql GhfPWKYBQgumzbDiBPONTQ 1 1 1682 0 282.8kb 282.8kb 282.8kbyellow open shakespeare umINGu-cQGykbRmDb4BmZQ 1 1 111396 0 19mb 19mb 19mbyellow open shakespeare-sample Z1Akxga4SqKT8mmrhScvyw 1 1 0 0 249b 249b 249b -
To search for a specific movie, run the following:
curl -s -u $ELASTIC_USER:$ELASTIC_PW \-H 'Content-Type: application/json' \-XGET $ELASTIC_ENDPOINT:9200/movielens-sql/_search?q=title:Terminator&pretty | jqSample output:
{"took": 7,"timed_out": false,"_shards": {"total": 1,"successful": 1,"skipped": 0,"failed": 0},"hits": {"total": {"value": 2,"relation": "eq"},"max_score": 7.205778,"hits": [{"_index": "movielens-sql","_id": "qBqA-pMBWFPC_Q3Dto7V","_score": 7.205778,"_source": {"movieid": 195,"@version": "1","releasedate": "1984-01-01T00:00:00.000Z","@timestamp": "2024-12-24T21:09:17.277354657Z","title": "Terminator, The (1984)"}},{"_index": "movielens-sql","_id": "JBqA-pMBWFPC_Q3Dt4-Y","_score": 5.8547363,"_source": {"movieid": 96,"@version": "1","releasedate": "1991-01-01T00:00:00.000Z","@timestamp": "2024-12-24T21:09:17.092565174Z","title": "Terminator 2: Judgment Day (1991)"}}]}}