Skills
Overview
Skills are reusable instructions that guide the AI whenever a consistent process is needed. They define the exact method for a task rather than assigning it to a specific role.
Skills are loaded in two stages to save memory.
- The name and description are always available
- The full details are only fetched when a request matches.
This keeps your active session clean and efficient by withholding unnecessary guidelines until they are needed.
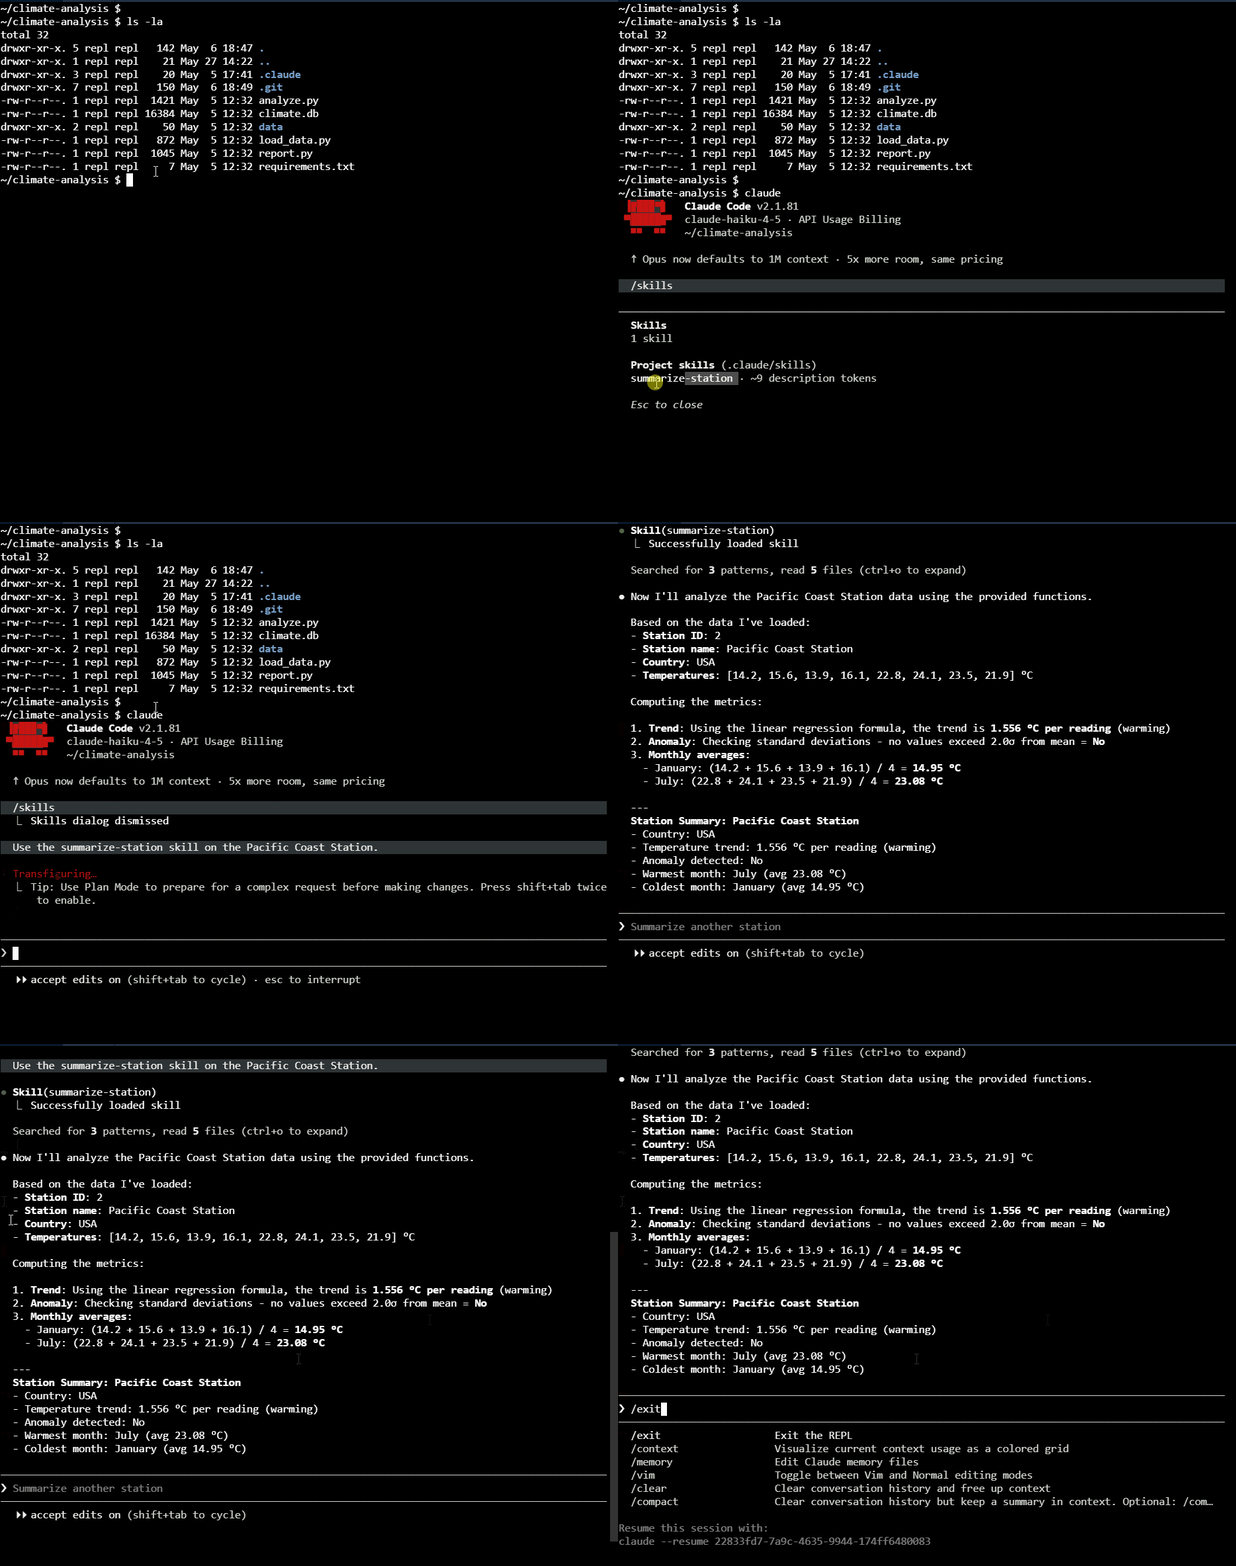
Skills Directory
Skills are stored inside the .claude directory in a dedicated skills folder. They can be shared at project level or used personally depending on where they are placed.
Personal skills (all projects):
~/.claude
└── skills
    └── my-skills
        └── SKILL.md
Project skills (specific to a project and shared via git):
project-directory
└── .claude
    └── skills
        └── my-skills
            └── SKILL.md
This structure keeps skills organized and reusable across different environments.
SKILL.md Structure
Each skill is defined in a SKILL.md file that contains metadata and step-by-step instructions. The description tells Claude when to use it, and the body defines the process.
Unlike agents, skills are more manual to create, but still flexible and reusable.
As an example, a SKILL.md for unit testing might look like this:
---
# SKILLS.md
name: "Unit Testing"
description: "Use pytest unit tests to verify function behavior in Pyhton."
---
When writing unit tests, follow these steps:
1. Identify the function to test
2. Define clear input and expected output
3. Use descriptive test names
4. Write the test case for normal cases
5. Write the test cases for edge cases (empty input, invalid data)
6. Run the tests and verify results
Sample Skill: Unit Testing
Unit testing is a good example of a skill because it always follows a predictable structure. Each test checks one function with a clear input and expected output.
- One function per test
- Clear input and output
- Pass or fail results
This consistency makes unit tests a reliable safety layer when changing code.
Creating a Skill Manually
-
Create a skill folder in the project root.
mkdir -p .claude/skills/skill-unit-tests -
Add a
SKILL.mdfile with the frontmatter and instructions.You can open the file in your editor and write the content or ask Claude to generate it for you.
touch .claude/skills/skill-unit-tests/SKILL.mdcode .claude/skills/skill-unit-tests/SKILL.md -
Save the file and start Claude.
-
Confirm if the skill is registered and ready to use.
/skills
This makes the skill available for reuse once it is registered in the system.
Automatic Discoverability
Claude Code decides when to load a skill from the skill name and description. The full skill instructions are only read after Claude decides the skill is relevant.
If a skill is not being used automatically, you can try to improve the description. Good descriptions explain the task and the trigger clearly.
For example, a code review skill description might say:
description: Use this skill to optimize React components and check for common best practices.
Or:
description: Use this skill when reviewing code for bugs, security issues, and performance problems.
The description should be specific enough to match the work, but broad enough to catch the real situations where the skill should apply.
Note: The skill body can contain detailed workflow instructions, but the body does not help much with automatic discovery until the skill has already been selected.
Custom Commands and Skills
Custom commands and skills have overlapping purposes. A custom command is basically a reusable prompt that can be invoked when you want Claude Code to perform the same type of work repeatedly.
For example, you might create a reusable code review command instead of rewriting a long review prompt every time.
Common use cases include:
- Running code reviews
- Checking for security issues
- Generating reports
- Applying a repeated project workflow
Custom commands can still be useful, but the same pattern can often be handled with skills. In practice, skills are the more flexible option when the reusable prompt should include clear workflow instructions, tool restrictions, and optional arguments.
Some online resources still mention custom commands. If the Claude official docs focus more on skills, treat custom commands as a related older pattern rather than a separate core concept.
Custom Command Pattern
A custom command is normally stored as a markdown file in a commands folder. The file can contain only a prompt, or it can include optional metadata.
Metadata can define:
- A description that appears when browsing commands
- Allowed tools that restrict what Claude Code may use
- Arguments that make the command reusable for different modes
For a code review command, tool restrictions are useful. If the goal is only to review code, the command can be limited to read-only tools so it does not modify files.
Arguments in Reusable Prompts
Custom commands can accept input through an arguments placeholder. This lets one reusable prompt behave differently depending on the mode you pass in.
For example, a review command could accept:
bugsfor logical issuessecurityfor security issuesbugs,securityfor a combined review
Skills support a similar idea with $ARGUMENTS. This is why many custom command workflows can be moved into a skill without losing flexibility.
Example:
---
description: Review code for bugs, security issues, or both.
allowed-tools: Read, Grep, Glob
---

MODE: $ARGUMENTS

Review the codebase based on the selected mode.

- If MODE is `bugs`, look for logic errors and behavior regressions.
- If MODE is `security`, look for secrets, unsafe input handling, and risky dependencies.
- If MODE is `bugs,security`, perform both review types.
- If MODE is empty, perform a general code review.

Return findings first, ordered by severity.
Include file paths, line numbers, impact, and suggested fixes.
Skill Metadata Controls
Skill frontmatter can control how Claude Code invokes the skill and what tools it may use.
For more information, see the Claude Code settings documentation.
| Metadata | Purpose | When to Use |
|---|---|---|
name | Defines the skill identifier. | Required for all skills. |
description | Explains when Claude Code should use the skill. | Describe the trigger or use case, not the implementation details. |
disable-model-invocation | Prevents automatic model invocation when set to true. | Use when the skill should behave like a custom command only. |
user-invocable | Prevents direct user invocation when set to false. | Use when the skill should be available for automatic discovery but not callable directly by users. |
allowed-tools | Restricts which tools Claude Code may use inside the skill. | Use when the skill should be limited to specific or safer operations. For example, Read allows file access but prevents modifications. |
Skill Arguments
Skills can receive extra input with the $ARGUMENTS placeholder. This is useful when building a skill that also works like a custom command.
For example, a code-review skill can use $ARGUMENTS to change the review mode:
---
name: code-review
description: Review code for bugs, security, or performance issues.
allowed-tools: Read
---

MODE: $ARGUMENTS

If MODE is one of the following, adjust the review as described:

- MODE == BUGS: Focus only on logical or other bugs.
- MODE == SECURITY: Focus only on security issues.
- MODE == PERFORMANCE: Focus only on performance issues.

MODE can also be set to a combination like BUGS,SECURITY.
Perform the combined review in that case.

If MODE is set to anything else or nothing at all,
perform a thorough general code review.

Perform an in-depth code review of the entire codebase.

Carefully explore the codebase file by file to find potential issues and improvements.

Create a detailed report of all findings.
This pattern keeps one skill reusable across several review styles.
Third-Party Skills
Custom skills are useful because they let you tune Claude Code to your own project and preferences. You can also install third-party skills and then adapt them to your workflow.
A public skills repository is available at skills.sh.
Install a skill from that repository with:
npx skills add <owner/repo>
This requires Node.js because npx is installed with Node.js.
After installing a third-party skill, review the skill contents before relying on it. You can adjust the description, remove parts you do not need, or tighten the allowed tools.
Skills vs Agents
Skills and agents solve different problems and are chosen based on workflow needs.
Skills are ideal for tasks that require consistency and repeatability, while agents are better for tasks that require specialized knowledge or decision-making.
| Aspect | Skills | Agents |
|---|---|---|
| Purpose | Repeatable process | Specialized task handling |
| Focus | How to do something | Who performs the task |
| Scope | Workflow steps | Independent execution |
| Use case | Testing, refactoring, checks | Investigation, planning, review |
| Location | .claude/skills | .claude/agents |
| Invocation | /skill-name or automatic | @agent-name or automatic |
Skills and agents can work together to create more powerful workflows. An agent can use a skill as part of its toolkit. This pairing allows structured processes to be executed by specialized agents consistently.
Example: Refactoring as a Skill
Refactoring is improving code structure without changing its behavior. The logic stays the same, but the structure becomes cleaner and easier to maintain. It can include:
- Extracting helper functions
- Renaming unclear variables
- Simplifying complex logic
Unit tests make this process safe by confirming that behavior does not change before and after updates. They act as a safety check while the structure is being improved.
- Run tests before changes
- Run tests after refactoring
- Ensure behavior stays the same
Refactoring becomes even more reliable when guided by a structured skill. The process ensures changes are incremental, tested, and predictable.
- Verify tests exist first
- Make small controlled changes
- Confirm all tests pass
This ensures refactoring is consistent and repeatable across different developers.
Hooks
Hooks are automatic shell commands that run when Claude performs actions using tools like file edits or reads. They are useful for automating follow-up tasks that should always happen after certain actions, such as running tests after code changes or logging modifications.
Configuration file:
.claude/settings.json
The settings.json file is where you define all Claude Code settings, not just hooks.
For more information, please see Configuration and Sessions.
Every tool action defined in the settings file follows a consistent flow where hooks can be inserted at different stages. The stages are:
| Stage | What it does | When it runs |
|---|---|---|
PreToolUse | Checks or blocks an action before it runs | Before the tool executes |
Tool | Performs the requested operation | During execution |
PostToolUse | Runs follow-up actions like tests or logs | After the tool completes |
In the example below, a PostToolUse hook is set to run after any file write or edit. It executes tests and then logs the change:
{
  "hooks": {
    "PostToolUse": [
      {
        "matcher": "Write|Edit",
        "hooks": [
          {
            "type": "command",
            "command": "cd $CLAUDE_PROJECT_DIR && python -m pytest --tb=short -q"
          },
          {
            "type": "command",
            "command": "echo 'file modified' >> hook.log"
          }
        ]
      }
    ]
  }
}
Note that hooks run in the background, so their output is not always visible by default. This makes it important to have a logging mechanism to ensure that progress and failures can be tracked over time.
A sample log shows how results appear after each change:
[11:22:33] Running PostToolUse hooks for Write/Edit...
[11:22:33] Executing command: cd /path/to/project && python -m pytest --tb=short -q
[11:22:34] Tests passed successfully.
[11:22:34] Logged file modification to hook.log.