LM Studio
Overview
LM Studio is a tool used to run open large language models locally. It can be downloaded directly from the official website: LMStudio.ai.
- Supports macOS, Windows, and Linux
- Installer auto-detects your system
- Manual OS selection is available if needed
After downloading, you simply install it like any normal application. If the system detection is wrong, you can manually choose your operating system from the download page.
Once installed, you launch the app and move into the main interface.
Exploring the Interface
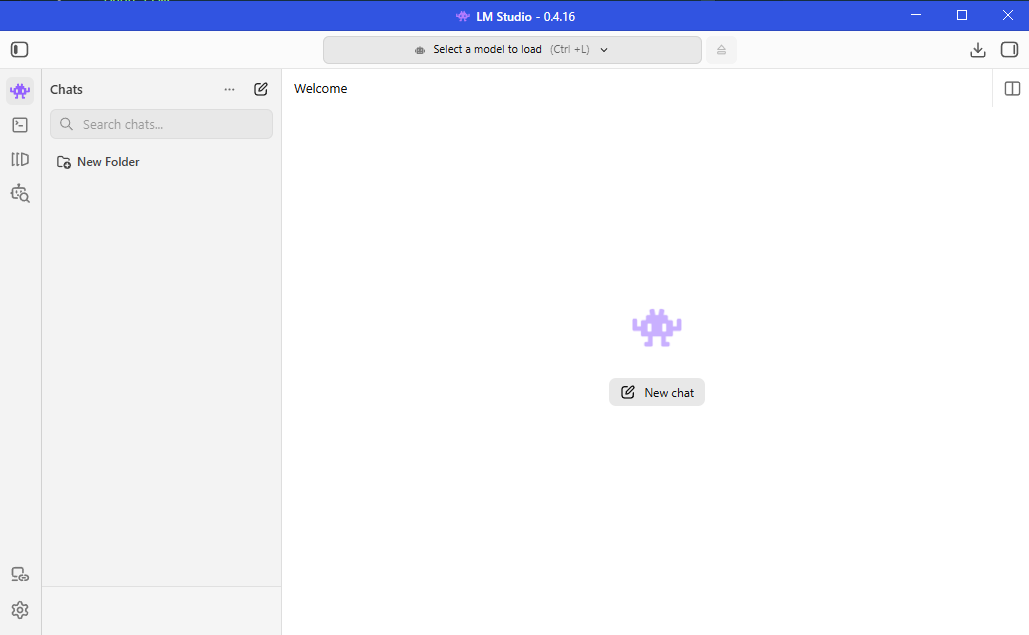
When you open LM Studio, you will see a main workspace designed for chatting with local models.
When LM Studio opens, you will see a main workspace designed for chatting with local models.
- The chat window is where you talk to the model.
- The sidebar stores your previous conversations so you can revisit them later. The model loader is where you choose and load models for local use.
You may also see different modes such as user mode, power mode, and developer mode, depending on the version. These mainly control how much access you have to advanced settings.
Developer View
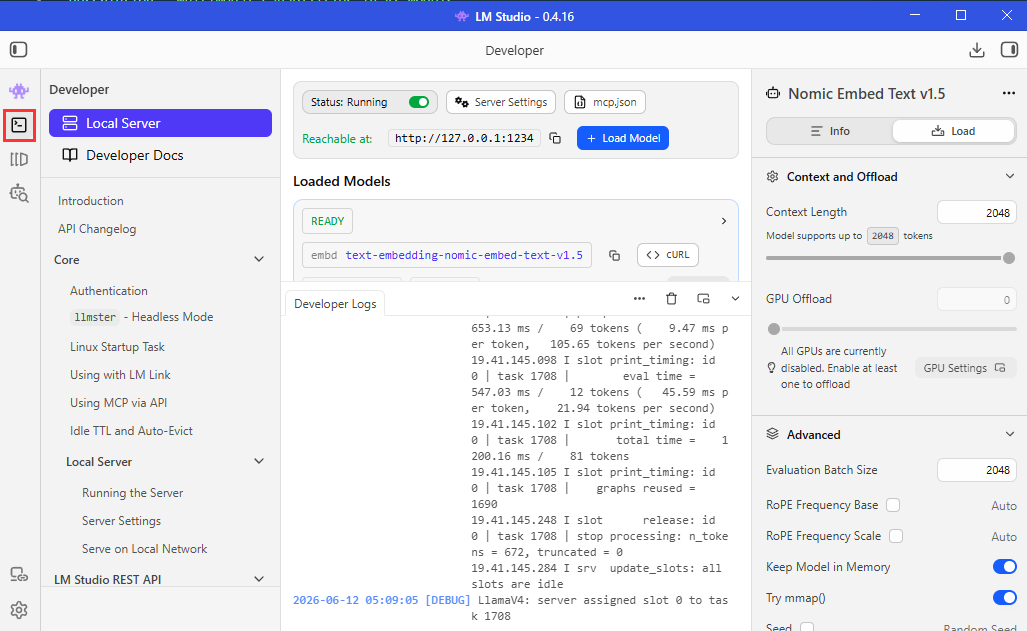
Developer View provides information about the currently loaded model and its activity.
- View model information
- Configure advanced settings
- See API endpoints
- Monitor logs and errors
If you are building applications that communicate with LM Studio, the API endpoint information can be useful.
You can also use this area to troubleshoot issues when a model behaves unexpectedly.
- Error logs show failures
- Debug logs show model activity
For example, if a model fails to generate a response, the error details may appear in the log viewer.
My Models
The My Models page shows all downloaded models and where they are stored.
- View downloaded models
- See storage location
- Open model folder
- Change storage path
- Delete unused models
You can choose a different folder if you want to store models on another drive.
For example:
C:\Users\Example\.lmstudio\models
On Linux:
/home/example/.lmstudio/models
On macOS:
/Users/example/.lmstudio/models
The exact path depends on your operating system and LM Studio configuration.
Embedding Models
LM Studio supports both large language models and embedding models.
| Feature | Large Language Model (LLM) | Embedding Model |
|---|---|---|
| Purpose | Generates text and responses | Converts text into numerical vectors |
| Input | Text | Text |
| Output | Natural language text | Vector embeddings (numbers) |
| Common Uses | Chatbots, writing, summarization, coding | Search, retrieval, similarity matching, RAG |
| Example Output | "Python is a programming language." | [0.12, 0.91, 0.34, ...] |
| Generates Text? | Yes | No |
| Used for Search? | Indirectly | Yes |
| Supported in LM Studio? | Yes | Yes |
Embedding models are commonly used in Retrieval-Augmented Generation (RAG) systems, semantic search, and recommendation systems.
Model Search
The Model Search built-in search page is usually the easiest way to find models that are already compatible with LM Studio.
- Search supported models
- Download directly
- Access model information
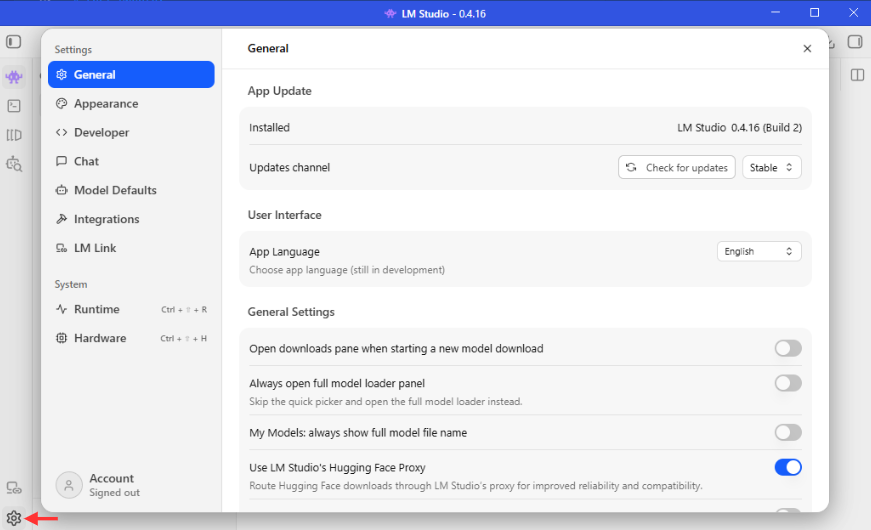
Settings and Customization
LM Studio includes settings that let you adjust how the application looks and behaves.
- Theme selection like light or dark mode
- Language configuration options
- System-based automatic appearance mode
- General app preferences
These settings are optional but useful for personalizing the experience. Most default settings work well out of the box, so no complex configuration is required to start using the tool.
Getting Started
Using Quantized Models
Most local models are not the original full-size versions. Instead, they are compressed (quantized) to reduce memory usage.
- Smaller file size
- Lower RAM or VRAM usage
- Faster performance on local machines
- Slight trade-off in precision
Quantization reduces the precision of model weights (for example, 4-bit instead of full precision), which makes it practical to run on consumer hardware.
For more information, please see Quantization.
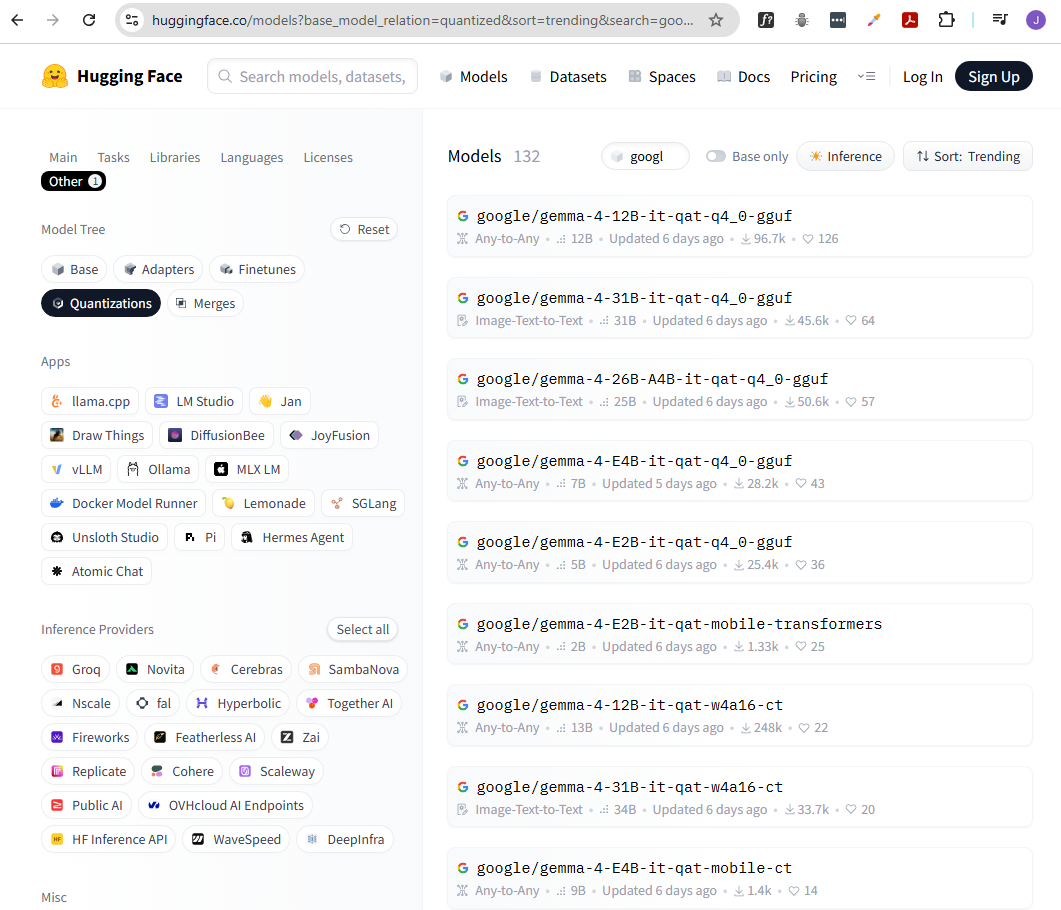
Finding Models on Hugging Face
You can browse models directly on Hugging Face and check how they can be used locally.
- Search and browse model catalog
- Open a model card for details
- Check supported runtimes (LM Studio, Ollama)
- Requires Hugging Face login for integration
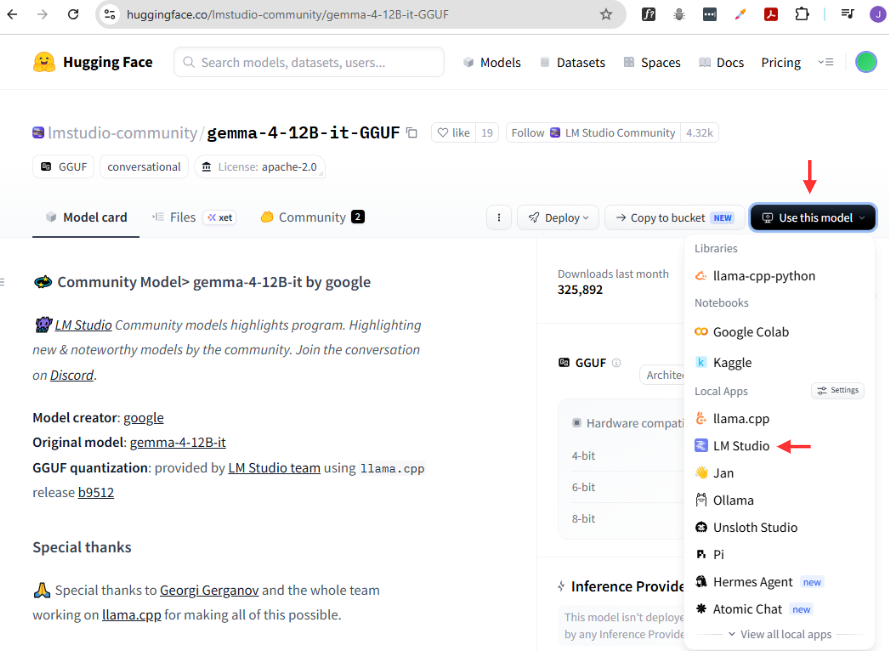
On a model page, Hugging Face shows a dropdown that lists supported apps like LM Studio or Ollama. If supported, you can often launch or download the model directly from there.
However, not all models work with LM Studio in raw form, so you usually need a compatible version.
To use it, you can select a model in Hugging Face that supports LM Studio, then click Use this model.
Alternativey, you can find compatible models directly in LM Studio's model loader, which often lists popular options.
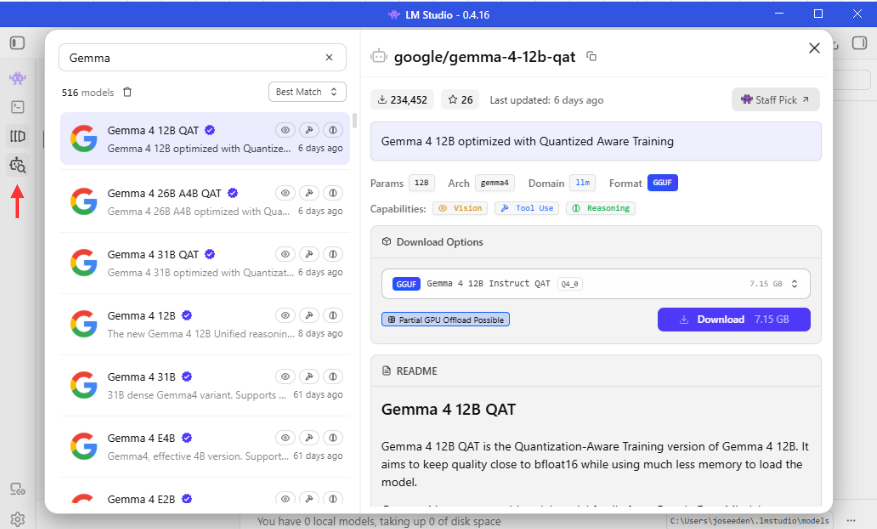
The choice depends on your system capacity, especially RAM and GPU memory.
- 1B parameter model ➜ very light, runs on weak machines
- 12B parameter model ➜ balanced performance and quality
- 27B parameter model ➜ high quality, needs more RAM
Loading Models
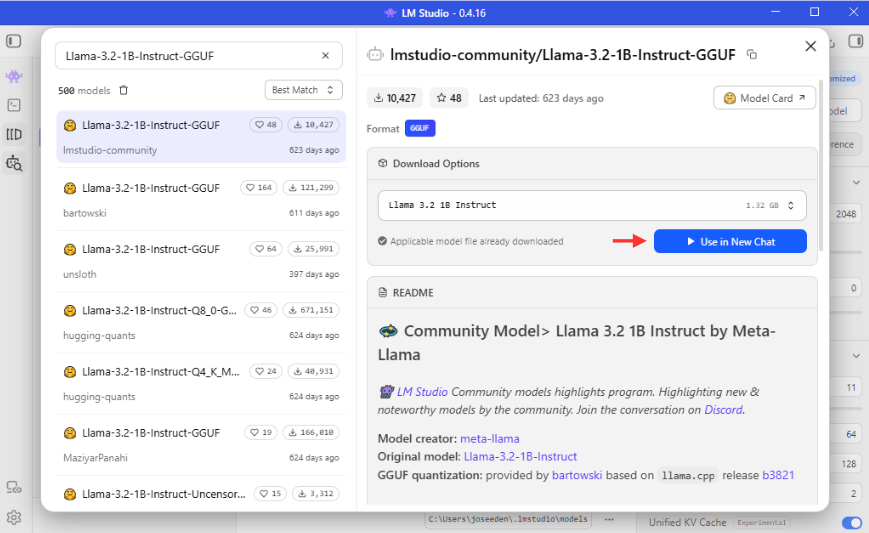
After download, you must explicitly load the model before chatting with it.
UPDATE: You can click the "Use in New Chat" button to start a conversation immediately after downloading the model, which automatically loads it for you.
System Resource Usage
When a model runs locally, it consumes system memory and sometimes GPU memory.
- RAM usage depends on model size
- VRAM usage depends on GPU support
- CPU handles fallback if no GPU is available
- Unified memory systems combine RAM and VRAM
On systems like Apple Silicon, memory is shared, so RAM and VRAM are unified. On other systems, GPU memory may be separate.
Running a Local Chat Session
Once the model is loaded, you can start chatting normally inside LM Studio.
- Open new chat
- Send prompt to model
- Receive formatted markdown response
- Works even without internet
The model runs fully offline, so internet access is not required after download.
System Prompts
A system prompt is a base instruction that guides how an AI model behaves throughout a chat.
- Has higher priority than user messages
- Applies to the entire conversation
- Can be saved and reused with presets
You can think of a system prompt as a set of instructions that the model reads before processing user messages.
For example, a system prompt could say:
You are an creative poet.
Your answer should always be in rhymes.
If the user then asks:
Define cloud computing
The model will try to answer in rhymes because the system prompt instructed it to do so.
This makes system prompts useful for controlling behavior, tone, formatting, or other rules throughout a conversation.
All these chats are simply JSON files, which you can view by right-clicking on the chat and selecting "Show in Folder". You can open the JSON file in a text editor to see the system prompt and user messages.
Saving System Prompts as Presets
Many AI tools allow you to save system prompts as presets.
- Reuse common instructions
- Avoid retyping prompts
- Apply rules automatically
- Keep behavior consistent
For example, you might create a preset called:
You are an expert poet.

Answer in rhymes.
The preset could contain:
Provide a 3 months roadmap for studying web development.
Whenever that preset is selected, the system prompt is automatically applied to new chats.
Practical Uses
In practice, system prompts are usually used for more useful instructions than rhyming.
Common examples include:
- Respond as a technical tutor
- Use simple language
- Provide step-by-step explanations
- Format responses in Markdown
- Keep answers concise
- Focus on a specific topic
Example system prompt:
You are a technical tutor.

Explain concepts in simple language.
Provide examples where helpful.
Keep responses concise and beginner-friendly.
With instructions like these, the model can maintain a consistent style throughout the conversation.
Presets vs Regular Chats
A regular chat may start without a system prompt.
When a preset is selected:
- The system prompt is loaded automatically
- The same rules apply to every new chat using that preset
- No need to re-enter instructions
Without a preset, the model uses its default behavior or any system prompt already configured for that conversation.
This makes presets a convenient way to reuse common instructions and keep model behavior consistent across multiple chats.