Archive Build Artifacts
Lab Environment
In this lab, we have the following Linux machines, and we will use a local computer (laptop) to connect to them.
- jenkinsmaster
You can choose to set up a virtual machine on your computer or create instances in the cloud. In this case, EC2 instances are used.
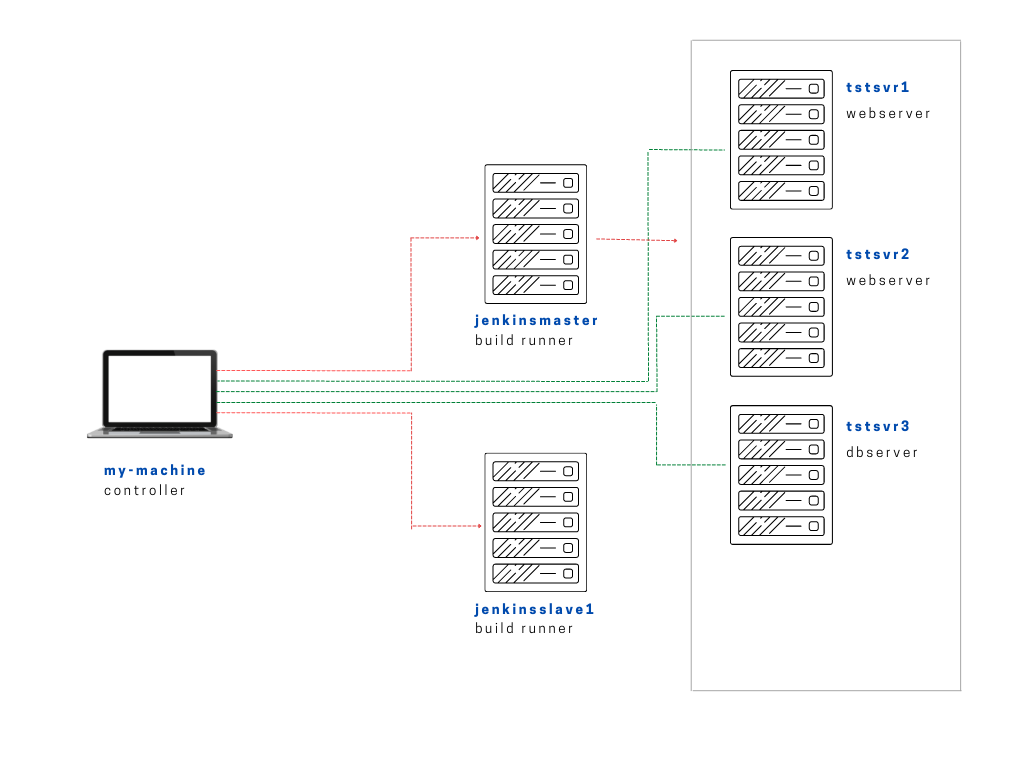
Note that for this lab, we'll only be using jenkinsmaster and you can disregard the other tstsvrs and jenkinsslave1 for now.
Setting Up Jenkins
If you have your Jenkins server already setup, you can skip this section. There's an option to manually install Jenkins on a Linux machine or you can also use Ansible playbooks to perform the entire installation of Jenkins on this machine.
To setup Jenkins:
Using a CI Workflow
When building and testing software, developers usually follow a Continuous Integration Workflow. The process begins with compiling, testing, and packaging the code. Afterward, an artifact is generated and archived for future use.
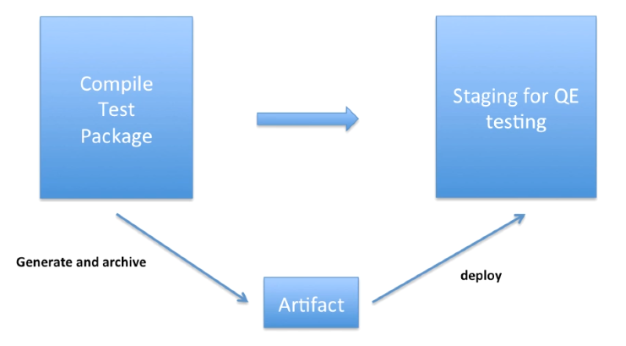
The artifact is then deployed to a staging environment for Quality Engineering (QE) testing. This workflow helps streamline the development cycle and ensures consistent build and test practices.
Artifacts
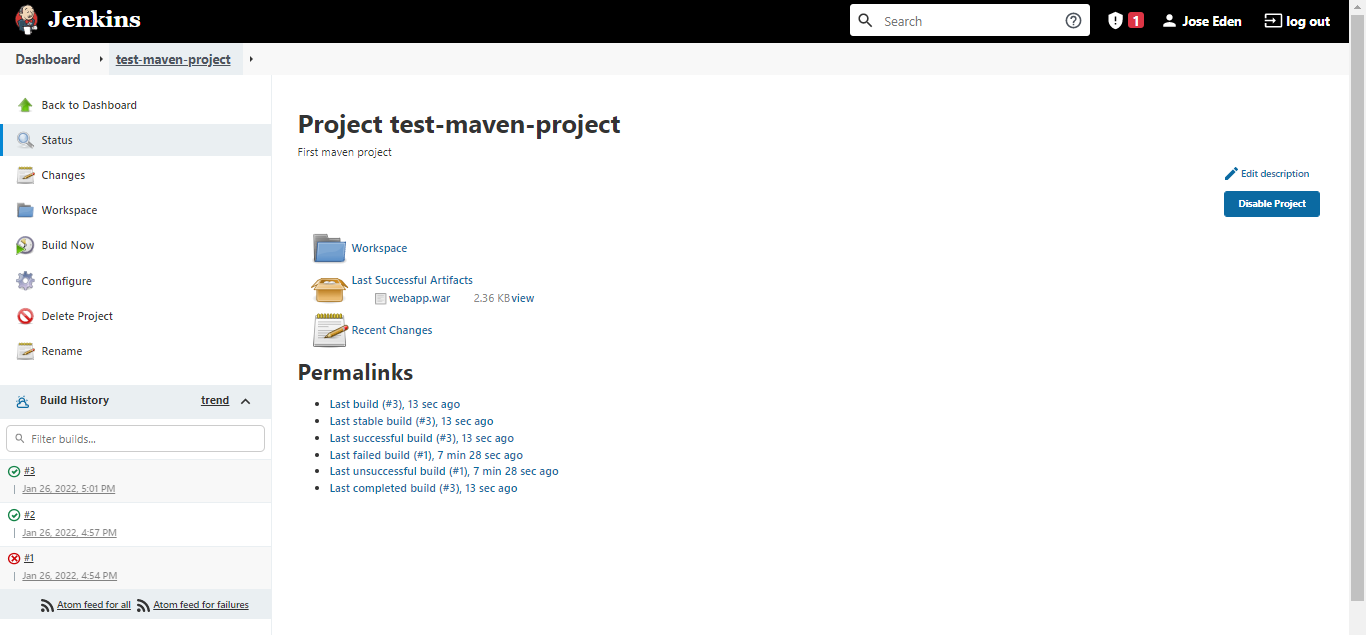
This is continuation of the Maven-based Jenkins lab.
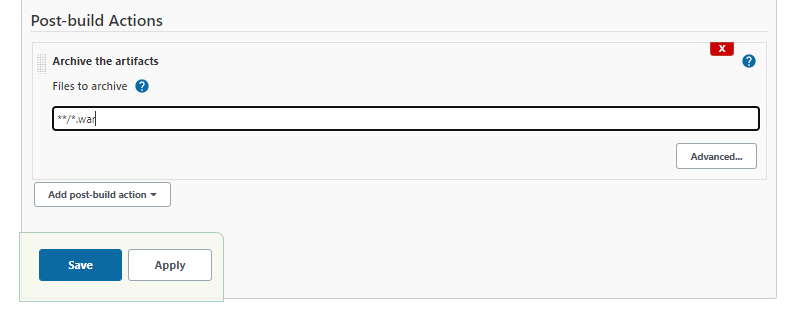
In the maven-project job, click Configure. Then in the Post-build Actions section, click the dropdown menu and select Archive the artifacts.
In the Files to archive field, we'll put in the file that we want to archive. This file can be used to deploy to servlet containers such as tomcat.
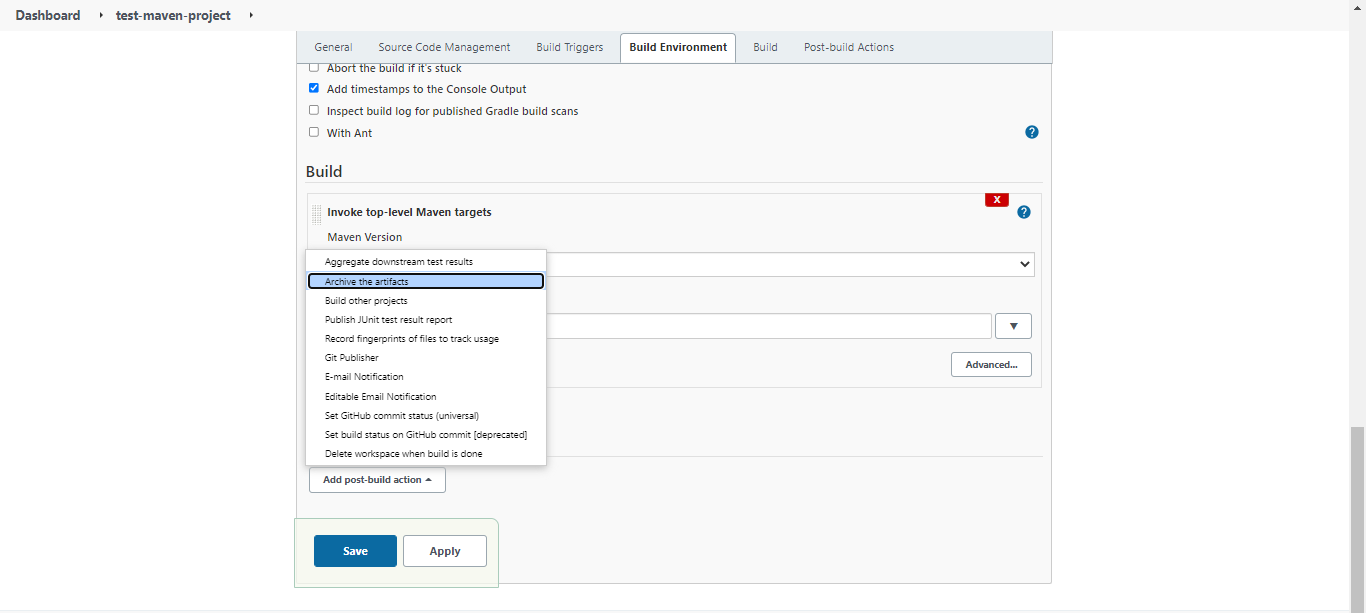
Use "/*.war"** - this means to archive all .war files in the current workspace. Then, click Save.
Trigger the build by clicking Build Now. Refresh the job page once build is done. There should now be a Last Successful Artifacts