Distributed Builds
Lab Environment
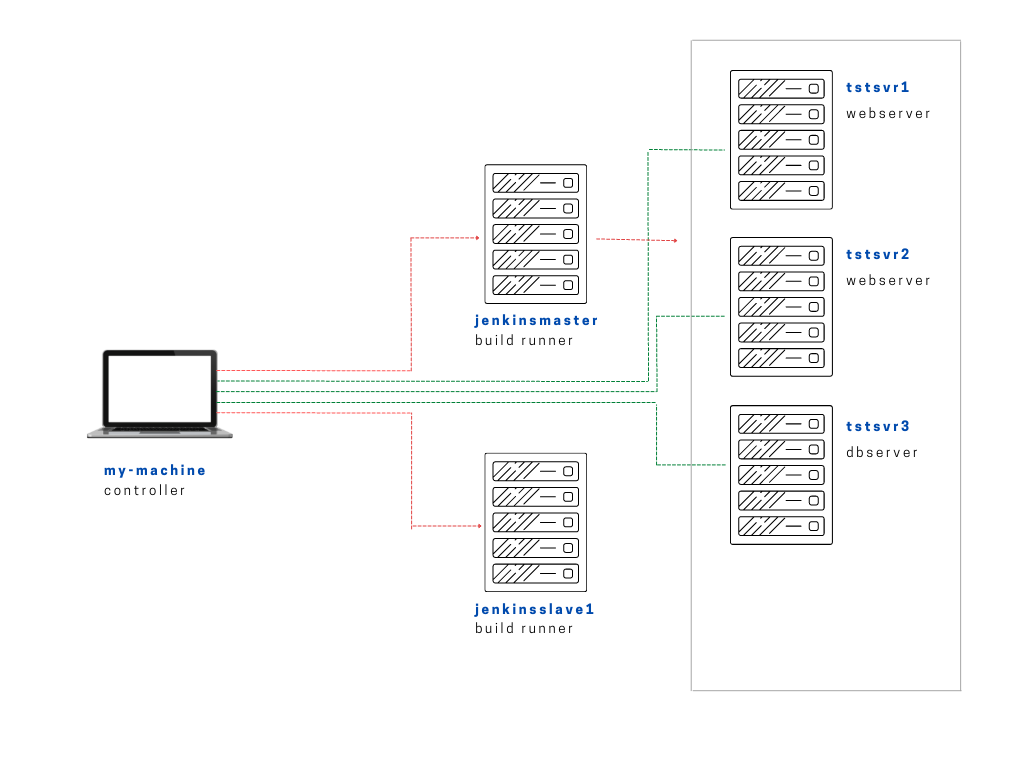
In this lab, we have the following Linux machines, and we will use a local computer (laptop) to connect to them.
- jenkinsmaster
- jenkinsslave1
You can choose to set up a virtual machine on your computer or create instances in the cloud. In this case, EC2 instances are used.
Setting Up Jenkins
If you have your Jenkins server already setup, you can skip this section. There's an option to manually install Jenkins on a Linux machine or you can also use Ansible playbooks to perform the entire installation of Jenkins on this machine.
To setup Jenkins:
The link above set up both the Jenkins master and Jenkins slave using Ansible. It also provisions a Jenkins user.
Distributed Builds
Distributed builds allow build jobs to run on separate agents (nodes), while the master controls and assigns specific builds to specific agents, enhancing parallelism and supporting multiconfiguration setups.
For more information, please see Distributed Builds.
Install Jenkins Agent on Slave Node Manually
To run builds on the slave node, we need to install Jenkins. Follow the steps below to install the Jenkins agent. To install it using Ansible, proceed to the next section.
Run the commands below on the master node:
sudo -iu jenkins

ssh root@<slave_ip> mkdir -p .ssh

cat .ssh/id_rsa.pub | ssh root@<slave_ip> 'cat >> .ssh/authorized_keys'
Run the commands below on the slave node:
mkdir ~/bin

cd bin

wget http://<master_ip>:8080/jnlpJars/slave.jar

sudo apt-get install default-jre
start slave agent:

ssh root@<slave_ip> java -jar /root/bin/slave.jar
Notes:
- Master node will start the slave agent on the slave node via SSH.
- Automatic SSH login without password needs to be configured
To enable SSH login without password, please see Configure Build Accounts.
Install Jenkins Agent on Slave Node using Ansible
I recommend following the link below to install Jenkins using Ansible.
Add User on Slave Node
On jenkinsslave1, add the jenkins user. Set the user to NOPASSWD through visudo since this is for labbing purposes only.
sudo useradd jenkins
sudo passwd jenkins
$ visudo

## Allow root to run any commands anywhere
root    ALL=(ALL)       ALL
jenkins ALL=(ALL)       NOPASSWD: ALL
Configure Build Accounts
From jenkinsmaster, switch to the jenkins user and generat the SSH keys.
su - jenkins
ssh-keygen -t rsa -b 2048
Copy the id_rsa.pub and note it down.
cat ~/.ssh/id_rsa.pub
Still on jenkinsmaster, edit the /etc/ssh/sshd_config and set PubkeyAuthentication to yes. Then reload the sshd service.
$ sudo vim /etc/ssh/sshd_config

PubkeyAuthentication yes
Restart sshd.
sudo systemctl restart sshd
Head over to the jenkinsslave1, switch to jenkins user, and open the ~/.ssh/authorized_keys. If there file or folder doesn't exist, create them. Then paste the copied contents of id_rsa.pub.
su - jenkins
cat > ~/.ssh/authorized_keys
Still on jenkinsslave1, edit the /etc/ssh/sshd_config and set PubkeyAuthentication to yes. Then reload the sshd service.
$ sudo vim /etc/ssh/sshd_config

PubkeyAuthentication yes
Restart sshd.
sudo systemctl restart sshd
From master, you should now be able to SSH to slave without entering any password.
[jenkins@jenkinsmaster ~]$ ssh jenkins@jenkinsslave1
Last login: Sat Jan 29 16:31:53 2022 from 13.228.99.157
[jenkins@jenkinsslave1 ~]$
[jenkins@jenkinsslave1 ~]$
From the slave node, you should now be able to SSH to the master node without entering any password.
[jenkins@jenkinsslave1 ~]$ ssh jenkins@jenkinsmaster
Last login: Mon Jan 31 03:20:49 2022
[jenkins@jenkinsmaster ~]$
[jenkins@jenkinsmaster ~]$
Add slave node
To add the second slave node in Jenkins,
Manage Jenkins --> Manage Nodes
Click New Node then add a node name. Check Permanent Agent then click Ok.
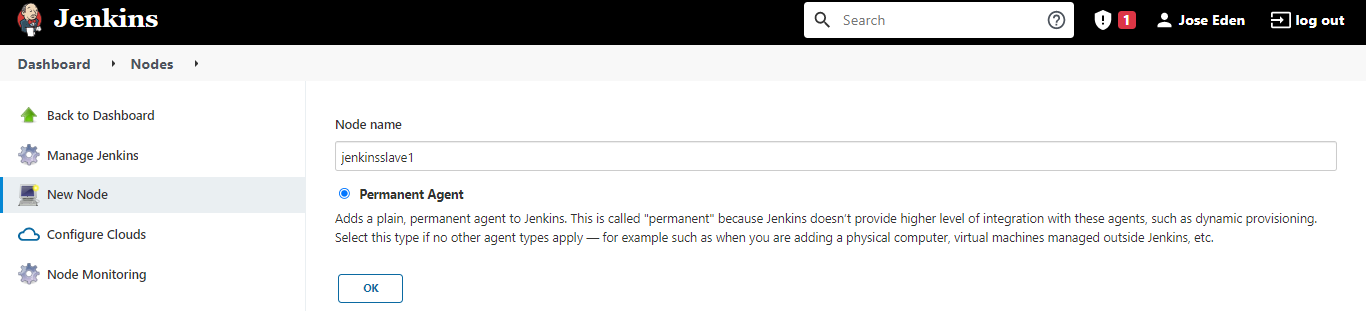
You'll then have to fill-in some more details in the next page.
| Fields | Value | Description |
|---|---|---|
| Number of Executors | "3" | This is the number of parallel threads that can run on the server. best practice is to set this to the number of CPU in the server |
| Remote root directory | "/var/lib/jenkins/jenkins_workspace" | This is the directory created by the install-jenkins-slave.yml playbook |
| Labels | "jenkinsslave1" | Similar to a tag |
| Usage | "Only builds with label expressions..." | Two options here: Offload as much build as possible or only use this node when specified in the job |
| Launch Method | "Launch via SSH" | |
| Host | "54.255.28.202" | IP or hostname of the slave node |

In the Launch Method > Credential, click Add > Jenkins.
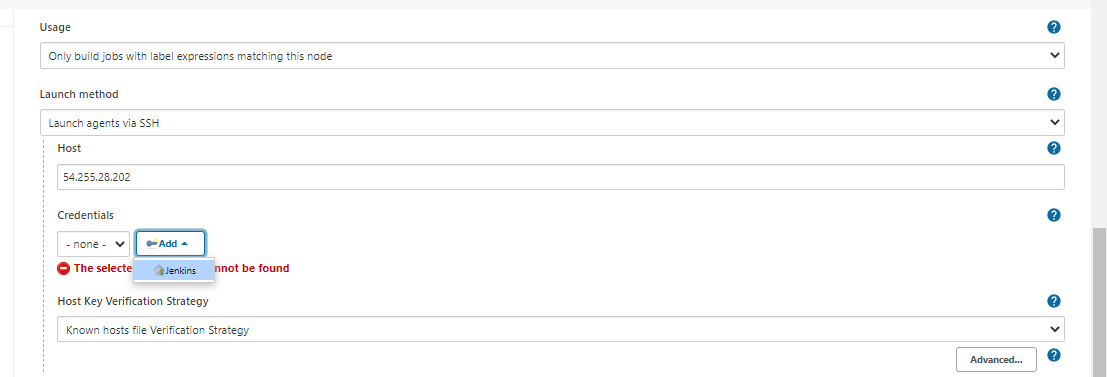
In the next window, set the following values
| Fields | Value |
|---|---|
| Kind | SSH Username with private key |
| Username | Jenkins |
| Passphrase | If you entered a passphrase when you generated the SSH key, put it here. |
Afterwards, click Add.

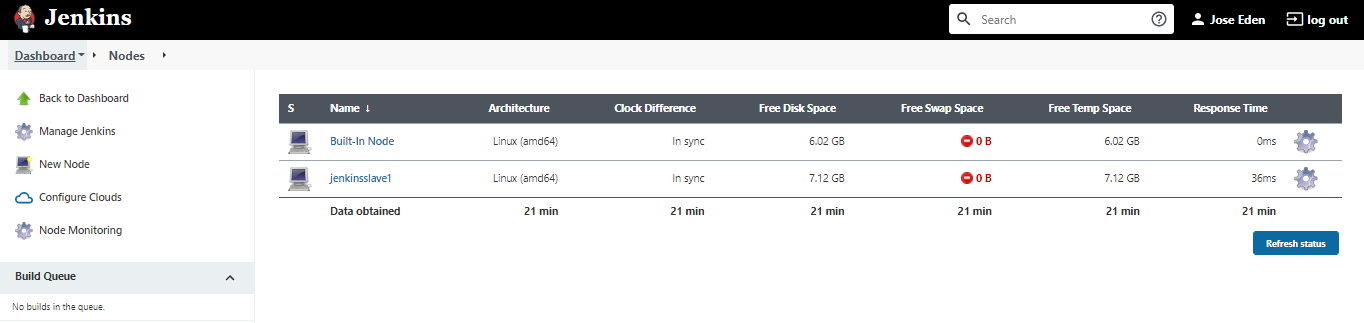
Back on the new users page, click Save. You'll be brought back to the Nodes page. After a few minutes, the new slave node should appear "In sync".

Launch Jobs on the Slave Node
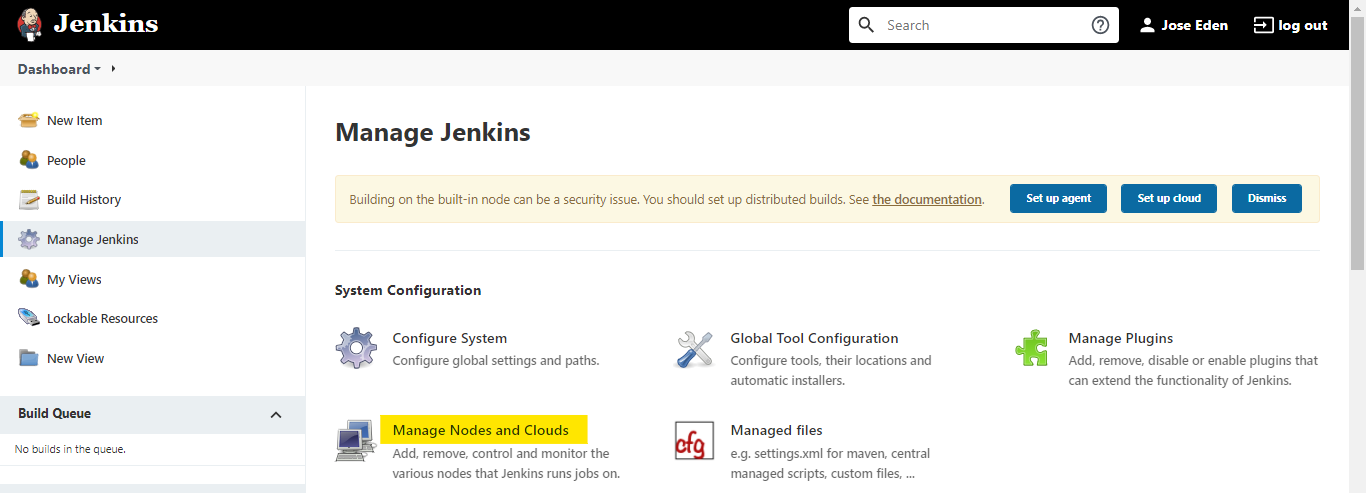
We currently have a master and a slave node configured for Jenkins. This can be seen by clicking:
Manage Jenkins --> Manage Nodes and Clouds
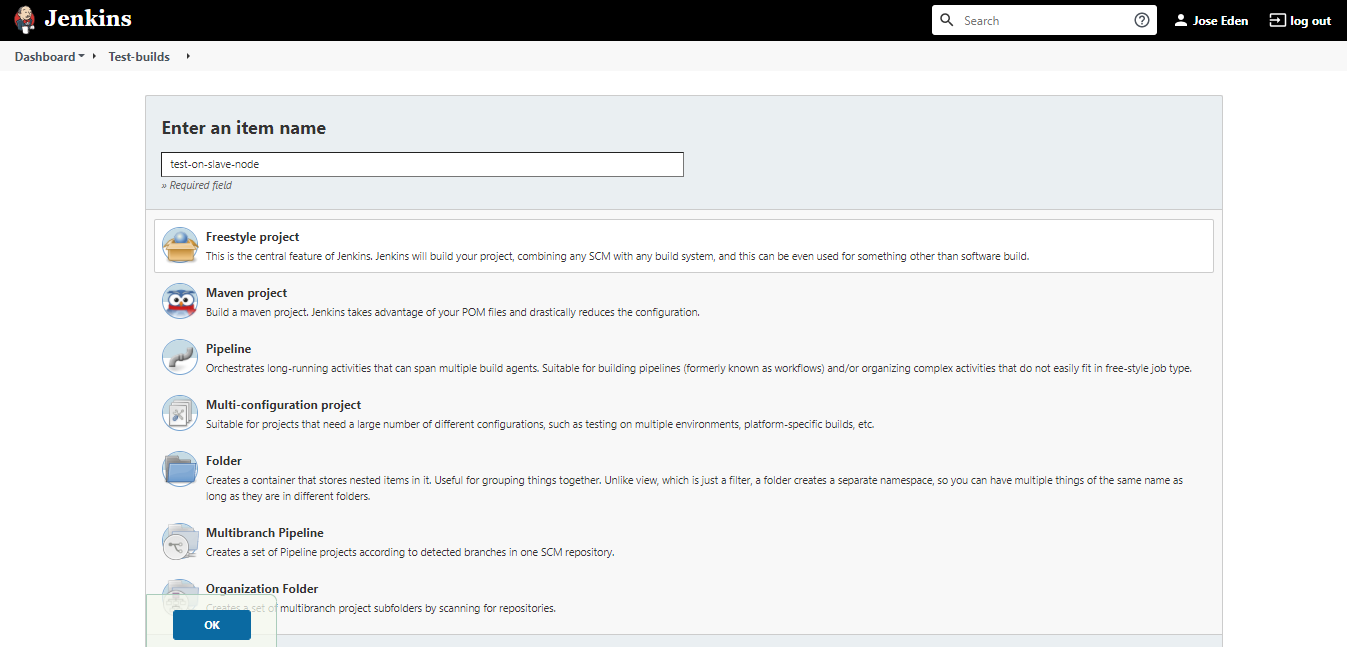
Create a job that will execute the build on the slave node. On the dashboard, click:
New Item --> Enter an item name --> Freestyle project --> Ok
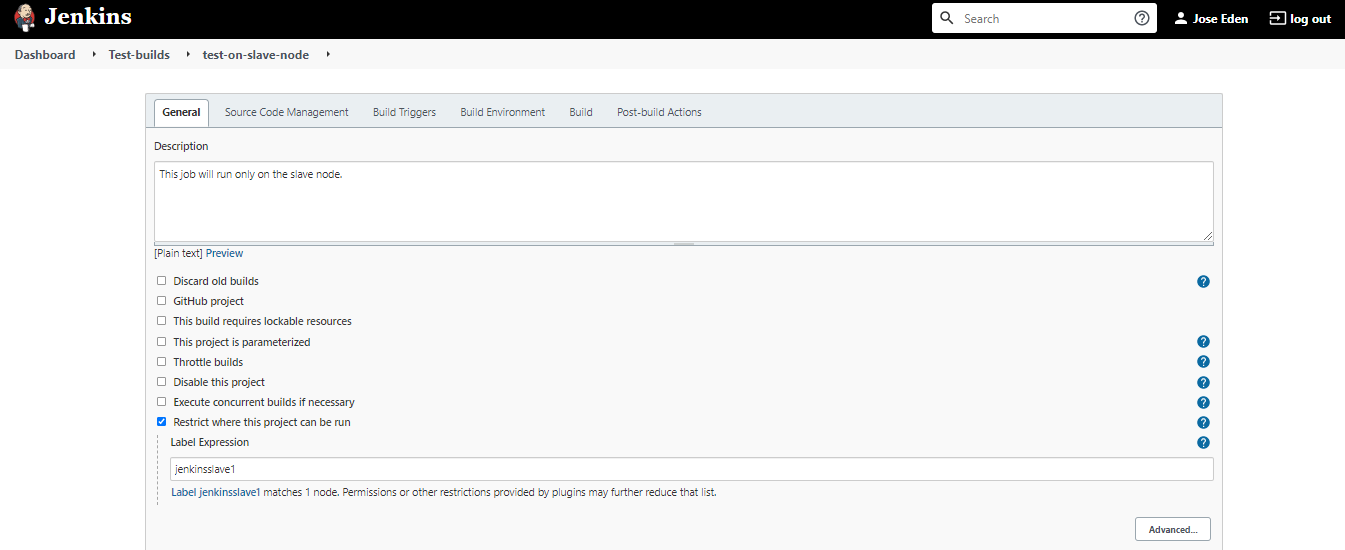
On the next page, click and enter:
Restrict where this project can be run --> Label Expression --> jenkinsslave1
jenkinsslave1 is the node name and at the same time the label I tagged my slave node with.
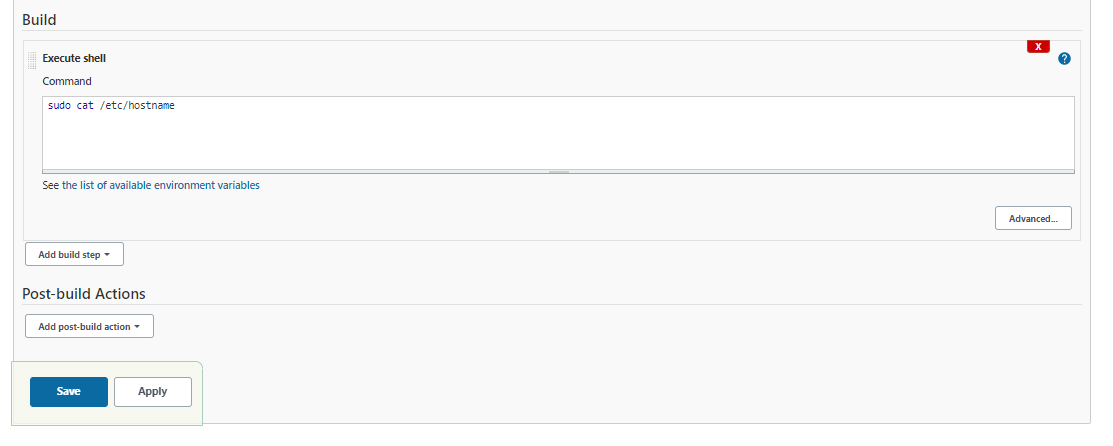
Under the Build section, click:
Add build step --> Execute shell
In the Command field, enter:
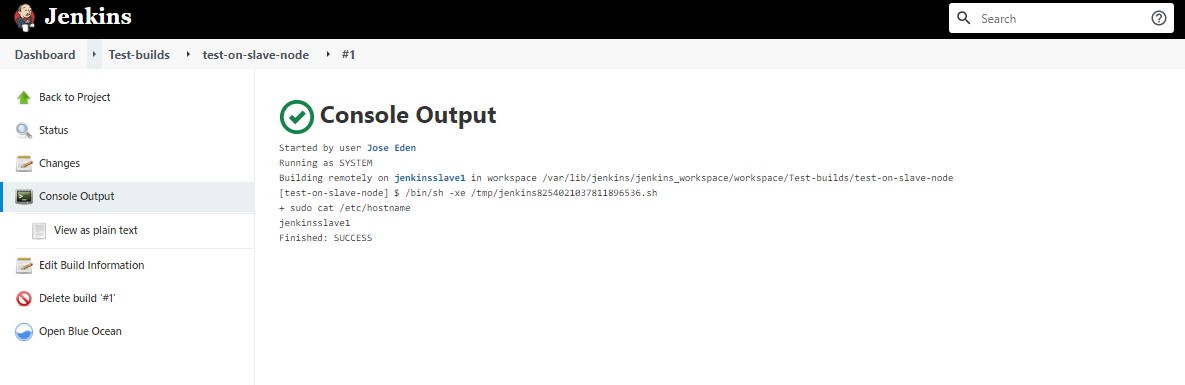
sudo cat /etc/hostname
Hit Save afterwards.
Click Build Now to make sure it works. Open the most recent build under Build History in the left panel then open Console Output.