Building Applications
Overview
Local models can be used in two main ways:
- Chat interface
- API access
With a chat interface, you interact with the model manually. With API access, your application sends requests to the model and receives responses automatically.
Common use cases include:
- Building applications
- Automating workflows
- Generating content
- Processing user input
Using an API makes it possible to integrate local AI models into your own tools and services.
See code files here: Github
LM Studio API Server
LM Studio includes a local API server that allows applications to communicate with models running on your machine.
- Runs locally
- Exposes API endpoints
- Accepts HTTP requests
- Does not require external AI services
Before applications can access a model, the LM Studio API server must be running.
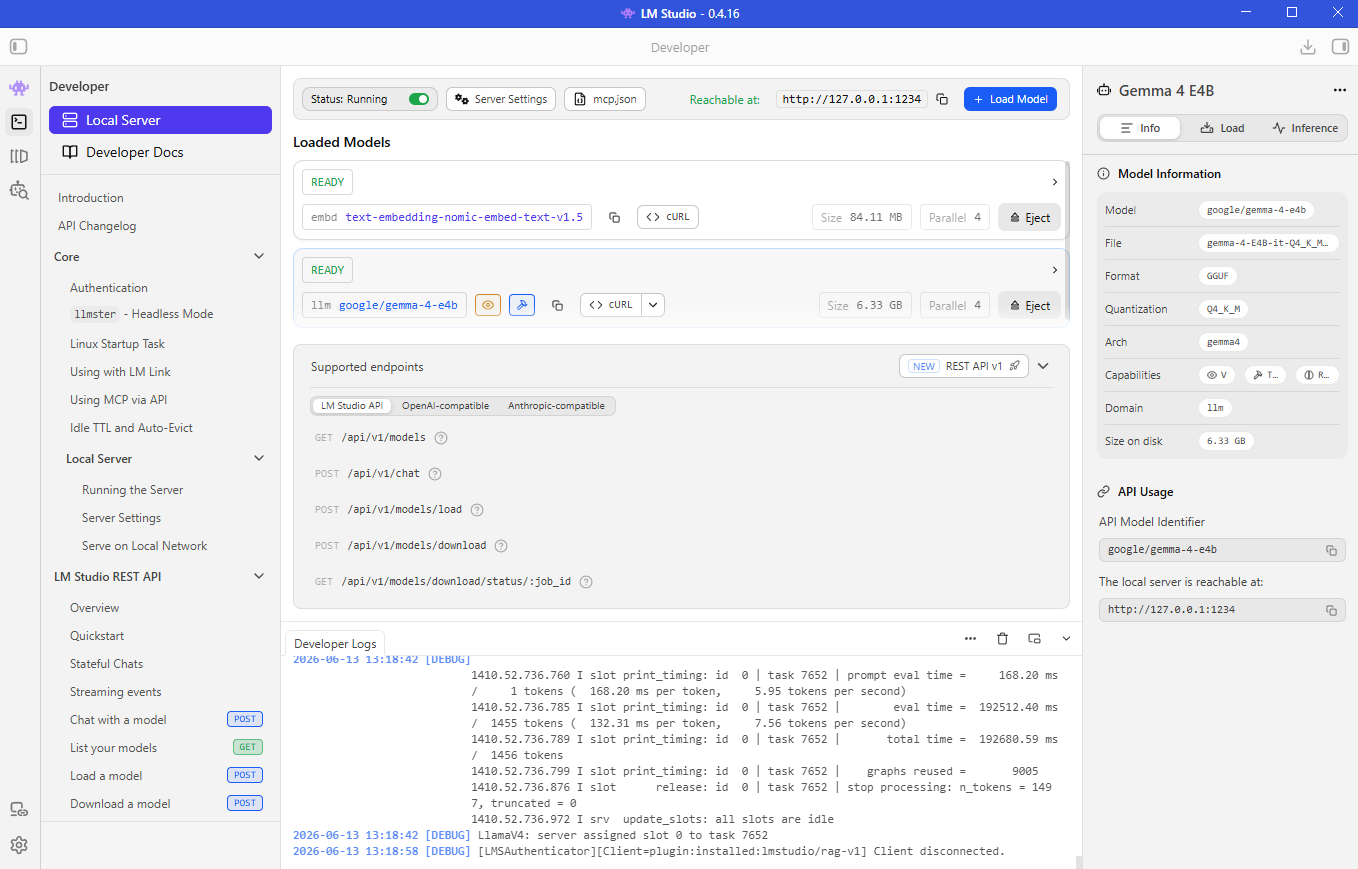
Open the Developer section in LM Studio and start the server.
Once started, LM Studio displays:
| Item | Description |
|---|---|
| Server status | Shows whether the LM Studio API server is running or stopped. |
| API endpoints | Shows the URLs that applications use to communicate with the server. |
| Request logs | Displays incoming API requests and helps with troubleshooting. |
| Server settings | Provides configuration options such as port settings and model loading behavior. |
Because the server runs locally, it is usually only accessible from your own machine unless you manually expose it to other systems.
This local server acts as the bridge between your applications and the model.
Useful Server Settings
LM Studio provides several server settings you can adjust.
- Port configuration
- Just-in-Time model loading (On-demand)
- Automatic model unloading
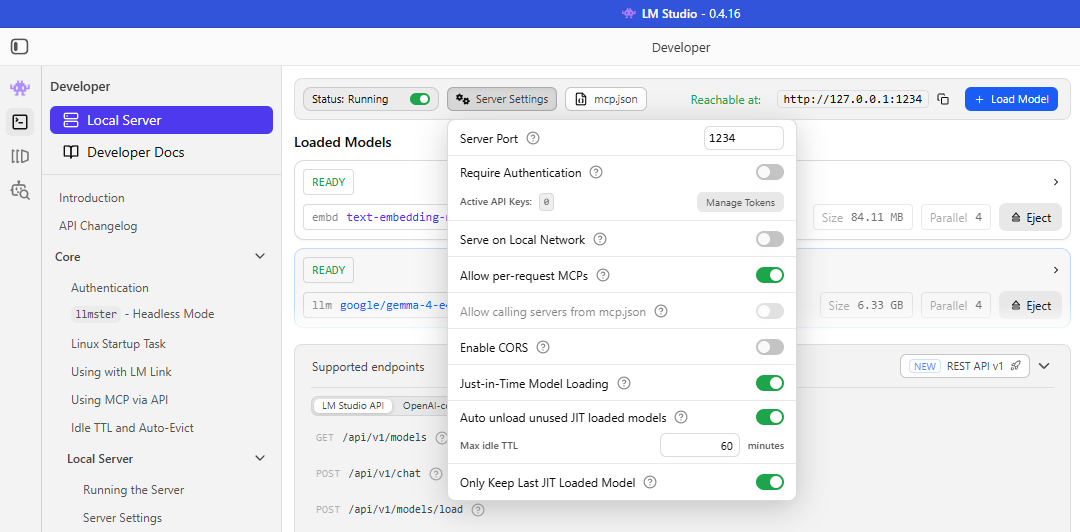
Just-in-Time Model Loading (On-demand)
If enabled, LM Studio automatically loads a model when a request is received for a model that is not currently loaded.
- Less manual work
- No need to preload models
Trade-off:
- The first request may take longer because the model must be loaded first
Automatic Model Unloading
LM Studio can automatically unload models that have not been used for a period of time.
- Frees memory
- Reduces resource usage
This helps manage system resources when working with multiple models.
Accessing Local Models
There are two common ways to access a local model.
| Method | Description | Advantages |
|---|---|---|
| HTTP requests | Send requests directly to the API. | Gives full control and works with any programming language. |
| OpenAI SDK | Use an OpenAI-compatible client library. | Easier to use because it provides helper functions and a familiar interface. |
Before testing each method, make sure you can connect to the LM Studio API server by sending a simple request using a tool like curl or Postman.
curl http://127.0.0.1:1234/v1/models
If you are using WSL in Windows, please see the Troubleshooting: Using WSL. section below.
If you are using Windows, run from PowerShell:
curl http://localhost:1234/v1/models
Lab: Prerequisites
See the codefiles here: Github
-
Clone the repository and navigate to the
lm-studio/api-serverdirectory.git clone https://github.com/joseeden/llm-engineering-sandbox.gitcd llm-engineering-sandbox/openllm-lm-studio/api-serverProject structure:
llm-engineering-sandbox/openllm-lm-studio/api-server|├── README.md├── chatbot.py├── image-parser.py├── images│ └── taal.jpg├── requirements.txt├── using-http-request.py├── using-openai-sdk.py├── wsl-chatbot.py├── wsl-image-parser.py├── wsl-using-http-request.py└── wsl-using-openai-sdk.py -
Create a virtual environment and activate it.
python -m venv ~/venvsource ~/venv/bin/activateIf using Powershell on Windows, use:
python -m venv "$HOME\venv"& "$HOME\venv\Scripts\Activate.ps1" -
Install dependencies:
pip install -r requirements.txt -
Create a
.envfile in the root of the project.cp .env.example .env -
Populate your
.envfile with the appropriate values.LM_STUDIO_BASE_URL=<ENTER_LM_STUDIO_API_URL>MODEL_NAME=<ENTER_LOCAL_MODEL_NAME>## Example (if using localhost):# LM_STUDIO_BASE_URL=http://localhost:1234# MODEL_NAME=google/gemma-4-e4bIf you're using WSL in Windows, get your Windows host IP and use it instead of localhost:
cat /etc/resolv.conf | grep nameserver | awk '{print $2}'Then use it in your
.envfile:LM_STUDIO_BASE_URL=http://<ENTER_WINDOWS_HOST_IP>:1234
Direct HTTP Requests
One of the simplest ways to communicate with a local model is by sending an HTTP request.
Create a Python script (e.g., app.py) that sends a request to the LM Studio API server. You can create this file anywhere on your system since now we're doing everything outside of LM Studio.
See the script here: Github
The code does the following:
- Connects to the LM Studio API server
- Sends a prompt
- Receives a response
- Prints the returned JSON
Note If you are using WSL in Windows, please see the Troubleshooting: Using WSL. section below.
Run the script:
python using-http-request.py
Output:
An LLM (Large Language Model) is a sophisticated type of artificial intelligence trained on immense datasets of text and code, allowing it to understand and generate humanremarkable fluency. It functions by identifying complex statistical patterns within this vast data, predicting the most logically and grammatically probable sequence of wo to any given prompt or query. This ability enables it to perform a wide range of tasks, including answering questions, summarizing documents, translating languages, and give text that mimics human communication.
The exact response depends on the model currently loaded in LM Studio.
This approach works because LM Studio exposes a standard HTTP API that applications can call.
Using the OpenAI SDK
LM Studio provides an API that is compatible with the OpenAI API format.
Because of this, applications can use the OpenAI SDK while still communicating with a local model.
- Same API structure
- Uses local models
- No OpenAI API required
The main difference is that you must point the SDK to the LM Studio server instead of the real OpenAI service.
client = OpenAI(
    base_url="http://localhost:1234/v1",
    api_key="lm-studio"
)
Note If you are using WSL in Windows, please see the Troubleshooting: Using WSL. section below.
See the script here: Github
Run the script:
python using-openai-sdk.py
Output:
An LLM is a type of artificial intelligence model trained on massive amounts of text data to understand and generate human language. It operates by identifying complex statistical patterns within this data, allowing it to predict the most plausible sequence of words in response to any prompt. Consequently, these models can perform sophisticated tasks like writing articles, summarizing documents, answering questions, and even generating code.
The exact response depends on the model currently loaded in LM Studio.
Examples using OpenAI SDK
Chatbot
You can build a simple chatbot that uses a local model to respond to user input.
See the script here: Github
Run the script:
python chatbot.py
Image Parser
In this example, we have a script that sends an image to a local model and asks it to describe the image in detail. It does this by:
- Reading an image file
- Encoding it as a base64 data URL
- Sending it to the model with a prompt
- Printing the model's response
See the script here: Github
Sample image:

Run the script:
python image-parser.py
Troubleshooting
Using WSL
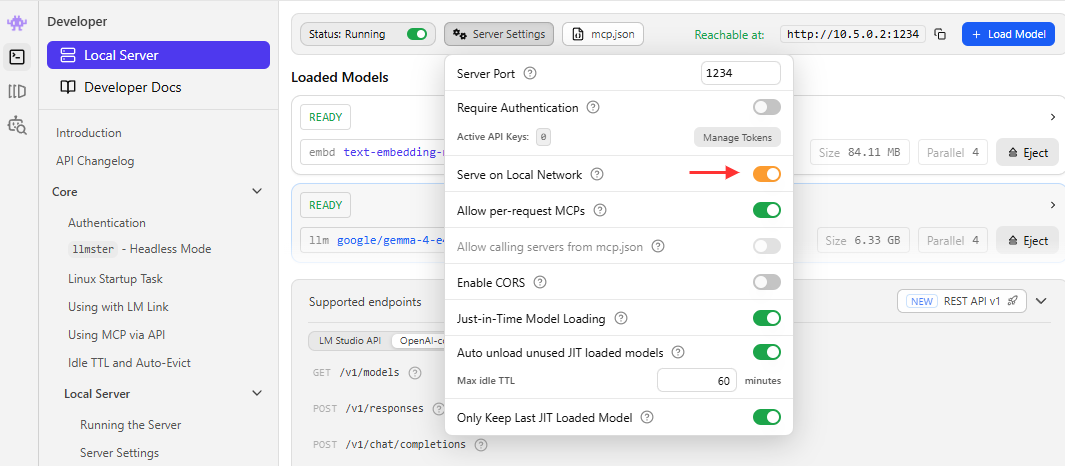
If you are using WSL in Windows, you may encounter issues connecting to the LM Studio API server.
Make sure to enable the local network access option in LM Studio settings.
Try running cURL from WSL:
curl http://$(cat /etc/resolv.conf | grep nameserver | awk '{print $2}'):1234/v1/models
If you can connect successfully, you can proceed with running the scripts.
For reference, I've created scripts for both direct HTTP requests and using the OpenAI SDK that are compatible with WSL.
See the script here: Github
├── wsl-chatbot.py
├── wsl-image-parser.py
├── wsl-using-http-request.py
└── wsl-using-openai-sdk.py